

Changing brake pads is part of regular maintenance and needs to be kept in check to ensure shorter braking distances and a safe drive. Of course, you should inspect your brakes if you hear them squealing or, even worse, scratching — if you get to that point, your brakes definitely need changing! Luckily, checking if your brake pads need changing is relatively easy. Indeed, if you have aluminum wheels, you can probably see the pads’ thickness just by peaking through the spokes. If not, you’ll have to take your wheels off, but even then, it’s not rocket science.
Depending on how many miles you put on your car every year, it could be very beneficial to learn how to change brake pads yourself and save a bunch in repair shop bills. Even better, changing brake pads is a fairly simple affair, even for anyone with very basic auto mechanic skills. It is important to note that you might need some special tools, but the good news is they are usually cheap, and you can get them from pretty much anywhere, including the store where you bought your aftermarket brake pads. Yes, there are also ways to get around them if you are on a really tight budget, but in this case, be extra careful — we are big advocates of using the right tool for the job, but we also understand it’s not always possible. Just remember to stay safe; it’s not worth losing an eye for this.
Also, changing front and rear brake pads will differ slightly, but we’ll cover both below. So, if you are wondering how to change brake pads, do not worry; we’ll explain everything you need to know to do it like a pro.
Let’s go!
Necessary Tools to Change Brake Pads
Car jack
You will, of course, need to take your wheels off to change brake pads. And for that, you’ll need a car jack that can lift your car correctly.
But of course, since you are already reading this post and, consequently, already thinking of doing this job, you probably already have one.
If not, check our review of the best car jacks out there here.
Jack stands
Leaving your car on a car jack alone can be very dangerous when changing brake pads as there might be little hitting or jerking when taking the calipers off. The car may be unstable on a car jack alone, so propping your vehicle up on two jack stands is a much safer option.
Need to buy jack stands but not sure where to start? Take a quick look at the best jack stands for cars, SUVs, and trucks here.
Lug nut wrench
You will need a wrenching tool to take your wheels off. A lug nut wrench is usually standard equipment in a car, but an impact wrench would significantly speed up the process. Don’t have an air compressor at home? No worries — battery-powered impact wrenches are quite powerful and relatively affordable nowadays.
Brake caliper piston retractor
A piston retractor is a special tool for brake jobs, and we highly recommend using it. It’s always best to use a purpose-built tool, especially since these are pretty inexpensive. Alternatively, you can use a big screwdriver, wood plank, clamp, or pump pliers. We’ll cover in more detail how to change brake pads using each method later.
Allen key set or a wrench set
Depending on your car, Allen or standard bolts will hold the caliper in place. It might be better to use a socket set for hex bolts as it will have a better grip on the bolt. As for Allen bolts, be extra careful not to strip them.
How to Change Front Brake Pads
1. Jack up your car
Jacking up your car is naturally the first thing to do when changing brake pads. First, ensure the vehicle is on level ground, and second, secure it with jack stands. Getting the calipers off might necessitate punching the wrench as the bolts will likely be seized. It might jerk the car and push it off the jack, especially if you use something like a scissor jack.
2. Take the wheels off
A powerful enough impact wrench will make the job easier for you. Meanwhile, if you use a lug nut wrench, someone will have to push the brake in so the wheels don’t turn. Alternatively, you can get the lug nuts loose while the car is still in contact with the ground. Just make sure not to overdo it. As soon as the bolt or lug nut starts to turn, that’s enough. Raise the car, remove the bolts, and remove the wheel.
As an extra safety measure, I personally like to slide the wheel you’ve just taken off under the car — better safe than sorry.
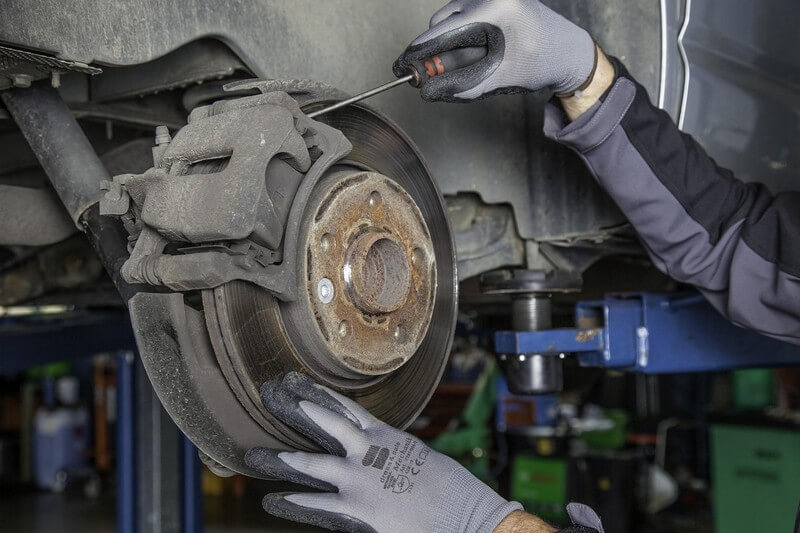
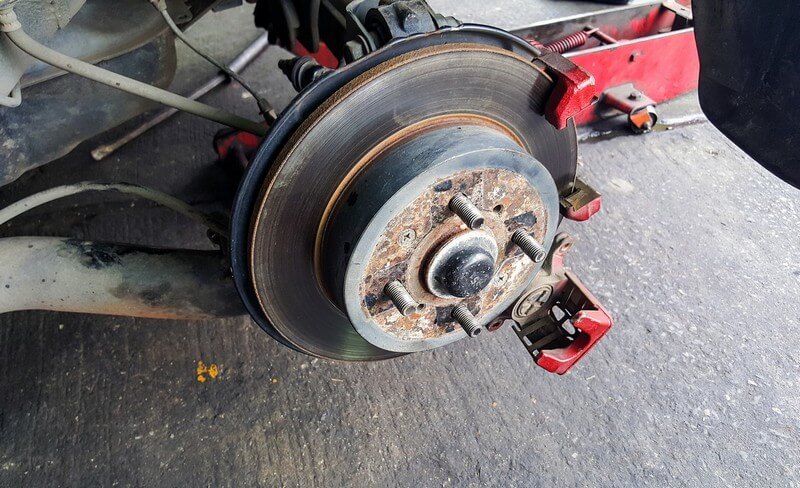
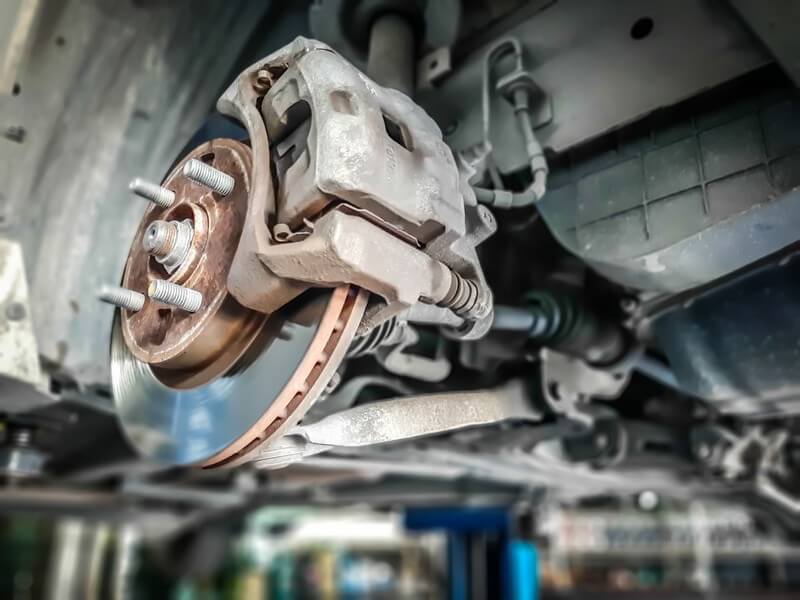
3. Take the caliper off
Two bolts will hold each front brake caliper. You will find them on the side of the caliper facing the wheel arch. If they are Allen bolts, they might have a plastic cover over them (looking at you, Ford). Simply remove the caps and keep them aside.
No matter the type of bolt, it’s always a good idea to spray some “loose-nut” rust remover thing first. These bolts are frequently seized due to the high temperatures they have to operate under. Also, be extra careful not to strip them — you really don’t want to have to drill guide pins, and replacement ones often come with new calipers so…
The calipers might also have retaining wires or clips. If they do, think about prying them out with a screwdriver before removing the bolts. Taking out the bolt first will cause the calipers to become loose, which may complicate removing the retaining devices.
Once done, unscrew the bolts, take them out and slide the caliper off. If the caliper is stuck, jam a flat head screwdriver between the brake disc and the brake pads and try to unclasp the caliper from the disc a little by retracting the brake piston.
4. Take out the old brake pads
Once the caliper is off, slide each brake pad to the side. Some brake pads will have metal clips holding them inside the caliper piston. There is no right or wrong technique to do this, so pull them out whichever way you find easier. Some brake pads will also have retainer clips; these will sometimes come new in the package, and you can replace them once the brake pads are out.
5. Retract the caliper piston
New brake pads will be a lot thicker than the old ones, and to fit them in, you’ll first need to retract the caliper piston. You can do this with a special retracting tool, but you can also leverage a big screwdriver and slowly squeeze them back in.
If your caliper has two pistons, you must push them in simultaneously; otherwise, the second one will come back out as you push the other. For this, you can throw in a plank or anything that can cover both pistons at a time (I personally just use the old brake pads and retract the piston before taking out the pads) and leverage the screwdriver against it. Alternatively, you can use a C clamp, which will be even easier. This way, as you are pressing against the plank, it will, in turn, push and retract both pistons simultaneously.
6. Clean everything
Before you can slide in the new brake pads, you’ll first need to ensure everything is tight and clean so the new ones don’t jam in there and wear out prematurely.
Take out the guide pins from the caliper, clean them with brake cleaner, remove any rust, and grease the thoroughly with brake lubricant — not all-purpose grease, not WD-40, not “Permatex Anti-Seize” either. Brakes get incredibly hot, and any other grease won’t work. Use some proper brake lubricant and slide the guide pins back in the caliper.
Using a metal brush, clean the surface where the brake pads slide on the pad holder. Apply brake lubricant there too.
7. Install new brake pads
Before installing the new brake pads, spray them with a bit of brake cleaner, and lubricate the contact points. Slide them on the brake holders and make sure not to forget any retaining wires or clips. Reinstall the calipers, tighten the bolts, and voila!
Drive slowly and go easy on the brakes for the first 20 miles. Braking performance will be slightly reduced until the top layer of brake pads is scratched off and perfectly married to the rotors, especially if you haven’t replaced them.
But all in all, the answer to how to install brake pads is a fairly simple one.
How to Change Rear Brake Pads
Replacing rear brake pads will be much the same as changing the front ones. There are a couple of exceptions, however. First is that retracting the rear caliper piston is often a little different. Also, if your car has an electric handbrake, then it’s a job best done at a repair shop. Still, here are a couple of pointers regarding how to change rear brake pads and some of the main differences with front brake pads.
How to retract rear brake pistons
While some cars have the same system in the rear, others might require you to twist the piston while pushing on it. You will recognize these pistons by not being hollow; more importantly, they will have two or four distinct notches on the edges. These notches are there to fit a specialized tool.
If you don’t have one, you can use the same method as for the front calipers, but this time you will have to twist the piston too. You can use long nose pliers to turn the piston while pushing hard, but be careful not to pinch the surrounding rubber seal.
How to retract an electric handbrake piston
If your car has an electric handbrake, you will need a professional diagnostics tool to retract the piston. Since this isn’t that DIY-friendly, it’s best left to the professionals. Of course, there are ways to retract the piston by connecting it to an external 12v battery. However, doing that wrong may fry the electric motor, and you’ll then need to replace the complete caliper. If you don’t know what you are doing here, don’t do it at all.
Moreover, more premium vehicles may be equipped with much more technically advanced brake systems (BMW is a prime example of that) and may require specific replacement procedures, including sensors resetting and re-calibrating everything. If this is your case, I would highly suggest first getting your hands on a good BMW repair manual and strictly following the manufacturer’s recommended procedure here — omitting to do that could do more harm than good.
How to change drum brake shoes
Changing drum brake shoes is an entirely different job from how to replace brake pads. But don’t worry — we have covered this process in another article that you can find here.
Frequently Asked Questions (FAQs)
How long does it take to change brake pads?
For someone with a lot of experience, it will take between 30 minutes and 1 hour to change the brake pads on one axle, depending on their conditions (some really rusty/seized systems will require a lot more time to clean and free up everything).
For someone doing this for the first time, it can take up to 2 hours.
When should you replace brake pads?
You should change your brake pads if you hear excessive squealing when braking or if you hear a metal-grinding noise. You should also change them if a brake pad indicator light comes on.
However, the real answer here should be, “you should replace them whenever they need to be replaced.”
Indeed, visually inspecting your brake pads regularly to see how much material is left will allow you to actually replace them as needed, ultimately providing you a lot more bang for your bucks in the long run.
How much does it cost to replace brake pads?
The cost of parts and labor can be anywhere from $110 to $300, depending on how long it takes to change brake pads and the repair shop’s pricing. Brake pads can set you back anywhere from as little as 30$ to as much as 150$ for a passenger car, and labor is usually between $50 and $100 per hour.
Last Words
With everything said and done, chances are much higher that you can change your brake pads at home than not. Potentially saving triple-figure on labor every year or even six months if you travel a lot is tempting. How long it takes to change brake pads will depend on your skills, but even if you’ve never done it before, it’s a pretty simple job you can do on a Sunday morning. Plus, it’s always satisfying to learn something new.
And if you are comfortable with DIY maintenance and repairs, we have a guide on changing the brake fluid, upgrading the brakes in your car, or even replacing the clutch right here!


I enjoyed your article on changing disk brakes. I’m an 80 year old that enjoys tinkering with my old 1998 Jeep Cherokee. I bought it just to satisfy my need to have a hobby. It was nice to realize, after reading your article, that the Brake Job I did on the ole Jeep was done correctly.
Thanks
D Farmer
Glad to hear you liked it mate!
What’s the engine in that thing? Are you lucky enough to have the 4.0L inline 6?