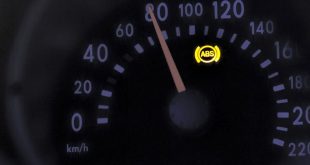
Imagine you’re driving down the road, and suddenly, your car starts to shake, and the engine feels like it’s skipping a beat, especially under load and often accompanied by a flashing check engine light on your dashboard. This unsettling experience is often due to an engine misfire.
An engine misfire happens when one or more cylinders in your engine fail to ignite the air-fuel mixture at the right time. This can lead to mild problems like a rough ride, poor performance, and increased emissions, to more serious issues like being left stranded at the worst possible time or even a clogged catalytic converter, which can be quite pricey to repair. Hence, understanding why engine misfires occur as soon as they start happening is crucial for keeping your vehicle in good shape, avoiding costly tow trucks, and making sure you get where you need to be on time every time.
In modern vehicles, the key component playing a significant role in the firing process is the coil-on-plug (COP) ignition system. Unlike older ignition systems that use a single coil and a distributor or coil packs, COP systems have individual coils for each cylinder. This means each spark plug has its own dedicated coil, sitting right on top of it, ensuring a more reliable and efficient spark.
In this guide, we’ll take a deep dive into the world of engine misfires, focusing on vehicles with coil-on-plug ignition systems, well, because that’s what cars are equipped with nowadays (I know, I miss the simpler coil packs too, but nostalgia will not change anything to what your car is probably equipped with now haha). We’ll explore how these systems work, what causes misfires, how to diagnose and fix them, and provide tips on preventing them in the future. Whether you’re an expert or relatively new to car maintenance, this guide will help you understand and tackle engine misfires with ease — at least, that’s the plan.
Let’s go!
Understanding Engine Misfires
As briefly explained earlier, an engine misfire occurs when one or more of your engine’s cylinders fail to set fire to the fuel-air mixture properly. Combustion is the process where fuel and air mix and ignite, creating the power needed to move your car. When this process is disrupted, the cylinder doesn’t produce power as it should, leading to a misfire.
There are several symptoms of engine misfires, including:
- Rough idling: The engine feels shaky and uneven when the car is stationary.
- Hesitation or stumbling: The car stutters when you try to accelerate.
- Loss of power: The engine feels weak and doesn’t respond well when you press the gas pedal.
- Increased exhaust emissions: Unburnt fuel from misfires can cause higher emissions, sometimes visible as black smoke.
- Check engine light: Modern vehicles have sensors that detect misfires, triggering the check engine light on your dashboard.
No need to say, engine misfires can significantly impact your vehicle. Not only do they affect your car’s performance and fuel efficiency, but they can also cause long-term damage if left unchecked. Misfires can lead to unburnt fuel entering the exhaust system, damaging the catalytic converter, an essential component for controlling emissions and, more importantly, for letting the exhaust gas out of the engine. Put simply, misfires will more often than not cause your engine to stall, and that’s the best-case scenario, as annoying as it may be. When misfires don’t cause the engine to stall, that’s when the engine will start sending unburnt fuel in the catalytic converter and cause all sorts of long-term (and costly) issues.
Moral of the story? As soon as you feel your engine stuttering and crying for help, stop whenever possible and start investigating — you’ll thank me later.
How Modern Coil-On-Plug Ignition Systems Work
Common Causes of Engine Misfires on Coil-on-Plug Ignition Systems
Engine misfires can be caused by a wide range of issues, each affecting the combustion process in its own way and, let’s be honest, significantly complicating the diagnostic process. To help you with that, we’ll explore the most common culprits behind engine misfires, focusing specifically on COP ignition systems.
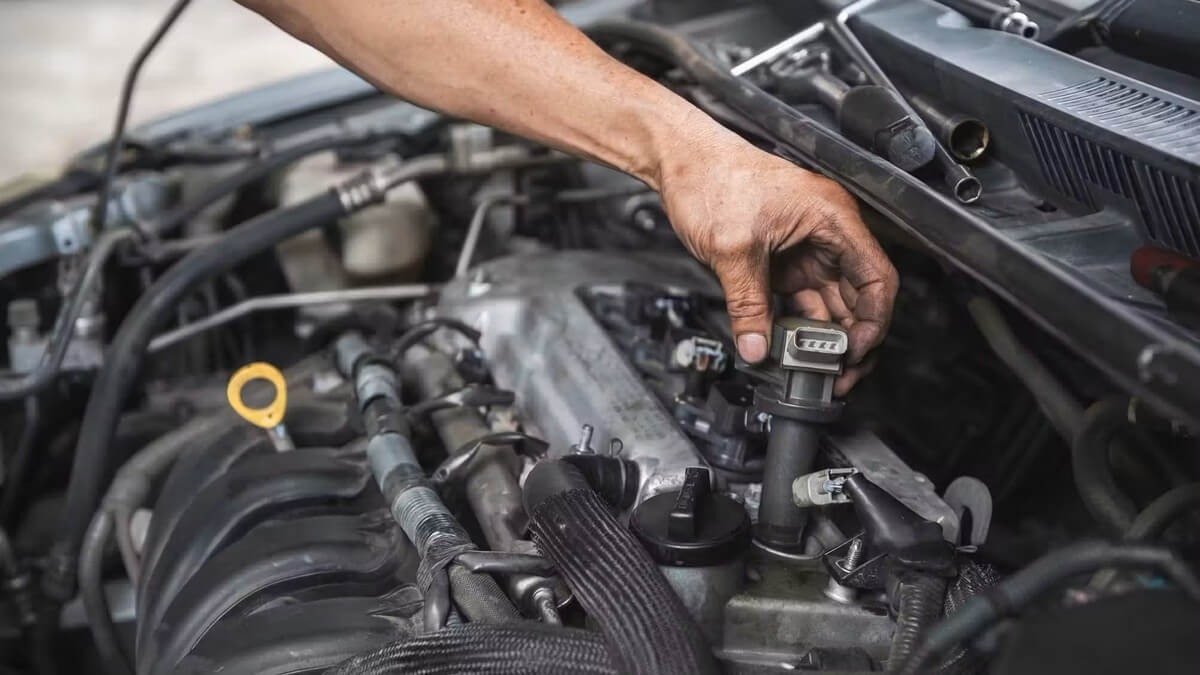
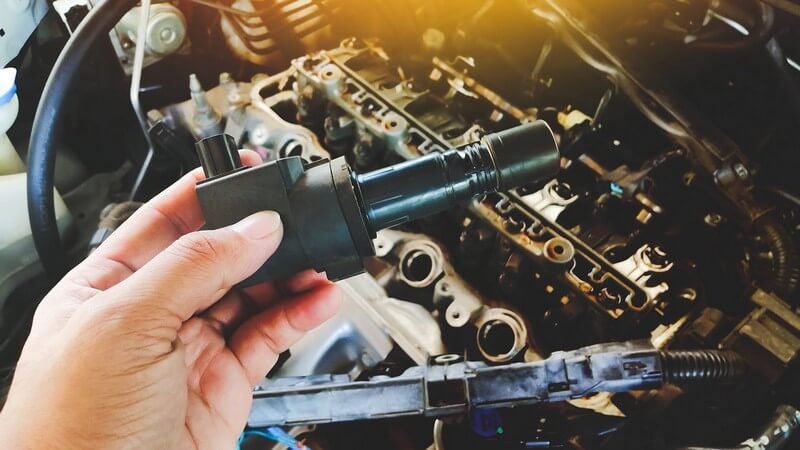
Faulty Ignition Coils
Ignition coils play a critical role in generating the high voltage needed to ignite the fuel-air mixture in the cylinders. The good thing is that, in a COP system, each cylinder has its own coil, so when one fails, it will only cause a misfire in the corresponding cylinder.
- Symptoms of Faulty Ignition Coils: Engine stalling, rough idling, reduced power, and increased fuel consumption.
- Causes of Coil Failure: Heat, vibration, and age can degrade the internal components of the ignition coil, leading to weaker or intermittent sparks.
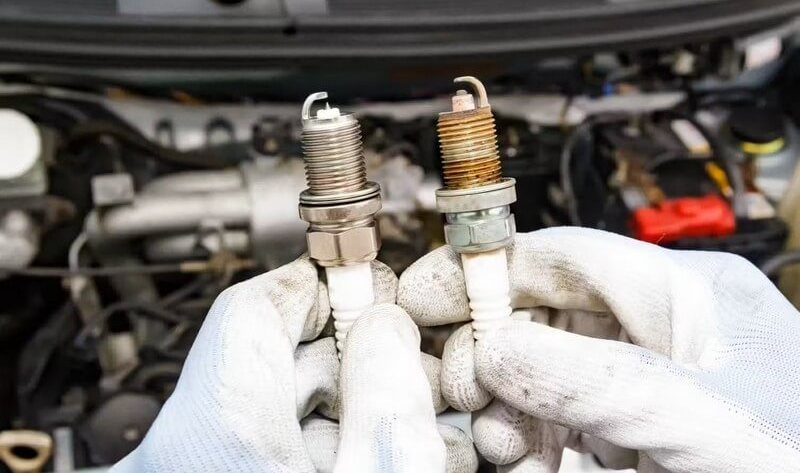
Spark Plug Issues
Spark plugs have evolved a lot over the years, but in essence, they work exactly like they always did. They sure last longer than they used to, too, but eventually, worn-out or faulty spark plugs will cause weaker sparks, leading to incomplete combustion and misfires.
- Symptoms of Spark Plug Issues: Poor acceleration, rough idle, difficulty starting the engine, and increased emissions.
- Causes of Spark Plug Problems: Normal wear and tear, carbon buildup, oil fouling, and incorrect spark plug gap.
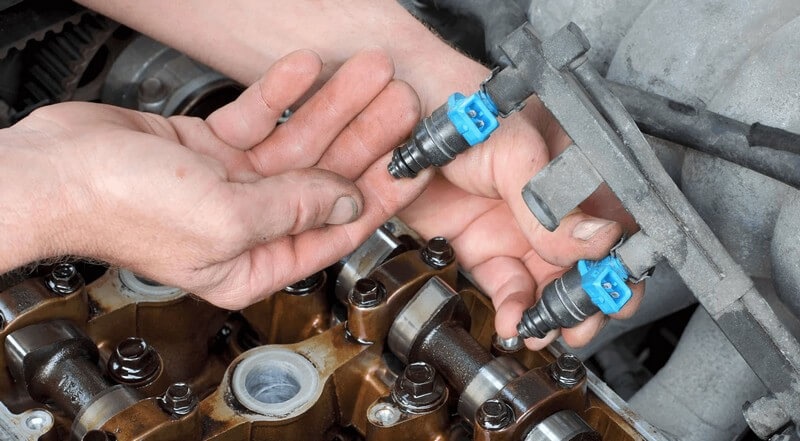
Fuel Delivery Problems
The tricky part when diagnosing misfires is that the ignition is not necessarily the only culprit. While it’s true that anything that doesn’t work right on the spark’s side can eventually cause a misfire, no matter how good that spark is, if no fuel is getting into the engine, then no combustion can occur either. And since the engine relies on a precise amount of fuel being delivered to each cylinder, any disruption in this delivery can cause a lean or rich mixture, often causing improper combustion and misfires.
- Symptoms of Fuel Delivery Problems: Hesitation during acceleration, rough running, poor fuel economy, and backfires.
- Causes of Fuel Delivery Issues: Clogged fuel injectors, weak fuel pump, dirty fuel filter, or fuel pressure regulator failure.
Vacuum Leaks
Complicating things further, the same also applies to the vacuum system since it controls a wide range of components, including, on some vehicles, the fuel pressure regulator, for instance. Vacuum leaks can also cause an unintended introduction of air into the engine, bypassing the Mass Air Flow (MAF) sensor and disrupting the air-fuel ratio. This can cause the engine to run lean, eventually leading to misfires, depending on how serious the leak is.
- Symptoms of Vacuum Leaks: Rough idle, high idle speed, poor fuel economy, and hissing sound from the engine bay.
- Causes of Vacuum Leaks: Cracked or disconnected vacuum hoses, faulty intake manifold gasket, or damaged throttle body gasket, only to name a few (it would be impossible to list every possible place where air could unintentionally enter the engine, but if there’s a gasket, a clamp or a joint, there could be a leak).
Sensor Malfunctions
Modern engines rely on various sensors to monitor and control the combustion process. Sensor malfunctions can send incorrect data to the ECU, disrupting the various adjustments required to maintain a stoichiometric air-fuel ratio, resulting in misfires.
Key Sensors and Their Impact on Misfires:
- Crankshaft Position Sensor: Monitors the position and rotational speed of the crankshaft. A faulty sensor can cause erratic engine timing, leading to misfires.
- Symptoms: Stalling, difficulty starting, intermittent power loss.
- Causes of Failure: Heat damage, electrical issues, or physical damage.
- Camshaft Position Sensor: Works with the crankshaft position sensor to manage timing. A malfunction can disrupt the timing of the spark and fuel injection.
- Symptoms: Rough idling, misfires, poor acceleration.
- Causes of Failure: Wear and tear, heat damage, electrical problems.
- Oxygen (O2) Sensor: Monitors the level of oxygen in the exhaust gases to adjust the air-fuel mixture. A failing sensor can cause a rich or lean mixture.
- Symptoms: Poor fuel economy, increased emissions, rough running.
- Causes of Failure: Contamination, age, or wiring issues.
- Mass Air Flow (MAF) Sensor: Measures the amount of air entering the engine. Incorrect readings can affect the air-fuel ratio.
- Symptoms: Stalling, rough idling, poor acceleration.
- Causes of Failure: Dirt buildup, electrical faults.
- Manifold Absolute Pressure (MAP) Sensor: Measures the pressure in the intake manifold to adjust the air-fuel mixture. Faulty readings can cause incorrect fuel delivery.
- Symptoms: Poor performance, misfires, rough idle.
- Causes of Failure: Contamination, sensor damage.
Other Causes
While the above causes are the most common, other factors can also lead to engine misfires. These include:
- Worn or damaged valves: Improper sealing can cause compression issues, leading to misfires.
- Head gasket failure: This can allow coolant or oil to leak into the combustion chamber, disrupting the combustion process.
- Timing issues: Problems with the timing chain or belt can cause the engine’s valves and pistons to operate out of sync, resulting in misfires.
As you can see, misfires can stem from multiple sources. Thus, understanding the common culprits should help you pinpoint where you should start looking first or, at the very least, rule out what can’t be the culprit in your specific scenario.
In the following sections, we will provide a step-by-step guide to diagnosing engine misfires using tools like OBD-II scanners and practical inspection methods. This will help you identify the exact cause of the misfire and take appropriate action to fix it.

How to Diagnose and Repair Engine Misfires
Diagnosing and repairing engine misfires can seem daunting, but with the right tools and a systematic approach, you can identify and fix the problem effectively. This section will guide you through the steps to diagnose and repair engine misfires in vehicles with Coil-On-Plug (COP) ignition systems.
Using an OBD-II Scanner
The first step in diagnosing an engine misfire is to use an OBD-II scanner to retrieve the diagnostic trouble codes (DTCs). These codes provide valuable information about which cylinder is misfiring and potential causes. It’s important to mention that not all misfires will record codes, and there might be a wide range of reasons why that we will not be covering here, but it doesn’t cost much to take 5 minutes and just check that first. If you are lucky, the code will point directly to the problematic cylinder saving you significant time, and if not, well you just wasted 5 minutes anyway.
How to Use an OBD-II Scanner:
- Plug the scanner into the OBD-II port, located under the dashboard;
- Turn the ignition to the ON (II) position;
- Follow the scanner’s instructions to retrieve DTCs;
- Note the codes and their descriptions.
Common misfire-related codes include P0300 (random/multiple cylinder misfire) and P0301-P0308 (specific cylinder misfires, with P0301 being “misfire on cylinder #1”, P0302 being “misfire on cylinder #2” and so on). Keep in mind that the code does not state why the misfire occurred or which component might have caused it — a P0300 does not mean that there was no spark, that the coil was faulty, or anything of the sort. It only means that a misfire occurred, and that’s it.
Still, the system may have recorded many other DTCs that may point more accurately to a potential culprit. For instance, if a P0230 code was recorded, it could let you know that the fuel pump control circuit is faulty; a P0171 code may tell you that there’s a lean condition, possibly due to a vacuum leak; a P0351-P0358 series code might indicate an ignition coil problem for a specific cylinder; a P0096 code could suggest an issue with the intake air temperature sensor; or a P0420 code might point to a catalytic converter efficiency problem, which could be related to the misfire.
If you really are unlucky and no DTC code was recorded, you’ll need to put on your thinking cap and start troubleshooting a little more methodically, starting with the most common potential culprits and going from there.
✱ Important Note:
From this point on, you will start hearing me say things like, “Test this and that and ensure it’s within the manufacturer’s specifications.” I know it’s annoying that I am not telling you what those specific specifications are, but every car is built differently and has different specification thresholds when it comes to electrical components.
Unfortunately, there is no way around getting your hands on the repair manual for your car and checking the OEM specs for your specific model here, but trust me, you are much better off investing a couple of bucks for the manual than trying to go through the troubleshooting process blind.
Need a repair manual for your car? We’ve got you covered below.
➤ Download the repair manual for your car here!
Inspecting and Replacing Faulty Ignition Coils
Inspection:
- Remove the ignition coil from the cylinder;
- Check for signs of damage, corrosion, or wear;
- Use a multimeter to test power and ground to the coil. If all is good, move to step 4. If not, you’ll need to troubleshoot the circuit;
- Measure the coil’s resistance and ensure it’s within the manufacturer’s specifications.
➜ Quick tip: If you have a cylinder-specific misfire, a quick trick is to start by switching the suspected coil to a known-good cylinder. For instance, if your code is P0302 – misfire on cylinder #2, try switching coil #2 with #4. Erase the DTC codes, start the engine, wait for the check engine light to come back, and then read the codes again. If the code is now P0304, you know for sure the problem comes from the coil. Replace it and call it a day!
Repair:
- If the coil is faulty, replace it with a new one;
- Ensure proper installation by securing the coil firmly on top of the spark plug;
- Reconnect any electrical connector;
- Erase the DTC codes;
- Start the engine and confirm the repair.
Inspecting Spark Plugs
Inspection:
- Remove the suspected spark plug using a spark plug socket;
- Check for signs of wear, carbon buildup, oil fouling, or incorrect gaps.
➜ Quick tip: Same thing for this one too. If you have a cylinder-specific misfire, start by switching the suspected spark plug to a known-good cylinder. For instance, if your code is P0302 – misfire on cylinder #2, try switching spark plug #2 with #4. Erase the DTC codes, start the engine, wait for the check engine light to come back, and then read the codes again. If the code is now P0304, you know for sure the problem comes from the spark plug. Replace it, and your job is done!
Repair:
- Replace any damaged or worn-out spark plugs;
- Ensure the new spark plugs have the correct gap as specified by the manufacturer. While spark plugs are usually gapped right from the factory, it’s not uncommon to see them being banged around during transport which may slightly modify the gap — take the extra two minutes and avoid future problems;
- Install the spark plugs and reconnect the ignition coils;
- Erase the DTC codes;
- Start the engine and confirm the repair.
Checking Fuel Injectors and Fuel Pressure
Fuel Injector Inspection
Inspection:
- Use a noid light to test the electrical signal to the injector. If the signal is good, move to step 2. If there’s no signal, move to electrical system troubleshooting;
- Remove the injector and check for clogs or damage.
➜ Quick tip: Same thing again, so I won’t repeat the whole thing, but you get the point — switch the injector, and if the problem moves, you’ve found your problem.
Repair:
- Clean clogged injectors using a fuel injector cleaning kit;
- Replace any injectors that are beyond cleaning;
- Reinstall the injectors, erase the DTC codes, start the engine, and confirm the repair.
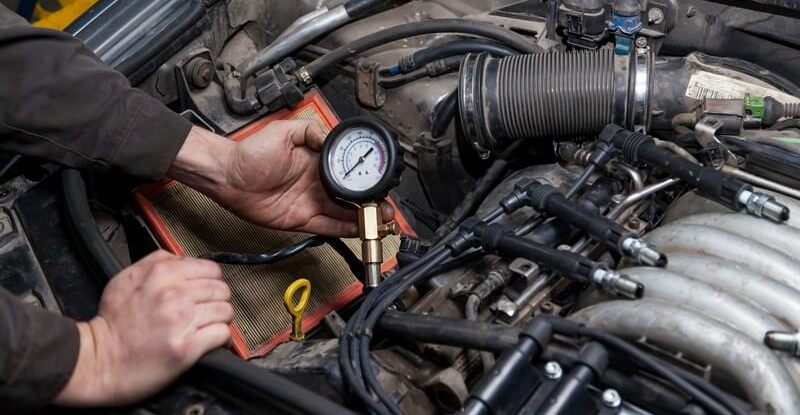
Fuel Pressure Check
Inspection:
- Connect a fuel pressure gauge to the fuel rail;
- Turn on the ignition and note down the pressure reading;
- Compare the reading to the manufacturer’s specifications.
Repair:
- Address any issues with the fuel pump, filter, or pressure regulator if the pressure is outside the specified range;
- Replace the faulty components as needed;
- Erase the DTC codes, start the engine, and confirm the repair.
Verifying Sensor Readings and Addressing Malfunctions
Before we start this section, I need to point out that, when it comes to modern cars, there are TONS of different sensors that the PCM might be using to adjust the ignition timing and the air-fuel ratio. As said before, it would be impossible to even hope to cover every single sensor that may or may not be used on the incredibly high number of vehicles we come across every day.
Similarly, each sensor also comes with its own specific testing procedure, so it would be a herculean task to try to include them all here — not to mention that it would make up for a very, very long blog post.
So, instead of trying to rewrite the whole manual here, I have tried my best to cover the most commonly problematic sensors, those that are on pretty much any gas-powered car equipped with a COP system nowadays. I have also given a brief explanation and added a couple of pointers on where to go from there.
However, if you end up going through the whole list and can’t find anything, your best bet would be to grab the manual, have a look at the various sensors your specific model is using, and follow the manufacturer’s recommended testing and troubleshooting procedure for each of them. Bummer, I know.
Crankshaft and Camshaft Position Sensors
The crankshaft and camshaft position sensors keep tabs on the position and speed of the crankshaft and camshaft, ensuring that the ECU knows precisely when to fire those ignition coils. But, like any hardworking component, they can fail, and that’s where things get tricky.
Heat is one of the biggest enemies of these sensors. They’re often located near hot engine components, and over time, the relentless heat can cause them to deteriorate. Electrical issues are another common problem. The wiring and connectors that feed these sensors can get damaged or corroded, leading to poor signals or no signals at all. And let’s not forget physical damage — a stray piece of debris or a minor impact can knock a sensor out of commission.
So, what do you do when your crankshaft or camshaft position sensor starts acting up? Start by giving them a good look-over. Check for any obvious signs of wear and tear, like cracks or corrosion. Sometimes, a simple cleaning can work wonders. Dirt and grime can build up and interfere with the sensor’s ability to send accurate signals.
If a visual inspection and cleaning don’t do the trick, it’s time to break out the scan tool and have a look at the signals and if they’re consistent and accurate. If the readings are all over the place, you likely have a faulty sensor on your hands. Replacing it is usually straightforward, but make sure to follow the manufacturer’s guidelines to ensure it works correctly.
Oxygen (O2) Sensors
Oxygen sensors are crucial for monitoring the amount of oxygen in your vehicle’s exhaust gases. This information helps the ECU adjust the air-fuel mixture to maintain a stoichiometric ratio for optimal combustion. However, these sensors can get contaminated over time due to exposure to exhaust byproducts, which reduces their accuracy.
When an O2 sensor gets dirty or fails, it disrupts the delicate balance of the air-fuel ratio. A lean mixture can cause misfires because there isn’t enough fuel to ignite properly, while a rich mixture can lead to incomplete combustion, also resulting in misfires. If you suspect an issue with your O2 sensor, start by inspecting it for any signs of contamination or damage. Cleaning the sensor with brake cleaner can sometimes bring it back to life. If not, you may need to replace it.
Luckily, most OBD2 scan tools will have an “O2 sensor testing” function (often called Mode 6 or On-Board Monitoring or something similar— it could differ depending on the manufacturer), allowing you to access the onboard test results for various sensors, including oxygen sensors. This can help you identify if the sensor is functioning correctly or if it needs to be replaced.
Brace yourself tho. Depending on the car you work on, there might be quite a couple of steps to perform — these tests often require specific conditions to be met before they can be performed accurately. For instance, the engine needs to be in a closed-loop operation and fully warmed up, the idle needs to be stable or between a certain range, you may need to go through a certain number of drive cycles, etc., etc.
It may take some time, but you’ll get there.
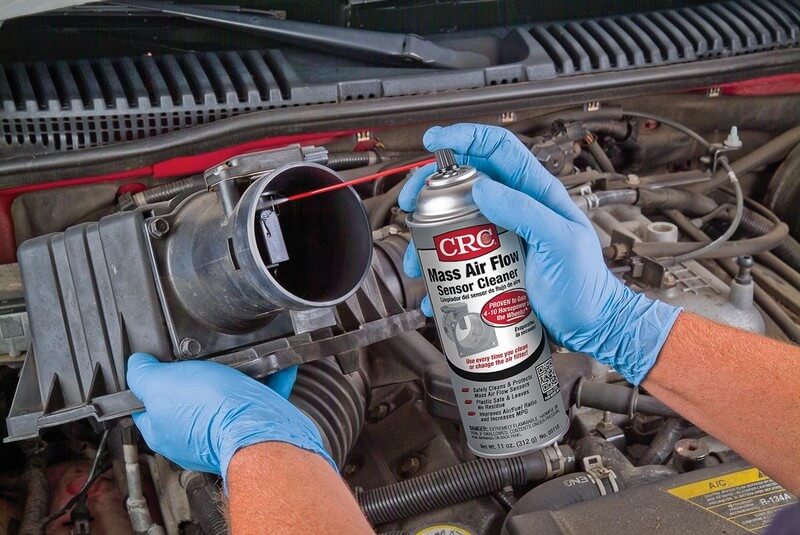
Mass Air Flow (MAF) Sensors
The mass air flow sensor measures the amount of air entering the engine, which, again, is crucial for maintaining the correct air-fuel ratio; and MAF sensors are sensitive devices (to say the least) and can easily get dirty or damaged.
First things first, break out the OBD2 scan tool and have a look at the MAF’s data. If the reading is moving a lot at idle or is simply out of the recommended threshold (again, you’ll need the manual for the OEM spec for your specific car here), you’ve probably found your problem.
When in doubt, start by removing your MAF and spraying it with brake cleaner or electric contact cleaner. Doing so can often resolve minor issues, especially if the reading was off due to dirt or grime (I’ve seen MAFs go crazy because of spiderwebs before, so you never know). If cleaning doesn’t help, the MAF will probably need to be replaced.
Performing a Compression Test and Addressing Mechanical Issues
No matter whether the air-fuel ratio is on-point or not, if the compression inside the cylinders isn’t right, there will be no explosion. Of course, compression problems are definitely not the most common cause of misfires, but if you’ve checked everything above already and you haven’t found anything yet, it’s time to start thinking about breaking out your compression tester.
Unfortunately, as explained before, every engine is different, so it would be impossible to tell you exactly what the readings should be when running a compression test on your specific vehicle. Once again, you’ll need the repair manual to verify if the readings you get are between the manufacturer’s recommended threshold. Still, what really matters here is consistency between cylinders. Indeed, the exact readings you get matter a lot less than getting a similar reading on all the cylinders since a difference of more than 10-15% between them can point to trouble.
Performing the Test
Here’s a quick rundown on how to do it:
- Warm Up the Engine: Let the engine run until it reaches normal operating temperature — if you have a pretty serious misfire, you might be better off skipping this step.
- Disable Injection: Since you’ll be repeatedly cranking the engine with the spark plugs disabled in the next step, think about removing the fuel pump relay to avoid flooding the engine.
- Remove Spark Plugs: Take out the plugs from all cylinders.
- Insert Compression Gauge: Screw it into the spark plug hole of the first cylinder.
- Crank the Engine: Turn it over several times and note the highest pressure reading.
- Repeat for All Cylinders: Compare the readings to find any discrepancies.
Interpreting the Results
If you find significant differences in compression between cylinders, it could indicate worn piston rings, leaking valves, or a blown head gasket. A drop in compression is often accompanied by other symptoms like coolant loss or white smoke from the exhaust.
Fixing the Issues
Unfortunately, diagnosing and fixing compression issues is a bit more complex and goes way beyond the scope of this article. Again, though, you’ll find everything you need in the repair manual, including a step-by-step procedure to find the cause of your compression problem, as well as complete instructions on how to fix it. When in doubt, get the manual!
Addressing Vacuum Leaks
Vacuum leaks are another sneaky culprit behind engine misfires. When air is unintendedly introduced into the engine, it can mess up the air-fuel ratio, leading to a lean condition and, eventually, misfires. If you’ve ruled out ignition and fuel delivery issues, it might be time to hunt down some pesky vacuum leaks.
Understanding Vacuum Leaks
Vacuum leaks occur when air enters the engine through a path that bypasses the Mass Air Flow (MAF) sensor. This extra, unmetered air can cause the engine to run lean, as the ECU is unaware of its presence and doesn’t compensate by adding more fuel. Common causes of vacuum leaks include cracked or disconnected vacuum hoses, faulty intake manifold gaskets, and damaged throttle body gaskets.
Finding the Leak
Here’s how you can track down a vacuum leak:
- Visual Inspection: Start by checking all the vacuum hoses connected to the intake manifold. Look for cracks, splits, or disconnections. Also, inspect the intake manifold and throttle body gaskets for signs of wear or damage.
- Listen for Hissing Sounds: With the engine running, listen for any hissing sounds, which often indicate a vacuum leak. Be careful around moving parts, and use a piece of hose as a stethoscope to pinpoint the source of the sound.
- Use a Smoke Machine: If a visual inspection and listening don’t help, a smoke machine can be your best friend. Introduce smoke into the intake manifold and watch for it to escape from any leaks. This method is highly effective and can quickly reveal even the smallest leaks.
- Spray Soapy Water: Another trick is to spray soapy water around suspected areas while the engine is running. Bubbles forming indicate a leak.
- Spray Brake Cleaner EVERYWHERE: This one is a bit of a nasty one, but it’s been a life savior several times in my career, especially when all else fails. If there’s a leak, air is necessarily entering the combustion chambers, so an easy trick is to take out a can of brake cleaner and methodically spray around potentially leaking areas like the plenum, the head gasket, the throttle body, vacuum hoses and such, while the engine is running at idle. If the engine suddenly surges, you have found your leak! (Just watch out when spraying around hot components so you don’t set the engine bay on fire. lol)
Fixing the Leak
Once you’ve found the vacuum leak, fixing it is usually straightforward. Replace any cracked or damaged vacuum hoses and secure any loose connections. If the leak is coming from the intake manifold or throttle body gaskets, replacing these gaskets should solve the problem.
Frequently Asked Questions (FAQ)
Q: What are the most common symptoms of an engine misfire?
Engine misfires can manifest in various ways, and recognizing these symptoms early can help prevent further damage. The most common symptoms include:
- Rough Idling: The engine feels shaky or uneven when the car is idling.
- Loss of Power: The car struggles to accelerate smoothly and may feel sluggish.
- Unusual Sounds: You might hear popping, coughing, or sputtering sounds from the engine.
- Poor Fuel Economy: Misfires can cause your car to consume more fuel than usual, leading to reduced mileage.
- Check Engine Light: A flashing or steady check engine light is a common indicator of engine misfires. Using an OBD-II scanner can help identify the specific cause.
Q: Can I drive my car with an engine misfire?
While it might be possible to drive with a misfire, it is not recommended. Driving with a misfiring engine can lead to several issues. Continuous misfires can damage the catalytic converter, one of the most expensive components to replace. Your vehicle will likely perform poorly, with reduced power and efficiency. Additionally, a misfiring engine can cause the vehicle to stall or lose power unexpectedly, and then, you’ll need a tow truck anyway.
Put simply, you can usually get back home, but that should probably be as far as you go.
Q: How often should I replace spark plugs to prevent misfires?
The replacement interval for spark plugs depends on the type of spark plugs and your vehicle’s specifications. Here are general guidelines:
- Copper Spark Plugs: Every 20,000 to 30,000 miles.
- Platinum Spark Plugs: Every 60,000 miles.
- Iridium Spark Plugs: Every 100,000 miles.
Q: Can a dirty fuel injector cause an engine misfire?
Yes, a dirty or clogged fuel injector can cause an engine misfire. Fuel injectors deliver the precise amount of fuel to each cylinder. If an injector is clogged, it can disrupt the fuel supply, leading to a lean mixture and causing a misfire.
Symptoms of a dirty fuel injector include rough idling, where the engine runs unevenly at idle; poor acceleration, as the vehicle struggles to accelerate smoothly; and increased emissions, as a clogged injector can cause higher emissions due to incomplete combustion. Regular use of fuel injector cleaner and performing fuel system cleaning can help prevent these issues and keep your engine running smoothly.
Q: What tools do I need to diagnose and repair engine misfires?
Diagnosing and repairing engine misfires requires some essential tools and equipment. Here’s a basic list:
- OBD-II Scanner: To retrieve diagnostic trouble codes (DTCs) and identify the misfiring cylinder.
- Spark Plug Socket and Wrench: For removing and inspecting spark plugs.
- Multimeter: To test the resistance of ignition coils and sensors.
- Fuel Pressure Gauge: To check the fuel pressure in the fuel rail.
- Compression Tester: To perform a compression test and check the mechanical health of the engine.
- Noid Light: To test the electrical signal to the fuel injectors.
- Vacuum Gauge or Smoke Machine: To detect vacuum leaks.
Last Words
So there you have it, everything you need to know to tackle engine misfires on coil-on-plug ignition systems. While it might seem overwhelming, with the right knowledge and tools, it’s totally doable.
Think of it this way; every time you diagnose and fix a problem, you’re simultaneously taking care of your car, learning something new, and becoming more skilled.
Now, I know we’ve covered a lot here, but remember, this is just a starting point. Every car is a bit different, and sometimes the best tool in your arsenal is the repair manual specific to your vehicle. When in doubt, get your hands on that manual. It’ll have all the specifications, detailed procedures, and tips directly from the manufacturer. Trust me, it’s worth it.
Don’t let misfires intimidate you. Approach the problem step-by-step, use the tools and tips we’ve discussed, and don’t be afraid to get your hands dirty. And if you ever hit a roadblock, there’s no shame in consulting the manual or even asking for a bit of help from a fellow gearhead.
So, the next time your engine acts up, or you face a misfire, take it as a chance to learn and improve. With some patience and effort, you’ll have your car running smoothly again.
Happy fixing!