

No matter whether you’re a race car fan or simply a car owner using his car to go from point A to point B, you need your vehicle to be in good working order at all times. Nothing is worse than getting stranded on the side of the road while you’re headed somewhere important. Unfortunately, like any other mechanical equipment, a car will wear out with time, and if it’s not properly taken care of, it might break down more often than not. One of the components frequently overlooked by car owners and regularly causing problems is the thermostat. To help you prevent expensive cooling system repairs on your vehicle, here’s a quick guide outlining the most common signs of a bad thermostat and how to fix or replace it yourself so you can get your car back on the road and save money while you’re at it.
What is a Thermostat and How Does it Work?
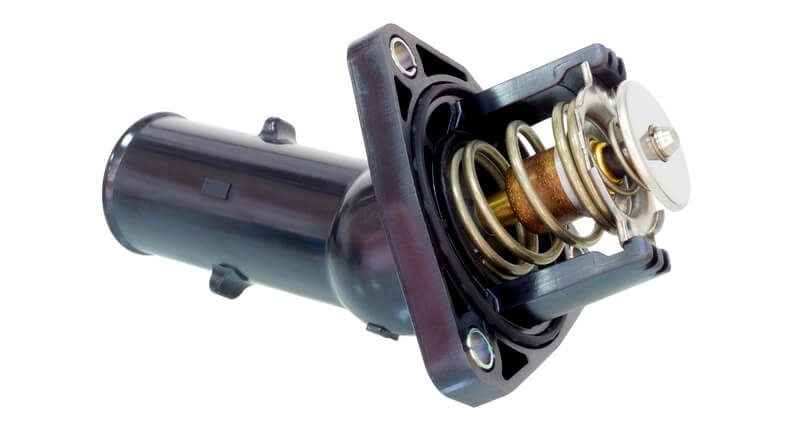
All water-cooled cars have a thermostat. The thermostat in your car is like a one-way valve opening and closing the cooling system’s circuit as needed. To do that, a thermostat takes advantage of the metal expansion principle. It’s made of two plates and two springs that expand as temperature increases, ultimately opening the valve once the coolant’s temperature reaches a certain threshold.
When the thermostat is closed, the coolant only circulates inside the engine block to warm up the engine as quickly as possible. When the coolant reaches the correct operating temperature, the thermostat opens, allowing the coolant to circulate through the radiator to be cooled down, preventing the engine from overheating. This process ensures that the coolant stays within a certain range.
As a general rule, it’s safe to say that once the thermostat opens, it usually stays in this position until the car is turned off. Even if you let your car run at idle for a long time, the heat generated by the internal explosions and the moving parts is more than enough to keep the temperature above the closing threshold. In fact, when stuck in traffic, for example, the airflow going through the radiator is greatly reduced, and the cooling system needs to work even harder. That is also why every car is equipped with a radiator fan, just in case the cooling system can’t cool down the coolant fast enough.
Why Does My Car Need a Thermostat?
Your car needs a thermostat to keep the engine working at a controlled temperature. Even though it’s actually possible to remove the thermostat altogether and just keep driving, your car will take much longer to reach an adequate operating temperature, especially in cold weather. Furthermore, on some car models equipped with an especially efficient cooling system, the coolant might never reach the correct temperature at all.
While driving your car without a thermostat, it’s unlikely that your engine will overheat, but you can seriously damage vital components by driving it below normal operating temperature. Driving your car while it’s running colder than normal will significantly reduce the lifespan of many internal parts, mainly because the lubrication properties of engine oil are best when hot. Driving for an extended period with cold engine oil can cause severe damage to the cylinder walls and piston rings. Moreover, multiple components need to reach the normal operating temperature to be fully functional. A cold engine will also run on a richer air-fuel ratio, increasing pollution and reducing fuel efficiency.

What are the Most Common Signs of a Bad Thermostat?
Like most other mechanical car parts, a thermostat will eventually go bad. There’s no way around it. The springs might rust and break. Calcium deposits can build up in the thermostat and clog it. Sometimes it still looks fine, but it won’t just open or close anymore.
In all cases, only two things can happen. It will either stay stuck open or stuck closed. And each situation will lead to only one problem: a thermostat stuck close will cause your engine to overheat, while a thermostat stuck open will take more time to reach the normal operating temperature than usual.
Simple right?
Let’s look at each of the symptoms in more detail.
Engine Overheating

This symptom is one of the most common signs of a bad thermostat. This condition usually happens when the thermostat is stuck closed. This usually happens after the engine is turned off, cools down, and is then started again. With time, the springs may become weak and can’t reopen the disc valves. When such a situation occurs, the engine will warm up normally. But once it reaches the normal operating temperature, the thermostat staying closed shut will cause the coolant’s temperature to increase uncontrollably.
This condition is called engine overheating. The first thing you’ll notice is the temperature gauge in the dashboard going way higher than usual. Unfortunately, it’s frequent for recent cars to be exempt from a traditional engine temperature gauge and only have a red light lighting up when the temperature reaches an abnormal level. In all cases, if the gauge gets in the red or if the coolant warning light comes up, you should turn off the engine right away.
Shut down the engine but leave the key in the ON position. This will allow the radiator fan to stay operational to help cool down the engine as fast as possible. Once the engine is cold, start the engine and keep an eye on the gauge. If the engine overheats again, you’ll need to call for a tow truck. Driving with an overheating engine will definitely damage expensive internal components. Doing so for an extended period might even cause the engine to seize, and it will need to be overhauled or replaced.
Download your engine repair manual here!
Engine Running Cold
For the same reason, it’s also possible for a thermostat to stick open. If your thermostat sticks open, you are likely to notice that your engine takes longer to warm up or doesn’t warm up at all. Your heater may also blow cooler air than usual. If your car is equipped with a temperature gauge, you might notice the needle stays lower than the normal range. Unfortunately, if your car doesn’t a such a gauge, it’s a lot harder to notice the problem, especially during summertime.
While a thermostat stuck open is significantly less dangerous than a thermostat stuck closed, the situation should also be taken care of as soon as detected.
Common Faulty Thermostat-Related DTC Code
A faulty thermostat can trigger multiple DTC codes depending on the specific condition and what is causing the problem. Here are some of the most common ones:
- P0125 – Insufficient Coolant Temperature For Closed Loop Fuel Control: This code indicates that the engine hasn’t reached the proper temperature to enter closed loop mode after a specific amount of time. This is frequently caused by a thermostat stuck open.
- P0127 – Engine Overtemp Condition: This code is stored in your car’s PCM when the coolant reaches higher than the normal operating temperature. It could be related to a thermostat being stuck closed, but it could also be caused by many other cooling system problems. Any other obstructed component reducing the flow of coolant, for example, could cause the same code to pop up. A P0127 may sometimes also indicate there’s a leak in the system or a bad water pump.
- P0128 – Coolant Thermostat (Coolant Temperature Below Thermostat Regulating Temperature): This code is specifically related to the thermostat and indicates that the engine did not reach the normal operating temperature after a sufficient time. A P0128 code is usually a sure sign of a bad thermostat.
- P2181 – Cooling System Performance: This one is a generic code indicating there’s something wrong with the cooling system. It doesn’t have to be related to the thermostat in any way but may sometimes be found with other codes mentioned above. If only this code is in History, it might be a good idea to erase it, take the car out for a spin and see if it comes back. If it does, more troubleshooting might be required, and a complete checkup of the cooling system is highly suggested.

Fixing a Bad Thermostat
Replacing a thermostat is one of the easiest jobs to do on your car. Even if you are a beginner and only have basic auto mechanic notions, you should be able to pull it off with no problem. If you are unsure about how to proceed or if it’s your first time replacing a thermostat, I strongly recommend you get your hands on your car’s repair manual first. In this type of manual, you’ll find everything you need to make sure you replace your thermostat correctly on the first try and don’t break anything while doing it. Not only do repair manuals include the manufacturer’s recommended procedure to replace the faulty components, but you’ll also be able to follow the right troubleshooting procedure to test it and make sure it’s actually the source of the problem.
In most vehicles, the thermostat is located inside the thermostat housing, where the upper radiator hose connects with the engine block. On some cars equipped with a reverse circulation cooling system, the thermostat housing may be on the lower hose, but it’s really not that frequent.
To access the thermostat to inspect it, test it or replace it, you’ll need to remove any hoses attached to the thermostat housing first, which brings us to the first step required to replace a thermostat: draining the coolant.
Step 1 – Draining the Cooling System
The first thing you have to do when replacing a bad thermostat is to drain the cooling system. You could always just unplug the upper radiator hose right away, but doing so will cause the coolant to spill out on the floor. Since coolant is harmful to the environment, you should always collect the coolant in a drain pan and recycle all automotive fluids properly.
Drain valve
Most vehicles have a coolant drain valve, especially for that purpose. If your car has one, it should be near the bottom of the radiator. Simply unscrew it and collect the coolant in a large drain pan. To reduce the risk of spilling coolant everywhere, make sure to leave the radiator cap on while unscrewing the drain plug. Doing so will only allow the coolant to drip slowly. Once the drain plug is removed, take out the radiator cap to increase the flow of coolant and speed up the process.
If your car isn’t equipped with a drain valve, you’ll need to remove one of the radiator hoses. Watch out, though. This technique is usually a lot messier!
Flushing the cooling system
If all you want to do is to replace the thermostat, you don’t always need to completely drain the cooling system. However, when replacing the thermostat, it’s also a good time to flush the system. If you find build-up and deposits on your old thermostat, dirt in the drain pan, or if the coolant’s color seems rusty, you should plan on performing a cooling system flush to prevent signs of a bad thermostat from coming back.
Keep in mind that orange coolant doesn’t always mean that it needs to be replaced. It’s true that a majority of cars used green coolant in the past and that a rust-colored coolant used to be a sign that it needed to be replaced, but it doesn’t really apply anymore. It’s frequent for car manufacturers to use coolants of different colors nowadays. For example, Toyota uses pink coolant, while Honda’s OEM fluid is blue. In all cases, if the color has significantly changed, the coolant should be flushed and replaced.

Step 2 – Removing the Thermostat
The thermostat housing is bolted down and has a gasket that seals the housing to the engine. When removing the housing, notice how the thermostat is sitting. You will need to install the new thermostat facing the same direction. If you install the thermostat backward, your car will definitely overheat.
Once the housing is removed, take out the thermostat. If it seems to be stuck in place, use a flathead screwdriver to pry it out. Make sure to clean the gasket surface and where the thermostat is sitting thoroughly. Be careful not to gouge the surface with a scraper or make the surface uneven with coarse-grit sandpaper. The thermostat housing surface also needs to be clean and smooth. You should take time to make sure your surfaces will seal well now to prevent unexpected coolant leaks in the future. I personally use a razor blade to remove most of the debris and gunk and then fine-grit sandpaper to finish it off.
Step 3 – Testing the Thermostat
Obviously, the first thing to do after removing the thermostat is to inspect it. If the valve is open at room temperature, you know right away that the thermostat is faulty and needs to be replaced. Look at the spring and search for cracks. Cracked springs won’t be able to move the valves far enough for the coolant to flow adequately. You should also be able to push open the valve and move the springs with your fingers. If it doesn’t budge, the thermostat is probably stuck closed.

If everything looks good, the next step is to test it for proper operation. Luckily, there is an easy way to test a thermostat at home without the need for any special tool. All you need to do is place the thermometer in a pot of water and start heating the water. Do not let the thermostat (A) touch the bottom of the container. Instead, attach it to a wooden stick, as illustrated in Fig.1. Use an immersible thermometer (B) and monitor the water’s temperature. Write down the temperature at which the thermostat starts to open and at which it’s fully opened. Once it’s fully open, take it out of the water and measure the lift height using a digital caliper.
Once done, all you have to do is to compare the data to the manufacturer’s recommended specs you’ll find in your car’s repair manual. As an example, this is the kind of specs you would have for a 2005 Acura RDX:
Standard Thermostat Specifications
Lift height: Above 8.0mm (0.31″)
Starts opening: 169-176 °F (76-80 °C)
Fully open: 194 °F (90 °C)
If any of the measurements for the thermostat are out of specs, it’s faulty, and it will need to be replaced. However, since the thermostat is already out and because most thermostats are quite inexpensive, I would suggest you replace it anyway. Even if the measurements are on point, nothing proves that it won’t just stop working in a month or two. You really don’t want to spend time fixing it now only to face new signs of a bad thermostat shortly. Unless your thermostat is expensive, which I doubt, or if you are on a really tight budget, just play it safe and install a new one right away.
Step 4 – Installing a New Thermostat
Always replace your thermostat with the same temperature rating as specified in your car’s repair manual. There are different temperature ratings for thermostats that can be as low as 165 degrees or as high as 210. It used to be common practice in older cars that did not have sophisticated computers to install a lower temperature thermostat when the car started exhibiting signs of poor cooling system performance, but this is only a temporary fix. Modern, computer-controlled vehicles will have engine management problems if you use the wrong thermostat. Your car may overheat or trigger engine codes while trying to fix what it thinks are signs of a bad thermostat.
Sealing
Your new thermostat should come with a new gasket. Nonetheless, we highly suggest using a high-quality sealant intended for high-temperature environments to seal the thermostat housing gasket. When playing with a car’s cooling system, it’s always better to play it safe.
Apply sealant lightly to both sides of the gasket. Too much sealant is messy and does not make the seal any better. If your housing or engine block has deep gouges or is not level, you can buy a sealant to help fix this. Check your service manual for the torque specifications of your thermostat housing before tightening it down. As with most gasket seals, you will get a better seal if you torque the retaining bolts in steps, a little at a time until they are all even and at the correct torque specs. Don’t forget to check the cure time on the sealant and let it dry all the way before going any further.

Position
Your thermostat will also only work properly when installed in the correct orientation. The longer, spring-loaded part of the thermostat should be toward the engine side. The position of the thermostat is also crucial, especially if it comes with an air bleed valve. If it’s your case, the air bleed valve should be positioned exactly as it was before. Placing the air bleed valve at the 6 o’clock position, for example, could cause bleeding problems later on.
Step 5 – Finishing Up Your Thermostat Replacement
Once you reinstall the housing and thermostat, connect the hoses that you had to remove. Use a 50/50 mix of coolant and distilled water to refill your cooling system. Once done, you will need to bleed the cooling system to remove any air bubbles.
To do so, start the engine and make sure there’s no leak whatsoever. A leaking system will simply be impossible to bleed as air will enter through the leak. Let the engine run and reach the normal operating temperature with the radiator cap off. Keep an eye on the coolant level in the radiator and top it off as needed. When the temperature gauge in your car is near the normal operating temperature, the thermostat should open. When it does, the upper radiator hose will also start to get warm to the touch. These are signs you have fixed your bad thermostat.
Once the thermostat opens, top off the coolant one last time and put on the radiator cap. Let the engine run and monitor the temperature at all times. If everything works fine, the radiator fan should start soon. Once it does, you know for sure that the cooling system in your car is exempt from any air bubbles and that it’s back to normal. Take your car out for a quick road test and make sure there are no more signs of a bad thermostat. If not, you fixed it.
Good job!
Cost of a New Thermostat Replacement
Thermostats are not expensive parts. Most thermostats will cost around $15 from your local auto parts store but could run as high as $100 for specialty cars. Including purchasing coolant and sealant, the total cost for most drivers to replace a thermostat at home will be about $40. The project should take an hour or two, depending on the type of vehicle. Obviously, if you own a Porsche with a rear-engine configuration or any other luxury car, the process can take much longer.
A shop will obviously charge you much more to replace a thermostat than if you were to replace it yourself. Third-party websites comparing prices found repair shop costs for a thermostat replacement to be between $196 and $326. That means you can save lots of money doing this easy job yourself. Furthermore, not only will you have the pride of knowing you did the work on your own, but you’ll also be certain that the job is well done.
How to Fix a Stuck Open/Close Thermostat
This is actually a question frequently asked by customers, and unfortunately, there are not a million ways to fix a stuck thermostat. In most cases, a thermostat will stop doing its job either because it’s rusty, causing it to seize in place, or the spring is broken. If you are lucky and your thermostat is just seized, soaking it overnight in a bucket of loose-nut should do the trick. On the other hand, if the spring is broken, it would need to be replaced; unfortunately, I have never seen an aftermarket auto part store selling replacement springs, so finding one might be quite a hassle.
Of course, you could always use a spring sourced from another thermostat, but that would bring two concerns:
- It would need to be the exact same thermostat model; otherwise, the spring may not be properly calibrated for your specific engine, and your rebuilt thermostat might not open at the right time
- If you actually have another identical thermostat in good working order, why not just install this one instead?
The main reason why aftermarket suppliers don’t really sell replacement thermostat components really comes down to the fact that thermostats are already quite cheap. For instance, a new thermostat for a 2016 Honda Civic only costs $5, and even one for a pricier BMW or Mercedes-Benz would still only set you back about $60. At that price, there’s really no point in going the hard way and trying to find a replacement spring, assuming you were even able to replace it in the first place.
As a general rule, I would strongly suggest you just drop a new one in there and call it a day. Of course, that’s unless you are trying to restore an antique model, but that would be a totally different story.
Frequently Asked Questions (FAQs)
Can a stuck thermostat fix itself?
No — a stuck thermostat won’t fix itself.
On the other hand, it might stick one morning and then work fine the next day, and so on. However, once a thermostat starts playing games, it’s only a matter of time before it seizes again. And as you may expect, driving a car with an engine temperature jumping all over the place because the thermostat is intermittently sticking is quite stressful — and you know it will start sticking at the worse possible moment.
If stuck open, the engine will run cold, which is still the best case of the two, sure, but can still cause serious problems in the long run. On the other hand, if it’s stuck in a closed position, your engine will quickly overheat; and that’s never a good thing. Indeed, some vehicles only need to overheat once for the engine head to need to be rebuilt completely.
Considering that a thermostat is relatively inexpensive and, in most cases, easy to replace, I would highly suggest you replace it at the first sign of malfunction. It will only take you a couple of hours to replace it with a new one, and you won’t have to worry about it for years — better safe than sorry here!
Can you fix a sticking thermostat?
If your thermostat is stuck and visibly rusty, you can often fix it by soaking it in a rust remover solution overnight. However, if the spring is broken or the thermostat doesn’t unstick after a night in a rust remover solution, the only option left is to replace it. Remember that replacing a sticking thermostat is always your best bet. They are inexpensive and, in most cases, will cost pretty much the same as a can of rust remover spray anyway.
Also, keep in mind that a rusty thermostat may often indicate other problems with the cooling system, including an improperly mixed coolant. When in doubt, there are special rust-removing solutions for car cooling systems. They are pretty straightforward to use and are a great way to avoid further problems and remove rust from the cooling system as a whole. Once done, flush the system once more, replace your thermostat, fill your cooling system with new coolant, and you’ll be good to go.
What happens if a thermostat is stuck closed?
If a thermostat is stuck closed, the engine will quickly overheat, potentially causing expensive damage. The thermostat is supposed to be closed upon starting a car when the engine is cold. Once the engine reaches its optimal operating temperature, the thermostat is supposed to open, allowing the coolant to flow through the radiator, keeping it at the right temperature.
If a thermostat fails to open, you will either notice the temperature gauge rising and going past the middle or an engine overheating warning light. If your engine starts overheating, it’s best not to push your luck and turn it off immediately. Running an engine at high temperatures can cause many problems, including cracked coolant hoses, leaking oil seals, leaking head gasket, engine head warping, seized pistons, and ultimately a cracked engine block.
Can you clean a car thermostat?
Yes, you can clean a car thermostat — but if it needs cleaning, it usually implies that the entire cooling system would also needs some attention. If the thermostat is working correctly, there is no need to take it out for cleaning. In that case, you can get different cleaning solutions for the cooling system and flush it as a whole. This method removes rust, sludge buildup, and debris from every component, including the thermostat, engine cooling ports, water pump, radiator, etc.
However, if the thermostat is stuck closed or open, remove it first and flush the system without a thermostat in there. Sludge and debris won’t cause the thermostat to stick, but rust will. If you notice it’s rusty, you can clean it with some rust remover and test it in hot water. On the other hand, if it doesn’t appear rusted or the water test isn’t positive after cleaning, the only solution left is a replacement.
In Brief…
Thermostat testing and replacement is an easy job for the average person. You can do the job safely and easily at home without any special tools. If you suspect your car has a bad thermostat, you should also plan on completing other routine preventative repairs to your cooling system while you’re at it.
This is a great time to flush your cooling system, check your hoses and belts for wear and damage, and top off your cooling system with the correct type and amount of coolant. In all cases, make sure to troubleshoot and fix your car as the first signs of a bad thermostat appear. Doing so will ensure you prevent bigger damages from happening and save a lot of money at the same time.


very helpful, how i wish we have people like you in Nigeria, Abuja.
The electrician did direct connection instead of giving me all options for fixing the overheating of Honda civic.2008 model.
Now i know what it looks like at least, and can ask basic questions.
Thanks for the kind words!
Don’t hesitate to ask if you have any questions… Fixing cars online is never easy but we’d be happy to help!