Electrical systems in modern cars are packed with various components, and troubleshooting them can be a bit overwhelming. However, using a simple test light can help you pinpoint most electrical issues. These tools are straightforward, affordable, and you can easily find them at any auto parts or hardware store.
Most car electrical systems share the same core components. The battery provides power when the engine is off, while the alternator takes over when the engine is running. Power flows to various components via circuits protected by fuses, which prevent damage in case of a short. Switches or control units then regulate the power to specific accessories—whether it’s a light, motor, ignition coil, or another electrical part. In the end, everything connects back to the battery’s negative terminal, either through the chassis or a direct wire. A wiring harness bundles all these wires together, linking the system.
The most common culprits for electrical issues are either short or open circuits. A short circuit happens when a wire makes contact with the ground, which blows the fuse. An open circuit, on the other hand, is caused by a broken wire or bad connection that prevents power from flowing through.
What Types of Test Lights Are Available?

Test lights come in various shapes and sizes, but they all fall into two main categories.
Basic test lights consist of a light bulb inside a casing, with one end attached to a metal probe and the other to a wire with a clip. The typical way to use it is by connecting the clip to the negative terminal of the battery and testing connections with the probe. If there’s continuity to the positive side of the battery, the circuit will complete, and the bulb will light up. Alternatively, you can clip the end to the positive terminal and use the probe to check for ground connections. If the test point is grounded, the light will turn on.
Many newer test lights use LEDs instead of traditional light bulbs—and for a good reason. Older lights draw more current, which can be risky when testing wires connected to a vehicle’s computer, potentially damaging sensitive circuits. LED test lights significantly reduce this risk. Some even feature two LEDs—one lights up when probing for power, and the other when detecting ground. This handy feature eliminates the need to switch the clip from the positive to the negative terminal constantly.
How to Check a Fuse Using a Test Light

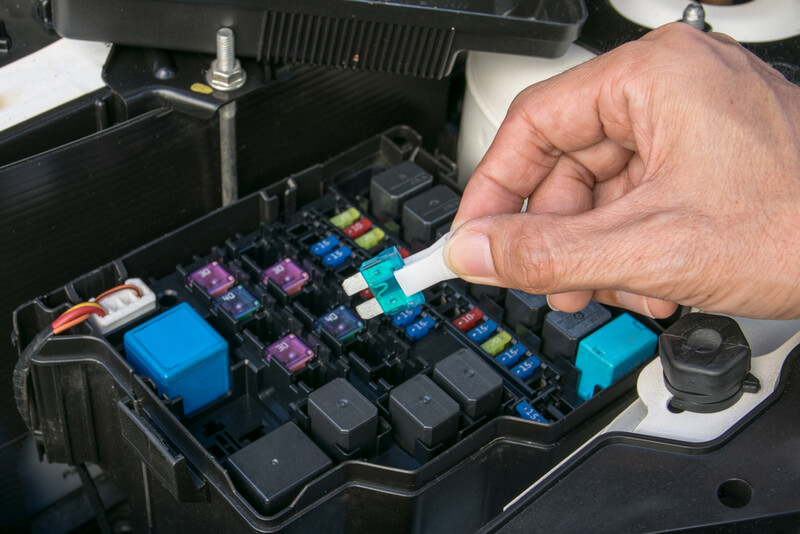
Testing fuses with a test light is one of the most straightforward and useful applications. It saves you the hassle of pulling out the fuse entirely. Simply locate the fuse box, connect the clip to a nearby piece of metal (ground), and touch the probe to each side of the fuse. If the light illuminates on both sides, the fuse is good. If it doesn’t light up, the fuse is blown.
Download car repair manuals here!
How to Diagnose Electrical Problems in Your Car

Taking a systematic approach is key to diagnosing electrical problems. Start by making sure your test light works. The easiest way to do this is by clipping the wire to the battery’s negative terminal and touching the probe to the positive terminal. If the light comes on, you’re good to go.
The first step is to check the fuses, as we discussed earlier. This will tell you if the fuse is intact and confirm if there’s power flowing to the fuse when a component fails. Once you’ve verified the fuse, you can move down the circuit, testing switches or control units next.
Having a wiring diagram can be a game-changer during electrical diagnostics. For instance, if you test a relay or fuse and it shows power, but the accessory (like a cooling fan) still isn’t working, a test light can help you trace the issue step by step. With a wiring diagram and a test light, you can eliminate possibilities and find the problem faster. If you don’t have a wiring diagram, you can grab a car repair manual here to guide you!
Test lights are also great for checking ground connections. A bad ground can cause a variety of electrical problems and performance issues, so it’s crucial to track these down. To do this, clip the test light to the positive terminal of the battery and use the probe to check for ground in the area you suspect.
Frequently Asked Questions (FAQs)
How can a test light be used to test a ground connection?
Each test light has a probe on one end and a clip on the other. To test the ground connection, attach the clip to the positive terminal and put the probe on the negative terminal. If the light comes on, the ground connection is good; if not, you should inspect the ground wires.
However, before you test the ground connection, you should first test the positive end. The ground connection test won’t be accurate if no power comes from the other side. Luckily, it’s pretty simple. Testing the positive wire or terminal is the opposite of how you would test a ground connection; the clip goes on a negative (use a known-good ground here, like the negative post of the battery), and the probe on the positive terminal. If it lights up, you’re good to go!
Also, note that some probe lights have two bulbs in different colors — in most cases, one red and one green light. The red one lights up when testing positive connections, and the green one when testing negative connections. These are particularly useful if, for whatever reason, you are not sure which wire or terminal is which.
Wrapping Up: The Power of a Simple Test Light in Diagnosing Electrical Issues
A test light is one of the most versatile tools for diagnosing electrical issues in a vehicle. Whether you’re checking fuses, tracing wires, or confirming ground connections, this simple tool can save you time and frustration. As car electrical systems become more complex, mastering the basics of using a test light is essential for any DIYer or seasoned mechanic. And remember, if you ever get stuck, having a wiring diagram or repair manual can make the troubleshooting process that much easier. Armed with these tools and knowledge, you can confidently tackle most electrical problems without needing a professional.


