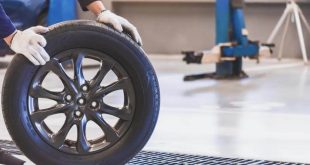
Drum brakes have fallen out of favor on most new vehicles these days, but you will still find them on most older vehicles but also small, entry-level cars. While being sub-par when compared to more efficient disc brakes, drum brakes are easy to service yourself, saving you lots of money on overpriced shop fees. Of course, when you know how to do it properly. To help you with that, here are a couple of tips and tricks to replace or rebuild drum brakes like a professional in the comfort of your garage.
What are Drum Brakes?
Drum brakes are fairly simple and use some of the same concepts as disc brakes. A basic drum brake system consists of numerous parts, making the system seem more complex than it actually is. But drum brakes work by hydraulic pressure, just like disc brakes.
When you press the pedal down, fluid is forced through the brake lines and causes the stopping material to engage with the drum. This friction slows the car down. Simple as that. Once you understand the different parts of the drum brake system, you’ll see how simple servicing drum brakes is.

Key Components of Drum Brakes
Some manufacturers vary drum brake design, but in general, all drum brake systems use the same parts. We will quickly describe what these parts are called and how they work so that you will be able to identify them easily.
Drum
This is the heavy metal part responsible for the friction surface. It is called a drum because, well, it looks like a drum. Drums are typically two pieces, the drum and the hub. The hub is usually secured to the drum by the lug studs, which also mount to the wheels. This makes a solid, secure, and balanced mounting point for the wheels.
Hub
The hub is the center part of the drum, and as mentioned earlier, it attaches to the drum through the lug studs. The hub houses the inner and outer wheel bearings, which allow the wheel to turn. A metal cap presses into the outside of the hub keeping grease in, and a seal presses into the back for the same purpose.
Backing Plate
This is the metal plate that bolts to the axle flange or steering upright. The entire brake assembly mounts to the backing plate.
Shoes
These are friction-creating surfaces and are shaped like semi-circles. Most drum brake applications use two shoes per brake. The most common design mounts the shoes front and rear, called primary and secondary shoes. The primary shoe is longer than the secondary and mounts to the front of the brake. Shoes are replacement parts and use a friction material glued, bonded, or riveted to a metal bracket.
Anchor Pin
This is a thick metal pin at the top center of the backing plate. The shoes ride on the anchor pin. The brake adjuster cable also mounts to the anchor pin.
Wheel Cylinder
The wheel cylinder is responsible for providing force against the brake shoes when you depress the brake pedal. This is one of the most common items to fail on drum brake applications. The wheel cylinder typically has metal fingers on both sides that slip into a notch on the primary and secondary brake shoes.
Return Springs
These are the two top springs that mount into holes in the shoe and backing plate. The return springs pull the shoe off the drum after you release the brake pedal. There is a primary spring and a secondary spring that mount to the respective brake shoe.

Adjuster Spring
This is the long spring that mounts at the bottom of the brake and keeps tension on the brake adjuster. The adjuster spring connects the primary and secondary shoes.
Brake Adjuster
Also called a star adjuster, this is the device you will use to get the proper amount of clearance on the shoes. Unlike disc brakes, drum brakes need to be adjusted periodically. In the 1960s, most manufacturers began using “self-adjusters” intended to slowly expand as the brake shoe wears, largely eliminating the need for manual adjustment. Manual adjusters and self-adjusters are not interchangeable. Manual adjusters have fewer teeth than self-adjusters, making manual adjustments faster and easier.
Adjuster Cable
This is a long metal cable that keeps tension on a metal plate that prevents the star adjuster from backing off and allows the adjuster to rotate to expand the brakes as the shoes wear.
Hold Down Springs
Each brake shoe will have at least one hold-down spring. These springs mount through the backing plate on pins with an arrowhead shape to the tip, two small plates with a groove, and a rectangular hole resting on the top and bottom of the spring. The pin passes through the slot and is then rotated 90 degrees to lock the shoes in place.
Parking Brake Lever
On rear-drum brake applications, a lever will mount between the brake shoes and connect to a cable. When you apply the parking brake, the cable forces the shoes apart, locking the drum in place.
Symptoms of Bad Drum Brakes
There are two times you will know that you have a problem with your drum brakes. The most common failure involves the wheel cylinder leaking. This creates a serious safety hazard as your brakes could stop working. You can usually tell that you have a leaky wheel cylinder by looking at the back of the backplate. If you see moisture on the bottom, you have a bad wheel cylinder.
Drum brakes will often make a ton of noise when worn, particularly when the system uses riveted shoes. The rivets can dig into the drum’s metal, making a high-pitch squealing sound, a rough metal grinding sound, or any number of other bizarre noises. If your shoes are worn out, you may experience a reduction in braking efficiency, leading to longer stopping distances.

Disassembly of Drum Brakes
Before working on drum brakes, the first thing you should do is take a good look at car repair manuals. A workshop service manual can give you some helpful tips about your specific system.
You will need to jack and support the vehicle correctly and remove the wheels. Don’t forget that you should never work under a vehicle supported only by a floor jack. Use jack stands rated for more than the weight of your vehicle. A great tip from the pros is to slide the wheels under the vehicle after you remove them. That way, if a jack stand happens to fail, the rim will prevent the car from completely crushing you and may save your life.
Releasing the Tension
With the wheels removed, use a screwdriver or pliers to pry off the center cap on the hub. The hub is retained with a large nut, usually with a strange-looking metal sleeve on the top and a cotter pin running through it. The wheel nut shouldn’t be very tight. The wheel nut is only hand-tight on most vehicles and is prevented from falling off by the cotter pin. Remove the pin and unthread the nut. They are likely to be covered in wheel bearing grease, so it’s a good idea to have a shop rag handy for this step.
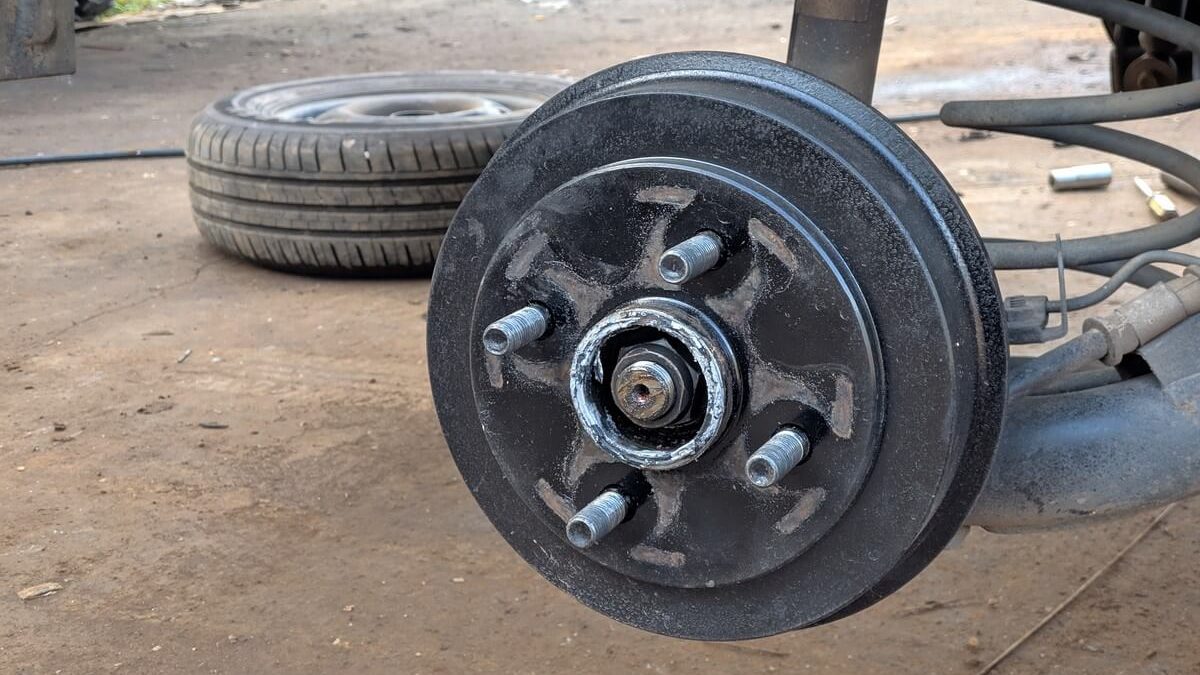
Removing the Drum
Grasp the drum with both hands and pull. If you are lucky, the drum will slide off. If you have the luck that most of us do, you will have to release the adjuster’s tension before you can remove the drum. Looking at the backing plate from underneath the vehicle, you will see a small slot at the plate’s bottom. To release tension, you will use a brake adjusting tool or a straight-edge screwdriver to press the metal plate away from the adjuster. With another straight-edge screwdriver, unwind the adjuster. It shouldn’t require very many turns to release pressure from the shoes. Keep unwinding the adjuster until the drum slides easily off the shoes.
Removing the Shoes
Now that the drum is off, you can see how the drum brake assembly goes together. A handy tip is to take a picture of the drum before disassembling it any further. This way, when you go to put it all back together, you can see how it was in the first place.
Everybody has their favorite way to remove shoes. There are even dozens of tools on the market specifically to aid in removing shoes. My favorite method isn’t always the safest, so you should use caution removing shoes the way I will describe.
Use a pair of pliers to grasp the retaining plate portion of the retaining pin. With your finger behind the backing plate holding the pin in place, press down on the retaining plate and rotate it until the pin’s arrowhead part is aligned with the slot. Carefully remove the retaining plates and spring, making sure they don’t shoot off across the garage floor. Remove all of the retaining pins.
Here is where things can get dicey if you aren’t careful. You will lift the primary shoe to clear the anchor pin and fold it inward toward the secondary shoe. The retaining springs will pop loose. You want to make sure they don’t hit you or fly off into the darkness. You should be able to remove the shoes, springs, and adjuster easily this way. Put the springs in a jar of parts cleaner and place the shoes off to one side.
Removing the Wheel Cylinder
If you are replacing the wheel cylinder, you will need to unbolt it from the backing plate. There are typically two bolts holding it in place. The brake line connects to the wheel cylinder. Use the correct size fitting wrench to remove it. You can use a regular box wrench to do this, but be careful not to round the fitting. Damaging the fitting will mean that you need to replace the brake line to prevent leaks. Have a catch pan handy as brake fluid will leak out. Remember not to get brake fluid on painted surfaces; it eats paint easily.
Inspecting Drum Brakes for Wear
Now that you have the components disassembled, you can inspect everything for signs of damage or wear. Use brake parts cleaner to clean the backing plate, springs, parking brake lever, and retaining parts. Do not get brake parts cleaner in your eyes! Use a rag to prevent brake dust from staining your driveway.
Inspecting and Turning Drums
Drums should be free of deep grooves and should be clean and dry. Deep grooves indicate an issue with the shoes, while dampness is typically a result of a failed wheel cylinder. Every drum has a minimum thickness that is usually stamped on the drum. If not, your shop manual will provide you with the proper measurement.
You should always turn the drums when servicing the brakes. Most automotive repair shops will handle this task, typically for around $15 per drum. When the drums are turned, the shop will measure the thickness to ensure enough material remains. If the drums are too thin, they will need to be replaced. It is a good idea to have brand new drums skimmed to ensure they are properly round. I can’t count how many times I have seen out-of-round brand-new brake drums.
Inspecting Shoes
Next, examine the shoes. They should be smooth and free of cracks. Rivets should be well below the surface of the shoe. Some shoes will have a small metal tab that indicates the maximum amount of wear the shoe can handle. Always replace shoes in pairs; you don’t want a new shoe on the primary and a used one on the secondary.

Inspecting the Springs
Brake springs should be free of damage. These parts seldom wear out, but if you are working on an old car or truck, it might be a good idea to source new return springs. These are typically cheap parts to replace, and they ensure your brakes will work correctly when you are done rebuilding them.
Inspecting the Wheel Cylinder
The wheel cylinder is the most common part to fail on a drum brake system. Use a small screwdriver to carefully remove the rubber caps on both ends. The bore of the cylinder should be shiny and free of grooves. If your wheel cylinder shows signs of rust or if it was leaking in the first place, replace it. Some wheel cylinders can be rebuilt, but it is usually cheaper and less hassle to simply buy new cylinders.
Reassembly of the Drum Brake System
Now that everything is good and clean and you have new brake shoes, and your drums are turned, it’s time to put it back together. For the most part, it’s just the reverse of what you did to take it apart, but there are a few helpful tips we want you to have.
It is easiest to attach the brake line to the wheel cylinder, then bolt the wheel cylinder in place. Most brake lines do not provide a method of turning the line once the cylinder is in place.
It is easiest to install the retaining pins to hold the shoes in place before you install springs. This helps to align the shoes and makes the entire process easier. Make sure the retaining pin plates face the right direction and that the pin sits all the way into its recess.
Don’t forget that every drum has a primary and secondary shoe that are not the same length. You may be able to put the shoes on backward, but braking performance will suffer.
Just like removal, everyone has their favorite way to install drum brake springs. There are drum brake spring tools you can use. The way I like to do it is simple but is also a little dangerous. You will want to make sure your face and hands are protected from flying springs.
Start by placing the retaining hook of the spring into the appropriate shoe. Use a strong screwdriver to lever the retaining end of the spring over the anchor pin. You should be able to slide the spring into position but be careful not to shoot straight back at you. It hurts when that happens.
Next, make sure the wheel cylinder forks are properly resting on the cutouts on the shoe. If you are working on rear brakes, don’t forget to align the parking brake lever at this step. The last part to fit is the star adjuster. Remember that picture you took earlier? This is where it can come in handy when you forget which direction the star adjuster sits. Screw the adjuster so that it is all the way in, giving you the maximum amount of clearance for the drum. This is essential when you replace shoes and drums.
The retaining cable should be fairly easy to route and hook over the anchor pin. Everything should be in place at this point. Ensure all the springs are sitting correctly, nothing is binding or loose, and the adjuster is installed in the correct direction.
Before you reinstall the drum, use brake parts cleaner to ensure no fingerprints on the shoes or the drum. Wash it down well and slide it into place over the shoes. Reinstall the wheel nut and tighten it to the manufacturer’s specifications. It’s usually finger-tight, then one-quarter turn. Overtightening the wheel nut can burn up wheel bearings and cause a serious fire.
Now, use a screwdriver or brake adjuster tool to turn the adjuster. You won’t need to hold the plate out of the way to tighten it. Turn the adjuster until the shoes lightly contact the drum. Too tight will cause premature wear.
Tips for Bleeding Brakes
One of the most frustrating parts of any brake job is bleeding the brakes. It’s usually a two-person task unless you have a vacuum or hand pump for bleeding. Start by ensuring the master cylinder is full using new, clean fluid. Then, follow the instructions in your workshop manual to bleed the brakes, starting at the wheel farthest from the master cylinder. Keep working air out until you have good brake pressure. Keep an eye out for leaks.
Some of the tools and parts out there can make bleeding easier. A vacuum pump makes bleeding a simple one-person task by pressurizing brake fluid through the system. Special bleeder valves can be installed in almost any vehicle that will prevent air from sucking back into the lines, making the entire process better and possible when you are alone.
Keep an eye on the master cylinder as you bleed. If it runs out of fluid, you’ll have to start over. Reinstall the wheels making sure to torque the lug nuts properly. Remove the jack stands and step back to admire how great a job you did rebuilding drum brakes at home.
Last Words
As drum brakes become less common, the skills to rebuild them will eventually be lost. Just like once upon a time, when any automotive enthusiast knew how to calibrate a magneto on their Model T, disc brakes will eventually render drums obsolete. Knowing how to properly and safely replace drum brakes will keep the knowledge alive and help you keep your older, classic, or vintage car stopping the way it should.