The best time to drive your vehicle is on its first time out of the showroom; the worst time is on a visit to the mechanic.
While modern cars and trucks sure don’t require as much attention as they once did, checking and adjusting the fluids is still crucial to keep the repair shop at bay. Indeed, your engine will wear out much faster without regular oil changes, low coolant is never a good idea and contaminated brake fluid can be a serious safety hazard.
And that’s not surprising since the fluids in your car are similar to the bloodline in living organisms. They take care of many things, including lubrication, temperature control, and operating specific hydraulic components — internal combustion engines just can’t live without fluids!
Luckily, car and truck fluids are reasonably cheap, especially compared to the potential repairs that could occur down the line if you were to neglect them. Hence, a regular inspection of the fluid levels in your vehicle can be very cost-effective in the long run while requiring only a little of your time.
But how do you check every type of fluid in your car or truck? Fret not, as we’ll guide you through the process of checking engine oil, transmission fluid, including manual gearboxes, automatics and CVTs, differential fluid, engine coolant, and brake fluid in no time.
Of course, it’s important to mention that all cars are different and will require different fluids. While we can demonstrate the general procedures to check the fluids in most cars and trucks, it’s important to keep in mind that we simply can’t cover every single engine configuration out there. For instance, if you own a Porsche 911 with a rear-mounted engine, the procedure to inspect the oil or coolant level will significantly differ from a run-of-the-mill Toyota Corolla. Similarly, if you drive a big semi, checking the differential fluid might be a bit more challenging than in an entry-level RWD pickup. When in doubt, having a look at the manufacturer’s recommended procedure in your car or semi truck repair manual first is always your best bet.
But without further ado, let’s begin!
How to Check Engine Oil
It’s no secret that internal combustion engines are made of several moving parts — the exact count is a bit blurry here but most sources say that a typical ICE would contain around 200 moving parts. And of course, since most of these parts are made from cast iron, steel, or aluminum, and all rub against each other, it causes quite a lot of friction.
The engine oil lubricates all those parts and significantly reduces wear. Moreover, since oil circulates inside the engine, it keeps those parts cool — also crucial for durability. Without oil, an engine would only run for 15-30 minutes at the very best before an inevitable catastrophic failure occurs. And if that happens, your repair bill will show at least four digits.
So no need to mention that, no matter the car, SUV, or pickup truck you drive, regularly checking the oil is essential. Fortunately, there is a light that will come up on the dashboard when the oil reaches a dangerously-low level on most vehicles. However, it’s really just a failsafe system, not an indicator you should rely on to know when it’s time to have a look.
Indeed, letting the oil drop that low is never a smart thing to do. As the oil level gets lower, the oil pressure will also get lower, resulting in a deficient lubrication system way before that light comes on. Put simply, for the best lubrication possible, it’s imperative to keep the oil near the maximum level — not more, and not less; just right.
Luckily, checking the oil level in your vehicle only takes a minute and a clean rag!
First, turn off the engine and wait for at least 10 minutes for the oil to settle and ensure you get an accurate reading (if it was running before, I’d still suggest watching out — 10 minutes is enough to settle but the oil will still be very hot).
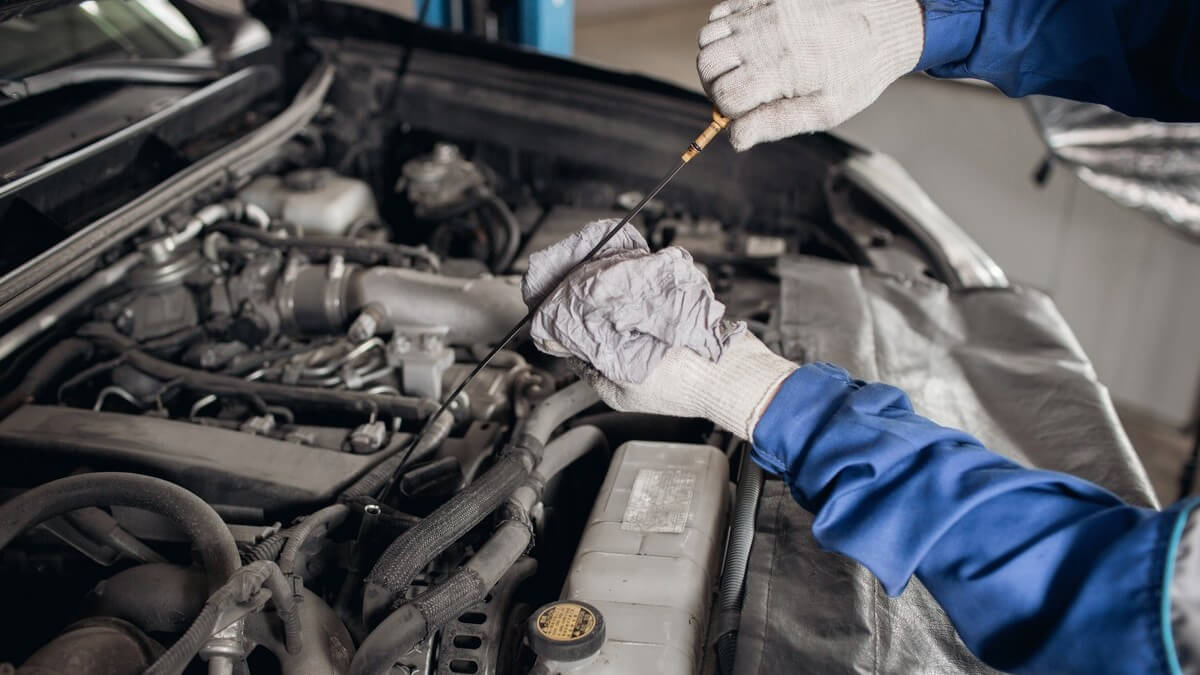
Open the hood and locate the dipstick — it should be in front of the engine in FWD vehicles with a transverse configuration and behind it in RWD vehicles with a longitudinal configuration. If you have a hard time finding it, keep an eye out for a bright yellow plastic ring marked “engine oil” or “motor oil.” If you aren’t sure, you’ll find the exact location of the engine oil dipstick in your car owner’s manual.
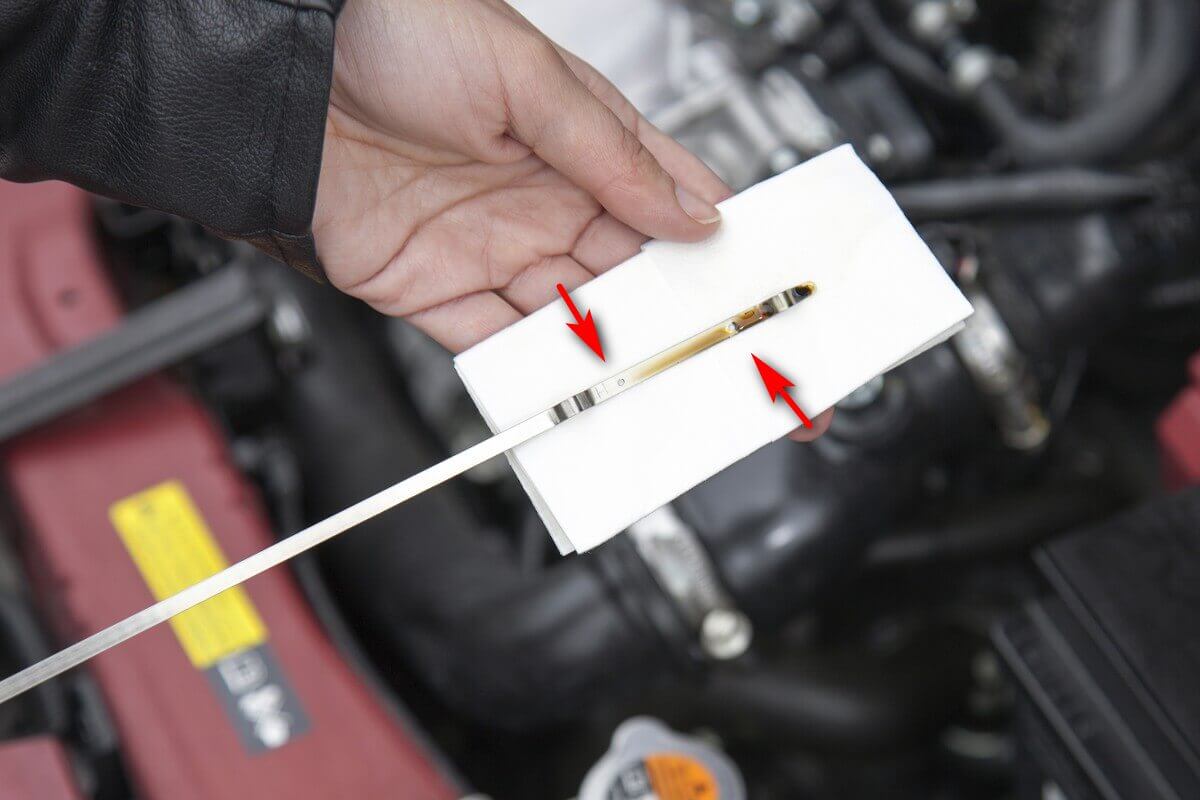
Once you have located it, turn the handle slightly (it tends to stick in there, and twisting helps) and pull the dipstick out. Then, use a clean rag and wipe the remaining oil from the dipstick and reinsert it down the pipe. Pull it out again, and look at the engine oil level. It should reach or be close to the “MAX” mark.
If the level is near or below the “MIN” mark, open the oil cap on top of the engine, and add more oil. We recommend refilling only a few ounces at a time and checking the dipstick regularly. Make sure not to exceed the maximum, which will cause the oil pressure to increase past the normal threshold, pop out seals, create leaks, and eventually damage the engine.
While checking the oil level, it might also be a good idea to check its condition. If the oil is yellow or amber, it’s probably still good for a little while. However, dark brown or black oil that smells like gasoline means you should probably think about changing it soon — or at least put it on your to-do list.
How to Check Transmission Fluid
Transmissions are slightly more complicated, mostly because they come in different types and shapes. For instance, while manual transmission fluid serves a similar purpose as engine oil, providing proper lubrication and ensuring the smooth functioning of the components, in automatic transmissions, it does a lot more than that, literally activating clutches and valves thanks to hydraulic pressure. Still, in all cases, making sure the fluid is level is essential.
Automatic Transmission Fluid
If your vehicle is equipped with an automatic transmission, you’ll first need to check your car owner’s manual to determine whether the engine should be running or turned off when checking the transmission fluid. The engine has to be running during a transmission fluid check with most vehicles, but newer models often require the engine to be turned off, so just make sure what you’re working with here.
Most automatic vehicles have a transmission fluid dipstick in the engine bay, usually identified with a bright red handle. In front-wheel-drive vehicles, it is located at the front, right over the transmission and beside the engine. In rear-wheel-drive vehicles or longitudinal engines, the transmission fluid dipstick will be further back, closer to the firewall.

Now, the exact procedure to check the automatic transmission fluid in your car is tricky to explain since several manufacturers recommend a different process. For instance, for some vehicles, you’ll need to shift through the gears first and leave the shifter in Park, or Neutral. In others, you’ll need to reach a specific temperature threshold, hold a steady RPM, etc.
Still, as a general rule, here’s how it goes:
- Start the engine
- Wait for the engine to reach its normal operating temperature
- Place the shift lever on Neutral
- Pull the dipstick
- Make sure the fluid level is between “MAX” and “MIN”
However, newer vehicles may not have a dipstick to check the transmission fluid at all. Automatic transmissions are getting increasingly complex nowadays, and in some cases, require the use of specialized hydraulic pressure measurement equipment to check the fluid level. If this is your case, it’s probably best to consult a trustworthy mechanic.
Regardless, it’s important to mention that the transmission lubrication system is a closed circuit, meaning that if everything is alright, the level should never move. Any indication of a low fluid level is a good indication that there might be a leak somewhere, which is not to be neglected since your automatic transmission heavily relies on hydraulic pressure. If the level is too low, the pressure will also be incorrect, leading to several problems, including slow shifts, slippage, and jerky acceleration.
Of course, if the transmission fluid level is too low, you are still better to top it off with a specially-designed automatic transmission fluid (ATFs). Once again, look in your owner’s or repair manual to find the right fluid type for your vehicle first. Most car manufacturers use different oil types developed to provide the best lubrication possible depending on their specific transmission design. For instance, Dodge and Chrysler often use ATF+4 fluid, Ford uses Mercon V, General Motors uses Dextron VI, Honda uses ATF DW-1, and so on.
So make sure to find what your car manufacturer recommends first — you really don’t want to use the incorrect fluid here.
Manual Transmission Fluid
There’s no denying it; checking the fluid level in manual transmissions is much more straightforward but may require the use of a car lift or a good jack and some jack stands since most manual cars don’t have a dedicated dipstick.
Indeed, most manual transmissions have a drain plug and a fill plug instead, which are nothing more than big bolts, one at the bottom and one place around the halfway point of the transmission, or more specifically, exactly as high as the fluid level should be. However, those plugs are rarely accessible from above and you’ll typically need to raise your car and slide under there to reach them.
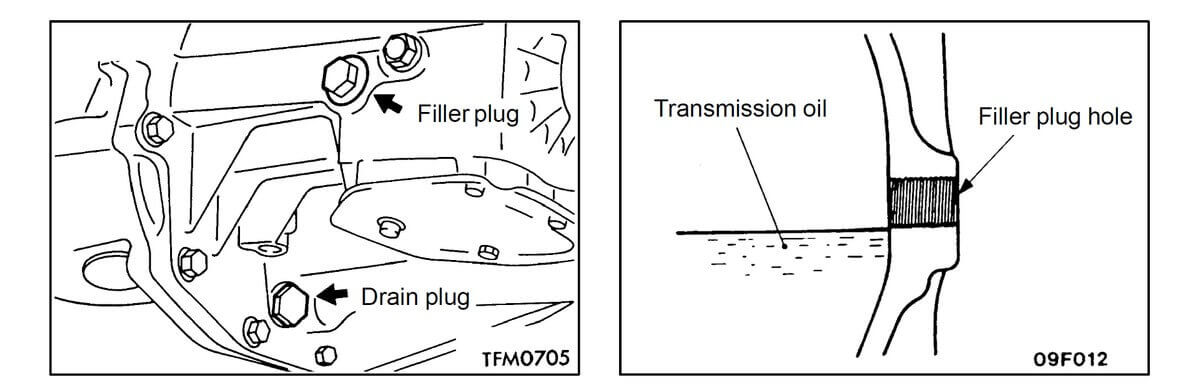
Still, once you are there, all you need to do is to remove the fill plug using a ratchet or a wrench and that’s it. Depending on the manufacturer, the fluid should either slightly drip or be near the opening (in this case, you’ll need to stick your finger in there and touch where the level is).
Luckily, this process makes it much easier to replace the fluid in your transmission since you can simply drain it all, and then refill it until fluid comes out of the plug — it’s as simple as that.
Continuously Variable Transmission (CVT) Fluid
CVTs are completely different beasts than regular transmissions, as they don’t have any gears. Instead, they use two pulleys, connected by a belt in older cars or a chain in newer vehicles. These transmissions change the ratio continuously while keeping the engine at a constant speed. Some like it, others don’t, but that’s definitely out of the scope of this article — we’ll keep it for another time.
Still, many car manufacturers use CVTs in their compact and mid-size cars nowadays, including Nissan, Honda, Toyota, Hyundai, and Subaru, while Audi also used a CVT in the past, but decided to ditch it for various reasons.
Since CVTs are so different in terms of design, they also require a special fluid to function correctly. Interestingly, while this specific fluid also lubricates the components like all other tranny fluids, in this case, keeping them cool is even more important. Hence, CVT-oriented fluid needs to be very resistant to high temperatures and able to dissipate heat rather quickly.
That being said, checking the CVT fluid differs from one vehicle to another, and some of these transmissions are even sealed. And even if you can check the fluid level, you’ll still need an OBD2 scan tool to monitor the temperature of the fluid, as per the manufacturer’s specs. Due to the higher complexity and required skill level, this information isn’t usually present in the owner’s manual, and you’ll find it in a proper service manual instead.
(Not sure where to find one? Have a look at eManualOnline‘s extensive car and truck repair manual — you’ll thank me later!)
For instance, on a Nissan vehicle, once you reach the recommended temperature range, cycle the shifter through all positions and wait for a few seconds. Then, open the drain plug and check how powerful the stream is. If there is enough fluid, the flow should be slow but steady. If there is not enough CVT fluid, the flow will appear interrupted. As you can imagine, doing this requires some expertise, so visiting a mechanic or making sure you know what you are doing here is a prerequisite.
And once again, every manufacturer designs its CVT to work with a specific CVT fluid. For example, if you own a Toyota, make sure you use a Toyota-branded CVT fluid — using the incorrect fluid is even worse in a CVT than in any other transmission type.
How to Check Rear Differential Fluid
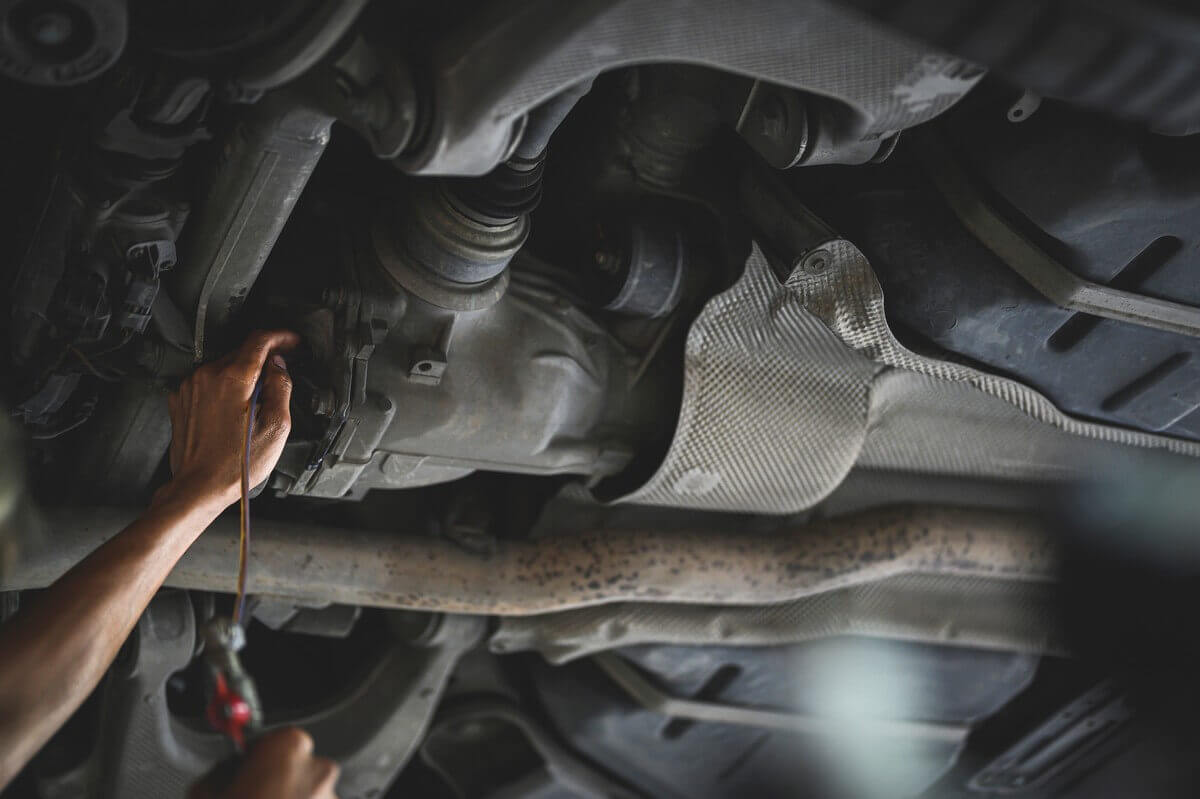
To check your rear differential fluid, raise your car on jack stands, and ensure it’s level to the ground. On RWD cars and trucks, the differential sits between the two rear wheels. Meanwhile, AWD cars with a longitudinal engine also have a center differential, along with front and rear differentials (FWD vehicles and AWD vehicles with a transverse engine also have a front differential but it’s usually part of the transmission so there’s no dedicated differential fluid here).
Just like manual transmissions, differentials usually have a drain plug and a fill plug. Once you are under your car, open the fill plug and watch if gear oil comes out of the hole. If it does, the fluid is at the right level. If it doesn’t, insert your finger in the hole and touch if the fluid is just below the opening. At that level, oil should wet your finger. If it doesn’t, the differential oil level is low, and you’ll need to add a bit more.
Warning: While you have your finger in there, make sure not to turn the driveshaft or the rear wheels — you really don’t want to squeeze your fingers between the differential gears.
How to Check Engine Coolant
Internal combustion engines produce a lot of heat resulting from the combustion process and friction between the various moving parts. Hence, cooling the engine is crucial to keep it running.
The coolant prevents the engine from overheating but also from freezing in winter. While your vehicle is running, the coolant circulates through the engine, absorbing the heat, before cooling down in the radiator before re-entering the engine.
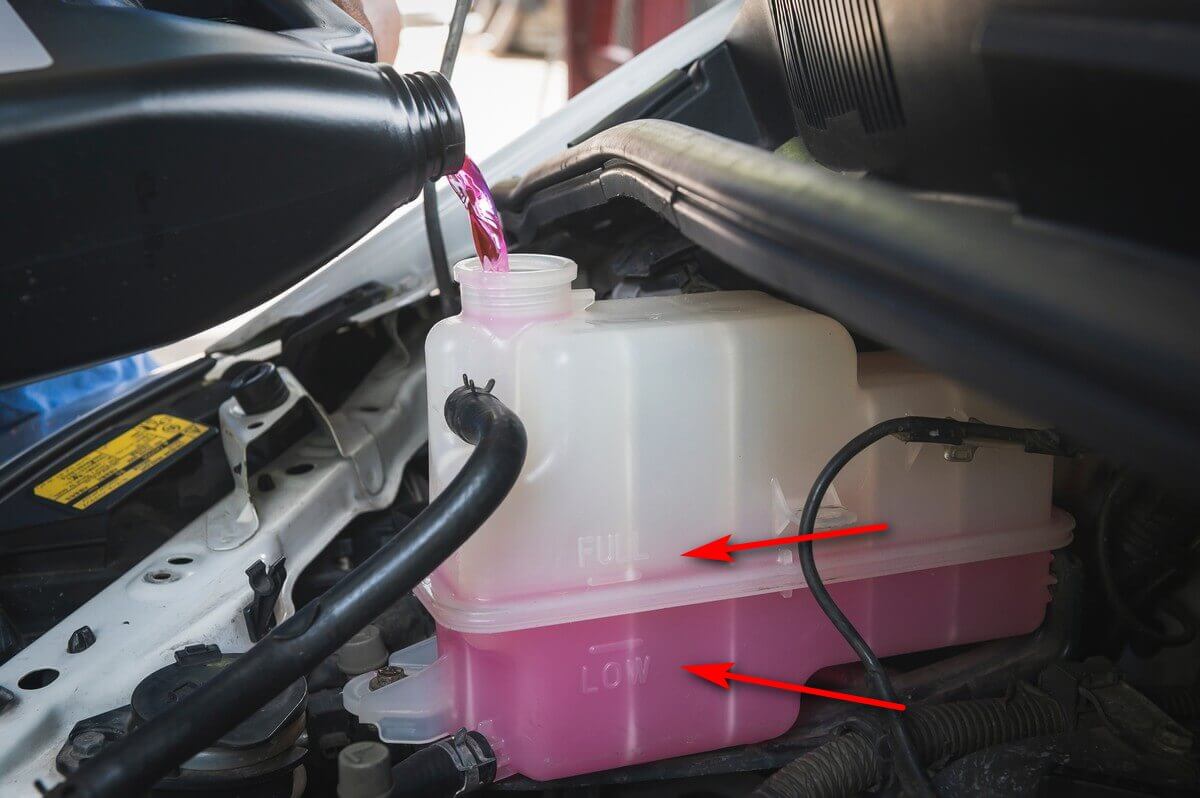
Luckily, coolant is one of the easiest fluids to check in your car. Indeed, all modern cars are equipped with an overflow tank used to store the excess coolant as it heats up and expands. To speed up the inspection process, the overflow tank is translucent, and “LOW” and “FULL” markers indicate the current level.
Meanwhile, if you own an older vehicle that doesn’t have a coolant reservoir, open the radiator cap and look inside. If the coolant is visible, the level is good — as simple as that.
If the level is low, add more coolant, (usually a 50/50 water and coolant mix, but make sure to check that in your owner’s manual) until it reaches the “full” mark again.
Warning: Never forget to turn your engine off and let it cool down before opening the overflow tank or radiator. Cooling systems are pressurized and opening the cap while your vehicle is hot will cause the burning liquid to spray everywhere, which could cause serious harm.
How to Check Brake Fluid
If you thought checking the coolant level in your car was easy, wait ’till you learn about brake fluid. Indeed, the master cylinder reservoir storing the brake fluid on modern vehicles is also translucent with similar “FULL” and “LOW” markers. The main difference is really that this system isn’t pressurized and the fluid never gets hot (if it does, something’s not right). Simply look at the fluid level from the side and make sure it’s between the two markers.

Quick tip: Since brake fluid is usually clear or slightly yellowish (if your brake fluid is dark, it needs to be replaced), it may sometimes be hard to see through the dusty plastic reservoir. Luckily, holding a work light from behind the reservoir usually makes it much easier to see.
Older vehicles will have a metal reservoir instead, with the lid clamped shut. Still, you can check the brake fluid level by unclamping the top and looking inside — there will be the same markers inside the tank.
Last Words
Whether your vehicle is manual or automatic, an SUV or a pickup truck, its fluids ensure that it runs in peak condition. Just like the blood running through your veins, if it’s dirty, contaminated, or just low, I ain’t got good news for you. Luckily, keeping an eye on the fluid levels in your vehicle is fairly easy, especially if you make it part of your car’s periodic maintenance routine.
Moreover, in most cases, you’ll find everything you need, from the manufacturer’s recommended procedure and the corresponding replacement fluid specifications in your owner’s manual. For the more challenging tasks that the carmaker reserves for trained mechanics, the information may not be in the owner’s manual but you’ll still find it in any good car or truck repair manual.
In all cases, staying on top of your vehicle’s recommended maintenance schedule is always your best to keep the repair shop at bay, and ensure your car lasts as long as possible while also staying light on your budget. And of course, if you are like me, your vehicle is much more than just an engine on wheels or a bare means of transportation to go from point A to B. Consequently, make sure to give it the care it deserves — it will all be worth it in the long run!