

Headlights have been an integral part of automobiles since their inception for obvious reasons, but initially, they were kind of lame. The first models used acetylene or oil to light a flame, and although there were mirrors behind the flame, they weren’t particularly good at focusing the beam on the road ahead.
Fortunately, not long after Thomas Edison patented the incandescent light bulb, automakers started experimenting with electric headlights, dramatically improving night visibility. Sure, they were still a far cry from the modern headlights we enjoy today, but they were fine considering how fast vehicles were traveling at the time.
However, the most significant improvement in headlight technology came with sealed beam headlights that featured a curved reflector behind the tungsten bulb. The reflector focused the beam on the road much more efficiently and didn’t blind oncoming motorists. Next came the halogen bulb, which was way more powerful and durable but was still limited by the reflector housings.
In the years that followed, automakers toyed with projector, xenon, LED, Matrix LED, and even laser headlights, targeting maximum visibility at night with minimum distraction to other traffic participants. But what’s the difference between all these different headlight technologies, and which one should you choose for your next car? Buckle up as we’ll get into some juicy detail about how all different headlights work and whether they are worth your money!
Sealed Beam Reflector Headlights

Reflector housings are an old design but still in widespread use today. One of the biggest reasons is cost — reflector headlights are cheap and easy to manufacture and are good enough to illuminate the road at night. Still, with other technologies becoming cheaper, particularly projector and LED headlights, I expect them to become extinct in new vehicles by the end of this decade, especially in developed countries.
The first generation of closed reflector housings debuted in the 1930s when the industry started using metal reflectors. The basic principle used was the reflection of light waves, which significantly differed from the previous technologies. Notably, Cadillac developed the modern electric vehicle system composed of steering-mounted switches, electric headlamps, and an electrical ignition system.
One essential feature of early reflector headlamps was the Fresnel Lens, i.e., the rows of fringes on the headlight covers. The lens, developed by French physicist Augustin-Jean Fresnel, focuses the light toward the road and illuminates farther objects. Some newer reflector headlights no longer use the Fresnel Lens, thanks to the more complex reflector housing that could focus the beam better. Besides, using a clear lens means a less diffused and sharper beam.
How do modern reflector headlamps work?
Reflector headlamps have two main components, a bulb and a housing reflector bowl. The reflector bowl is a hollow hemisphere, with the interior fabricated with intricately designed mirrors with a reflective coating. The mirrors are constructed at specific angles to focus the beam on a straight path.
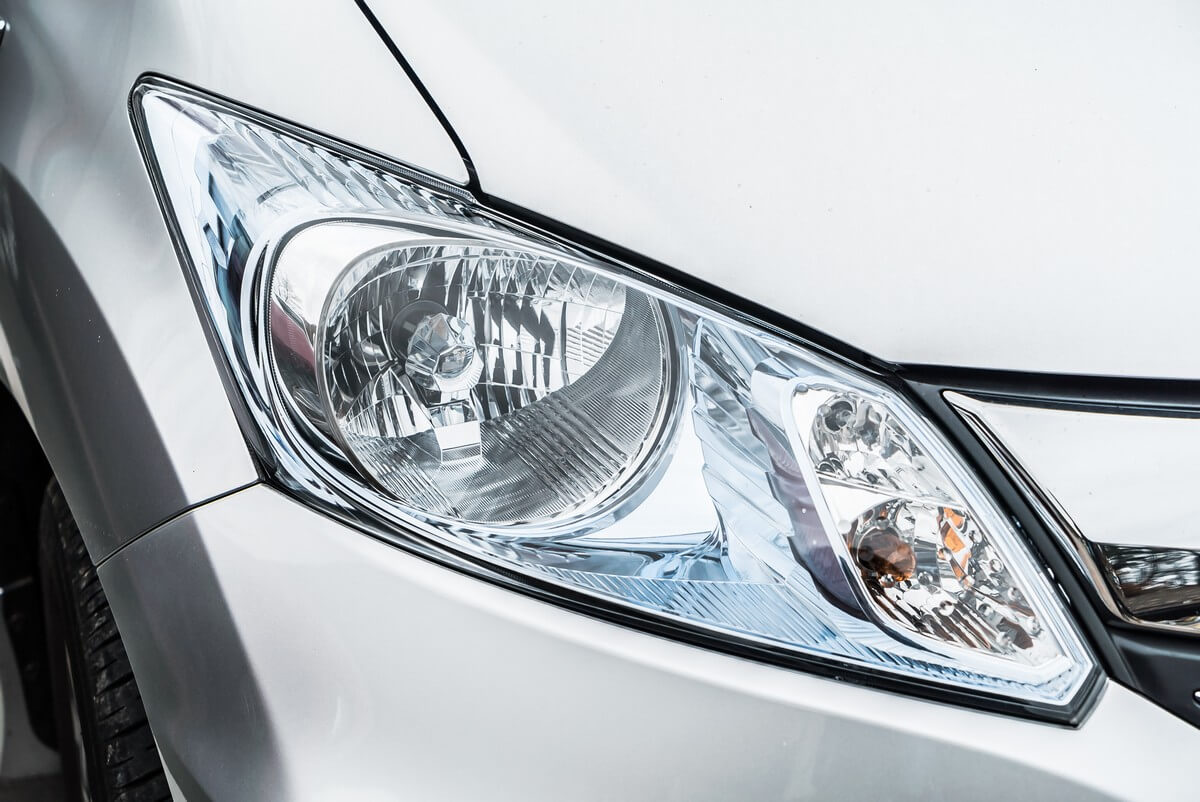
If you look closely, you can notice the design of the inner reflector part. It has carefully angled ridges and a ‘headlight diffuser’ positioned right above the bulb. The diffuser acts as the first reflector, focusing the light rays on the chromed reflector bowl, reflecting light rays forward. The design of modern reflector headlamps is very carefully planned, with total internal reflection and other calculations considered.
Another feature of contemporary reflector housings is that you can adjust them using the built-in screws. However, these aren’t designed to allow you to change the beam height on the go; instead, you should only use them to adjust the beam when you install a new headlight. Workshops have headlight adjustment tools that will direct the beam upon factory specifications, but you can also use a repair manual and do that yourself. Just make sure you don’t set it too low (limits visibility) or too high (disturbs oncoming drivers).
Motorized reflector housings
Fortunately, most modern vehicles have motorized reflector housings with built-in actuators that let you change the beam height via a knob inside the cabin. Usually, you should use the lower setting in urban scenarios or when driving on a steep incline. Meanwhile, the highest setting would be best for driving on the highway.
Projector Housings — a Massive Leap Forward
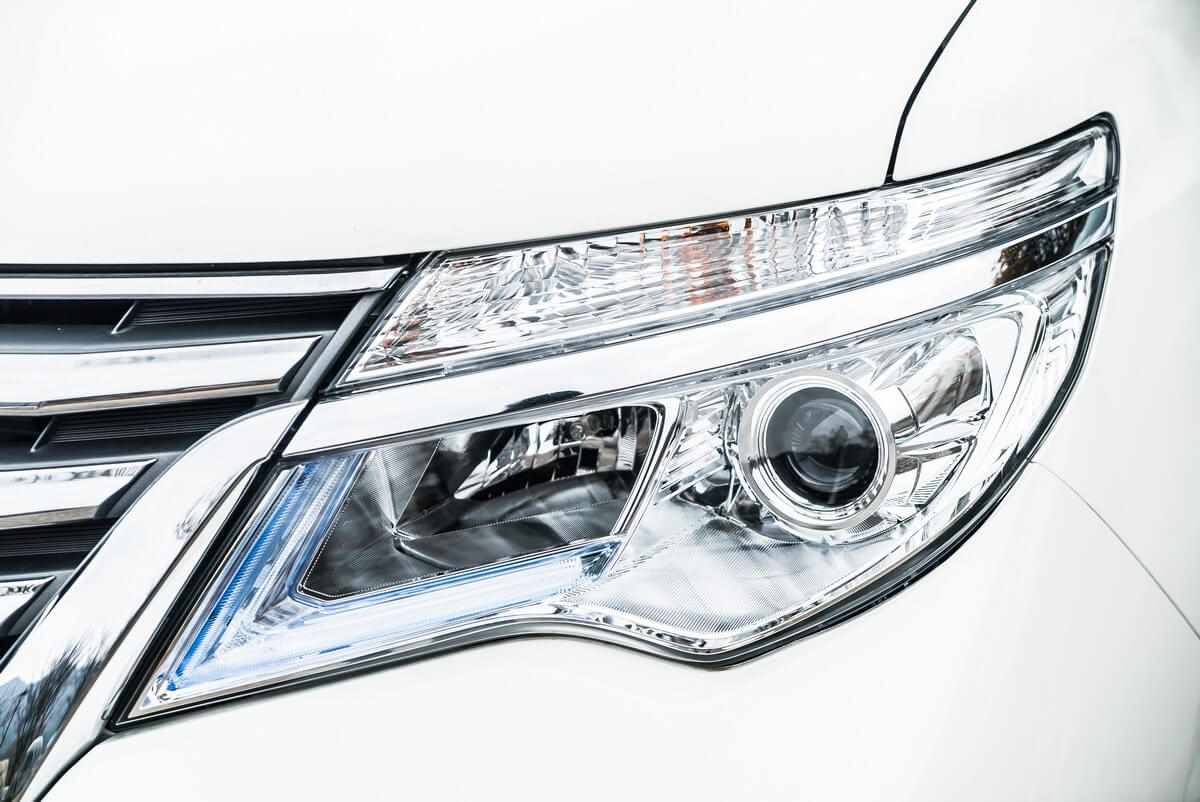
The projector headlamp is a newer development in the auto headlight industry. Projector headlights are similar to reflector headlights, as they also have a reflector behind a bulb. However, projector headlights have a lens in front of the bulb, magnifying the light output and focusing the beam even better.
Projector headlamps can successfully accommodate halogen, HID, and LED headlight bulbs without blinding other drivers. Meanwhile, most reflector headlights won’t work very with LED and HIDs, especially if they weren’t designed with those in mind. This is a big plus point since HID and LED bulbs last longer, shine brighter, and consume less energy.
How do projector headlamps work?
The main difference is that the projector headlights use a smaller closed system where the bulb fits. The projector is fabricated in an ellipsoid form, and the inside surface has a reflective coating. The ellipsoidal housing causes the light emitted by the bulb to be focused on a single, more intensive point. Meanwhile, a clear lens in front carries the light out of the housing.
On Bi-Xenon and Bi-LED models, a cutoff shield powered by a solenoid sits between the bulb and the lens, controlling the low and high beams. As a result, unlike reflector models, there is a clear distinction between the low and high beams on these headlights. Also, the light output is more focused on the road, with less diffused light that can distract other traffic participants.
Still, as a cost-cutting measure, some headlights feature a projector housing for the low beam and a reflector housing for the high beam. These are better than having only reflectors but worse than a Bi-Xenon or Bi-LED headlight.
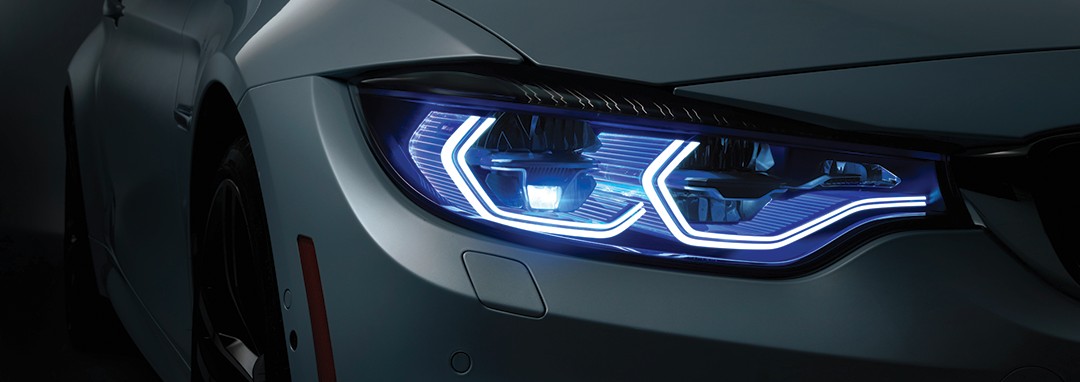
Lastly, projector housings definitely look the part. BMW even used them to create a more recognizable front fascia by putting a light halo around the projector and calling them Angel Eyes.
Retrofitting Projectors On Older Vehicles

Many people I know with older vehicles try all sorts of bulbs to enhance the light output of their reflector headlights. However, while an HID (Xenon) or LED bulb will shine brighter, the reflector won’t be able to focus the beam on the road. As a result, these configurations can blind oncoming drivers yet don’t provide better visibility at night.
Fortunately, you can retrofit projector modules on most older vehicles. However, the job isn’t very straightforward and requires opening the headlight, so you really should know what you are doing. Still, it’s very cost-effective — buying a pair of aftermarket headlights with built-in projectors can be very expensive.
Please note that the step-by-step guide below should work on most vehicles, but headlight assemblies differ from model to model. Also, you’ll need some special tools, like a pry tool, since the headlights weren’t designed to be opened in the first place.
Finally, always purchase projector kits that fit inside your headlight and decide on the bulb type beforehand. Since it’s 2022, I recommend going for LED models since they are the brightest, most efficient, and longest-lasting.
1. Remove the bumper (if necessary)
On most vehicles, you’ll need to remove the bumper first and then remove the headlight assembly. The process differs for every car, so consult your model’s repair manual. On some cars and trucks, though, you can remove the headlight without removing anything else.
2. Take out the front headlight cover
Removing the front cover on any headlight can be challenging since you are working with plastic and a perma-seal sealant (in most cases). In other words, automakers deliberately made these decisions to prevent you from opening the headlight assembly. You can still do that, although it will require controlled heating, prying, and special chemical dissolvent in some cases.
Some headlights have a butyl rubber sealant, which makes the job easier, as it only requires a heat gun to separate the cover. You can even put these models inside a preheated oven at 270 °F (~130 °C), and the cover should easily come out.
Regardless of the type of sealant, don’t hurry, as the transparent plastic cover can easily break, especially some of the brackets that hold it in place. So, apply heat (or dissolvent) first and then use a pry tool (or a flathead screwdriver) to carefully open the headlight — a simple but time-consuming process.
3. Install the projector inside the reflector housing
After finishing the tiresome and time-consuming process of removing the cover, it’s time for the fun part. However, installing the projector inside your headlight can be equally challenging, as you’ll need to modify the insides. In most cases, you’ll need a larger hole (where the bulb sits) to fit the projector inside. All of this depends on your vehicle’s headlights, but also the model of the projector. Hence, it’s important to always check beforehand if it fits the existing headlights.
Once you drill a larger hole, install the projector in the space where the bulb would sit. Then, use the provided seal, nut, and washer to tighten it from the back. Once the projector fits snugly into place, you can install the provided shroud for a better look (if it fits inside the reflector).
Bonus advice:
Since most aftermarket reflectors will provide you with a low and a high beam (Bi-Xenon and Bi-LED), the other reflector in your vehicle (if any) won’t serve any job. In those cases, you can put some DRLs (Daytime Running Lights) to further improve the looks of your headlights.
Also, since your reflectors are still in there, I recommend painting them black (or in the body color). By doing that, the projector will stand out even more and give your vehicle a sharper look.
4. Adjust the reflector correctly before assembling the headlight
An essential step is to check if the projectors work correctly before putting the cover back on. Too many DIYers forget this step and spend hours opening the headlight again and re-adjusting the projector. So, put your headlight on your vehicle and see if it illuminates the road correctly; if not, make the necessary adjustments to the projector. Once you are sure everything works correctly, you can start reassembling the headlight.
5. Use adhesive to put the cover back on the headlight
In this case, I recommend against using perma-seal for obvious reasons. Instead, you can rely on butyl sealant strips. These are easy to work with and also make disassembly more convenient. Put as much sealant as necessary — don’t leave unsealed spaces! Then, use a heat gun or an oven at 240 °F (115 °C) so that the sealant fills even the smallest openings. Then, use the clamps to tighten the cover and leave the whole headlight assembly to cool down. Don’t forget to trim the excess adhesive!
6. Put the headlight back on your vehicle, followed by the bumper
Once it cools down, put the headlight back on your vehicle using all screws — you can find the correct process in your car’s repair manual.
7. Install the bulbs
Once everything is in place, install the bulbs just like you did before, and enjoy the new look of your car!
All About Bulbs
The bulbs are as crucial as the headlight itself. With around 20 different bulb sockets and sizes to choose from and three different kinds of lighting tech involved, it’s not easy to choose a suitable one.
If you’re following our retrofitting guide or plan to change the headlights soon, you should know that LEDs are currently the brightest and most efficient bulbs. HIDs are close behind in brightness, though they aren’t as durable as LEDs (15,000 vs. 45,000 hours). Meanwhile, halogen bulbs are the cheapest, making them the best option for budget-minded buyers. Still, you need to consider that they aren’t very durable and will generally die after 450-1,000 hours of use (depending on the model).
Another thing to consider is temperature, as HIDs produce a lot of heat, and LEDs are not too far behind. The heat these bulbs produce can lower their luminance, which is why they come with built-in coolers. Make sure there is enough space around the cooler to dissipate the heat, or the bulb might not function properly.
Halogen bulbs also produce a lot of heat, but that won’t affect luminance. It does shorten their lifespan, though.
Matrix LED headlights
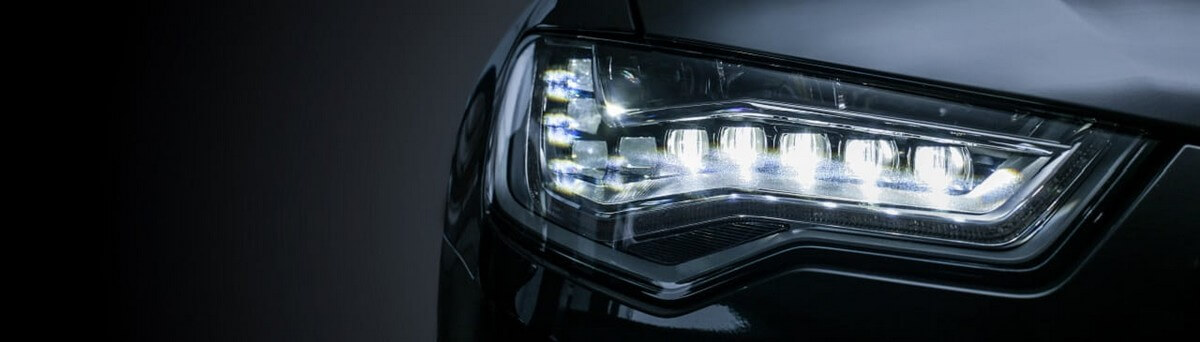
Matrix LED headlights are cutting-edge technology that uses a complex set of LEDs and mirrors to produce a beam of light. Imagine the LEDs as pixels that project their light on the road, and you won’t be far from the truth. Audi was the first company to sell cars with Matrix LED headlights, but few other companies followed suit.
This technology allows for a much brighter and more focused beam of light. Crucially, though, you are always driving with a high beam because Matrix LED headlights can lower the beam in certain areas, like an oncoming car, a cyclist, or a pedestrian. That way, these headlights don’t disturb other traffic participants while always giving you maximum illumination (on open roads).
And, trust me, once you try a car with Matrix LEDs, there is no going back. The illumination you get, paired with the ease of use (no more shuffling between low and high beams), is a game changer. If you frequently drive at night and have spare money, I recommend going for these headlights.
The technology is so advanced that it can even project images on the road — Audi even imagines using this feature to show you navigation directions directly on the road!
Still, the problem with Matrix LEDs is that they are costly, and any repair is impossible — you’ll need to replace the whole unit.
Laser Headlights
Laser headlights are the most recent technology that can significantly increase nighttime visibility. BMW already includes them in several high-end models, though they are a costly option and even more expensive to replace.
Nonetheless, these headlights use three lasers and a set of mirrors to project the light on a lens filled with yellow phosphorus. As a result, the phosphorus will glow and be very bright at that. The main advantage of laser headlights is that their throw is much longer than any other technology; BMW ones can illuminate about 2,000 ft (600 m) of the road ahead.
However, in my experience, they aren’t as good at illuminating closer subjects as Matrix LED headlights. They are still amazing, don’t get me wrong, but the road won’t be as bright as on Matrix LEDs. Laser headlights also have the option to dim the lights on certain parts to avoid blinding other drivers.
Final Words
Headlights, along with tires, are one of the most critical automotive technologies for safety. Hence, it’s not surprising that automakers continue to push the envelope and produce even better headlights. We can safely say that modern Bi-LED, Matrix LED, and Laser headlights work tremendously well at turning the night into a day, but further improvement is always possible.
We can only speculate on what future headlights will bring, but better interaction with the road ahead, like what Audi is doing with its matrix technology, seems to be on the horizon.
Regardless of what the future brings, you must always keep your headlights clean and install quality bulbs, as they can significantly increase safety. It’s the same with retrofitting projectors — choose quality products to ensure proper illumination and long-lasting performance!


