900A Fault during SAE J1939 transmission General information Note: The network referred to is not the main network SAE J1939 but the tachograph's secondary network. Note: This type of fault normally generates fault codes in the vehicle control unit. The vehicle control unit may then activate other symptoms than those described below, e.g. no speedometer and/or odometer update in the instrument. Component: A 33, tachograph. Cable harness: 1006. Fault code 900A All other faults during a transmission from the SAE J1939 bus that are not covered by fault code 900B. Condition for fault code: z Communication fault on the control link. Possible reason: z No connection with the vehicle control unit. z Disruption in the SAE J1939 connection. Reaction from control unit: z Fault code set. Noticeable external symptom: z No communication with the tachograph. Appropriate checks: z Check the connectors during the fault tracing for looseness, contact resistance and corrosion. For a more comprehensive fault tracing of cables and connectors, see separate Service Information under Function Group 371. z Check the cable harness for disruption or short-circuit. Page 1 of 1
900B SAE J1939 Control link, interruption General information Note: The network referred to is not the main network SAE J1939 but the tachograph's secondary network. Note: This type of fault normally generates fault codes in the vehicle control unit. The vehicle control unit may then activate other symptoms than those described below. Component: A 33, tachograph. Cable harness: 1000, 1006A. Fault code 900B A serious fault on the SAE J1939 bus. Condition for fault code: z No connection to the vehicle control unit. Possible reason: z Fault in control link. z Broken cables. z Log fault. Reaction from control unit: z Fault code set. Noticeable external symptom: z No communication with the tachograph. Appropriate checks: z Check the connectors during the fault tracing for looseness, contact resistance and corrosion. For a more comprehensive fault tracing of cables and connectors, see separate Service Information under Function Group 371. z Check the cable harness for disruption or short-circuit. Page 1 of 1
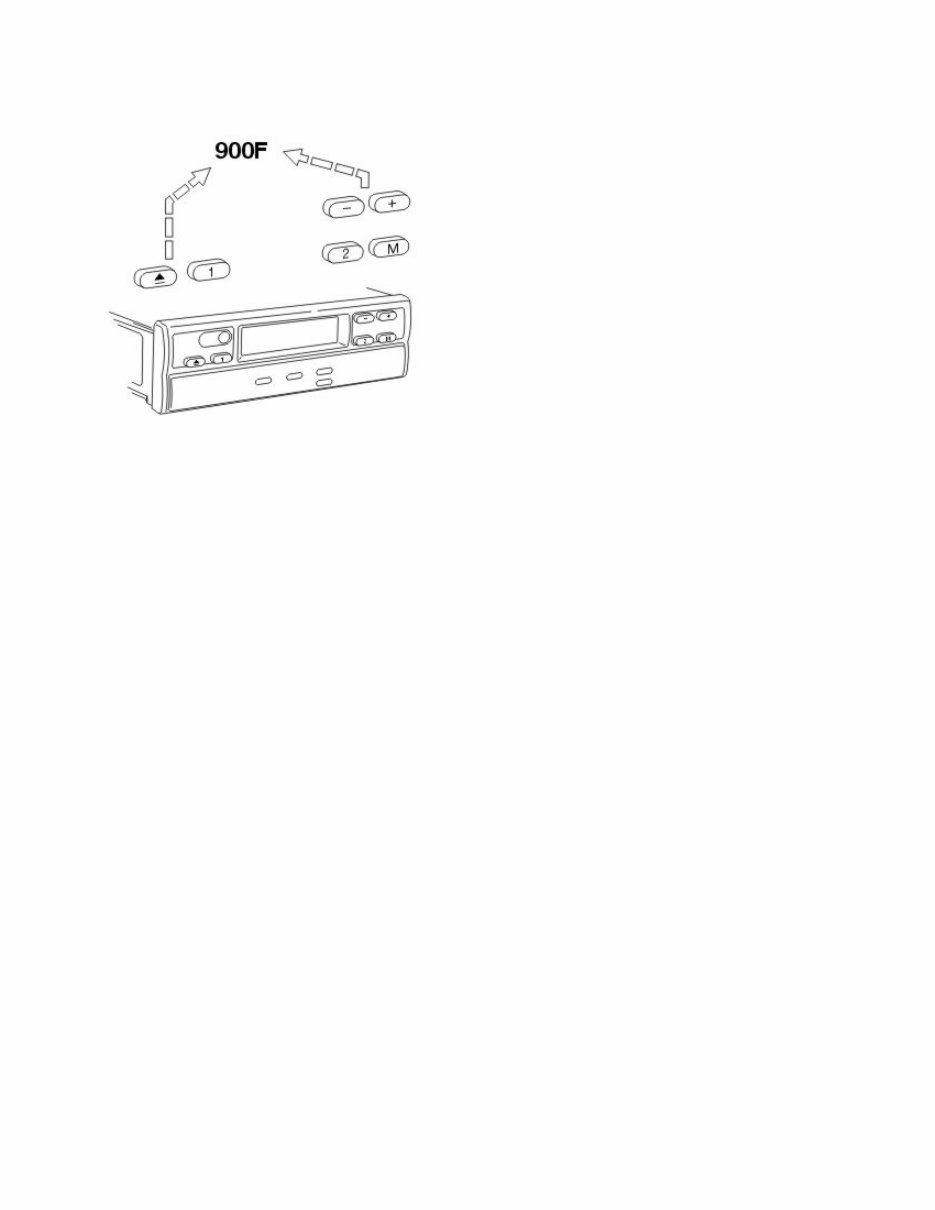
900F Tachograph buttons not working General information Note: All signals from the tachograph buttons are ignored when this fault is active. Component: A 33, tachograph. Fault code 900F The tachograph buttons are out of function. Condition for fault code: z The tachograph detects that one or more buttons have been pushed in for longer than 180 seconds. Possible reason: z One or more buttons are blocked. z Internal fault. Reaction from control unit: z Fault code set. z All signals from the tachograph buttons are ignored. Noticeable external symptom: z The tachograph buttons are out of function. Recommended measures: z A visual check of the buttons. Page 1 of 2
z Replace the tachograph. Page 2 of 2
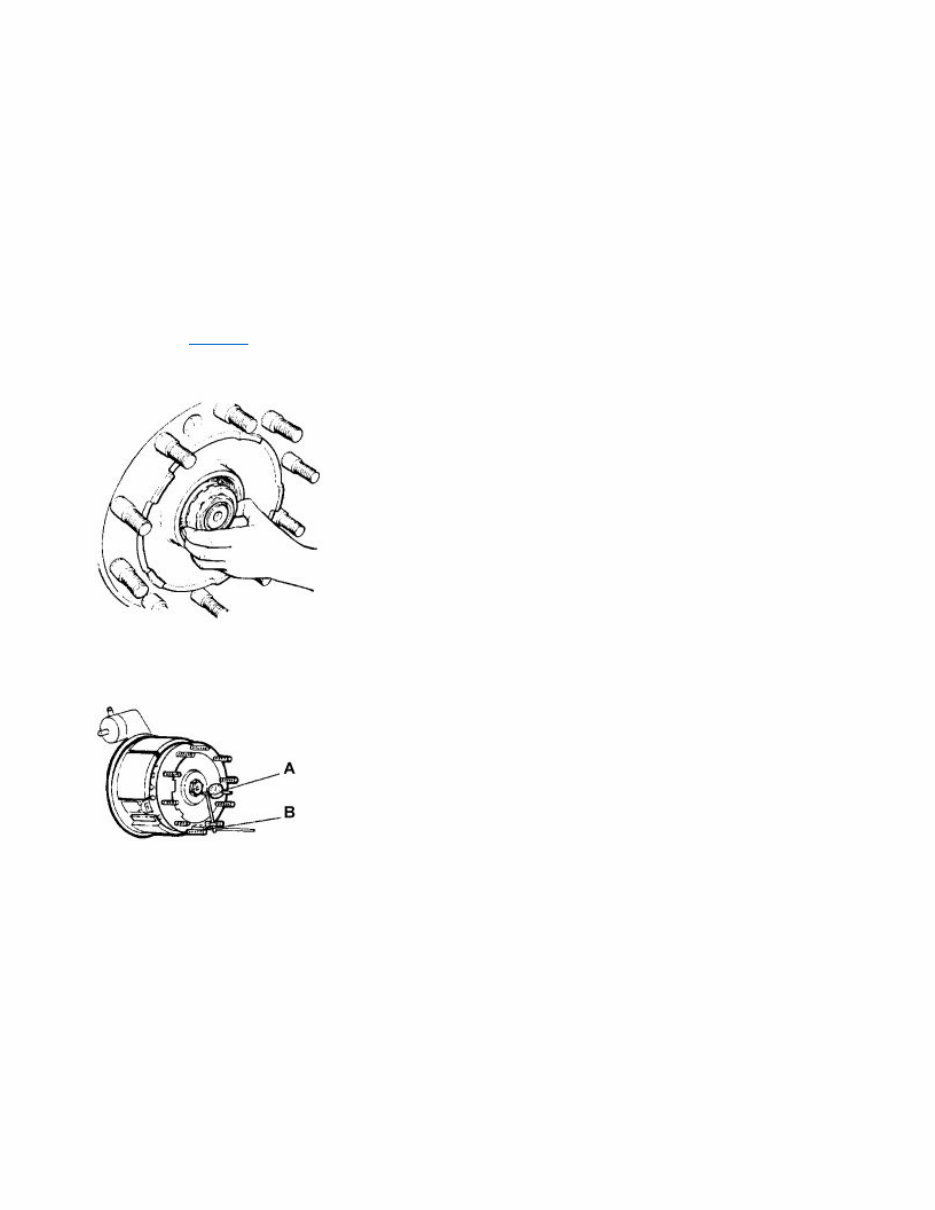
77323-3 Front wheel bearing, adjust (one) Wheel removed Special tools: 9996773, 9999696, 1159796 Other special equipment: 9985495, 9989876 1 Place a collection vessel under the hub and remove the oil plug. Remove the hub cap using tool 9996773. Special tools: 9996773 2 Remove the retaining ring and the lock washer from the hub nut. 3 A Dial indicator B Magnetic stand Fit the magnetic stand 9999696 in place with the tip of the dial indicator 9989876 resting on the hub nut. Mark the point of measurement. 4 Check if there is any end float. With the bearing correctly adjusted, an axial play of max 0.10 mm is permitted. Check the bearing preload if no play can be detected. Specifications: max. 0.10 mm Page 1 of 4
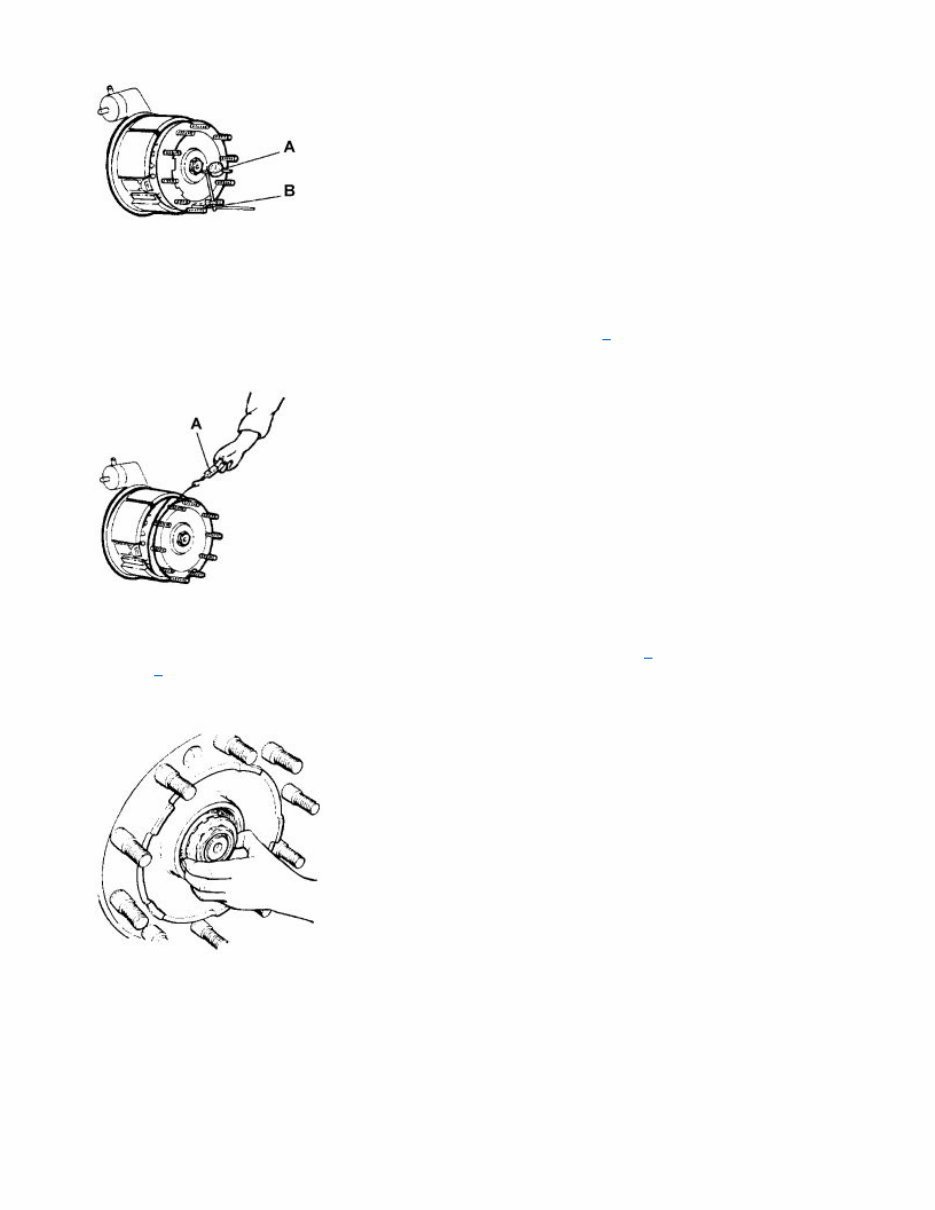
5 Remove the stand. 6 A Spring balance Check the bearing preloading using a spring balance. The highest permitted preloading corresponds to a spring force of max 4 kg when measuring as shown in the illustration. Specifications: max. 4 kg 7 If play or preload is greater than permitted then the distance between the bearing must be adjusted: Remove the hub nut using a socket 65 mm and the securing washer. Remove the outer bearing. When preloading: Change to a larger spacer socket and/or place adjusting washer 8152783 on the wheel spindle. Bearing play 0 (no play) should be strived for. For axial play: Change to a smaller spacer socket or remove the adjusting washer 8152783 from the wheel spindle (if an adjusting washer has been used). Bearing play 0 (no play) should be strived for. Part number: 8152783 Specifications: 65 mm 8 Fit the bearing and safety washer in place. Rotate the hub while torque tightening the hub nut at the same time to 800 ±80 Nm (80 ±8.0 kpm). Use torque wrench 1159796 and socket 65 mm. Special tools: 9996773 Specifications: 65 mm 800 ±80 Nm (80 ±8.0 kpm) 9 Page 2 of 4
A Dial indicator B Magnetic stand Place the magnetic stand with the indicator tip resting on the adjusting nut. Check the axial play. If it is greater than 0.10 mm, adjust in steps as follows7. 10 A Spring balance If there is not any axial play then check the bearing preloading in accordance with6 and adjust in accordance with step7. 11 Place a lock washer and lock ring on the adjusting screw. 12 Inspect the O-ring on the hub cover and replace if necessary. Oil the O-ring, fit the hub cover in place and then torque tighten to 267 ± 17 Nm (26.7 ± 1.7 kpm). Specifications: 267 ±17 Nm (26.7 ±1.7 kpm) Page 3 of 4
13 Fill the hub with 0.3 litres of engine oil. Inspect the O-ring on the oil plug and replace if necessary. Put in place the plug and torque tighten it to 3.5 ± 1.5 Nm (0.35 ± 0.15 kpm). Specifications: 267 ±17 Nm (26.7 ±1.7 kpm) 3.5 ±1.5 Nm (0.35 ±0.15 kpm) Page 4 of 4
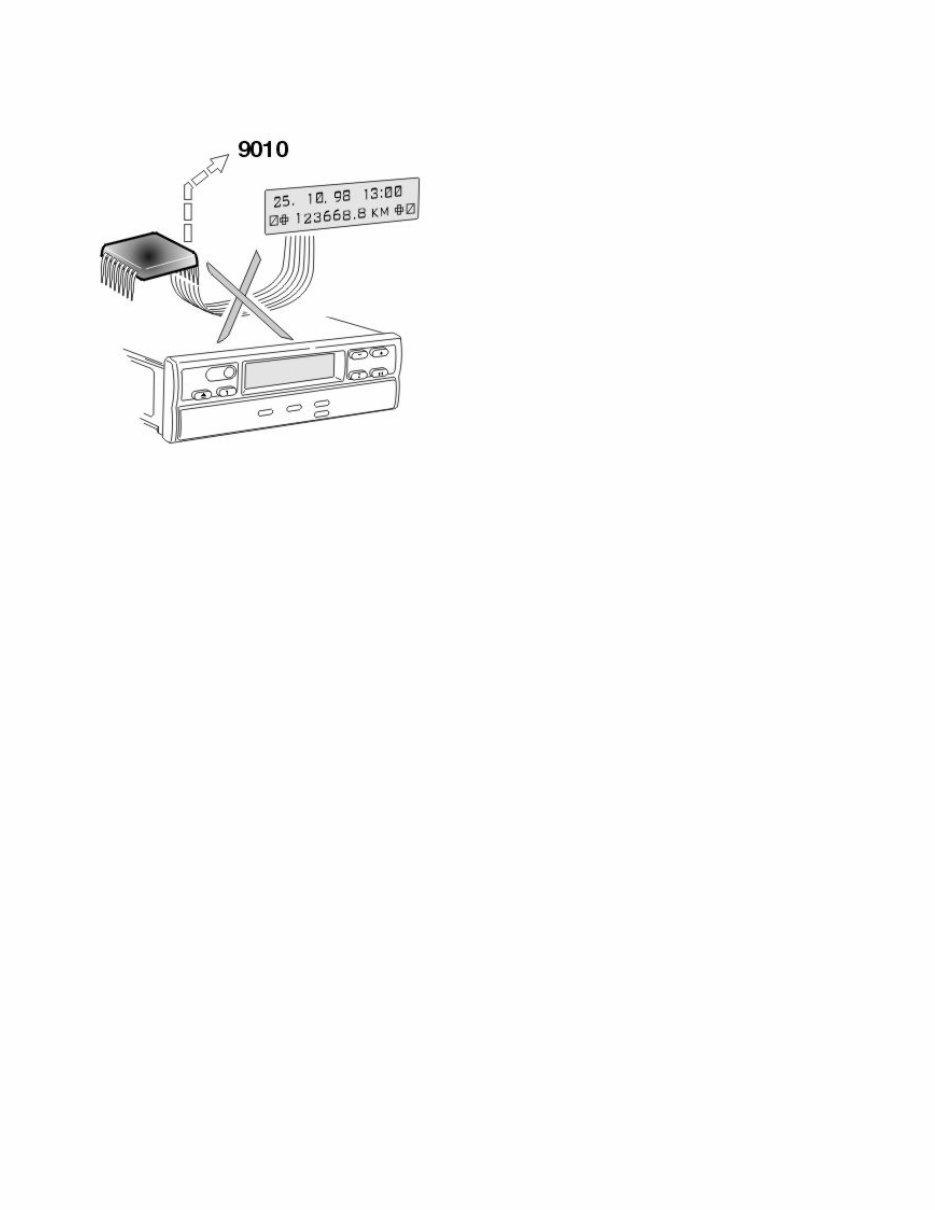
9010 Display fault General information Note: This fault code only covers internal communication faults. Display faults that are noticeable to the user may not generate an fault code. Component: A 33, tachograph. Fault code 9010 Fault in the internal communication between the tachograph processor and display. Condition for fault code: z Communication fault between the tachograph processor and display. Possible reason: z Internal fault. Reaction from control unit: z Fault code set. Noticeable external symptom: z The tachograph display is out of function. Recommended measures: z Replace the tachograph. Page 1 of 1
Get your hands on the Volvo B6, Lorry, and Bus Service and Repair Manual. These Auto Repair Manuals provide comprehensive instructions and procedures for fixing problems in your vehicle. Whether you're a professional mechanic or a DIY enthusiast, these manuals can be invaluable for immediate repairs and routine maintenance.
With 20 years of experience in auto repair and body work, the repair manuals offer detailed technical data, diagrams, and a complete list of car parts with illustrations and pictures. This makes it easy for even novice car mechanics to follow the step-by-step guides and undertake do-it-yourself projects.
The repair manual covers a wide range of sections including maintenance, engine, control system, mechanical, fuel service specifications, emission control, and much more. It also includes instructions for Windows Vista 32 and 64, XP, ME, 98, NT, 2000, and Mac compatibility.
These manuals are not only a cost-effective solution but also provide the satisfaction of repairing your vehicle on your own. You can print the necessary pages and diagrams, making it convenient to carry the instructions to your vehicle or workshop. The manual is designed to be durable and easily accessible, allowing you to keep it safely on your PC and print the required pages in a matter of seconds.
Compatible with all versions of Windows and Mac, these Auto Repair Manuals are a valuable resource for anyone looking to enhance their knowledge of car repair and maintenance.
Maintenance
Engine
Control System
Mechanical
Fuel Service Specifications
Emission Control
Intake Exhaust Cooling
Lube
Ignition Starting Charging
Auto Transmission Clutch
Manual Transmission
Transfer Propeller Shaft
Drive Shaft
Differential
Axle Suspension
Tire & Wheel
Brake Control
Brake
Parking Brake
Steering Column
Power Steering
Air Condition
Suppl Restraint System
Seat Belt
Engine Immobilizer
Cruise Control
Wiper & Washer
Door Lock
Meter Audio/Visual
Horn
Windshield/Glass Mirror
Instrument Panel
Seat
Engine Hood/ Door
Exterior & Interior
Electrical
Multiplex/ Can Communication
And much more...
These Auto Repair Manuals are a time-saving solution, providing all the necessary car information in one place. They empower you to stay updated and knowledgeable about your vehicle, eliminating the need to rely solely on a mechanic for even the simplest car repairs.