

2002-2007 Yamaha Jog 50 Scooter Service & Repair Manual
What's Included?
Fast Download Speeds
Online & Offline Access
Access PDF Contents & Bookmarks
Full Search Facility
Print one or all pages of your manual

2002
SERVICE MANUAL
CS50/Z 5RW1-AE1

CS50/Z
SERVICE MANUAL
© 2002 by Yamaha Motor España, S.A.
1st Edition, September 2002
Any reprinting or use of this material
without the prior authorisation of
Yamaha Motor España, S.A.
is expressly prohibited.
Printed in Spain.
EAS00001
EAS00002
NOTICE
This manual was produced by the Yamaha Motor España, S.A., primarily for use by Yamaha/MBK
dealers and their qualified mechanics. It is not possible to include all the knowledge of a mechanic
in one manual. Therefore, anyone who uses this book to perform maintenance and repairs on
Yamaha/MBK vehicles should have a basic understanding of the mechanics and the techniques to
repair these types of vehicles. Repair and maintenance work attempted by anyone without this
knowledge is likely to render the vehicle unsafe and unfit for use.
Yamaha Motor España, S.A., is continually striving to improve all of its models. Modifications and
significant changes in specifications or procedures will be forwarded to all authorized Yamaha/MBK
dealers and will appear in future editions of this manual where applicabe.
NOTE:
Designs and specifications are subject to change without notice.
EAS00005
IMPORTANT INFORMATION
Particularly important information is distinguished in this manual by the following.
The Safety Alert Symbol means ATTENTION! BECOME ALERT!
YOUR SAFETY IS INVOLDED!
Failure to follow W ARNING instr uctions could r esult in sever e injur y
or death to the scooter operator , a bystander, or a person inspec-
ting or repairing the scooter.
A CAUTION indicates special precautions that must be taken to
avoid damage to the scooter.
A NOTE provides key information to make procedures easier or cle-
arer.
t
s WARNING
CAUTION:
NOTE :
EAS00007
HOW TO USE THIS MANUAL
FORMAT OF THIS MANUAL
This manual consists of chapters for the main subject categories (See “Illustrated Symbols”).
First heading : This is a chapter with a symbol at the top right-hand side of each page.
Second heading : This title appears at the top of each page to the left of the chapter symbol.
(For the “Inspection and periodic adjustments”, chapter the third heading
appears.)
Third heading : This is a final heading.
MANUAL FORMAT
All the procedures in this manual are organized sequentially, step by step. The information has been
compiled to make reading easy for the mechanic and to provide useful reference material which
contains ample explanations of all disassembly, repair, assembly and inspection procedures. A par-
ticularly important procedure is placed between a lines of asterisks “**” with each procedure pre-
ceded by “•”.
IMPORTANT CHARACTERISTICS
• Data and special tools are put in a box preceded by a corresponding symbol .
• A number within a circle indicates the number of a part, and a alphabetical letter within a cir-
cle indicates data or an alignment mark , everything else is indicated by a letter within a box .
• The conditions of defective components will precede an arrow symbol and the course of action
to be followd will follow the symbol .
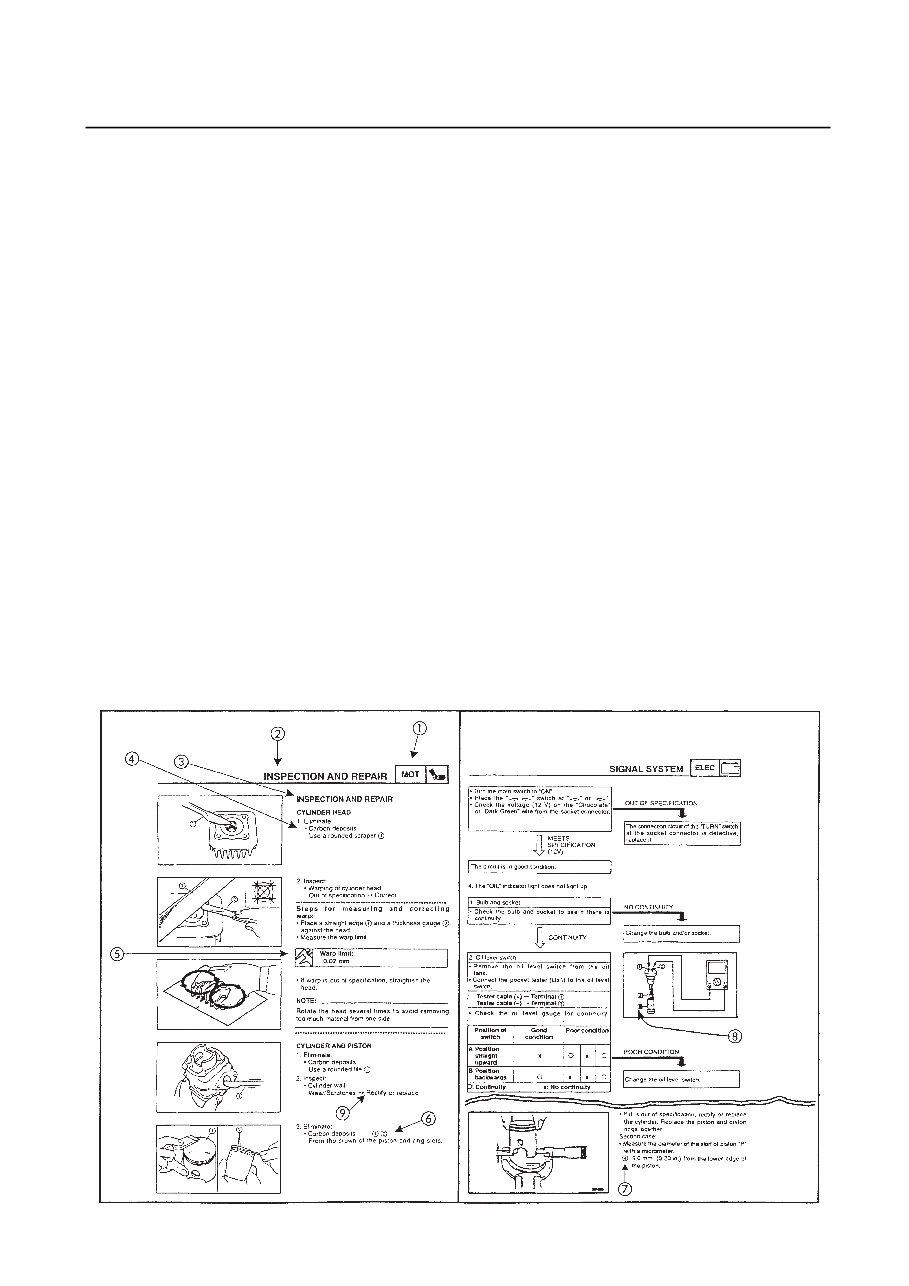
DETAILED DIAGRAM
Each chapter provides detailed diagrams before each disassembly section, for the easy identifica-
tion of disassembly/assembly procedures.
EAS00008
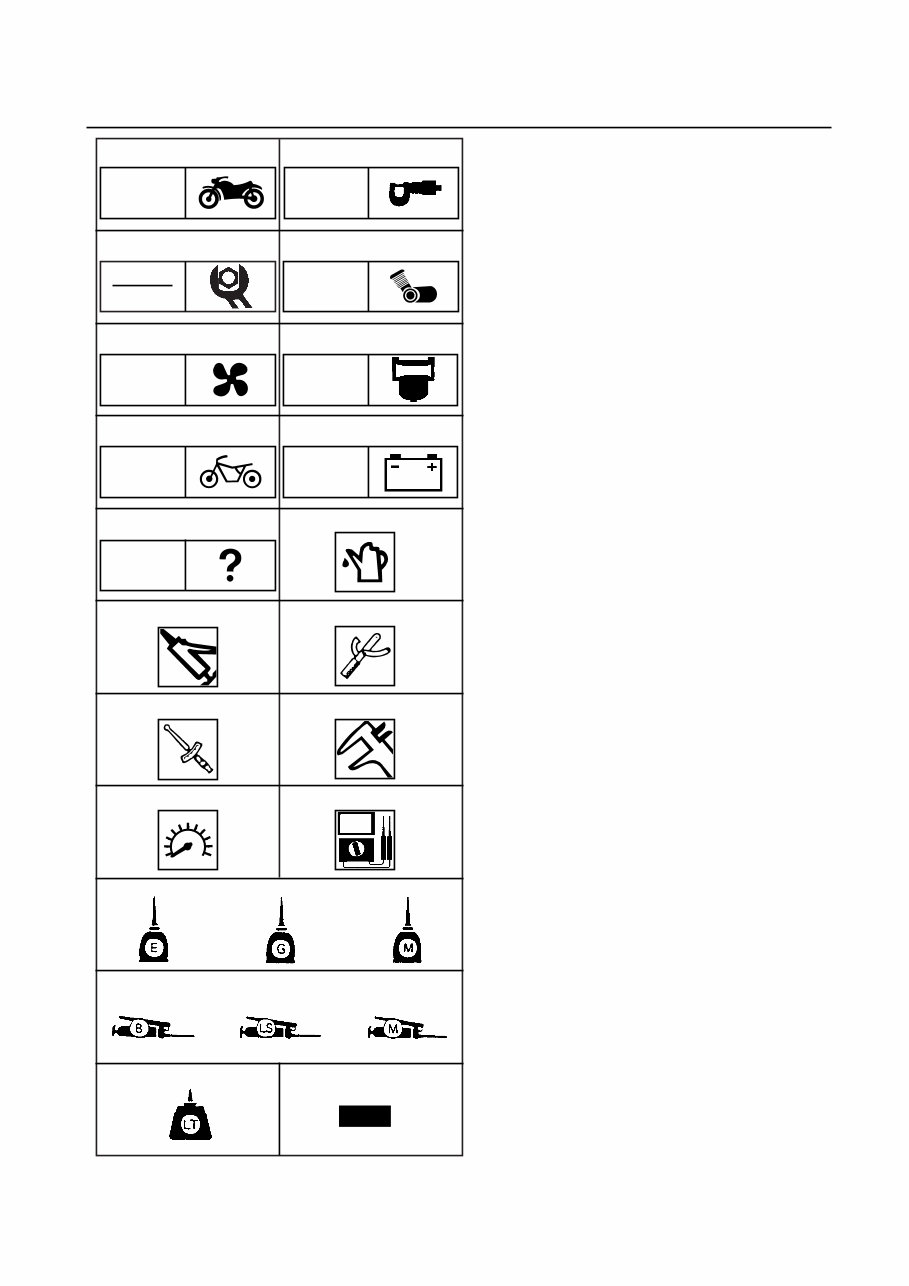
ILLUSTRATED SYMBOLS
(See illustration)
The symbols from to are designed as
thumb indices, to indicate the chapter num-
ber and index.
General information
Specifications
Periodic checks and adjustments
General motor revision
Cooling system
Carburetor
Chassis
Electrical system
Troubleshooting
The illustrated symbols from 10 to 16 are
used to identify the specifications that appear
in the text.
10 Refill liquid
11 Lubricant
12 Special tool
13 Torque
14 Wear, play limit
15 Motor speed
16 Ω, V, A
The illustrated symbols from 17 to 24 of the
detailed diagrams indicate the grade of lubri-
cant and the site of the lubrication point.
17 Apply motor oil
18 Apply gear oil
19 Apply molybdenum disulphide oil
20 Apply wheel bearing grease
21 Apply lightweight lithium soap base
grease
22 Apply molybdenum disulphide grease
23 Apply blocking agent (LOCTITE®)
24 Use a new one
CHK
ADJ
COOL
CHAS
TRBL
SHTG
SPEC
ENG
CARB
ELEC
GEN
INFO
New
11
13
15
17
20
23
10
12
14
16
24
19
22
18
21

SPEC
2
SPECIFICATIONS
CHK
ADJ 3
PERIODIC CHECKS AND
ADJUSTMENTS
ENG
4
ENGINE
COOL
5
COOLING SYSTEM
CARB
6
CARBURETOR
CHAS
7
CHASSIS
ELEC
8
ELECTRICAL SYSTEM
EAS00010
TABLE OF CONTENTS
TRBL
SHTG
9
TROUBLESHOOTING
GENERAL INFORMATION
GEN
INFO
1
GEN
INFO
1
GEN
INFO
CHAPTER 1
GENERAL INFORMATION
SCOOTER IDENTIFICATION……………………………………………………1-1
FRAME SERIAL NUMBER ……………………………………………………1-1
ENGINE SERIAL NUMBER……………………………………………………1-1
IMPORTANT INFORMATION …………………………………………………1-2
REPLACEMENT PARTS ………………………………………………………1-2
GASKETS, OIL SEALS AND O-RINGS ……………………………………1-2
LOCK WASHERS/PLATES AND COTTER PINS……………………………1-2
BEARINGS AND OIL SEALS …………………………………………………1-2
CIRCLIPS ………………………………………………………………………1-3
SPECIAL TOOLS …………………………………………………………………1-4
GEN
INFO
IDENTIFICATION OF SCOOTER
1-1
EAS00015
GENERAL INFORMATION
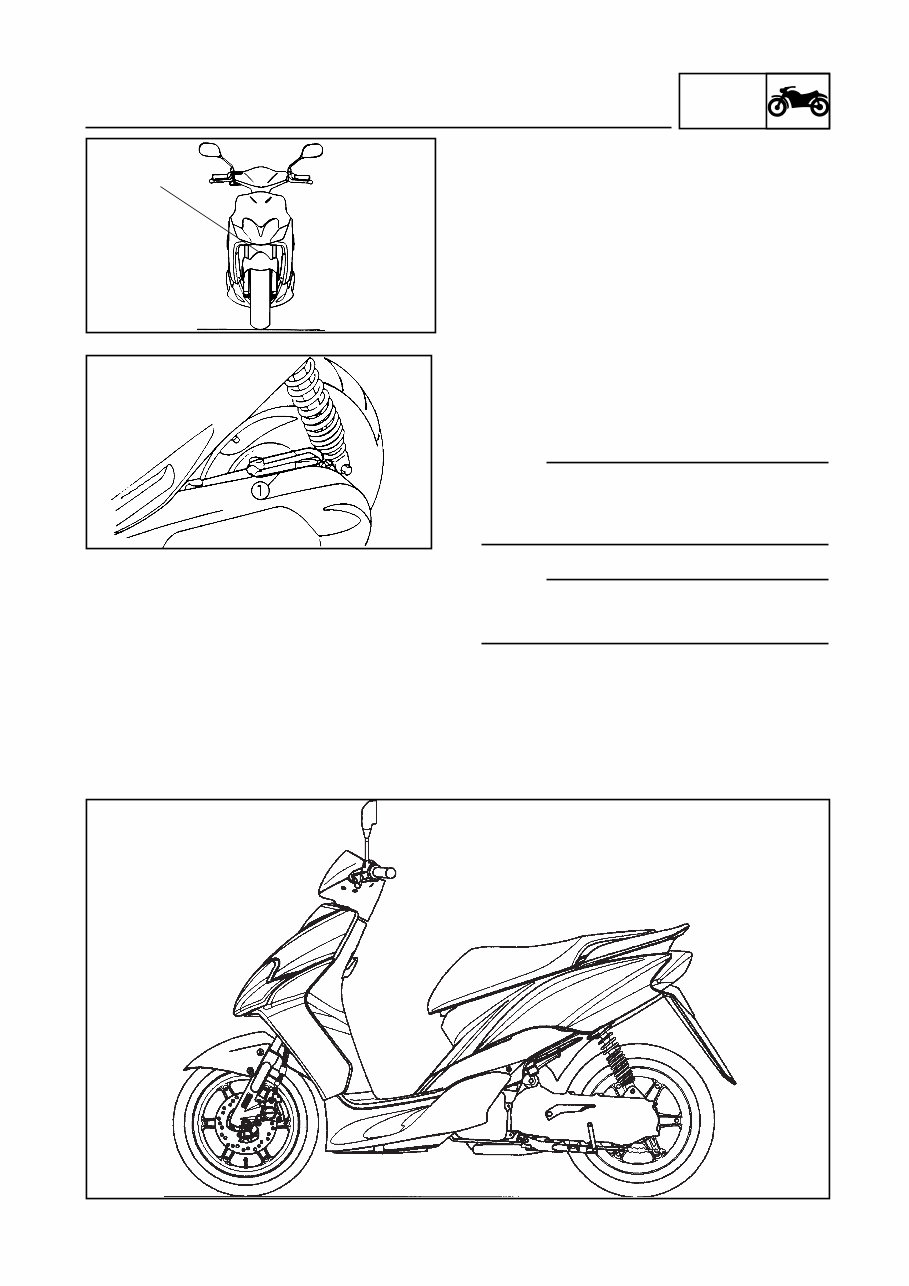
SCOOTER IDENTIFICATION
FRAME SERIAL NUMBER
The frame serial number is stamped on the
chassis.
ENGINE SERIAL NUMBER
The serial number of the engine is stamped
on the raised portion of the rear left section of
the transmission box.
NOTE:
The first three digits of these numbers are for
identifying the model; the remaining digits
constitute the production number of the unit.
NOTE:
Designs and specifications are subject to
change without notice.
GEN
INFO
IMPORTANT INFORMATION
1-2
IMPORTANT INFORMATION
EAS00021
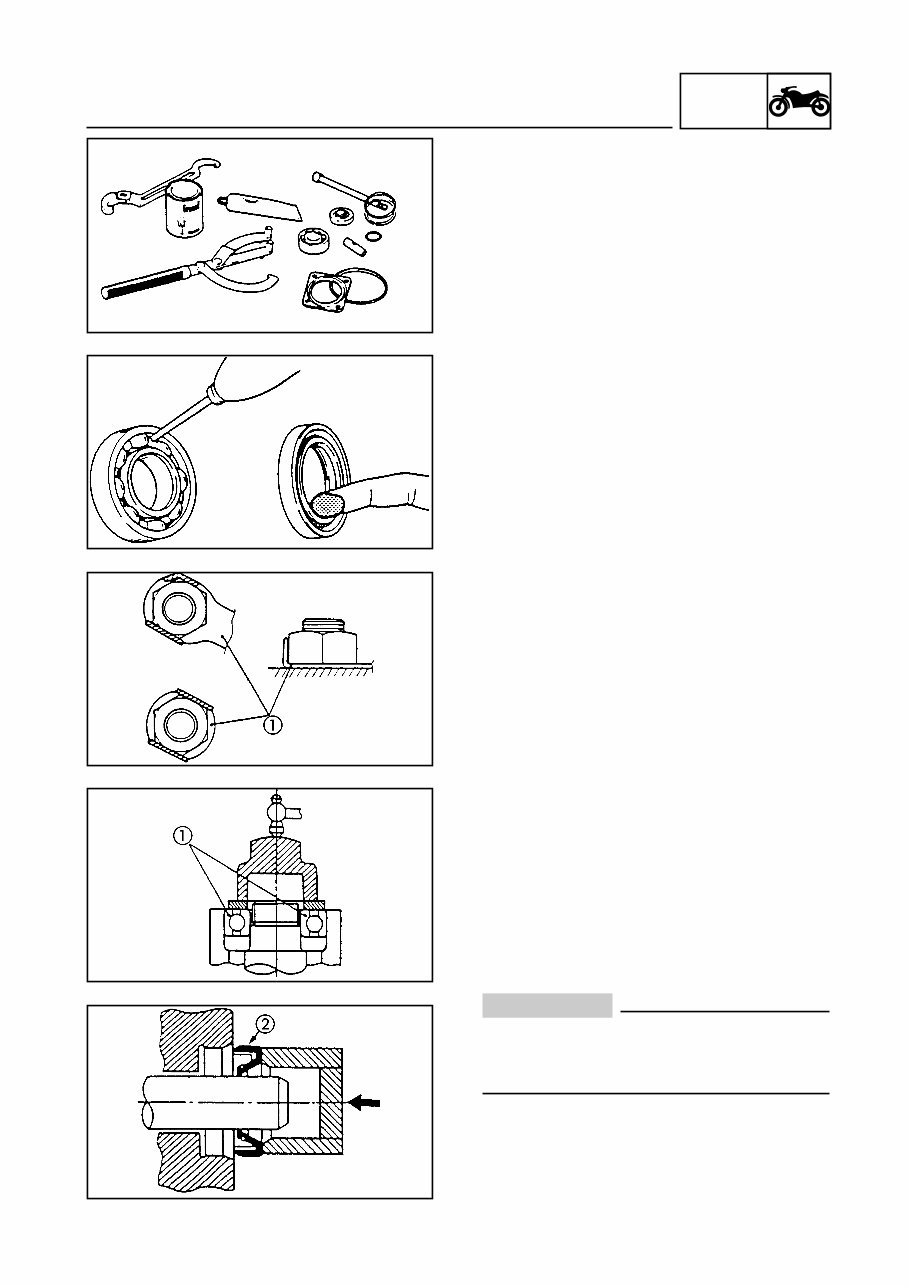
REPLACEMENT PARTS
1. Use only genuine Yamaha/MBK parts for all
replacements. Use the oil and/or grease
recommended by Yamaha/MBK for
assembly and adjustment.
EAS00022
GASKETS, OIL SEALS AND O-RINGS
1. Replace all gaskets, seals and O-rings
when overhauling the engine. All gasket
surfaces, oil seal lips and O-rings must be
cleaned.
2. Properly oil all mating parts and bearings
during reassembly. Apply grease to the oil
seal lips.
EAS00023
LOCK WASHERS/PLATES AND COTTER
PINS
1. Replace all lock washers/plates and cot-
ter pins after removal. Bend lock tabs along
the bolt or nut flats after the bolt or nut has
been tightened to specification.
EAS00024
BEARINGS AND OIL SEALS
1. Install the bearings and oil stops with
their manufacturer brands or numbers
facing outwards. (In other words, the stam-
ped letters should be on the side exposed
to view.) When installing oil seals, apply a
light coating of lightweight lithium base gre-
ase to the seal lips. Put oil on the bearings
when installing.
CAUTION:
Do not use compressed air to spin the bea-
rings dry. This will damage the bearing surfa-
ce.
You're Reading a Preview
What's Included?
Fast Download Speeds
Online & Offline Access
Access PDF Contents & Bookmarks
Full Search Facility
Print one or all pages of your manual
$35.99
$46.99
Viewed 13 Times Today


Secure transaction
What's Included?
Fast Download Speeds
Online & Offline Access
Access PDF Contents & Bookmarks
Full Search Facility
Print one or all pages of your manual
$35.99
$46.99
The Yamaha Jog 50 Scooter Workshop Manual 2002-2007 is a comprehensive resource for repairing, maintaining, and rebuilding your vehicle. It contains detailed diagnostic and repair procedures, making it valuable for both professional technicians and DIY enthusiasts.
- All repair procedures are covered extensively from A-Z.
- Includes high-quality photos, illustrations, and diagrams.
- Compatible with Microsoft Windows 95, 98, 98SE, 2000, NT, ME, XP, Vista, and Windows 7, as well as all Mac computers.
This workshop manual provides easy access to complete repair procedures, allowing users to view, print, and start working without requiring advanced computer skills. Say goodbye to cumbersome and worn-out manuals with this trusted resource.


