

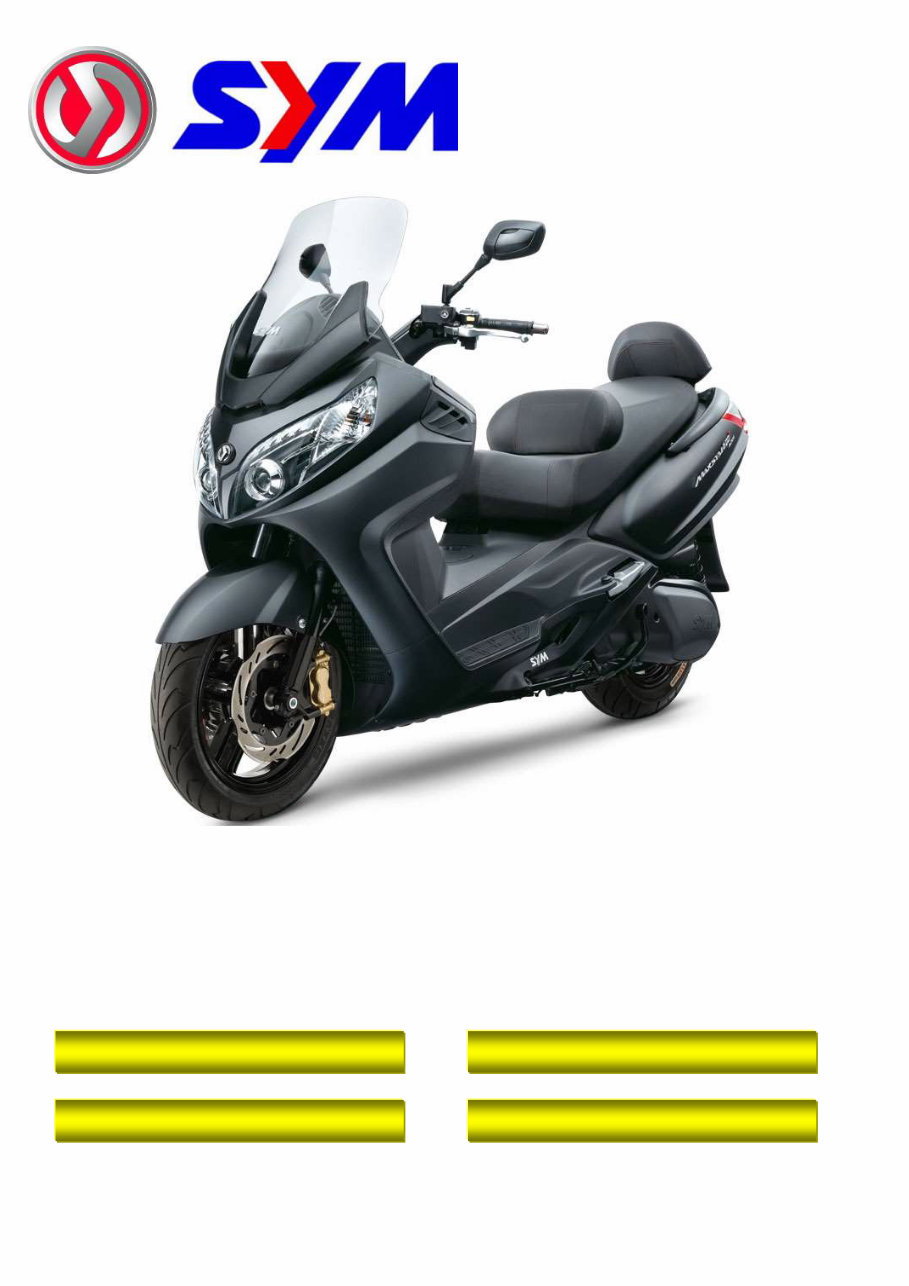
MAXSYM 400i / 400i ABS / 600i ABS
SERVICE MANUAL
201404
FOREWORD
HOW TO USE THIS MANUAL
CONTENTS
MECHANISM ILLUSTRATION

Foreword
This service manual contains the technical data of each component inspection
and repair for the Sanyang MAXSYM 400i / 400i ABS / 600i ABS scooter. The
manual is shown with illustrations and focused on “Service Procedures”,
“Operation Key Points”, and “Inspection Adjustment” so that provides
technician with service guidelines.
If the style and construction of the motorcycle, MAXSYM 400i / 400i ABS / 600i
ABS, are different from that of the photos, pictures shown in this manual, the
actual vehicle shall prevail. Specifications are subject to change without notice.
Service Department
Sanyang Industry Co., LTD.
Homepage Contents
How to Use This Manual
This service manual describes basic information of different system parts and
system inspection & service for Sanyang MAXSYM 400i scooter. In addition,
please refer to the manual contents in detailed for the model you serviced in
inspection and adjustment.
The first chapter covers general information and trouble diagnosis.
The second chapter covers service maintenance information.
Th third to the twelfth chapter covers the engine and driving systems.
The thirteenth to the sixteenth is contained the parts set of assembly body.
The seventeenth chapter is electrical equipment.
The eighteenth chapter is wiring diagram.
Please see index of content for quick having the special parts and system
information.
There are 4 buttons, “Foreword”, “Contents”, “How to Use This Manual” and
“Mechanism Illustration” in the PDF version, and can be access to these items
by clicking on the buttons.
If user wants to look for the content of each chapter, selecting the words of
each chapter on the contents can reach to each chapter. There are two buttons,
“Homepage and contents, on the top line of first page of the each chapter. Thus,
if the user needs to check other chapters, he can click the top buttons to back
the homepage or contents. The content of each chapter can be selected too.
Therefore, when needs to checking the content inside of the chapter, click the
content words of the chapter so that can back to the initial section of the
content. In addition, there is a “To this Chapter Contents” button at the second
page of each content so that clicking the button can back to the contents of this
chapter.
Homepage Contents
Contents
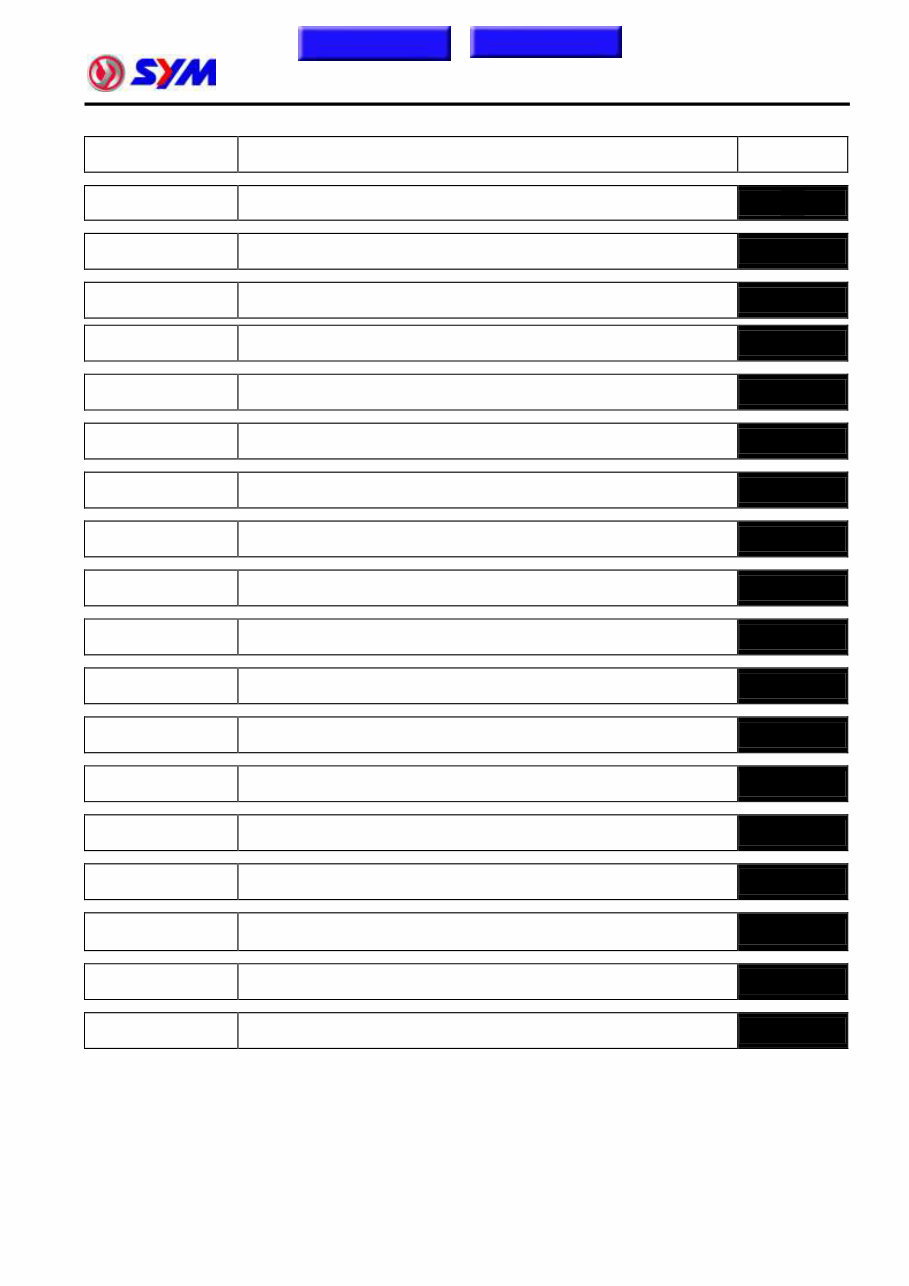
Page Content Index
1-1 ~ 1-18 General Information 1
2-1 ~ 2-16 Maintenance Information 2
3-1 ~ 3-6 Lubrication System 3
4-1 ~ 4-58 Fuel Injection System 4
5-1 ~ 5-4 Engine Removal 5
6-1 ~ 6-16 Cylinder Head / Valve 6
7-1 ~ 7-8 Cylinder / Piston 7
8-1 ~ 8-14 V-Belt Drive System 8
9-1 ~ 9-8 Final Drive Mechanism 9
10-1 ~ 10-4 AC Generator / Starting Clutch 10
11-1 ~ 11-8 Crankshaft / Crankcase 11
12-1 ~ 12-12 Cooling System 12
13-1 ~ 13-16 Body Cover 13
14-1 ~ 14-12 Brake System 14
15-1 ~ 15-11 Steering / Front Wheel / Front Cushion 15
16-1 ~ 16-6 Muffler / Rear Wheel / Rear Cushion 16
17-1 ~ 17-22 Electrical System 17
18-1 ~ 18-2 Wiring Diagram 18
Homepage Contents
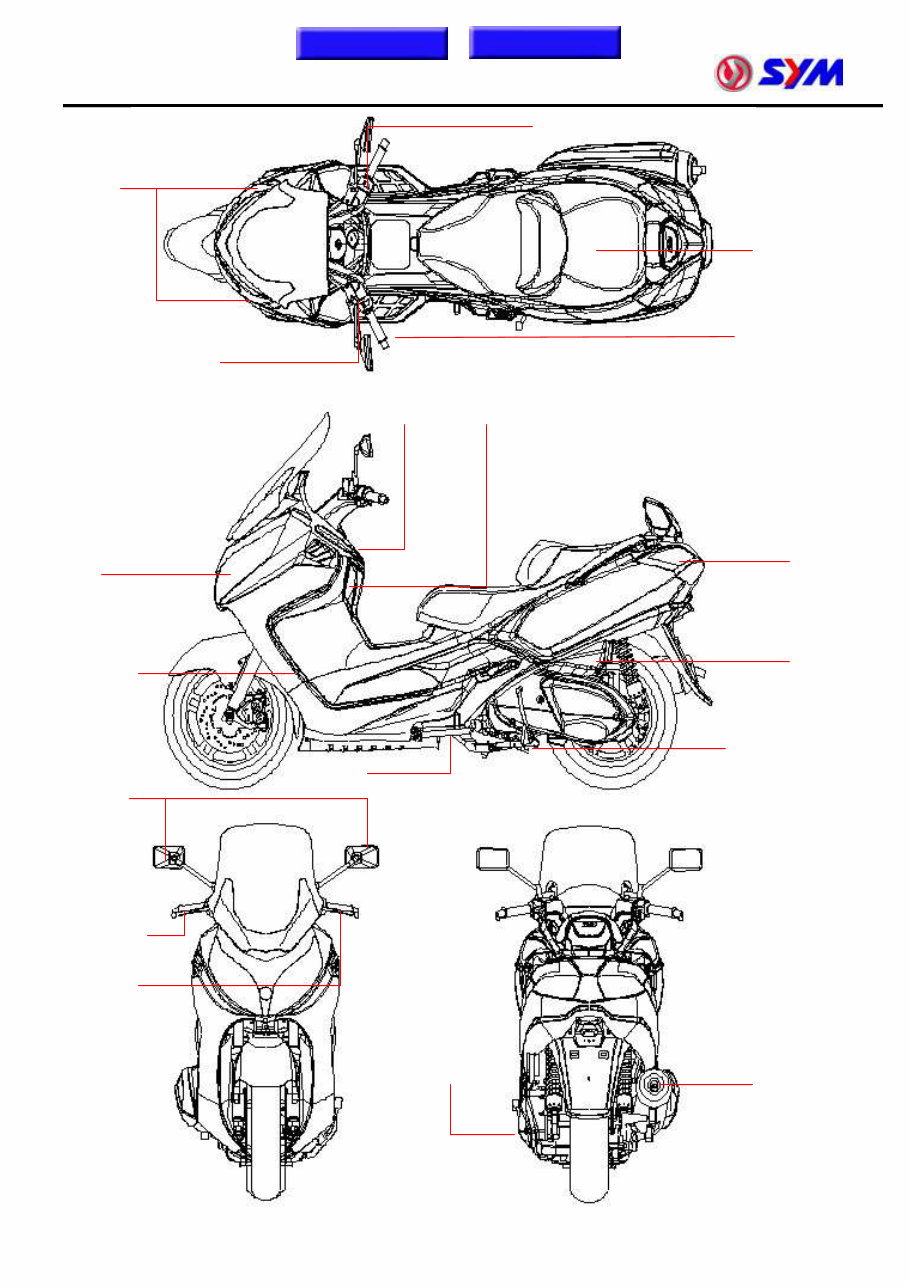
Mechanism Illustration
Front winker
Luggage box
Start / engine stop switch
Dimmer / winker / horn
seat open / pass switch
Muffler
Reserve tank
cap
Coolant filler cap Main switch
Fuel tank /
fuel pump
Side stand
Back mirror
Headlight
Front brake lever
Rear brake lever
Home page Contents
Main stand
Air cleaner
Taillight /
rear winker
Engine number
1. General Information
1-1
Symbols and Marks ······················· 1-1
General Safety ······························ 1-2
Before Servicing ··························· 1-3
Specifications ······························· 1-9
Torque Values ······························· 1-10
Troubleshooting ···························· 1-12
Lubrication Points ························· 1-16
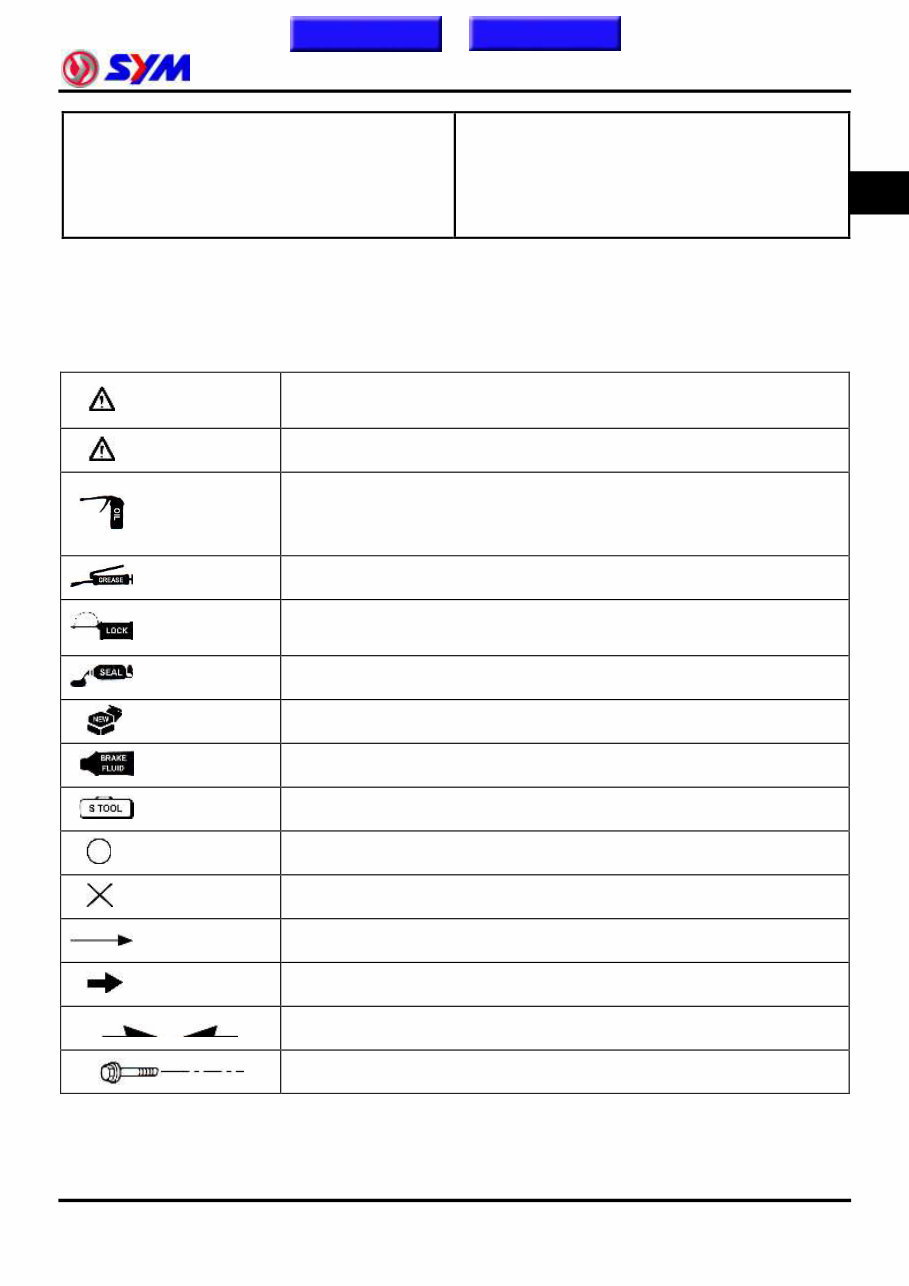
Symbols and Marks
Symbols and marks are used in this manual to indicate what and where the special service is needed. If
supplemental information is needed for these symbols and marks, explanations will be added in the text
instead of using the symbols or marks.
Warning
Means that serious injury or loss of life may happen if procedures are not
correctly followed.
Caution
Means that equipment damages may result if procedures are not followed.
Engine oil
Limits to use SAE 10W-30 API SG class oil. Warranty will not cover the
damage that caused by not apply with the limited engine oil.
(Recommended oil: KING MATE G-3 oil)
Grease King Mate G-3 is recommended.
Locking sealant
Apply sealant; medium strength sealant should be used unless otherwise
specified.
Oil seal
Apply with lubricant.。
Renew
Replace with a new part before installation.
Brake fluid
Use recommended brake fluid DOT3 or WELLRUN brake fluid.
Special tools
Special tools
Correct
Meaning correct installation.
Wrong
Meaning wrong installation.
Indication Indication of components.
Directions
Indicates position and operation directions
Components assembly directions each other.
Indicates where the bolt installation direction, --- means that bolt cross
through the component (invisibility).
Homepage Contents
1
1. General Information
1-2
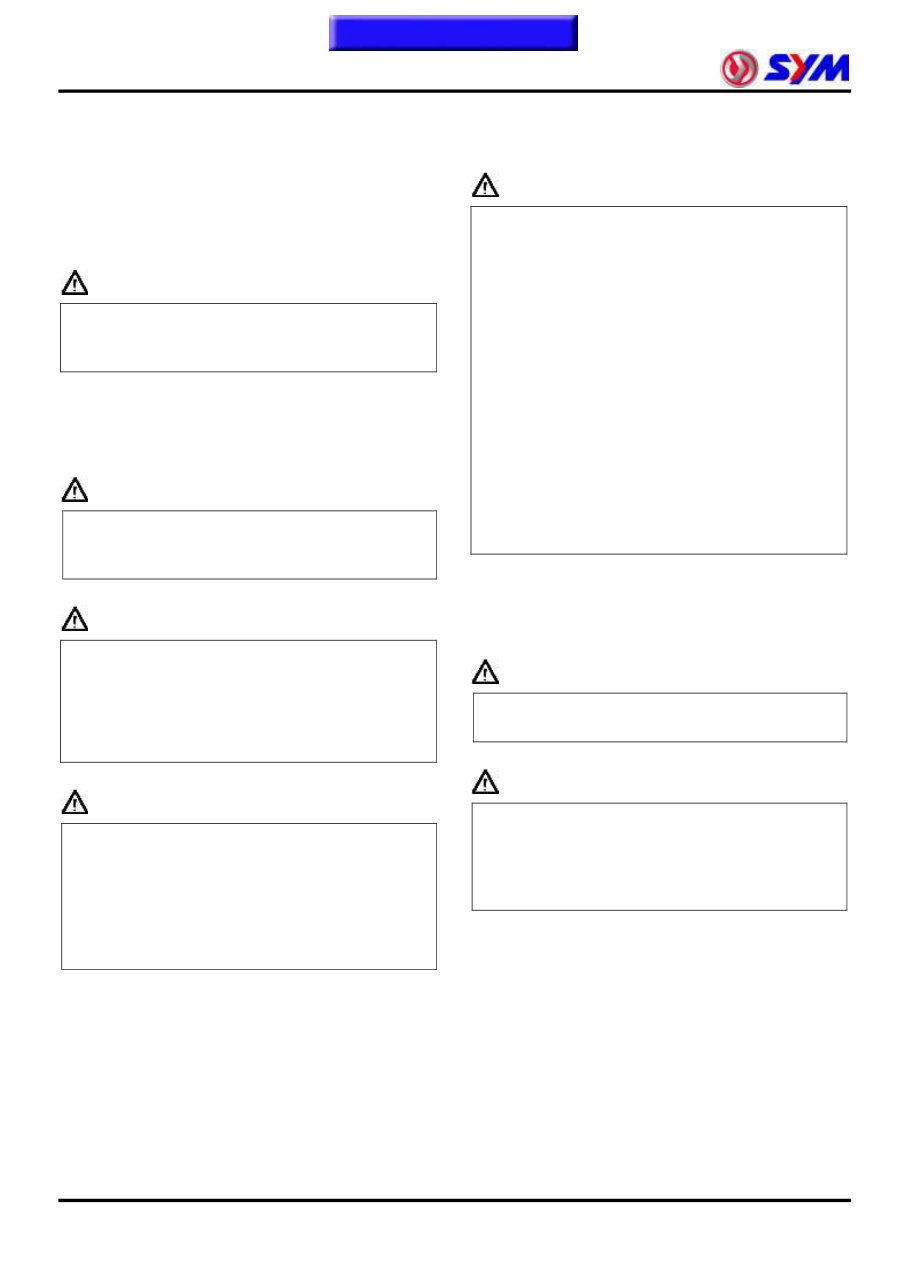
General Safety
Carbon Monoxide
Before you start the engine, make sure the place
is well ventilated. Never start the engine in an
unventilated place. If you have to start the engine
in an unventilated place, an exhaust fume
extractor is needed.
Caution
Exhaust fume contains toxic gas which may
cause one to lose consciousness and even result
in loss of life.
Gasoline
Gasoline is a low ignition point and explosive
material. Work in a well-ventilated place, no flame
or spark should be allowed in the work place or
where gasoline is being stored.
Caution
Gasoline is highly flammable, and may explode
under some conditions, keep it away from the
children.
Used Engine Oil
Caution
Prolonged contact with the used engine oil (or
transmission oil) may cause skin cancer although
it might not be verified yet. We recommend that
you wash your hands with soap right after
contacting. Keep the used oil beyond reach of the
children.
Hot Components
Caution
Components of the engine and exhaust system
can be extremely hot after engine running. They
remain very hot even after the engine has been
stopped for a period of time. Before performing
service work on these parts, wear the heat
insulation gloves or wait until the temperature
drops.
Battery
Caution
‧ Battery emits explosive gases; flame is strictly
prohibited. Keep the place well ventilated
when the battery is being charged.
‧ Battery contains sulfuric acid (electrolyte)
which can cause serious burns, be careful not
to spill it on your skin or eyes. If you get
battery fluid on your skin, flush it off with water
immediately. If you get battery fluid in your
eyes, flush it off immediately with water and
go to hospital to see an ophthalmologist
doctor.
‧ If you swallow the battery fluid by mistake,
drink a lot of water or milk, and take some
laxative such as Epsom salts or vegetable oil
and then go to see a doctor.
‧ Keep the battery and battery fluid beyond
reach of the children.
Brake Shoes
Do not use compressed air or brush to clean the
components of the brake system. Use a vacuum
cleaner or the equivalent to avoid dust drifting in
the air.
Caution
Inhaling brake shoes dust may cause disease or
even cancer of the respiratory system.
Brake Fluid
Caution
Brake fluid spilled on painted, plastic, or rubber
parts may cause damage to the parts. Place a
clean towel on the top of the parts for protection
when servicing the brake system. Keep the brake
fluid beyond reach of the children.
To this chapter contents
1. General Information
1-3
Before Servicing
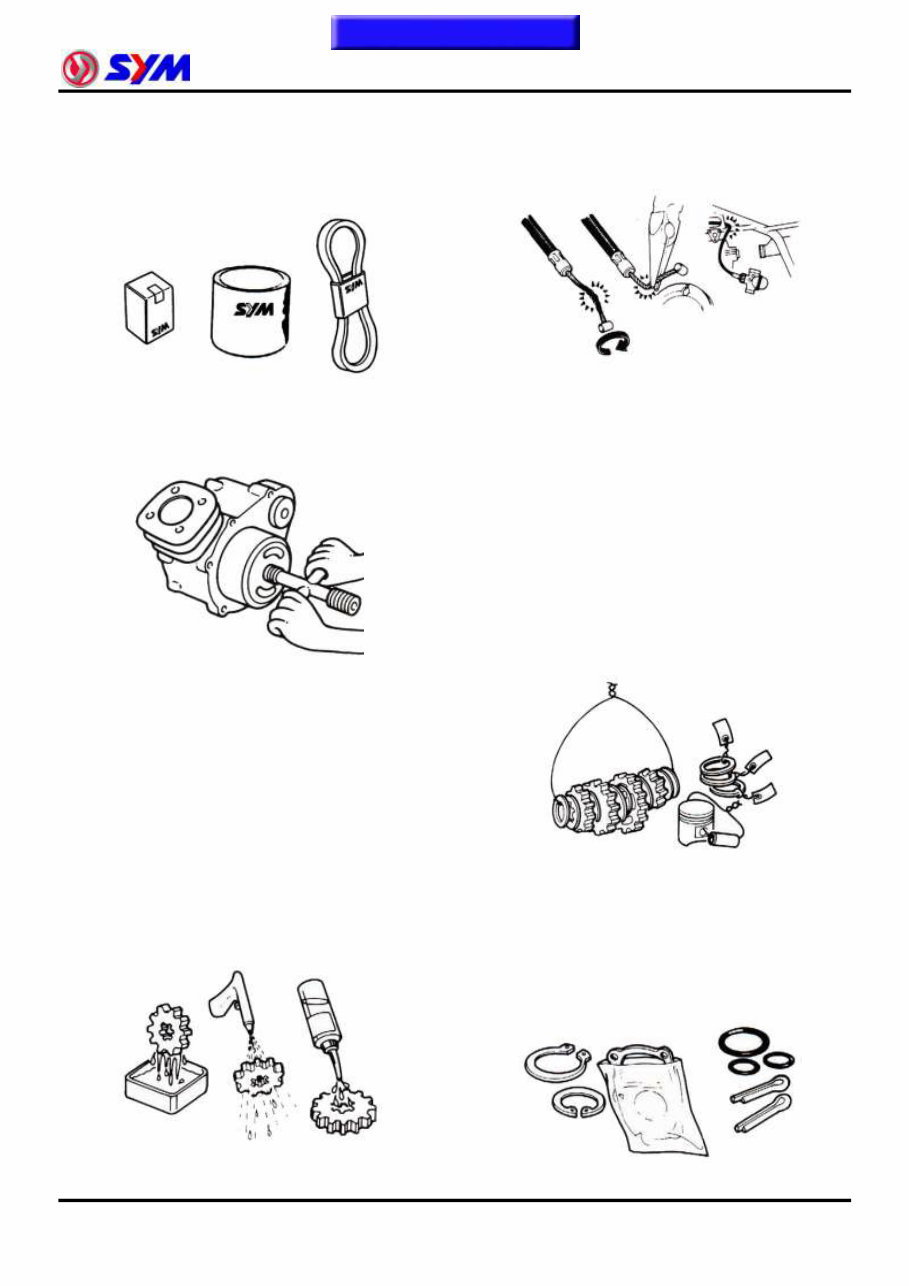
Always use SANYANG genuine parts and
recommended oil. Using improper parts may
cause damage to or destruction of the vehicle.
Special tools are designed for removal and
installation of component parts without
damaging them. Using wrong tools may result
in parts damage.
When servicing this vehicle, use only metric
tools. Metric bolts, nuts, and screws are not
interchangeable with the Britain system, using
wrong tools and fasteners may damage this
vehicle.
Clean the outside of the parts or the cover
before removing it from the vehicle. Otherwise,
dirt and deposit accumulated on the part's
surface may fall into the engine, chassis, or
brake system to cause damage.
Wash and clean parts with high flash point
solvent, and then blow dry with compressed air.
Pay special attention to O-rings or oil seals
because most of the cleaning agents have bad
effect on them.
Never bend or twist control cables to avoid
unsmooth control and premature worn out.
Rubber parts may become deteriorated when
old, and be damaged by solvent and oil easily.
Check these parts before installation to make
sure that they are in good condition, replace if
necessary.
When loosening a component which has
different sized fasteners, operate with a
diagonal pattern and work from inside out.
Loosen the small fasteners first. If the bigger
ones are loosen first, small fasteners may
receive too much stress.
Store complex components such as
transmission parts in the proper assemble order
and tie them together with a wire for ease of
installation later.
Note the reassemble position of the important
components before disassembling them to
ensure they will be reassembled in correct
dimensions (depth, distance or position).
Components not to be reused should be
replaced when disassembled including gaskets
metal seal rings, O-rings, oil seals, snap rings,
and split pins.
To this chapter contents
1. General Information
1-4
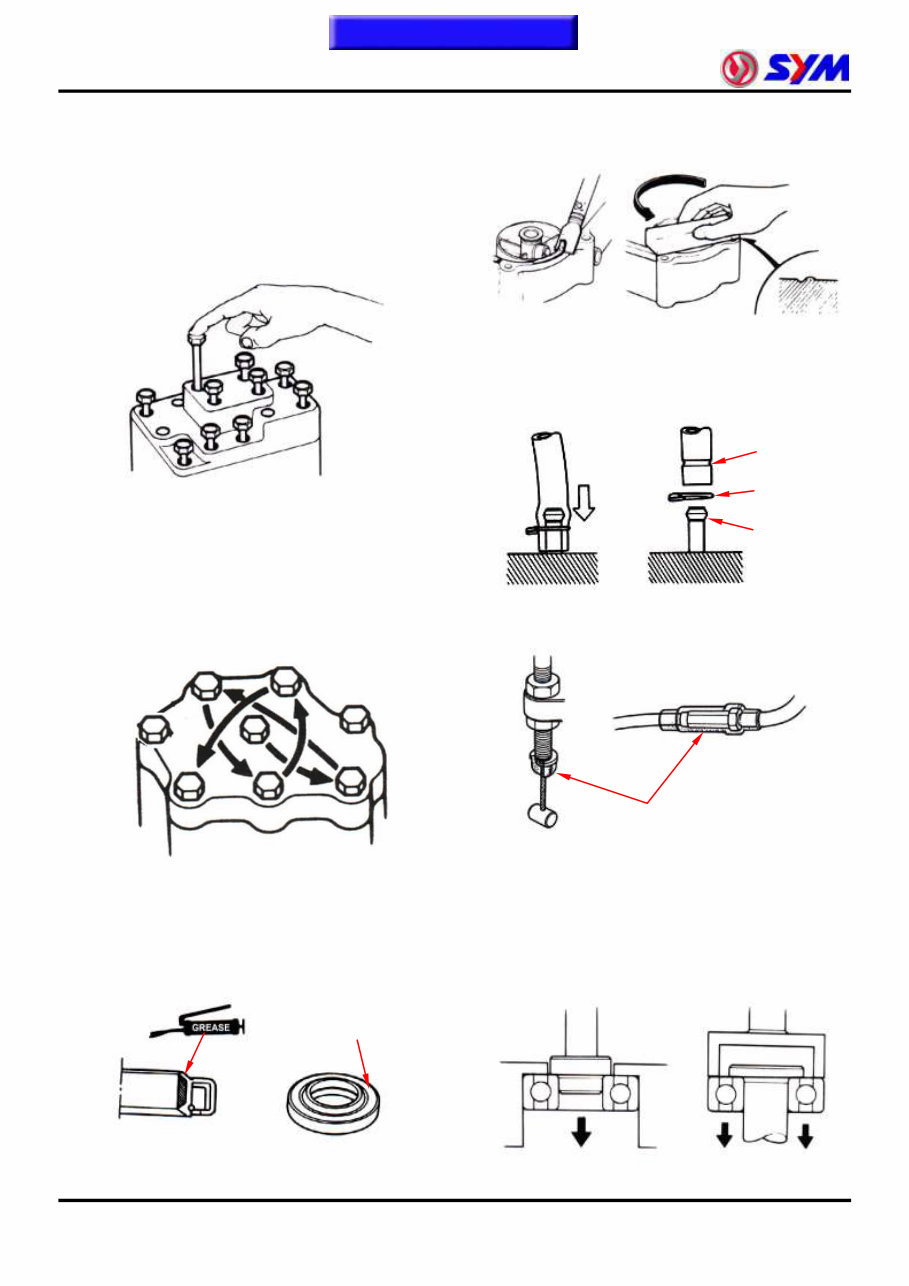
The length of bolts and screws for assemblies,
cover plates or boxes is different from one
another, be sure they are correctly installed. In
case of confusion, Insert the bolt into the hole to
compare its length with other bolts, if its length
out side the hole is the same with other bolts, it
is a correct bolt. Bolts for the same assembly
should have the same length.
Tighten assemblies with different dimension
fasteners as follows: Tighten all the fasteners
with fingers, then tighten the big ones with
special tool first diagonally from inside toward
outside, important components should be
tightened 2 to 3 times with appropriate
increments to avoid warp unless otherwise
indicated. Bolts and fasteners should be kept
clean and dry. Do not apply oil to the threads.
When oil seal is installed, fill the groove with
grease, install the oil seal with the name of the
manufacturer facing outside, and check the
shaft on which the oil seal is to be installed for
smoothness and for burrs that may damage the
oil seal.
Remove residues of the old gasket or sealant
before reinstallation, grind with a grindstone if
the contact surface has any damage.
The ends of rubber hoses (for fuel, vacuum, or
coolant) should be pushed as far as they can go
to their connections so that there is enough
room below the enlarged ends for tightening the
clamps.
Rubber and plastic boots should be properly
reinstalled to the original correct positions as
designed.
The tool should be pressed against two (inner
and outer) bearing races when removing a ball
bearing. Damage may result if the tool is
pressed against only one race (either inner race
or outer race). In this case, the bearing should
be replaced. To avoid damaging the bearing,
use equal force on both races.
Both of these examples can result in
bearing damage.
Manufacturer's name
Groove
Clamp
Connector
Boots
To this chapter contents
1. General Information
1-5
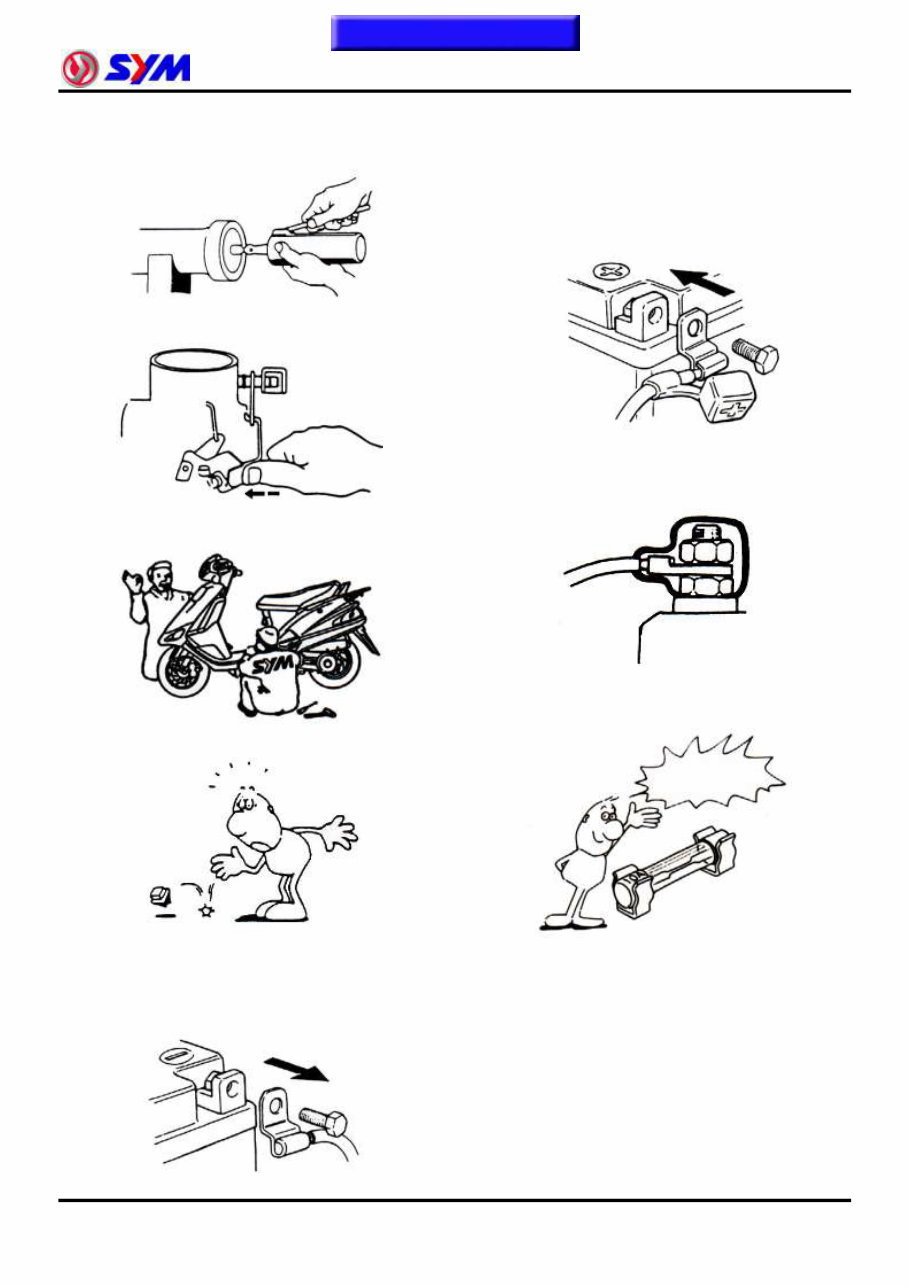
Lubricate the rotation face with specified
lubricant on the lubrication points before
assembling.
Check if positions and operation for installed
parts is in correct and properly.
Make sure service safety each other when
conducting by two persons.
Note that do not let parts fall down.
Before battery removal operation, it has to
remove the battery negative (-) cable firstly.
Notre tools like open-end wrench do not contact
with body to prevent from circuit short and
create spark.
After service completed, make sure all
connection points is secured.
Battery positive (+) cable should be connected
firstly.
And the two posts of battery have to be greased
after connected the cables.
Make sure that the battery post caps are
located in properly after the battery posts had
been serviced.
If fuse burned, it has to find out the cause and
solved it. And then replace with specified
capacity fuse.
Capacity
verification
To this chapter contents
You're Reading a Preview
What's Included?
 Lifetime Access
Fast Download Speeds
Online & Offline Access
Access PDF Contents & Bookmarks
Full Search Facility
Print one or all pages of your manual
$31.99
2011-2014 SYM MAXSYM 400I Scooter Service & Repair Manual
Viewed 82 Times Today

What's Included?
Lifetime Access
Fast Download Speeds
Online & Offline Access
Access PDF Contents & Bookmarks
Full Search Facility
Print one or all pages of your manual
$31.99

Secure transaction
What's Included?
Lifetime Access
Fast Download Speeds
Online & Offline Access
Access PDF Contents & Bookmarks
Full Search Facility
Print one or all pages of your manual
Description
Get instant access to the Complete Factory Service Repair Workshop Manual without any extra fees or expiry dates. This Professional Manual is suitable for both professional Mechanics and Technicians, as well as DIY enthusiasts. It covers all repairs, servicing, and troubleshooting procedures with detailed photos, diagrams, step-by-step instructions, and highly detailed exploded diagrams & pictures to ensure every job is completed correctly.
Print out a single page or the entire manual as per your choice. This Manual can be used on multiple computers without any limitations or trial periods, and it does not expire or require any renewal fees. It is fully compatible with all Windows & MAC Computers.


