

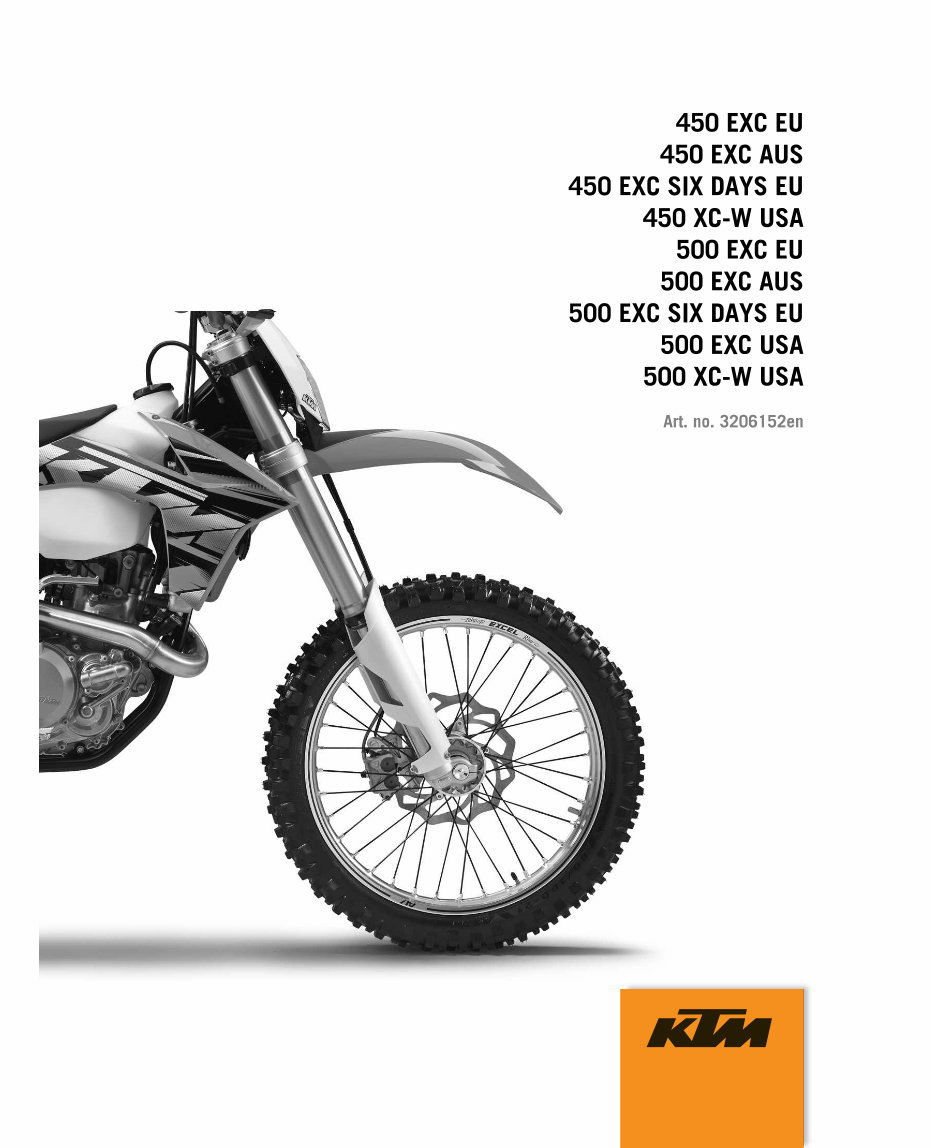
REPAIR MANUAL 2013
450 EXC EU
450 EXC AUS
450 EXC SIX DAYS EU
450 XC-W USA
500 EXC EU
500 EXC AUS
500 EXC SIX DAYS EU
500 EXC USA
500 XC-W USA
Art. no. 32D6152en
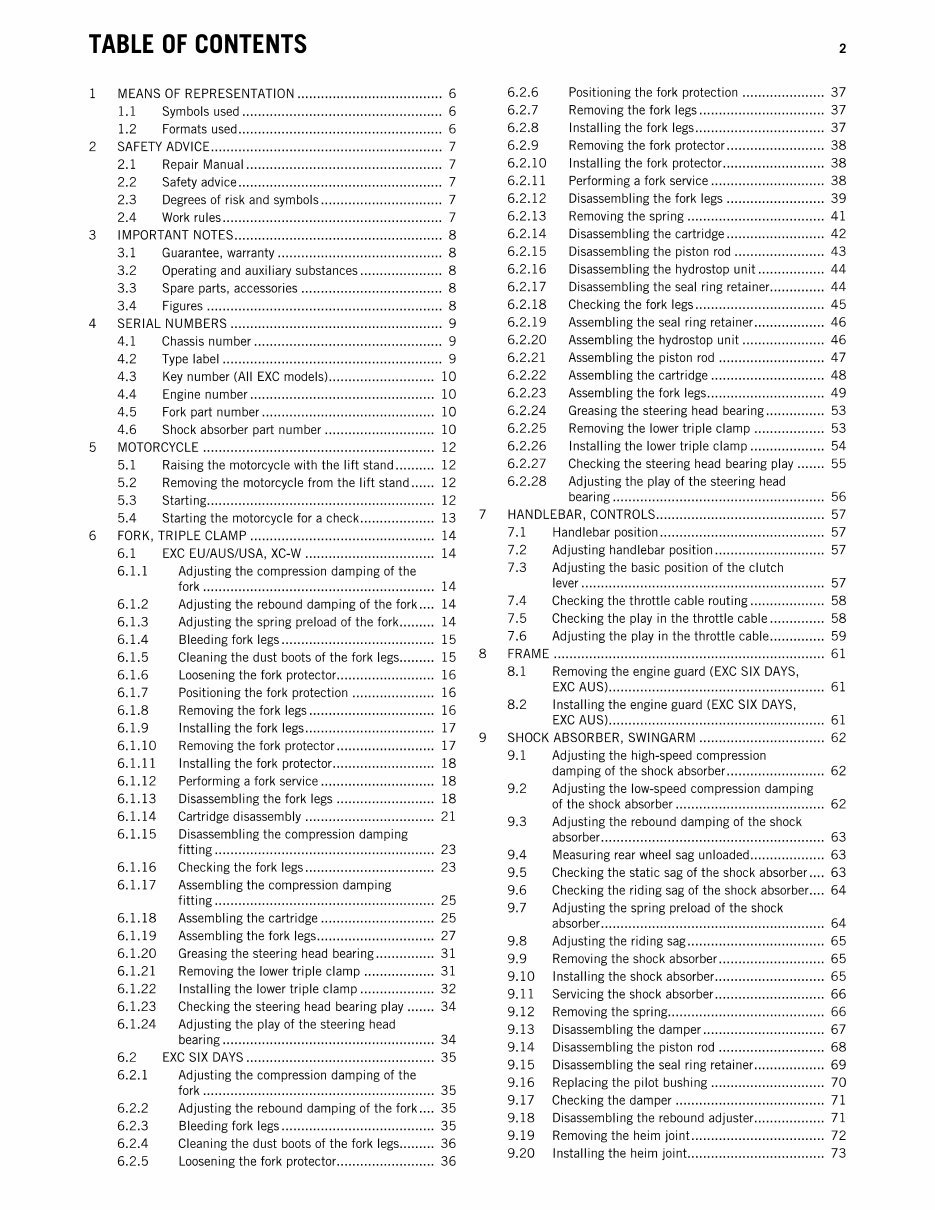
TABLE OF CONTENTS
1
2
3
4
5
6
MEANS OF REPRESENTATION ..................................... 6
1.1 Symbols used ................................................... 6
1.2 Formats used .................................................... 6
SAFETY ADViCE ........................................................... 7
2.1 Repair Manual .................................................. 7
2.2 Safety advice .................................................... 7
2.3 Degrees of risk and symbols ............................... 7
2.4 Work rules ........................................................ 7
IMPORTANT NOTES ..................................................... 8
3.1 Guarantee, warranty .......................................... 8
3.2 Operating and auxiliary substances ..................... 8
3.3 Spare parts, accessories .................................... 8
3.4 Figures ............................................................ 8
SERIAL NUMBERS ...................................................... 9
4.1 Chassis number ................................................ 9
4.2 Type label ........................................................ 9
4.3 Key number (All EXC moeelsl ........................... 10
4.4 Engine number ............................................... 10
4.5 Fork part number ............................................ 10
4.6 Shock absorber part number ............................ 10
MOTORCYCLE ........................................................... 12
5.1 Raising the motorcycle with the lift stand .......... 12
5.2 Removing the motorcycle from the lift stand ...... 12
5.3 Starting.......................................................... 12
5.4 Starting the motorcycle for a check ................... 13
FORK, TRIPLE CLAMP ............................................... 14
6.1 EXC EU/AUS/USA, XC-W ................................. 14
6.1.1 Adjusting the compression damping of the
6.1.2
6.1.3
6.1.4
6.1.5
6.1.6
6.1.7
6.1.8
6.1.9
6.1.10
6.1.11
6.1.12
6.1.13
6.1.14
6.1.15
6.1.16
6.1.17
6.1.18
6.1.19
6.1.20
6.1.21
6.1.22
6.1.23
6.1.24
6.2
6.2.1
6.2.2
6.2.3
6.2.4
6.2.5
fork ........................................................... 14
Adjusting the rebound damping of the fork .... 14
Adjusting the spring preload of the fork ......... 14
Bleeding fork legs ....................................... 15
Cleaning the dust boots of the fork legs ......... 15
Loosening the fork protector ......................... 16
Positioning the fork protection ..................... 16
Removing the fork legs ................................ 16
Install i ng the fork legs ........ ...... .............. ..... 17
Removing the fork protector ......................... 17
Installing the fork protector .......................... 18
Performing a fork service ............................. 18
Disassembling the fork legs ......................... 18
Cartridge disassembly ................................. 21
Disassembling the compression damping
fitting ........................................................ 23
Checking the fork legs ................................. 23
Assembling the compression damping
fitting ........................................................ 25
Assembling the cartridge ............................. 25
Assembling the fork legs .............................. 27
Greasing the steering head bearing ............... 31
Removing the lower triple clamp .................. 31
Installing the lower triple clamp ................... 32
Checking the steering head bearing play ....... 34
Adjusting the play of the steering head
bearing ...................................................... 34
EXC SIX DAYS ................................................ 35
Adjusting the compression damping of the
fork ........................................................... 35
Adjusting the rebound damping of the fork .... 35
Bleeding fork legs ....................................... 35
Cleaning the dust boots of the fork legs ......... 36
Loosening the fork protector ......................... 36
7
8
9
6.2.6
6.2.7
6.2.8
6.2.9
6.2.10
6.2.11
6.2.12
6.2.13
6.2.14
6.2.15
6.2.16
6.2.17
6.2.18
6.2.19
6.2.20
6.2.21
6.2.22
6.2.23
2
Positioning the fork protection ..................... 37
Removing the fork legs ................................ 37
Installing the fork legs ................................. 37
Removing the fork protector ......................... 38
Installing the fork protector .......................... 38
Performing a fork service ............................. 38
Disessembling the fork legs ......................... 39
Removing the spring ................................... 41
Disassembling the cartridge ......................... 42
Disassembling the piston rod ....................... 43
Disassembling the hydrostop unit ................. 44
Disassembling the seal ring retainer .............. 44
Checki ng the fork legs...... ...... ...... ........ ....... 45
Assembling the seal ring retainer .................. 46
Assembling the hydrostop unit ..................... 46
Assembling the piston rod ........................... 47
Assembling the cartridge ............................. 48
Assembling the fork legs .............................. 49
6.2.24 Greasing the steering head bearing ............... 53
6.2.25
6.2.26
6.2.27
Removing the lower triple clamp .................. 53
Installing the lower triple clamp ................... 54
Checking the steering head bearing play ....... 55
6.2.28 Adjusting the play of the steering head
bearing ...................................................... 56
HANDLEBAR, CONTROLS ........................................... 57
7.1 Handlebar position .......................................... 57
7.2 Adjusting handlebar position ............................ 57
7.3 Adjusting the basic position of the clutch
lever .............................................................. 57
7.4 Checking the throttle cable routing ................... 58
7.5 Checking the play in the throttle cable .............. 58
7.6 Adjusting the play in the throttle cable .............. 59
FRAME ..................................................................... 61
8.1 Removing the engine guard (EXC SIX DAYS,
EXC AUSl ....................................................... 61
8.2 Installing the engine guard (EXC SIX DAYS,
EXC AUSl ....................................................... 61
SHOCK ABSORBER, SWINGARM ................................ 62
9.1 Adjusting the high-speed compression
damping of the shock absorber ......................... 62
9.2 Adjusting the low-speed compression damping
of the shock absorber .... ...... ........ ...... .............. 62
9.3 Adjusting the rebound damping of the shock
absorber ......................................................... 63
9.4 Measuring rear wheel sag unloaded ................... 63
9.5 Checking the static sag of the shock absorber .... 63
9.6 Checking the riding sag of the shock absorber .... 64
9.7 Adjusting the spring preload of the shock
absorber ......................................................... 64
9.8 Adjusting the riding sag ................................... 65
9.9 Removing the shock absorber ........................... 65
9.10 Installing the shock absorber ............................ 65
9.11 Servicing the shock absorber ............................ 66
9.12 Removing the spring ........................................ 66
9.13 Disassembling the damper ............................... 67
9.14 Disassembling the piston rod ........................... 68
9.15 Disassembling the seal ring retainer .................. 69
9.16 Replacing the pilot bushing ............................. 70
9.17 Checking the damper ...................................... 71
9.18 Disassembling the rebound adjuster .................. 71
9.19 Removing the heim join!.. ................................ 72
9.20 Installing the heim join!.. ................................. 73
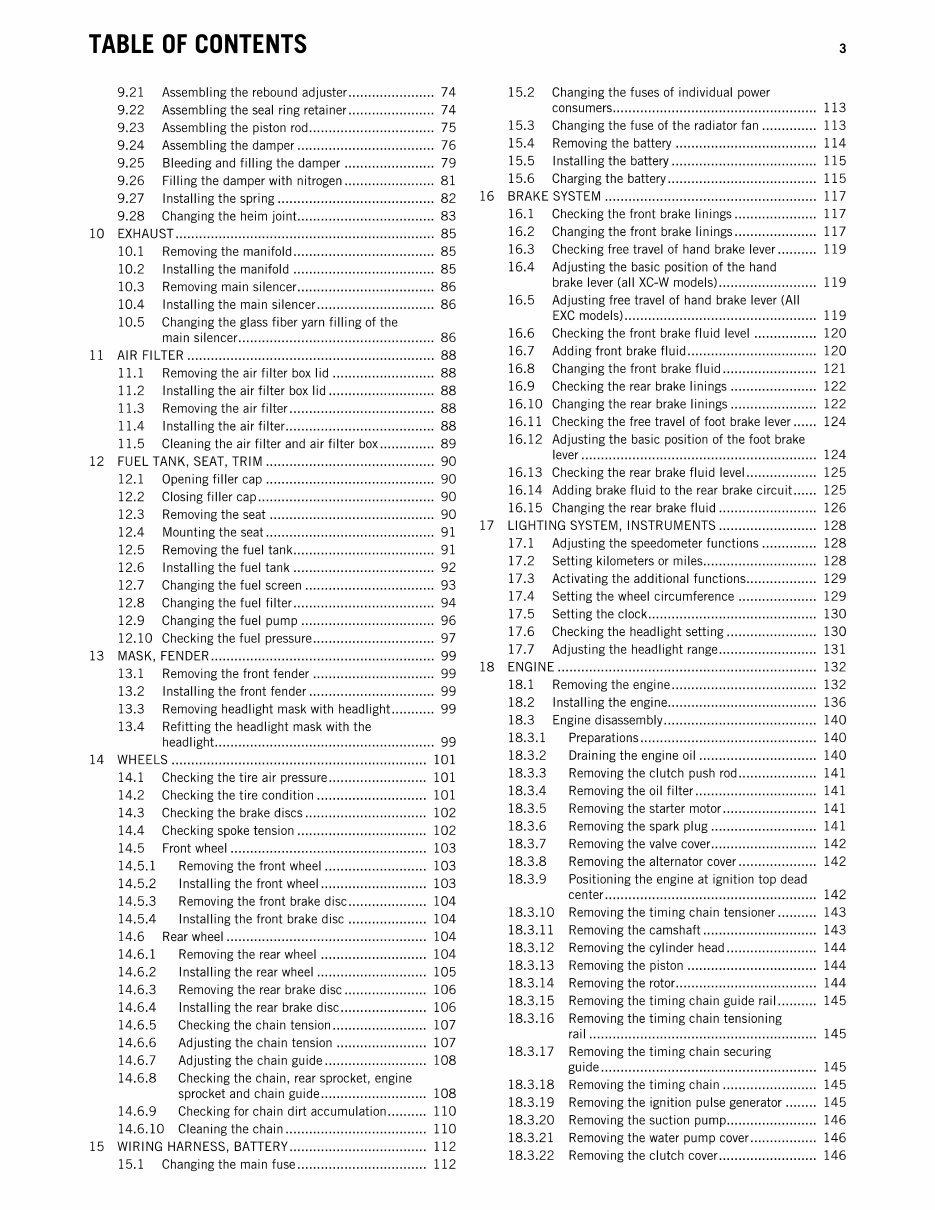
TABLE OF CONTENTS
9.21 Assembling the rebound adjuster ...................... 74
9.22 Assembling the seal ring retainer ...................... 74
9.23 Assembling the piston rod ................................ 75
9.24 Assembling the damper ................................... 76
9.25 Bleeding and filling the damper ....................... 79
9.26 Filling the damper with nitrogen ....................... 81
9.27 Installing the spring ........................................ 82
9.28 Changing the heim jOint ................................... 83
10 EXHAUST .................................................................. 85
10.1 Removing the manifold .................................... 85
10.2 Installing the manifold .................................... 85
10.3 Removing main silencer ................................... 86
10.4 Installing the main silencer .............................. 86
10.5 Changing the glass fiber yarn filling of the
main silencer .................................................. 86
11 AIR FILTER ............................................................... 88
11.1 Removing the air filter box lid .......................... 88
11.2 Installing the air filter box lid ........................... 88
11.3 Removing the air filter ..................................... 88
11.4 Installing the air filter ...................................... 88
11.5 Cleaning the air filter and air filter box .............. 89
12 FUEL TANK, SEAT, TRIM ........................................... 90
12.1 Opening filler cap ........................................... 90
12.2 Closing filler cap ............................................. 90
12.3 Removing the seat .......................................... 90
12.4 Mounting the sea!.. ......................................... 91
12.5 Removing the fuel tank .................................... 91
12.6 Installing the fuel tank .................................... 92
12.7 Changing the fuel screen ................................. 93
12.8 Changing the fuel filter .................................... 94
12.9 Changing the fuel pump .................................. 96
12.10 Checking the fuel pressure ............................... 97
13 MASK, FENDER ......................................................... 99
13.1 Removing the front fender ............................... 99
13.2 Installing the front fender ................................ 99
13.3 Removing headlight mask with headligh!.. ......... 99
13.4 Refitting the headlight mask with the
headlight.. ...................................................... 99
14 WHEELS ................................................................. 101
14.1 Checking the tire air pressure ......................... 101
14.2 Checking the tire condition ............................ 101
14.3 Checking the brake discs ............................... 102
14.4 Checking spoke tension ................................. 102
14.5 Front wheel .................................................. 103
14.5.1 Removing the front wheel .......................... 103
14.5.2 Installing the front wheel ........................... 103
14.5.3 Removing the front brake disc .................... 104
14.5.4 Installing the front brake disc .................... 104
14.6 Rear wheel ................................................... 104
14.6.1 Removing the rear wheel ........................... 104
14.6.2 Installing the rear wheel ............................ 105
14.6.3 Removing the rear brake disc ..................... 106
14.6.4 Installing the rear brake disc ...................... 106
14.6.5 Checking the chain tension ........................ 107
14.6.6 Adjusting the chain tension ....................... 107
14.6.7 Adjusting the chain guide .......................... 108
14.6.8 Checking the chain, rear sprocket, engine
sprocket and chain guide ........................... 108
14.6.9 Checking for chain dirt accumulation .......... 110
14.6.10 Cleaning the chain .................................... 110
15 WIRING HARNESS, BATTERy ................................... 112
15.1 Changing the main fuse ................................. 112
15.2 Changing the fuses of individual power
consumers ....................................................
15.3 Changing the fuse of the radiator fan ............ ..
15.4 Removi ng the battery .................................. ..
15.5 Installing the battery .....................................
15.6 Charging the battery .................................... ..
16 BRAKE SYSTEM .................................................... ..
3
113
113
114
115
115
117
16.1
16.2
Checking the front brake linings ..................... 117
Changing the front brake linings ..................... 117
16.3 Checking free travel of hand brake lever .......... 119
16.4 Adjusting the basic position of the hand
brake lever (all XC-W models) ......................... 119
16.5 Adjusting free travel of hand brake lever (All
EXC models).......... ...... ........ ...... ...... ........ ..... 119
16.6
16.7
Checking the front brake fluid level ................ 120
Adding front brake fluid ................................. 120
16.8 Changing the front brake fluid ........................ 121
16.9 Checking the rear brake linings ...................... 122
16.10 Changing the rear brake linings ...................... 122
16.11 Checking the free travel of foot brake lever ...... 124
16.12 Adjusting the basic position of the foot brake
lever ............................................................ 124
16.13 Checking the rear brake fluid level .................. 125
16.14 Adding brake fluid to the rear brake circui!.. .... 125
16.15 Changing the rear brake fluid ......................... 126
17 LIGHTING SYSTEM, INSTRUMENTS ......................... 128
17.1 Adjusting the speedometer functions .............. 128
17.2 Setting kilometers or miles............................. 128
17.3 Activating the additional functions .................. 129
17.4 Setting the wheel circumference .................... 129
17.5 Setting the clock ........................................... 130
17.6 Checking the headlight setting ....................... 130
17.7 Adjusting the headlight range ......................... 131
18 ENGINE .................................................................. 132
18.1 Removing the engine ..................................... 132
18.2 Installing the engine ...................................... 136
18.3 Engine disassembly ....................................... 140
18.3.1 Preparations ............................................. 140
18.3.2 Draining the engine oil .............................. 140
18.3.3 Removing the clutch push rod .................... 141
18.3.4 Removing the oil filter ............................... 141
18.3.5 Removing the starter motor ........................ 141
18.3.6 Removing the spark plug ........................... 141
18.3.7 Removing the valve cover........................... 142
18.3.8 Removing the alternator cover .................... 142
18.3.9 Positioning the engine at ignition top dead
18.3.10
18.3.11
18.3.12
center ...................................................... 142
Removing the timing chain tensioner .......... 143
Removing the camshaft ............................. 143
Removing the cylinder head ....................... 144
18.3.13 Removing the piston ................................. 144
18.3.14 Removing the rotor .................................... 144
18.3.15 Removing the timing chain guide rail .......... 145
18.3.16 Removing the timing chain tensioning
rail .......................................................... 145
18.3.17 Removing the timing chain securing
guide ....................................................... 145
18.3.18 Removing the timing chain ........................ 145
18.3.19 Removing the ignition pulse generator ........ 145
18.3.20 Removing the suction pump ....................... 146
18.3.21 Removing the water pump cover ................. 146
18.3.22 Removing the clutch cover ......................... 146
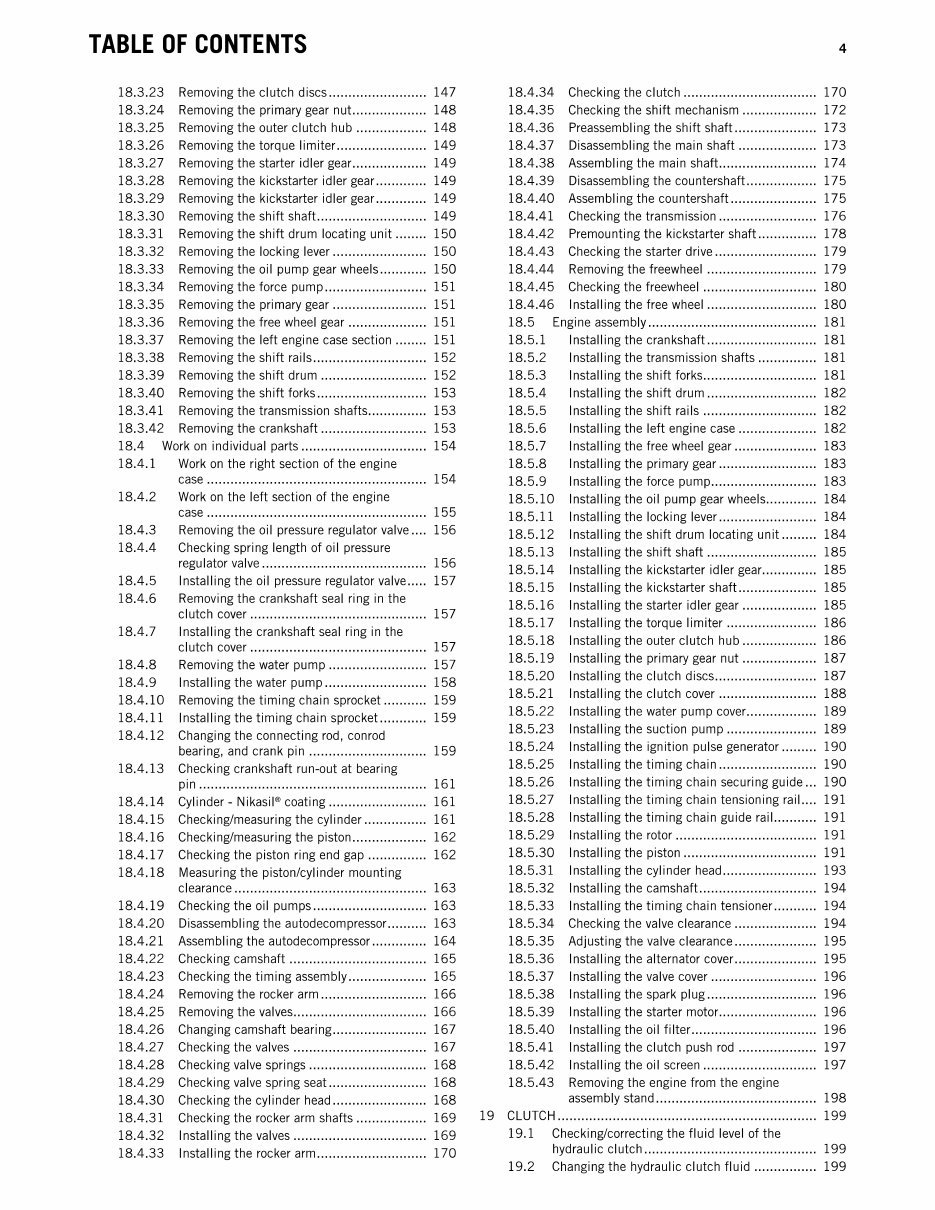
TABLE OF CONTENTS
18.3.23 Removing the clutch discs ......................... 147
18.3.24 Removing the primary gear nut. .................. 148
18.3.25 Removing the outer clutch hub .................. 148
18.3.26 Removing the torque limiter ....................... 149
18.3.27 Removing the starter idler gear ................... 149
18.3.28 Removing the kickstarter idler gear ............. 149
18.3.29 Removing the kickstarter idler gear ............. 149
18.3.30 Removing the shift shaft... ......................... 149
18.3.31 Removing the shift drum locating unit ........ 150
18.3.32 Removing the locking lever ........................ 150
18.3.33 Removing the oil pump gear wheels ............ 150
18.3.34 Removing the force pump .......................... 151
18.3.35 Removing the primary gear ........................ 151
18.3.36 Removing the free wheel gear .................... 151
18.3.37 Removing the left engine case section ........ 151
18.3.38 Removing the shift rails ............................. 152
18.3.39 Removing the shift drum ........................... 152
18.3.40 Removing the shift lorks ............................ 153
18.3.41 Removing the transmission shafts ............... 153
18.3.42 Removing the crankshaft ........................... 153
18.4 Work on individual parts ................................ 154
18.4.1 Work on the right section of the engine
18.4.2
18.4.3
18.4.4
18.4.5
18.4.6
18.4.7
18.4.8
18.4.9
18.4.10
18.4.11
18.4.12
18.4.13
18.4.14
18.4.15
18.4.16
18.4.17
18.4.18
18.4.19
18.4.20
18.4.21
18.4.22
18.4.23
18.4.24
18.4.25
18.4.26
18.4.27
18.4.28
18.4.29
18.4.30
18.4.31
18.4.32
18.4.33
case ........................................................ 154
Work on the left section of the engine
case ........................................................ 155
Removing the oil pressure regulator valve .... 156
Checking spring length of oil pressure
regulator valve .......................................... 156
Installing the oil pressure regulator valve ..... 157
Removing the crankshaft seal ring in the
clutch cover ............................................. 157
Installing the crankshaft seal ring in the
clutch cover ............................................. 157
Removing the water pump ......................... 157
Installing the water pump .......................... 158
Removing the timing chain sprocket ........... 159
Installing the timing chain sprocket ............ 159
Changing the connecting rod, conrod
bearing. and crank pin .............................. 159
Checking crankshaft run-out at bearing
pin .......................................................... 161
Cylinder - Nikasil" coating ......................... 161
Checking/measuring the cylinder ................ 161
Checking/measuring the piston ................... 162
Checking the piston ring end gap ............... 162
Measuring the piston/cylinder mounting
clearance ................................................. 163
Checking the oil pumps ............................. 163
Disassembling the autodecompressor .......... 163
Assembling the autodecompressor .............. 164
Checking camshaft ................................... 165
Checking the timing assembly .................... 165
Removing the rocker arm ........................... 166
Removing the valves .................................. 166
Changing camshaft bearing ........................ 167
Checking the valves .................................. 167
Checking valve springs .............................. 168
Checking valve spring seal.. ....................... 168
Checking the cylinder head ........................ 168
Checking the rocker arm shafts .................. 169
Installing the valves .................................. 169
Install i ng the rocker arm.... .............. .......... 170
4
18.4.34 Checking the clutch .................................. 170
18.4.35 Checking the shift mechanism ................... 172
18.4.36 Preassembling the shift shaft ..................... 173
18.4.37 Disassembling the main shaft .................... 173
18.4.38 Assembling the main shaft ......................... 174
18.4.39 Disassembling the countershaft .................. 175
18.4.40 Assembling the countershaft ...................... 175
18.4.41 Checking the transmission ......................... 176
18.4.42 Premountingthe kickstarter shaft ............... 178
18.4.43 Checking the starter drive .......................... 179
18.4.44 Removing the Ireewheel ............................ 179
18.4.45 Checking the freewheel ............................. 180
18.4.46 Installing the free wheel ............................ 180
18.5 Engine assembly ........................................... 181
18.5.1 Installing the crankshaft ............................ 181
18.5.2 Installing the transmission shafts ............... 181
18.5.3 Installing the shift lorks............................. 181
18.5.4 Installing the shift drum ............................ 182
18.5.5 Installing the shift rails ............................. 182
18.5.6 Installing the left engine case .................... 182
18.5.7 Installing the free wheel gear ..................... 183
18.5.8 Installing the primary gear ......................... 183
18.5.9 Installing the lorce pump ........................... 183
18.5.10 Installing the oil pump gear wheels ............. 184
18.5.11 Installing the locking lever ......................... 184
18.5.12 Installing the shift drum locating unit ......... 184
18.5.13 Installing the shift shaft ............................ 185
18.5.14 Installing the kickstarter idler gear .............. 185
18.5.15 Installing the kickstarter shaft .................... 185
18.5.16 Installing the starter idler gear ................... 185
18.5.17 Installing the torque limiter ....................... 186
18.5.18 Installing the outer clutch hub ................... 186
18.5.19 Installing the primary gear nut ................... 187
18.5.20 Installing the clutch discs .......................... 187
18.5.21 Installing the clutch cover ......................... 188
18.5.22 Installing the water pump cover .................. 189
18.5.23 Installing the suction pump ....................... 189
18.5.24 Installing the ignition pulse generator ......... 190
18.5.25 Installing the timing chain ......................... 190
18.5.26 Installing the timing chain securing guide ... 190
18.5.27 Installing the timing chain tensioning rail .... 191
18.5.28 Installing the timing chain guide rail ........... 191
18.5.29 Installing the rotor .................................... 191
18.5.30 Installing the piston .................................. 191
18.5.31 Installing the cylinder head ........................ 193
18.5.32 Installing the camshaft .............................. 194
18.5.33 Installing the timing chain tensioner ........... 194
18.5.34 Checking the valve clearance ..................... 194
18.5.35 Adjusting the valve clearance ..................... 195
18.5.36 Installing the alternator cover ..................... 195
18.5.37 Installing the valve cover ........................... 196
18.5.38 Installing the spark plug ............................ 196
18.5.39 Installing the starter motor......................... 196
18.5.40 Installing the oil filter ................................ 196
18.5.41 Installing the clutch push rod .................... 197
18.5.42 Installing the oil screen ............................. 197
18.5.43 Removing the engine lrom the engine
assembly stand ......................................... 198
19 CLUTCH .................................................................. 199
19.1 Checking/correcting the fluid level of the
hydraulic clutch ............................................ 199
19.2 Changing the hydraulic clutch fluid ................ 199
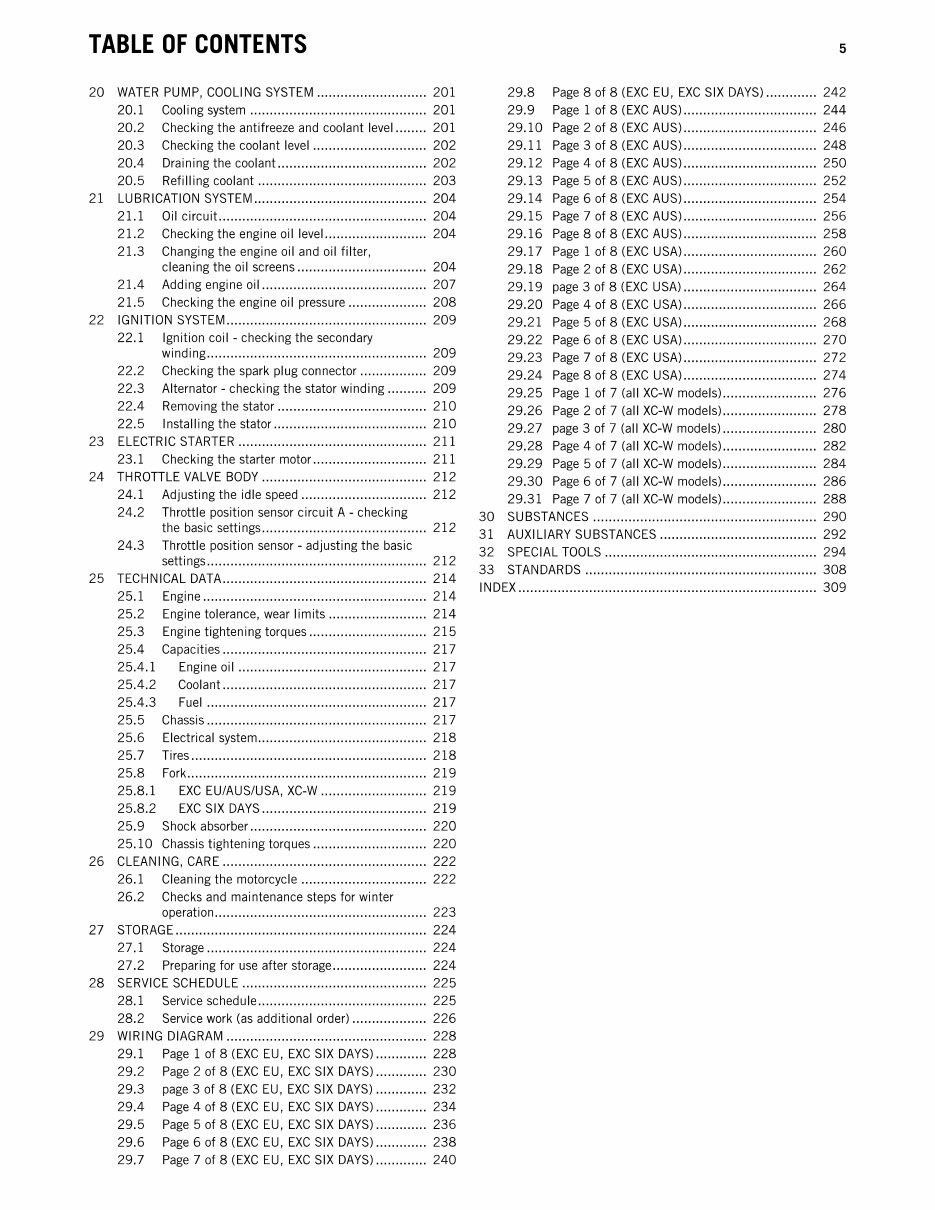
TABLE OF CONTENTS 5
20 WATER PUMP, COOLING SYSTEM ............................ 201 29.8 Page 8 of 8 (EXC EU, EXC SIX DAYS) ............. 242
20.1 Cooling system ............................................. 201 29.9 Page 1 of 8 (EXC AUS) .................................. 244
20.2 Checking the antifreeze and coolant level ........ 201 29.10 Page 2 of 8 (EXC AUS) .................................. 246
20.3 Checking the coolant level ............................. 202 29.11 Page 3 of 8 (EXC AUS) .................................. 248
20.4 Draining the coolanl.. .................................... 202 29.12 Page 4 of 8 (EXC AUS) .................................. 250
20.5 Refilling coolant ........................................... 203 29.13 Page 5 of 8 (EXC AUS) .................................. 252
21 LUBRICATION SySTEM ............................................ 204 29.14 Page 6 of 8 (EXC AUS) .................................. 254
21.1 Oil circui!.. ................................................... 204 29.15 Page 7 of 8 (EXC AUS) .................................. 256
21.2 Checking the engine oil level .......................... 204 29.16 Page 8 of 8 (EXC AUS) .................................. 258
21.3 Changing the engine oil and oil filter, 29.17 Page 1 of 8 (EXC USA) .................................. 260
cleaning the oil screens ................................. 204
29.18 Page 2 of 8 (EXC USA) .................................. 262
21.4 Adding engine oil .......................................... 207
29.19 page 3 of 8 (EXC USA) .................................. 264
21.5 Checking the engine oil pressure .................... 208
29.20 Page 4 of 8 (EXC USA) .................................. 266
22 IGNITION SySTEM ................................................... 209
29.21 Page 5 of 8 (EXC USA) .................................. 268
22.1 Ignition coil - checking the secondary
29.22 Page 6 of 8 (EXC USA) .................................. 270
winding ........................................................ 209
29.23 Page 7 of 8 (EXC USA) .................................. 272
22.2 Checking the spark plug connector ................. 209
29.24 Page 8 of 8 (EXC USA) .................................. 274
22.3 Alternator - checking the stator winding .......... 209
29.25 Page 1 of 7 (all XC-W models) ........................ 276
22.4 Removing the stator ...................................... 210
29.26 Page 2 of 7 (all XC-W models) ........................ 278
22.5 Installing the stator ....................................... 210
29.27 page 3 of 7 (all XC-W models) ........................ 280
23 ELECTRIC STARTER ................................................ 211
29.28 Page 4 of 7 (all XC-W models) ........................ 282
23.1 Checking the starter motor ............................. 211
29.29 Page 5 of 7 (all XC-W models) ........................ 284
24 THROTILE VALVE BODy .......................................... 212
29.30 Page 6 of 7 (all XC-W models)...... ...... ............ 286
24.1 Adjusting the idle speed ................................ 212
29.31 Page 7 of 7 (all XC-W models)...... ...... ............ 288
24.2 Throttle position sensor circuit A - checking
30 SUBSTANCES ......................................................... 290
the basic settings .......................................... 212
31 AUXILIARY SUBSTANCES ........................................ 292
24.3 Throttle position sensor - adjusting the basic
settings ........................................................ 212
25 TECHNICAL DATA .................................................... 214
25.1 Engine ......................................................... 214
32 SPECIAL TOOLS ...................................................... 294
33 STANDARDS ........................................................... 308
INDEX ............................................................................ 309
25.2 Engine tolerance, wear limits ......................... 214
25.3 Engine tightening torques .............................. 215
25.4 Capacities .................................................... 217
25.4.1 Engine oil ................................................ 217
25.4.2 Coolant .................................................... 217
25.4.3 Fuel ........................................................ 217
25.5 Chassis ........................................................ 217
25.6 Electrical system ........................................... 218
25.7 Tires ............................................................ 218
25.8 Fork ............................................................. 219
25.8.1 EXC EUiAUS/USA, XC-W ........................... 219
25.8.2 EXC SIX DAyS .......................................... 219
25.9 Shock absorber ............................................. 220
25.10 Chassis tightening torques ............................. 220
26 CLEANING, CARE .................................................... 222
26.1 Cleaning the motorcycle ................................ 222
26.2 Checks and maintenance steps for winter
operation ...................................................... 223
27 STORAGE ................................................................ 224
27.1 Storage ............ ...... .............. ...... ........ .......... 224
27.2 Preparing for use after storage ........................ 224
28 SERVICE SCHEDULE ............................................... 225
28.1 Service schedule ........................................... 225
28.2 Service work (as additional order) ................... 226
29 WIRING DIAGRAM ................................................... 228
29.1 Page 1 of 8 (EXC EU, EXC SIX DAyS) ............. 228
29.2 Page 2 of 8 (EXC EU, EXC SIX DAYS) ............. 230
29.3 page 3 of 8 (EXC EU, EXC SIX DAYS) ............. 232
29.4 Page 4 of 8 (EXC EU, EXC SIX DAYS) ............. 234
29.5 Page 5 of 8 (EXC EU, EXC SIX DAYS) ............. 236
29.6 Page 6 of 8 (EXC EU, EXC SIX DAYS) ............. 238
29.7 Page 7 of 8 (EXC EU, EXC SIX DAYS) ............. 240
You're Reading a Preview
What's Included?
 Lifetime Access
Fast Download Speeds
Offline Viewing
Access Contents & Bookmarks
Full Search Facility
Print one or all pages of your manual
$31.99
$41.99
KTM 450,500 EXC, six days,XC repair and owners manual . 2013
Viewed 19 Times Today

What's Included?
Lifetime Access
Fast Download Speeds
Offline Viewing
Access Contents & Bookmarks
Full Search Facility
Print one or all pages of your manual
$31.99
$41.99

Secure transaction
What's Included?
Lifetime Access
Fast Download Speeds
Offline Viewing
Access Contents & Bookmarks
Full Search Facility
Print one or all pages of your manual
Description
- This collection includes the following 2 manuals:
- KTM 450,500, EXC,SIX DAYS,XC-W Repair Manual
- Models covered:
- 450 EXC EU
- 450 EXC AUS
- 450 EXC SIX DAYS EU
- 450 XC-W USA
- 500 EXC EU
- 500 EXC AUS
- 500 EXC SIX DAYS EU
- 500 EXC USA
- 500 XC-W USA
- Pages: 313
- This factory service manual features easy-to-read text sections with high-quality diagrams, pictures, and illustrations. The step-by-step instructions demonstrate how to diagnose faults or complete repairs and overhauls accurately and efficiently, saving time and avoiding errors. It includes comprehensive listings of specifications and tolerances, along with explanations of component functions. The manual covers the entire bike, including the engine and chassis.
- KTM 450,500, EXC,SIX DAYS,XC-W Owners Manual
- Pages: 124
- This owner's manual provides essential information on the operation and maintenance of the bike, emphasizing careful handling, correct periodic inspections, adjustments, and maintenance.


