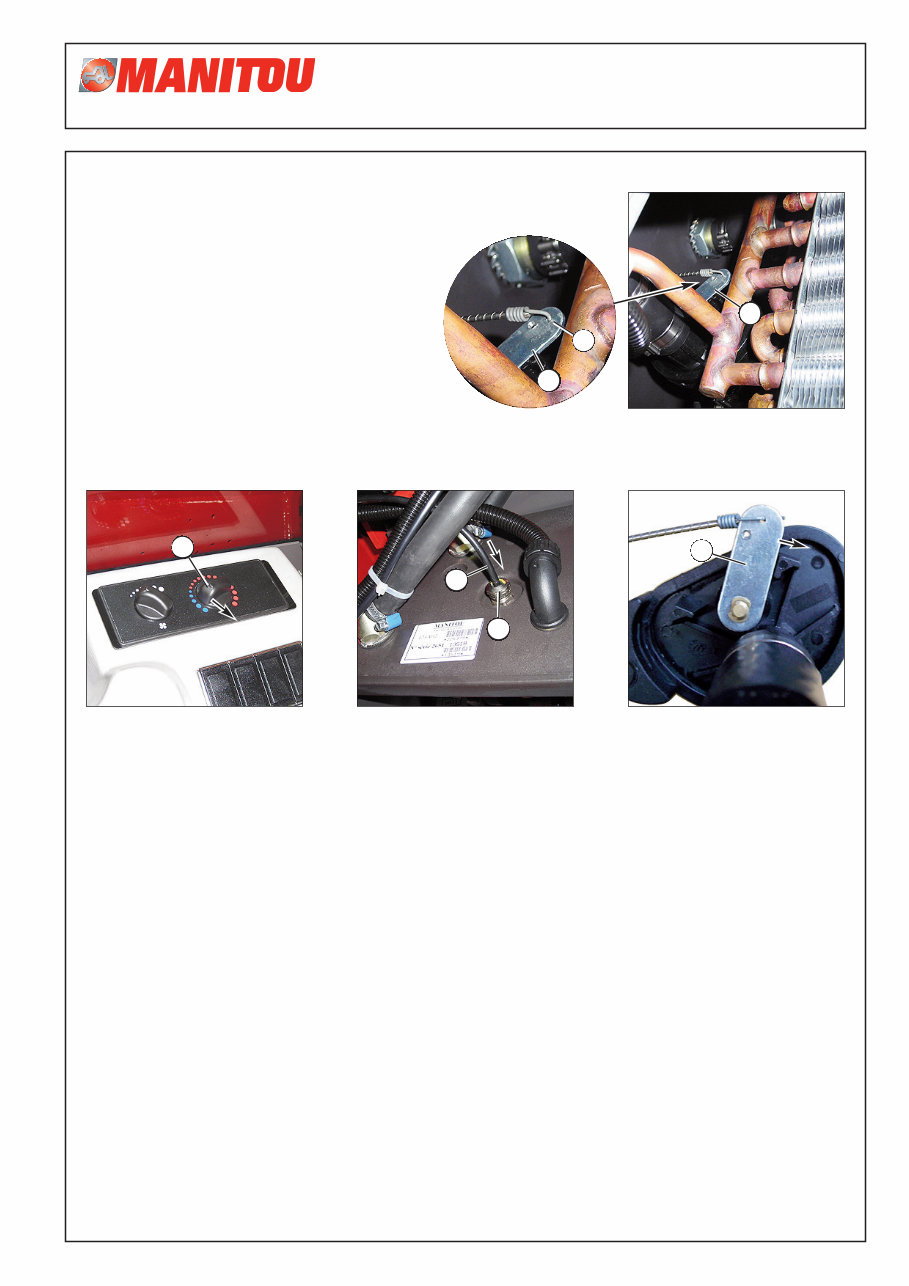
- Put control cable hook in heating valve lever arm R hole Q (Fig. P). - Use control knob S to close heating valve (Fig. Q). - Push cable T (Fig. R) to move heating valve lever arm U (Fig. S) to end of travel. - Re-tighten stuffing box V to lock cable T in place (Fig. R). - Operate heating valve control knob several times to check that lever arm actually reaches its end of travel when control knob is in “mini” position (Fig. Q). - If lever arm does not reach its end of travel, loosen stuffing box again and push in cable until arm hits its stop, then re-tighten stuffing box. - Replace heating chamber cover plate O (Fig. N). - Replace footstep unit N (Fig. M). - Replace floor covering M (Fig. L). A - 26/03/2007 TECHNICAL DATA N° : 1508 CODE : 109 04 PAGE : 8/14 Fig. R Fig. Q Fig. P R Q R T V Fig. S U S
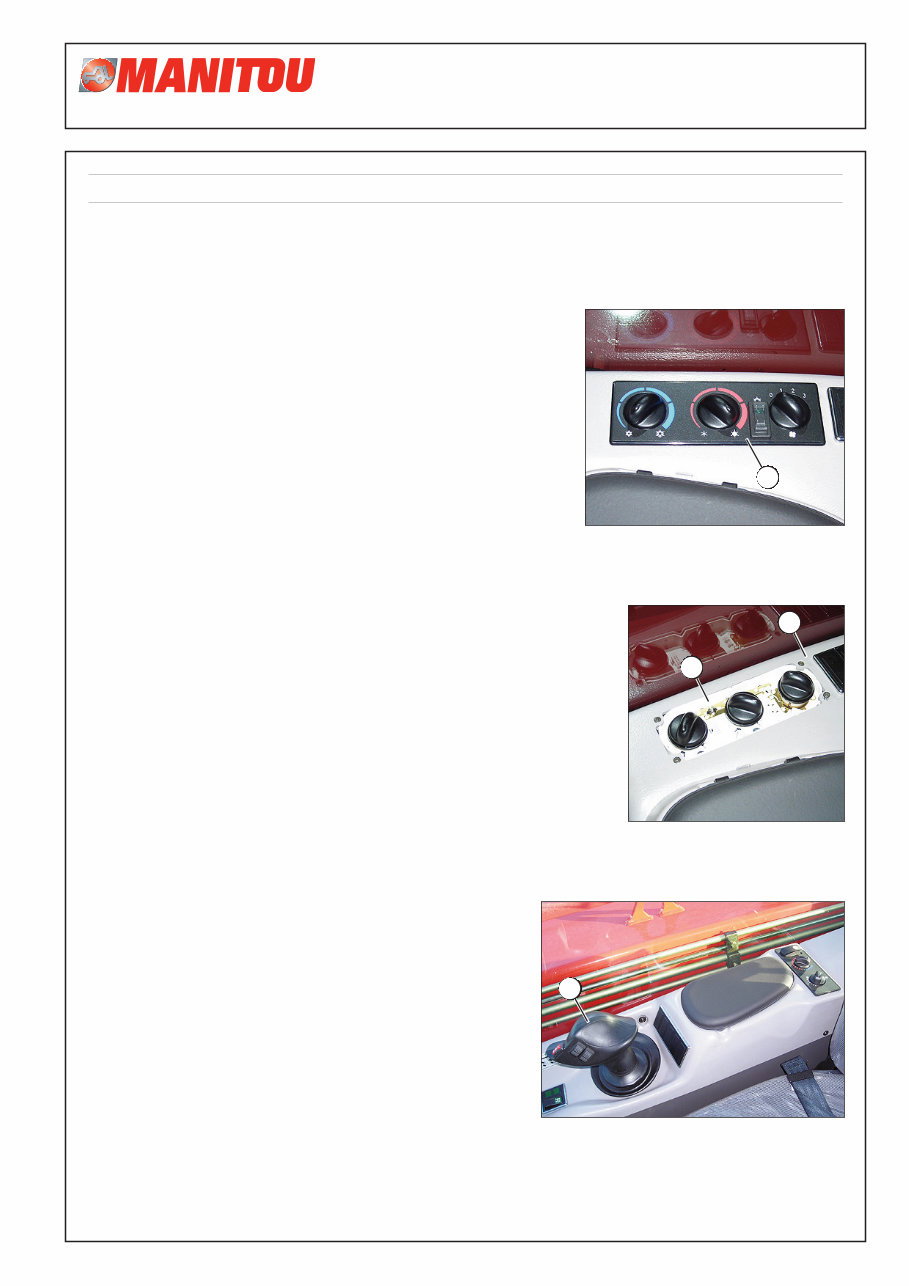
Procedure FOR HEATING + AIR CONDITIONING . . . . . . . . .Pages 9 to 14 - Unclip control box front cover A (Fig. AA). - Remove four control box fixing screws B (Fig. AB). - Remove lateral console C (Fig. AB). NOTE: For trucks fitted with “JSM” handle D (Fig. AC) you should make the required cut-outs on the two lateral consoles - see page 5. A - 26/03/2007 TECHNICAL DATA N° : 1508 CODE : 109 04 PAGE : 9/14 Fig. AA Fig. AB Fig. AC A D B C
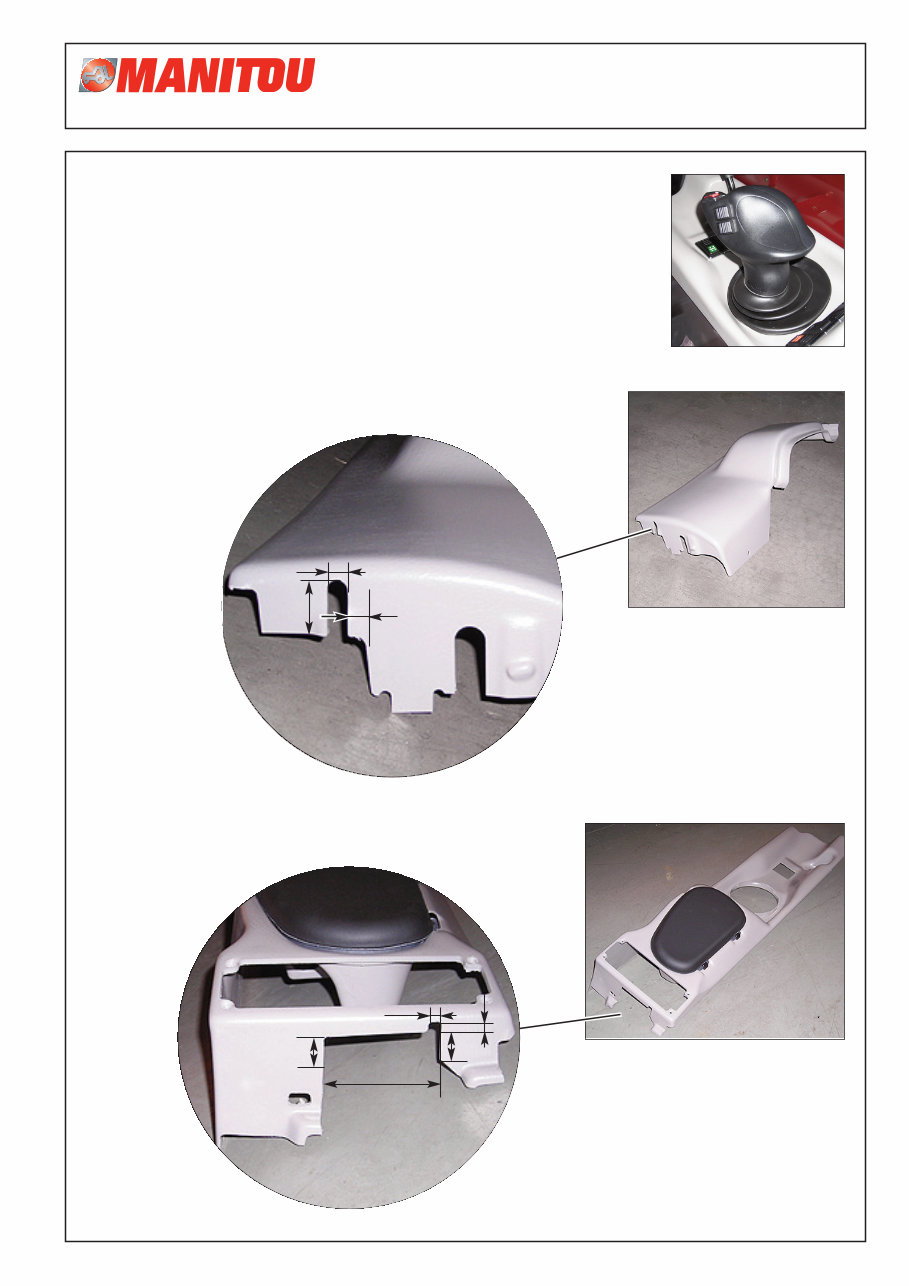
A - 26/03/2007 TECHNICAL DATA N° : 1508 CODE : 109 04 PAGE : 10/14 MAKE CONSOLE CUT-OUTS ONLY ON MACHINES FITTED WITH “JSM” HANDLE NOTE: Some consoles have already been cut-out. - Make cut-outs in rear console to dimensions shown below. - Make cut-outs in front console to dimensions shown below. Fig. AD 8 10 27 Fig. AE 15 75 20 5 7
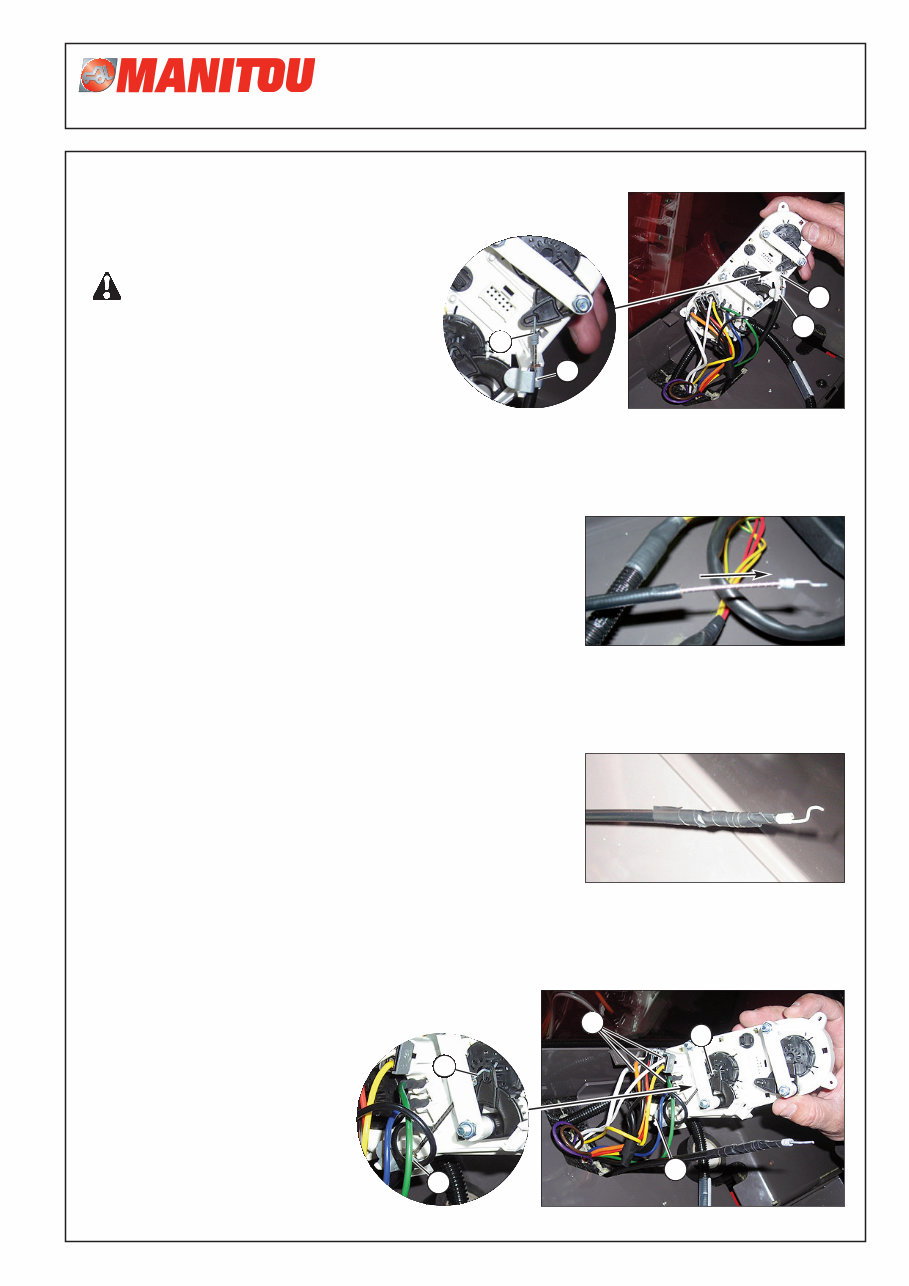
A - 26/03/2007 TECHNICAL DATA N° : 1508 CODE : 109 04 PAGE : 11/14 - Remove holding clip E and unhook thermostat control cable F (Fig. AG). PLEASE NOTE: The thermostat cable is no longer used. It is essential to lock it in the anti-freeze position. See below. - Pull out cable to the maximum (Fig. AH). - Use sticky tape to lock cable in this position (Fig. AI). - Remove holding clip G and unhook control cable H (Fig. AJ). - Disconnect harnesses I (Fig. AJ) and discard control box. Fig. AG Fig. AH E E F Fig. AI F Fig. AJ G H G H I
You're Reading a Preview
What's Included?
Lifetime Access
Fast Download Speeds
Offline Viewing
Access Contents & Bookmarks
Full Search Facility
Print one or all pages of your manual
$39.99
Manitou MLT630 120 LSU SB E2 Telescopic Loader Full Service & Repair Manual
Get the Manitou MLT630 120 LSU SB E2 Telescopic Loader Full Service & Repair Manual for comprehensive coverage of all repair, servicing, and troubleshooting procedures. This professional manual is a complete factory service repair workshop manual, containing step-by-step instructions, highly detailed exploded diagrams, and pictures to guide you through every job correctly. It is suitable for professional mechanics and technicians, as well as DIY enthusiasts.
The manual is available for instant access on your computer, tablet, or smartphone. It contains hundreds of pages with detailed photos and diagrams, allowing you to print out a single page or the entire manual as needed. There are no extra fees, expiry dates, limitations, or trial periods associated with this full manual, and it can be used on multiple computers without any renewal or additional payment requirements. It is fully compatible with Windows and MAC computers.
Reviews
Q&A
Recently Viewed
5,521,897Happy Clients
2,594,462eManuals
1,120,453Trusted Sellers
15Years in Business
Price:
Actual Price:
Manitou MLT630 120 LSU SB E2 Telescopic Loader Full Service & Repair Manual