


SERVICE
MANUAL
PUB-PS001
Rev. 09/05
Step by Step Procedure for Removal or
Repair of Pump Components on Subaru Robin
Pumps
(This Includes Mechanical Seal Replacement
and Proper Shimming)
Models
PTG109, PKV101, PKX201H,
PKX201, PKX301,
PKX201T, PKX301T,
PKX201ST, PKX301ST

© Copyright 2005 Robin America, Inc.
905 Telser Road • Lake Zurich, IL 60047 • Phone: 847-540-7300 • Fax: 847-438-5012
e-mail: sales@robinamerica.com • www.subarupower.com

GROUP INDEX
Group Name ...................................................................................................................... Page
PTG109 .....................................................................................................................................4
PKV101 ...................................................................................................................................16
PKX201, PKX301 - Centrifugal................................................................................................28
PKX201T, PKX301T - Trash ....................................................................................................42
PKX201ST, PKX301ST - Semi-Trash ......................................................................................60
PKX201H - High Pressure .......................................................................................................74
PTG109
Service
- 4 -
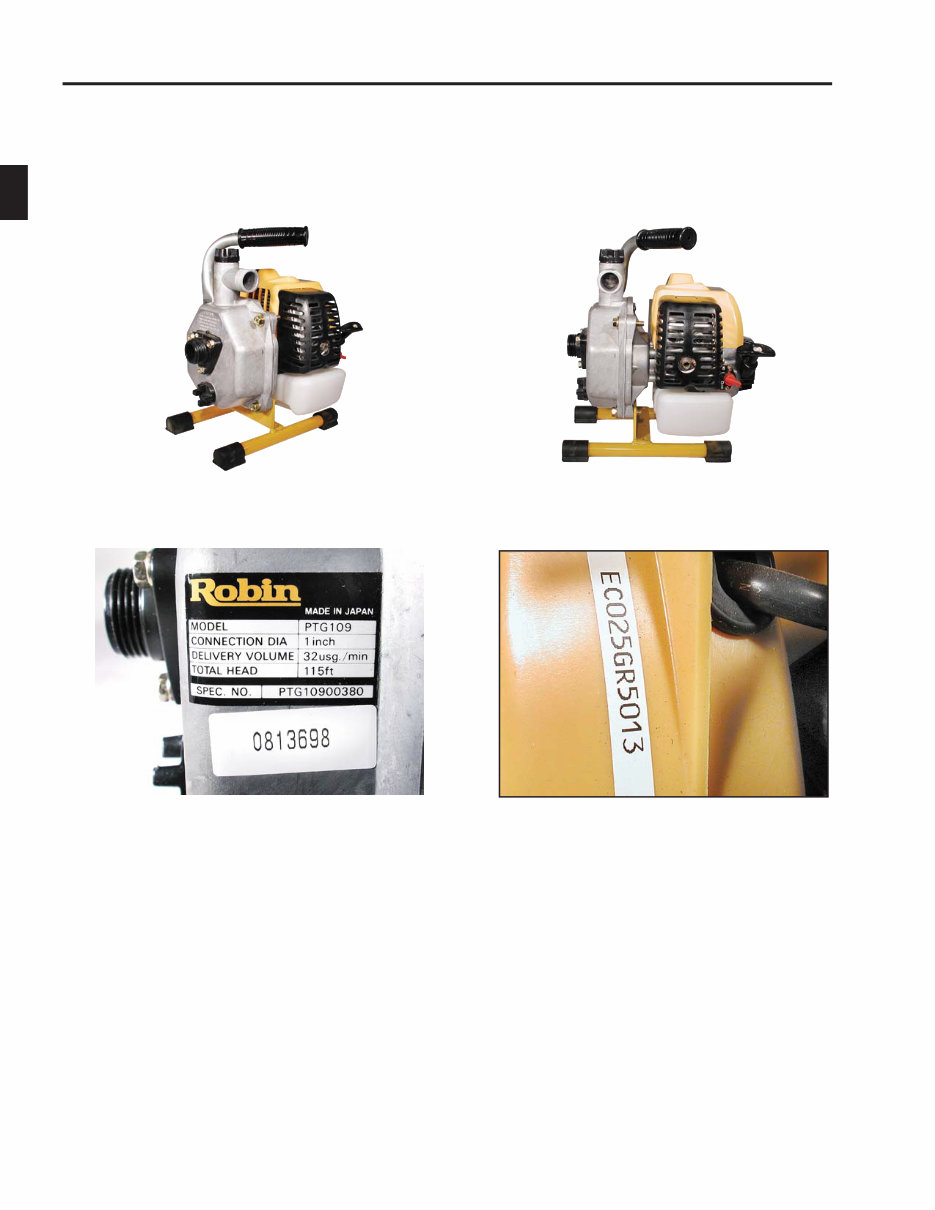
Always refer to the pump ID tag when ordering parts for the
pump. The engine has a separate ID tag as well. Refer to
the engine tag when ordering engine parts.
PTG 109
PTG109 Service
- 5 -
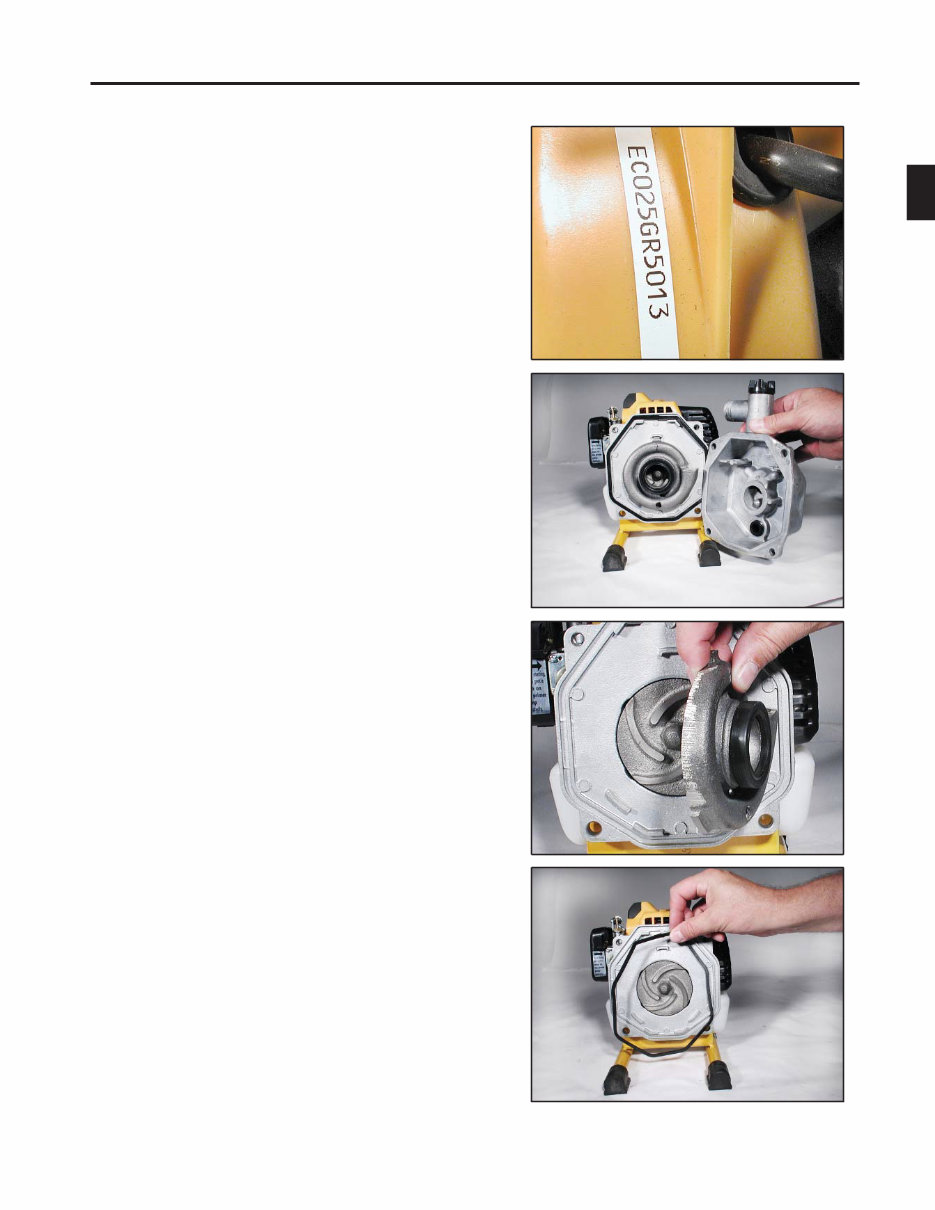
1. Remove the four outer pump housing bolts.
2. Remove the outer pump housing cover.
3. Remove the volute from the pump back plate .
4. Remove the outer pump housing to pump back plate
gasket. This will be a good time to check the gasket for
cracks, tears, and overall condition. Replace if neces-
sary.
PTG109
Service
- 6 -
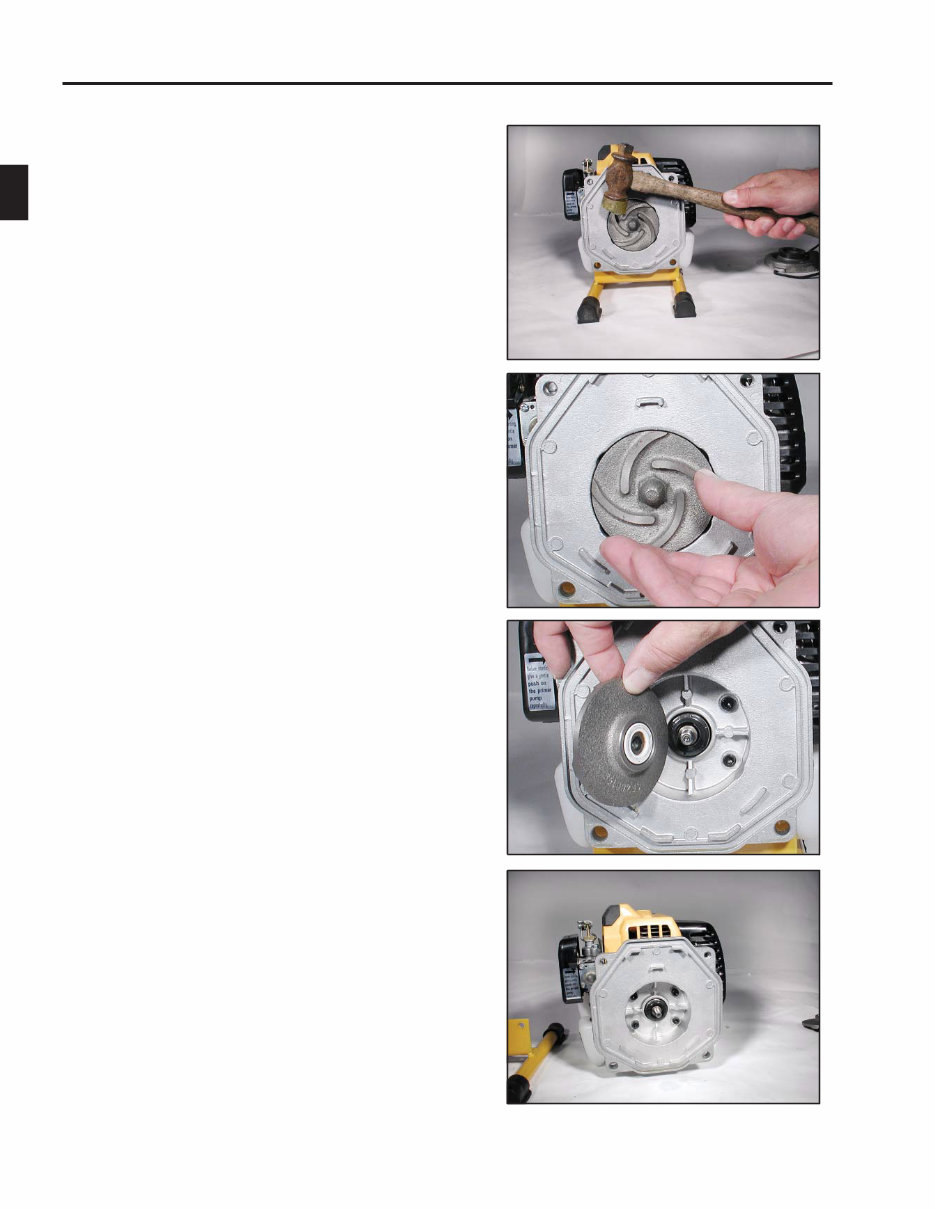
5. Loosen the impeller by hitting on one of the blades in a
counter clockwise position with a rubber mallet.
6. Turn the impeller by hand in a counter clockwise posi-
tion until free from the crankshaft of the engine.
7. Pull the impeller away from the pump back plate and
make sure that any shim(s) that might be positioned
on the crankshaft or the impeller be saved and
counted.
8. Pull the engine away from the frame.
PTG109 Service
- 7 -
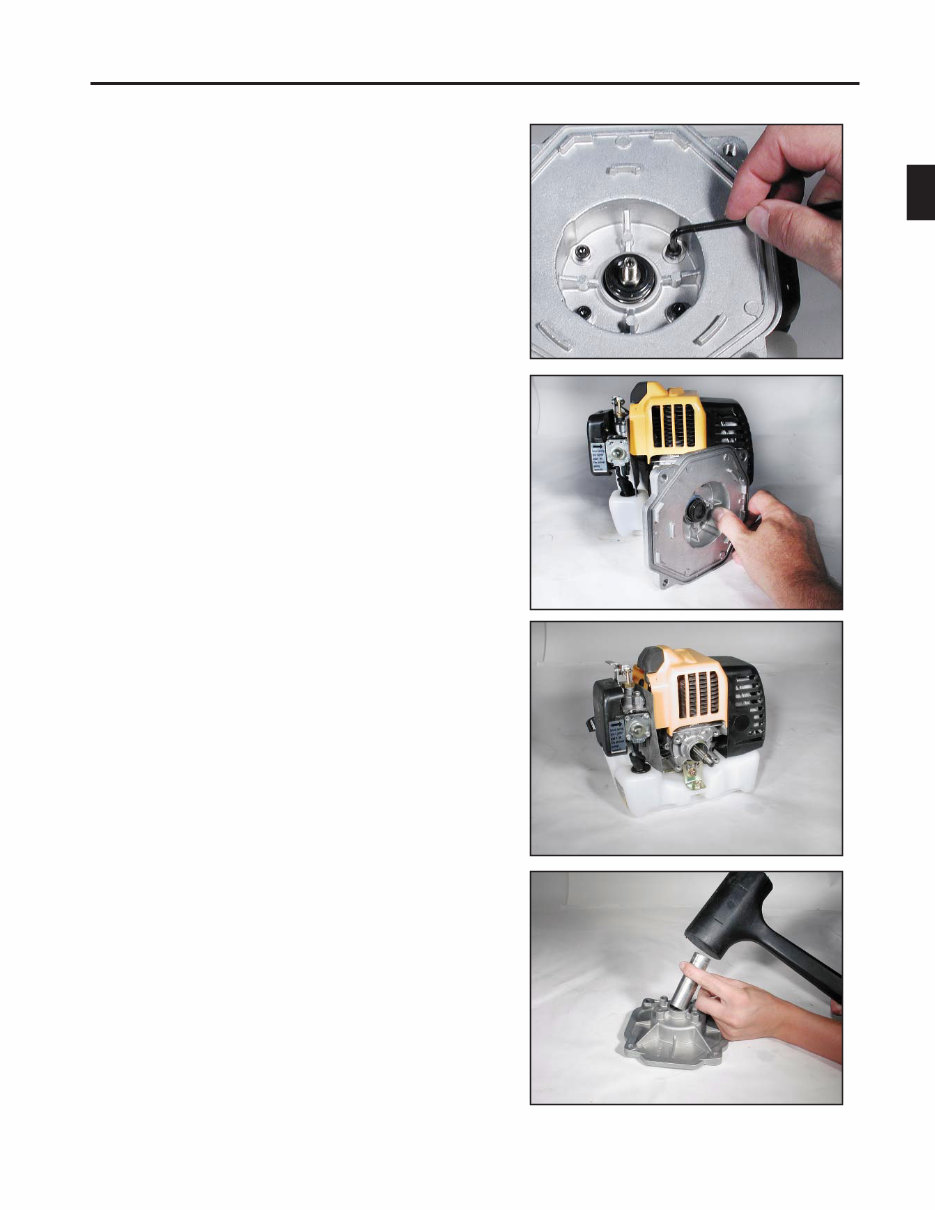
9. For engine service work, or seal replacement, the
pump back plate will need to be removed. Loosen and
remove the four bolts with a allen socket or wrench.
10. Pull the pump back plate away from the engine.
11. The engine in now separated from the pump compo-
nents for service.
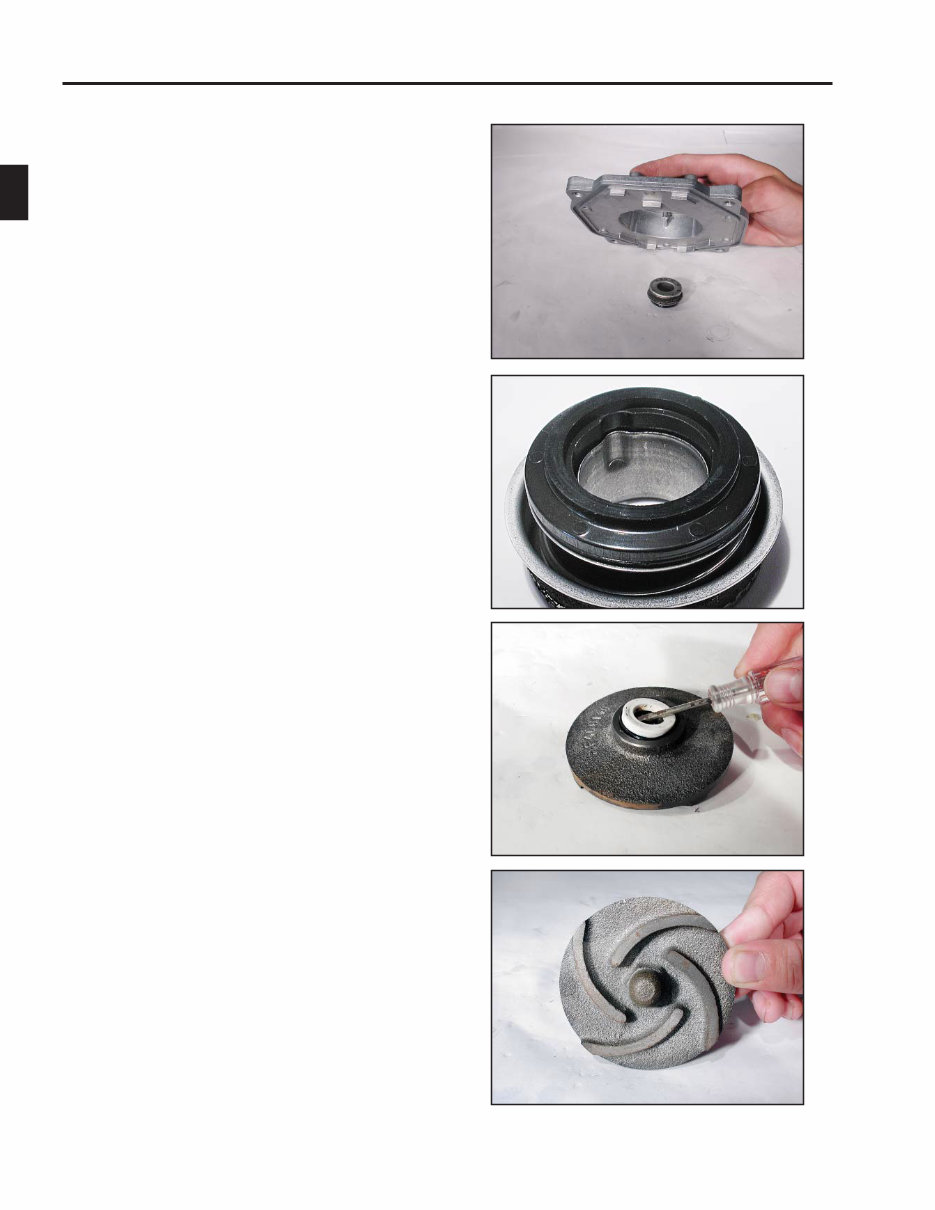
12. To remove the stationary seal from the back plate it will
be necessary to turn the pump back plate face down
on the workbench. Take a 3/4 inch socket and position
it into the cavity behind the seal.
PTG109
Service
- 8 -
14. This is what the seal will look like when in new condi-
tion. The sealing face will not have gouges, cracks,
chips or burnt edges. Replace if any of the previous
conditions apply.
13. Hit the backside of the socket until the seal drops to
the workbench below.
15. To remove the rotating seal from the impeller it might
become necessary to apply some liquid soapy water
to loosen it from the impeller. After the soapy water
loosens the seal in the impeller, take a small screw
driver and pry gently upward making sure not to
gouge the surface.
16. The impeller must be inspected for no cracks, chips,
and blades that are missing or broken off. Replace
with new if these conditions apply.
PTG109 Service
- 9 -
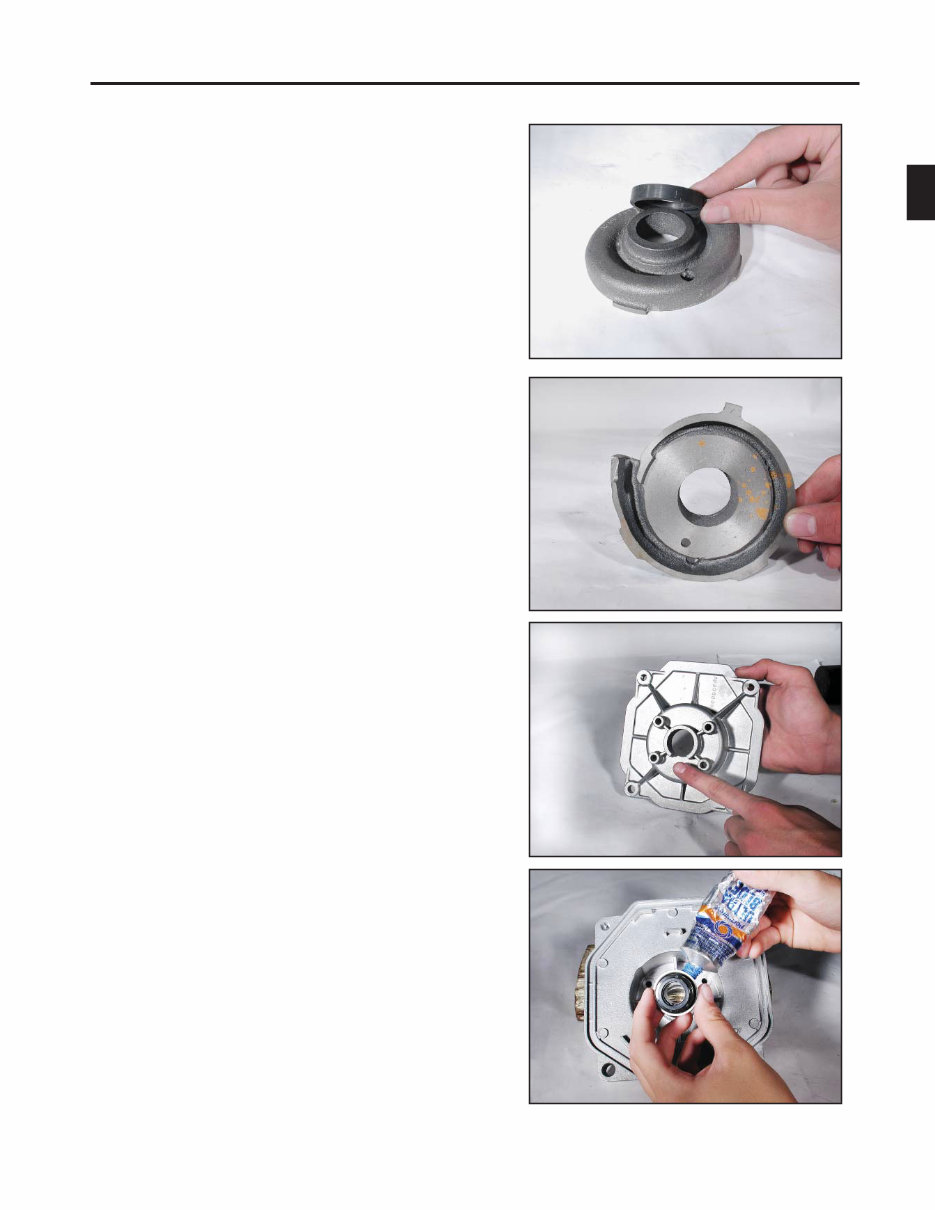
17. Check the condition of the volute seal for cracks, worn
spots, and overall condition. Replace with new if
necessary.
18. Check the condition of the volute. If cracked chipped or
bent, it must be replaced.
19. When reinstalling the back plate to the engine make
sure the weep hole faces downward. Weep hole must
be free from debris.
20. When replacing with a new seal, silicone compound
is not needed. However, if original seal is removed and
replaced back into pump back plate, then a small
amount of silicone sealant will help seal it. Place a thin
bead of sealant around the metal part of the seal.
PTG109
Service
- 10 -
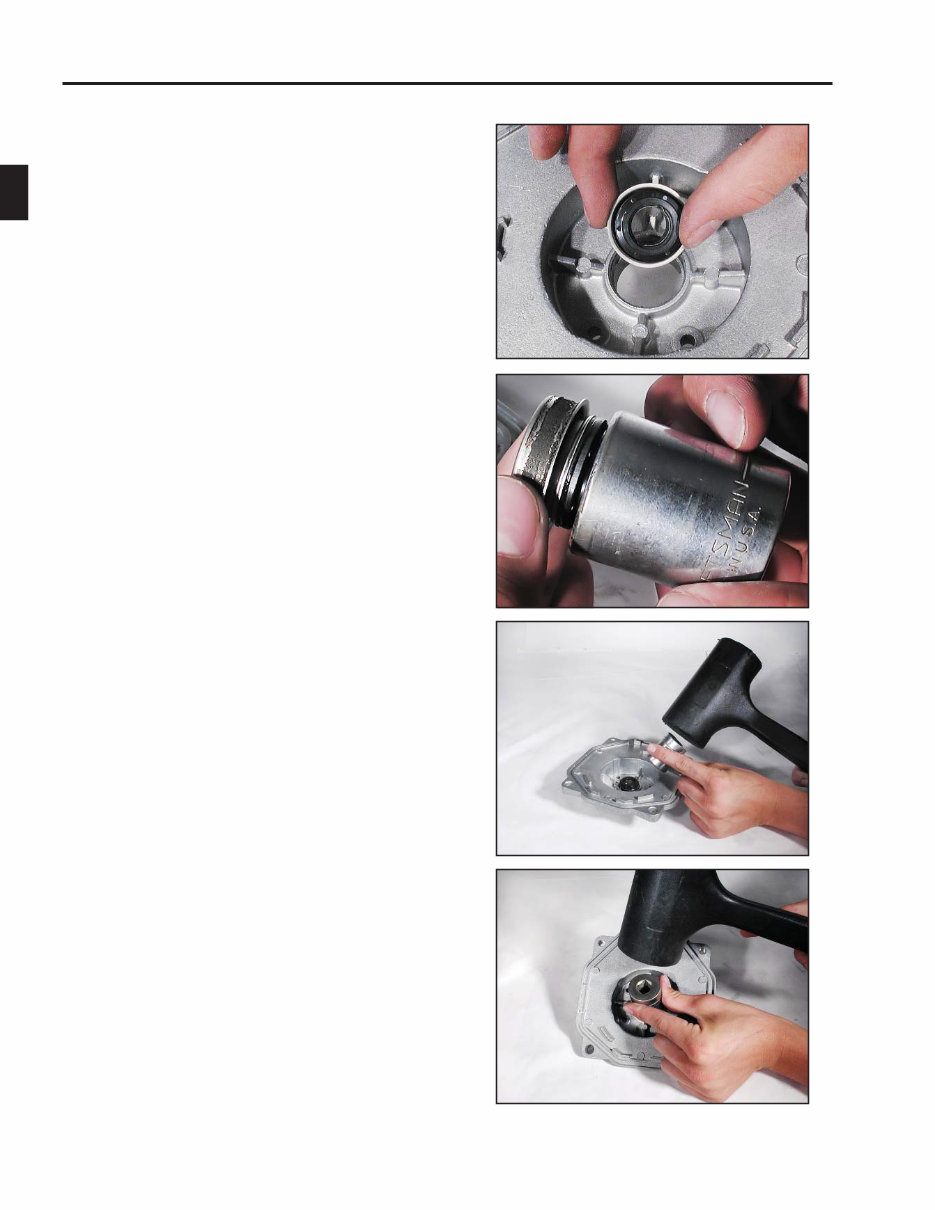
22. Using a 1" inch socket, place the socket over the seal
for installation.
21. Place the seal over the pump back plate for alignment.
23. After setting the seal in the pump back plate, set the
socket over the top.
24. Tap the seal into position, looking at the position of
the seal after each blow of the hammer to make sure it
is installing evenly.
You're Reading a Preview
What's Included?
Fast Download Speeds
Online & Offline Access
Access PDF Contents & Bookmarks
Full Search Facility
Print one or all pages of your manual
$39.99
Subaru Robin pump service manual PTG109 PVK101 PKX201
Viewed 51 Times Today

What's Included?
Fast Download Speeds
Online & Offline Access
Access PDF Contents & Bookmarks
Full Search Facility
Print one or all pages of your manual
$39.99

Secure transaction
What's Included?
Fast Download Speeds
Online & Offline Access
Access PDF Contents & Bookmarks
Full Search Facility
Print one or all pages of your manual
Description
Our service manual, PUB-PS001 Rev. 09/05, provides a comprehensive guide for the removal or repair of pump components on Subaru Robin pumps. This includes a step-by-step procedure for mechanical seal replacement and proper shimming. The manual covers models PTG109, PKV101, PKX201H, PKX201, PKX301, PKX201T, PKX301T, PKX201ST, and PKX301ST. Whether you are a professional mechanic or a DIY enthusiast, this manual is an invaluable resource for maintaining and repairing Subaru Robin pumps.


