

1996-2007 Suzuki Outboard 300HP 4 Stroke Service & Repair Manual
What's Included?
Fast Download Speeds
Online & Offline Access
Access PDF Contents & Bookmarks
Full Search Facility
Print one or all pages of your manual

Page: 1 - Suzuki Outboards 1996-07 2.5-300HP 4-stroke Repair Manual - http://www.ReadManuals.Com

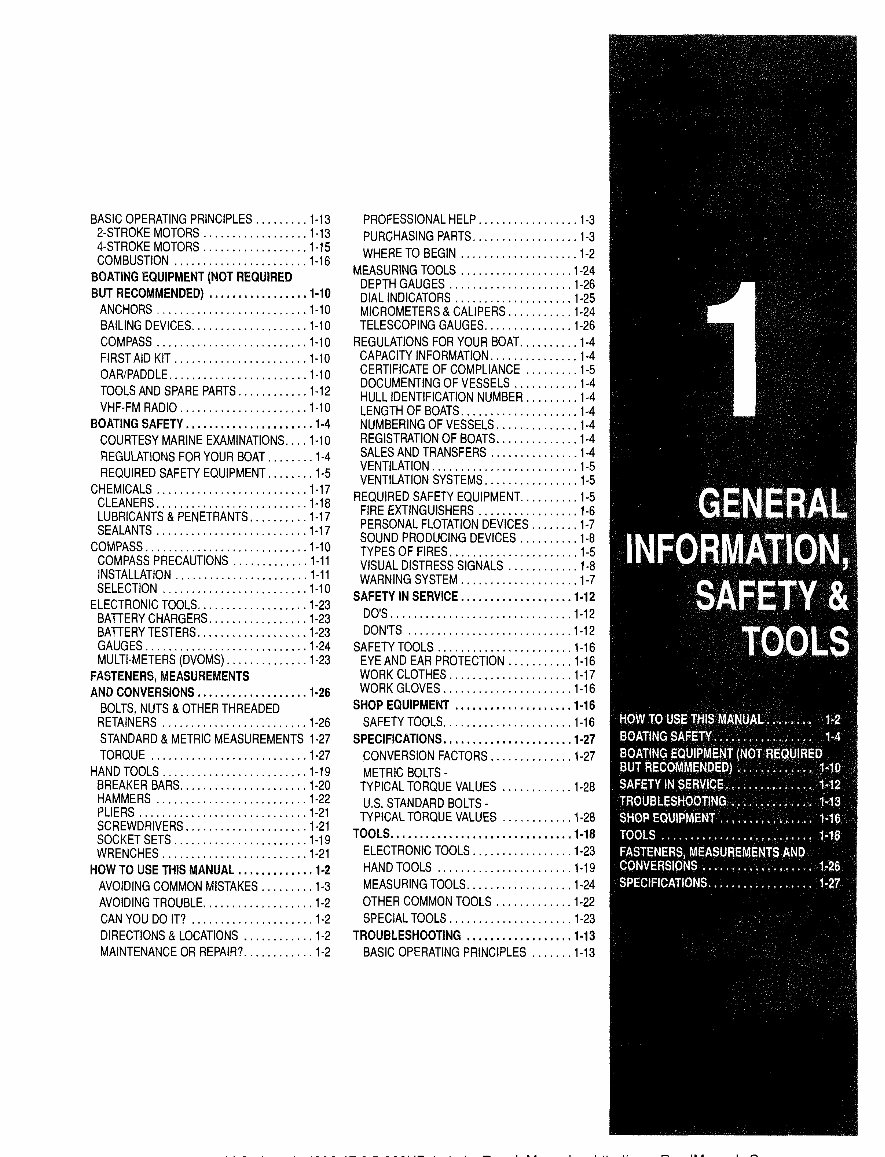
HOW TO USE THIS MANUAL
BOATING SAFETY
BOATING EQUIPMENT (NOT REQUIRED
BUT RECOMMENDED)
SAFETY IN SERVICE
TROUBLESHOOTING
SHOP EQUIPMENT
TOOLS
FASTENERS, MEASUREMENT, AND CONVERSIONS
SPECIFICATIONS
UBLESHOOTING
Page: 2 - Suzuki Outboards 1996-07 2.5-300HP 4-stroke Repair Manual - http://www.ReadManuals.Com
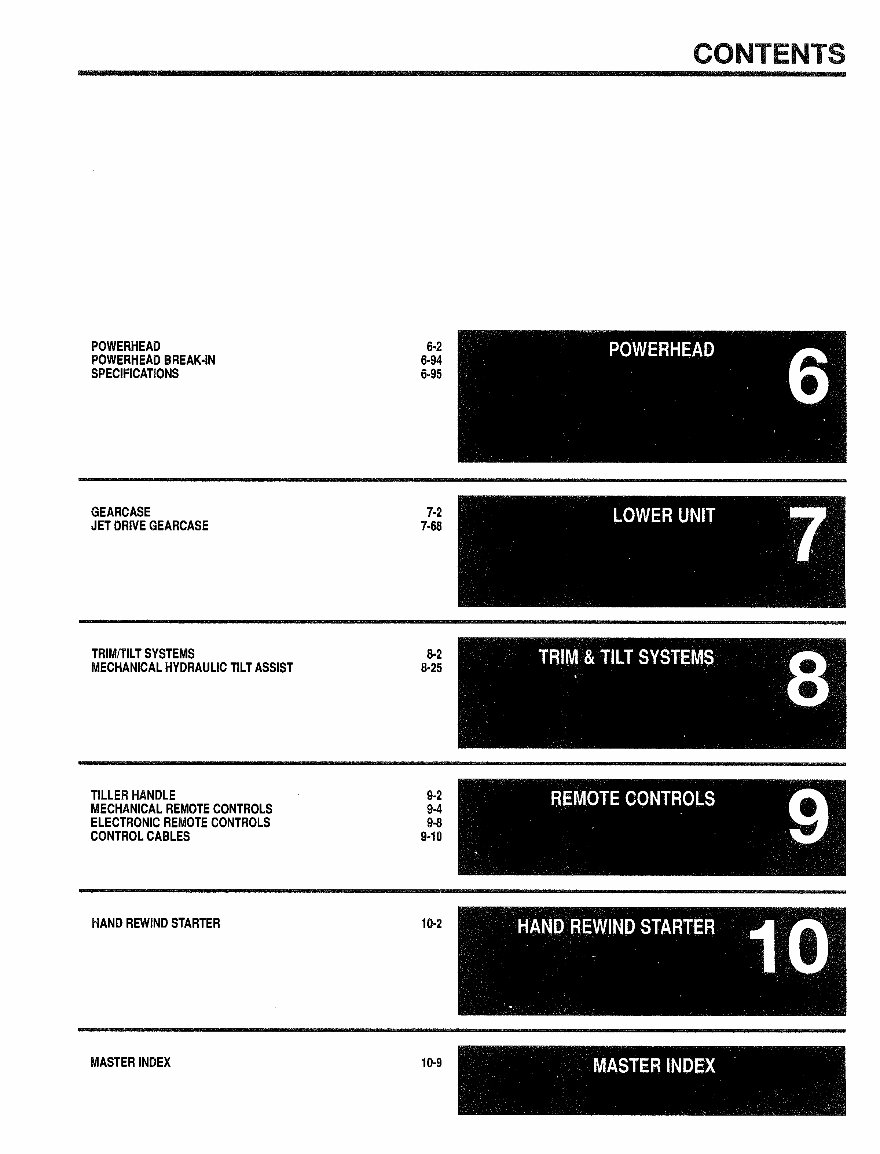
POWERHEAD
POWERHEAD BREAK-IN
SPECIFICATIONS
GEARCASE
JET DRIVE GEARCASE
TRIMRILT SYSTEMS
MECHANICAL HYDRAULIC TILT ASSIST
TILLER HANDLE
MECHANICAL REMOTE CONTROLS
ELECTRONIC REMOTE CONTROLS
CONTROL CABLES
HAND REWIND STARTER
MASTER INDEX
Page: 3 - Suzuki Outboards 1996-07 2.5-300HP 4-stroke Repair Manual - http://www.ReadManuals.Com
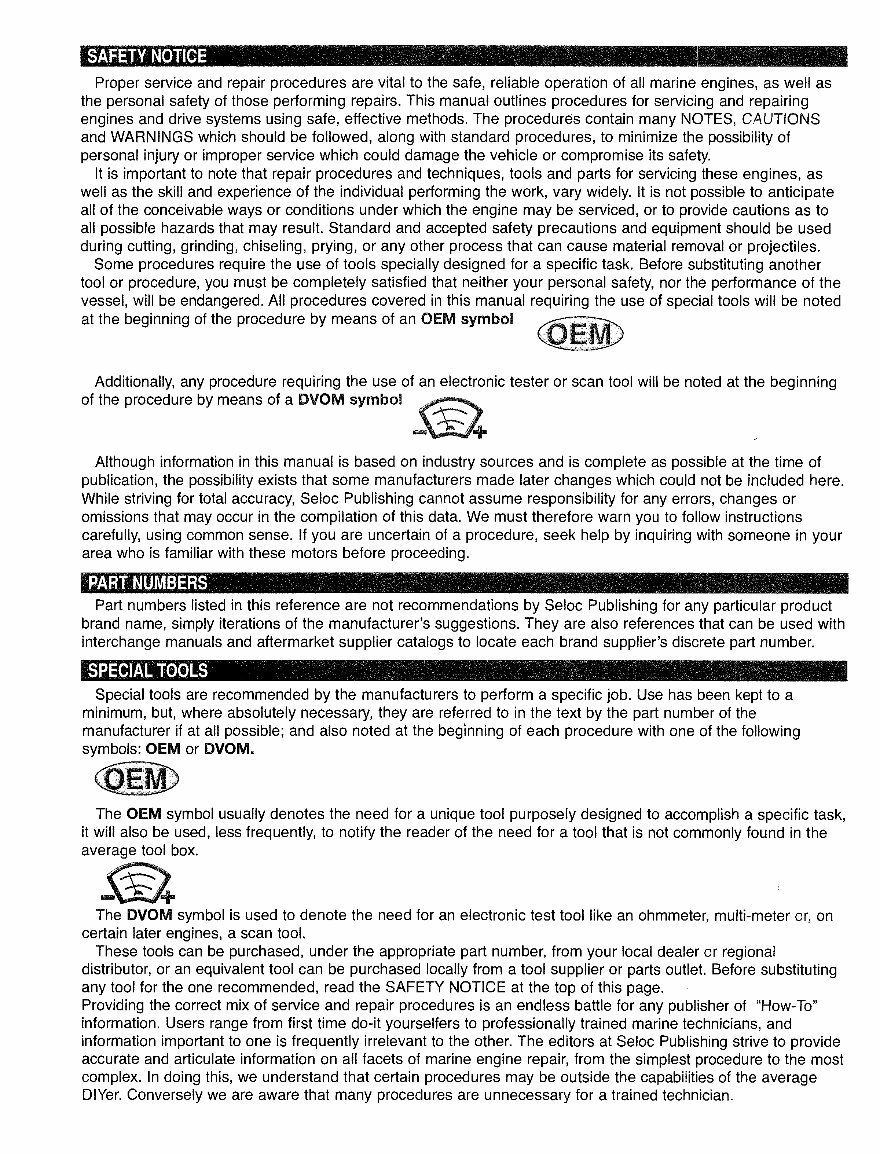
P ures are vital to the safe, re1 s, as well as
the personal safety of those performing repairs. This manual outlines procedures for servicing and repairing
engines and drive systems using safe, effective methods. The procedures contain many NOTES, CAUTIONS
and WARNINGS which should be followed, along with standard procedures, to minimize the possibility of
personal injury or improper service which could damage the vehicle or compromise its safety.
It is important to note that repair procedures and techniques, tools and parts for servicing these engines, as
well as the skill and experience of the individual performing the work, vary widely. It is not possible to anticipate
all of the conceivable ways or conditions under which the engine may be serviced, or to provide cautions as to
all possible hazards that may result. Standard and accepted safety precautions and equipment should be used
during cutting, grinding, chiseling, prying, or any other process that can cause material removal or projectiles.
Some procedures require the use of tools specially designed for a specific task. Before substituting another
tool or procedure, you must be completely satisfied that neither your personal safety, nor the performance of the
vessel, will be endangered. All procedures covered in this manual requiring the use of special tools will be noted
at the beginning of the procedure by means of an
Additionally, any procedure requiring the use of an electronic tester or scan tool will be noted at the beginning
of the procedure by means of a
Although information in this manual is based on industry sources and is complete as possible at the time of
publication, the possibility exists that some manufacturers made later changes which could not be included here.
While striving for total accuracy, Seloc Publishing cannot assume responsibility for any errors, changes or
omissions that may occur in the compilation of this data. We must therefore warn you to follow instructions
carefully, using common sense. If you are uncertain of a procedure, seek help by inquiring with someone in your
area who is familiar with these motors before proceeding.
Part numbers listed in this reference are not recommendations by Seloc Publishing for any particular product
brand name, simply iterations of the manufacturer's suggestions. They are also references that can be used with
interchange manuals and aftermarket supplier catalogs to locate each brand supplier's discrete part number.
Special tools are recommended by the manufacturers to perform a specific job. Use has been kept to a
minimum, but, where absolutely necessary, they are referred to in the text by the part number of the
manufacturer if at all possible; and also noted at the beginning of each procedure with one of the following
symbols: OEM or DVOM.
The OEM symbol usually denotes the need for a unique tool purposely designed to accomplish a specific task,
it will also be used, less frequently, to notify the reader of the need for a tool that is not commonly found in the
average tool box.
symbol is used to denote the need for an electronic test tool like an ohmmeter, multi-meter or, on
certain later engines, a scan tool.
These tools can be purchased, under the appropriate part number, from your local dealer or regional
distributor, or an equivalent tool can be purchased locally from a tool supplier or parts outlet. Before substituting
any tool for the one recommended, read the SAFETY NOTICE at the top of this page.
Providing the correct mix of service and repair procedures is an endless battle for any publisher of "HOW-TO"
information. Users range from first time do-it yourselfers to professionally trained marine technicians, and
information important to one is frequently irrelevant to the other. The editors at Seloc Publishing strive to provide
accurate and articulate information on all facets of marine engine repair, from the simplest procedure to the most
complex. In doing this, we understand that certain procedures may be outside the capabilities of the average
DIYer. Conversely we are aware that many procedures are unnecessary for a trained technician.
Page: 4 - Suzuki Outboards 1996-07 2.5-300HP 4-stroke Repair Manual - http://www.ReadManuals.Com

In order to provide all oi our users, particularly the DIYers, with a feeling for the scope of a given procedure or
task before tackling it we have included a rating system denoting the suggested skill level needed when
performing a particular procedure. One of the following icons will be included at the beginning of most
procedures:
SY
These procedures are aimed primarily at the DIYer and can be classified, for
the most part, as basic maintenance procedures; battery, fluids, filters, plugs, etc. Although certainly valuable to
any experience level, they will generally be of little importance to a technician.
DERA TE
. These procedures are suited for a DIYer with experience and a
working knowledge of mechanical procedures. Even an advanced DIYer or professional technician will
occasionally refer to these procedures. They will generally consist of component repair and service procedures,
adjustments and minor rebuilds.
CULT
These procedures are aimed at the advanced DIYer and professional
technician. They will deal with diagnostics, rebuilds and internal engineldrive components and will frequently
require special tools.
LED
. These procedures are aimed at highly skilled technicians and should not
be attempted without previous experience. They will usually consist of machine work, internal engine work and
gear case rebuilds.
Please remember one thing when considering the above ratings-they are a guide for judging the complexity
of a given procedure and are subjective in nature. Only you will know what your experience level is, and only
you will know when a procedure may be outside the realm of your capability. First time DIYer, or life-long marine
technician, we all approach repair and service differently so an easy procedure for one person may be a difficult
procedure for another. regardless of experience level. All skill level ratings are meant to be used as a guide only!
Use them to help make a judgement before undertaking a particular procedure, but by all means read through
the procedure first and make your own decision-after all, our mission at Seloc is to make boat maintenance
and repair easier for everyone whether you are changing the oil or rebuilding an engine. Enjoy beating!
No part of this publication may be reproduced, transmitted or stored in any form or by any means, electronic or
mechanical, including photocopy, recording, or by information storage or retrieval system, without prior written
permission from the publisher.
Seloc Publishing expresses appreciation to the following companies who supported the production of this
book:
Marine Mechanics Institute-Orlando, FL
Seloc Publishing would like to express thanks to the fine companies who participate in the production of all our
books:
Hand tools supplied by Craftsman are used during all phases of our vehicle teardown and photography.
* Many of the fine specialty tools used in our procedures were provided courtesy of Lisle Corporation.
Much of our shop's electronic testing equipment was supplied by Universal Enterprises Inc. (UEI).
Page: 5 - Suzuki Outboards 1996-07 2.5-300HP 4-stroke Repair Manual - http://www.ReadManuals.Com
BASIC OPERATING PRINCIPLES ......... 1.13
2-STROKE MOTORS .................. 1-13
4-STROKE MOTORS .................. 1-15
COMBUSTION ....................... 1.1 6
BOATING EQUIPMENT (NOT REQUIRED
BUT RECOMMENDED) ................. 1.10
ANCHORS .......................... 1-10
BAILING DEVICES .................... 1-10
COMPASS .......................... 1.10
FIRST AID KIT ....................... 1.10
OARIPADDLE ........................ 1.10
TOOLS AND SPARE PARTS ............ 1.12
VHF-FM RADIO ...................... 140
BOATING SAFETY ...................... 1.4
COURTESY MARINE EXAMINATIONS .... 1-10
REGULATIONS FOR YOUR BOAT ........ 1.4
REQUIRED SAFETY EQUIPMENT ........ 1.5
CHEMICALS .......................... 1.17
CLEANERS .......................... 1.18
LUBRICANTS & PENETRANTS .......... 1.17
SEALANTS .......................... 1.17
COMPASS ............................ 1.10
COMPASS PRECAUTIONS ............. 1.1 1
INSTALLATION ....................... 1-1 1
SELECTION ......................... 1.10
ELECTRONIC TOOLS ................... 1-23
BATTERY CHARGERS ................. 1.23
BATTERY TESTERS ................... 1.23
GAUGES ............................ 1.24
MULTI-METERS (DVOMS) .............. 1.23
FASTENERS. MEASUREMENTS
AND CONVERSIONS ................... 1.26
BOLTS. NUTS & OTHER THREADED
RETAINERS ......................... 1-26
STANDARD & METRIC MEASUREMENTS 1-27
TORQUE ........................... 1.27
HAND TOOLS ......................... 1.19
BREAKER BARS ...................... 1.20
HAMMERS .......................... 1.22
PLIERS ............................. 1.21
SCREWDRIVERS ..................... 1.21
SOCKET SETS ....................... 1.19
WRENCHES ......................... 1.21
HOW TO USE THIS MANUAL ............. 1.2
AVOIDING COMMON MISTAKES ......... 1.3
AVOIDING TROUBLE ................... 1.2
CAN YOU DO IT? ..................... 1.2
DIRECTIONS & LOCATIONS ............ 1-2
MAINTENANCE OR REPAIR? ............ 1-2
................. PROFESSIONAL HELP 1.3
.................. PURCHASING PARTS 1.3
WHERE TO BEGIN .................... 1.2
MEASURING TOOLS ................... 1.24
DEPTH GAUGES ..................... 1.26
DIAL INDICATORS .................... 1-25
MICROMETERS & CALIPERS ........... 1.24
TELESCOPING GAUGES ............... 1-26
REGULATIONS FOR YOUR BOAT .......... 1.4
CAPACITY INFORMATION ............... 1.4
CERTIFICATE OF COMPLIANCE ......... 1.5
DOCUMENTING OF VESSELS ........... 1.4
HULL IDENTIFICATION NUMBER ......... 1.4
LENGTH OF BOATS .................... 1.4
NUMBERING OF VESSELS .............. 1.4
REGISTRATIONOF BOATS .............. 1.4
SALES AND TRANSFERS ............... 1.4
......................... VENTILATION 1.5
VENTILATION SYSTEMS ................ 1-5
REQUIRED SAFETY EQUIPMENT .......... 1.5
FIRE EXTINGUISHERS ................. 1-6
PERSONAL FLOTATION DEVICES ........ 1.7
SOUND PRODUCING DEVICES .......... 1-8
TYPES OF FIRES ...................... 1.5
VISUAL DISTRESS SIGNALS ............ 1-8
WARNING SYSTEM .................... 1.7
SAFETY IN SERVICE ................... 1.12
DO'S ............................... 1.12
DON'TS ............................ 1.12
SAFETY TOOLS ....................... 1.1 6
EYE AND EAR PROTECTION ........... 1.16
WORK CLOTHES ..................... 1.17
WORK GLOVES ...................... 1.16
SHOP EQUIPMENT .................... 1.16
SAFETY TOOLS ...................... 1.16
SPECIFICATIONS ...................... 1.27
CONVERSION FACTORS .............. 1-27
METRIC BOLTS .
TYPICAL TORQUE VALUES ............ 1.28
U.S. STANDARD BOLTS .
TYPICAL TORQUE VALUES ............ 1.28
TOOLS ............................... 1-18
ELECTRONIC TOOLS ................. 1.23
HAND TOOLS ....................... 1.1 9
MEASURING TOOLS .................. 1.24
OTHER COMMON TOOLS ............. 1.22
SPECIAL TOOLS ..................... 1.23
TROUBLESHOOTING .................. 1.13
BASIC OPERATING PRINCIPLES ....... 1.1 3
Page: 6 . Suzuki Outboards 1996-07 2.5-300HP 4-stroke Repair Manual . http://www.ReadManuals.Com
This service is designed to be a handy reference guide to maintaining and
repairing your Suzuki Outboard. We strongly believe that regardless of how
many or how few year's experience you may have, there is something new
waiting here for you.
This service covers the topics that a factory service manual (designed for
factory trained mechanics) and a manufacturer owner's manual (designed
more by lawyers than boat owners these days) covers. It will take you
through the basics of maintaining and repairing your outboard, step-by-step,
to help you understand what the factory trained mechanics already know by
heart. By using the information in this service, any boat owner should be
able to make better informed decisions about what they need to do to
maintain and enjoy their outboard.
Even if you never plan on touching a wrench (and if so, we hope that we
can change your mind), this service will still help you understand what a
mechanic needs to do in order to maintain your engine.
If you are not the type who is prone to taking a wrench to something,
NEVER FEAR. The procedures provided here cover topics at a level virtually
anyone will be able to handle. And just the fact that you purchasedthis
service shows your interest in better understanding your outboard.
You may even find that maintaining your outboard yourself is preferable in
most cases. From a monetary standpoint, it could also be beneficial. The
money spent on hauling your boat to a marina and paying a tech to service
the engine could buy you fuel for a whole weekend of boating. And, if you
are really that unsure of your own mechanical abilities, at the very least you
should fully understand what a marine mechanic does to your boat. You may
decide that anything other than maintenance and adjustments should be
performed by a mechanic (and that's your call), but if so you should know
that every time you board your boat, you are placing faith in the mechanic's
work and trusting him or her with your well-being, and maybe your life.
It should also be noted that in most areas a factory-trained mechanic will
command a hefty hourly rate for off site service. If the tech comes to you this
hourly rate is often charged from the time they leave their shop to the time
that they return home. When service is performed at a boat yard, the clock
usually starts when they go out to get the boat and bring it into the shop and
doesn't end until it is tested and put back in the yard. The cost savings in
doing the job yourself might be readily apparent at this point.
Of course, if even you're already a seasoned Do-It-Yourselfer or a
Professional Technician, you'll find the procedures, specifications, special
tips as well as the schematics and illustrations helpful when tackling a new
job on a motor.
To help you decide if a task is within your skill level, procedures will
often be rated using a wrench symbol in the text. When present, the
number of wrenches designates how difficult we feel the procedure to
be on a 1-4 scale. For more details on the wrench icon rating system,
please refer to the information under Skill Levels at the beginning of
this service.
Before spending any money on parts, and before removing any nuts or
bolts, read through the entire procedure or topic. This will give you the
overall view or wnai tools and supplies will be required to perform the
procedure or what questions need to be answered before purchasing parts.
So read ahead and plan ahead. Each operation should be approached
logically and all procedures thoroughly understood before attempting any
work.
Some procedures in this service may require you to "label and disconnect
a . ' a group of lines, hoses or wires. Don't be lulled into thinking you can
remember where everything goes - you won't. If you reconnect or install a
part incorrectly, the motor may operate poorly, if at all. If you hook up
electrical wiring incorrectly, you may instantly learn a very expensive lesson.
A piece of masking tape, for example, placed on a hose and another on
its fitting will allow you to assign your own label such as the letter "A", or a
short name. As long as you remember your own code, you can reconnect
the lines by matching letters or names. Do remember that tape will dissolve
when saturated in some fluids (especially cleaning solvents). If a component
is to be washed or cleaned, use another method of identification. A
permanent felt-tipped marker can be very handy for marking metal parts; but
remember that some solvents will remove permanent marker. A scribe can
be used to carefully etch a small mark in some metal parts, but be sure NOT
to do that on a gasket-makingsurface.
SAFETY is the most important thing to remember when performing
maintenance or repairs. Be sure to read the information on safety in this
service.
Proper maintenance is the key to long and trouble-free engine life, and
the work can yield its own rewards. A properly maintained engine performs
better than one that is neglected. As a conscientious boat owner, set aside a
Saturday morning, at least once a month, to perform a thorough check of
items that could cause problems. Keep your own personal log to jot down
which services you performed, how much the parts cost you, the date, and
the amount of hours on the engine at the time. Keep all receipts for parts
purchased, so that they may be referred to in case of related problems or to
determine operating expenses. As a do-it-yourselfer,these receipts are the
only proof you have that the required maintenance was performed. In the
event of a warranty problem (on new motors), these receipts can be
invaluable.
It's necessary to mention the difference between maintenance and repair.
Maintenance includes routine inspections, adjustments, and replacement of
parts that show signs of normal wear. Maintenance compensates for wear or
deterioration. Repair implies that something has broken or is not working. A
need for repair is often caused by lack of maintenance.
For example: draining and refilling the gearcase oil is TCTntenance
recommended by all manufacturers at specific intervals. Failure to do this
can allow internal corrosion or damage and impair the operation of the motor,
requiring expensive repairs. While no maintenance program can prevent
items from breaking or wearing out, a general rule can be stated:
MAINTENANCE IS CHEAPER THAN REPAIR.
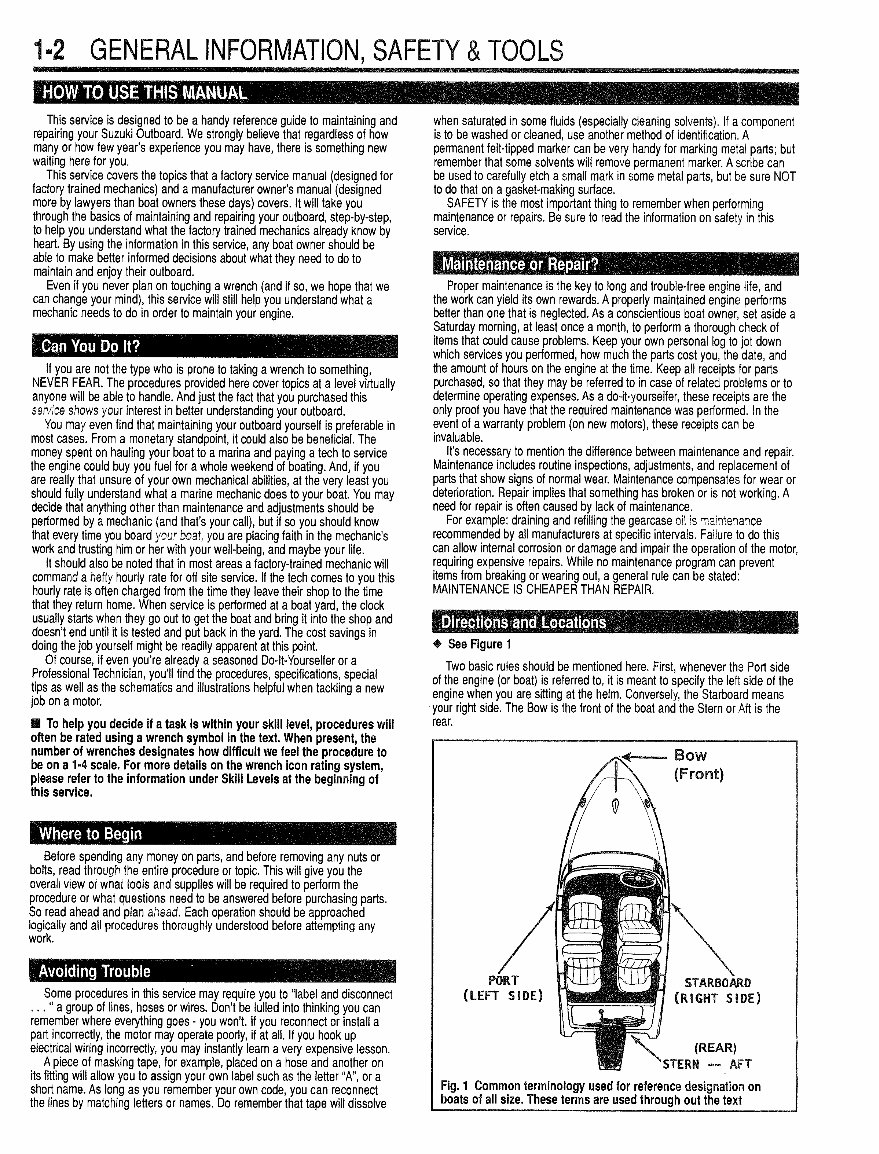
See Figure 1
Two basic rules should be mentioned here. First, whenever the Port side
of the engine (or boat) is referred to, it is meant to specify the left side of the
engine when you are sitting at the helm. Conversely, the Starboard means
your right side. The Bow isthe front of the boat and the Stern or Aft is the
rear.
Fig. 1 Common terminology used for reference designation on
boats of all size. These terms are used throuah out the text
Page: 7 - Suzuki Outboards 1996-07 2.5-300HP 4-stroke Repair Manual - http://www.ReadManuals.Com
Most screws and bolts are removed by turning counterclockwise, and
tightened by turning clockwise. An easy way to remember this is: righty-
tighty; lefty-loosey. Corny, but effective. And if you are really dense (and we
have all been so at one time or another), buy a ratchet that is marked ON
and OFF (like Snap-on@ ratchets), or mark your own. This can be especially
helpful when you are bent over backwards, upside down or otherwise turned
around when working on a boat-mountedcomponent.
Occasionally, there are some things when working on an outboard that
are bevond the caoabilities or tools of the averaae Do-It-Yourselfer (DIYer).
This shouldn't include most of the topics of this service, but you willhave to
be the judge. Some engines require special tools or a selection of special
parts, even for some basic maintenance tasks.
Talk to other boaters who use the same model of engine and speak with a
trusted marina to find if there is a particular system or component on your
engine that is difficult to maintain.
You will have to decide for yourself where basic maintenance ends and
where professionalservice should begin. Take your time and do your
research first (startingwith the information contained within) and then make
your own decision. if you really don't feel comfortable with attempting a
procedure, DON'T DO IT. If you've gotten into something that may be over
your head, don't panic. Tuck your tail between your legs and call a marine
mechanic. Marinas and independent shops will be able to finish a job for
you. Your ego may be damaged, but your boat will be properly restored to its
full running order. So, as long as you approach jobs slowly and carefully, you
really have nothing to lose and everything to gain by doing it yourself.
On the other hand, even the most complicated repair is within the ability
of a person who takes their time and follows the steps of a procedure.A rock
climber doesn't run up the side of a cliff, helshe takes it one step at a time
and in the end, what looked difficult or impossible was conquerable. Worry
about one step at a time.
See Figures 2 and 3
When purchasing parts there are two things to consider. The first is quality
and the second is to be sure to get the correct part for your engine. To get
quality parts, always deal directly with a reputable retailer. To get the proper
parts always refer to the model number from the information tag on your
engine prior to calling the parts counter. An incorrect part can adversely
affect your engine performance and fuel economy, and will cost you more
money and aggravation in the end.
Just remember a tow back to shore will cost plenty. That charge is per
hour from the time the towboat leaves their home port, to the time they return
to their home port. Get the picture. . .$$$?
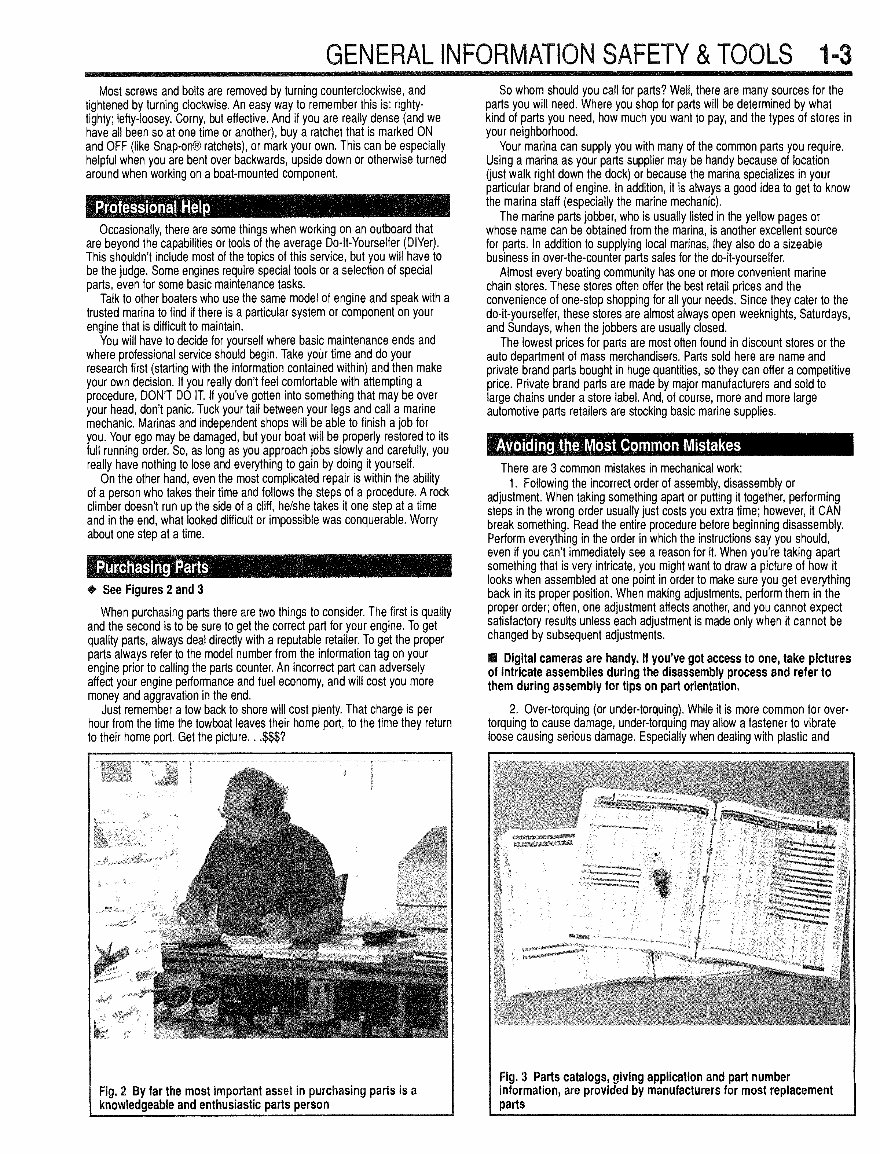
Fig. 2 By far the most important asset in purchasing parts is a
knowledgeable and enthusiastic parts person
So whom should you call for parts? Well, there are many sources for the
parts you will need. Where you shop for parts will be determined by what
kind of parts you need, how much you want to pay, and the types of stores in
your neighborhood.
Your marina can supply you with many of the common parts you require.
Using a marina as your parts supplier may be handy because of location
(just walk right down the dock) or because the marina specializes in your
particular brand of engine. In addition, it is always a good idea to get to know
the marina staff (especially the marine mechanic).
The marine parts jobber, who is usually listed in the yellow pages or
whose name can be obtained from the marina, is another excellent source
for parts. In addition to supplying local marinas, they also do a sizeable
business in over-the-counter parts sales for the do-it-yourselfer.
Almost every boating community has one or more convenient marine
chain stores. These stores often offer the best retail prices and the
convenience of one-stop shopping for all your needs. Since they cater to the
do-it-yourselfer,these stores are almost always open weeknights, Saturdays,
and Sundays, when the jobbers are usually closed.
The lowest prices for parts are most often found in discount stores or the
auto department of mass merchandisers. Parts sold here are name and
private brand parts bought in huge quantities, so they can offer a competitive
price. Private brand parts are made by major manufacturers and sold to
large chains under a store label. And, of course, more and more large
automotive parts retailers are stocking basic marine supplies.
There are 3 common mistakes in mechanical work:
1. Following the incorrect order of assembly, disassembly or
adjustment. When taking something apart or putting it together, performing
steps in the wrong order usually just costs you extra time; however, it CAN
break something. Read the entire procedure before beginning disassembly.
Perform everything in the order in which the instructions say you should,
even if you can't immediately see a reason for it. When you're taking apart
something that is very intricate, you might want to draw a picture of how it
looks when assembled at one point in order to make sure you get everything
back in its proper position. When making adjustments, perform them in the
proper order; often, one adjustment affects another, and you cannot expect
satisfactory results unless each adjustment is made only when it cannot be
changed by subsequent adjustments.
B Digital cameras are handy. If you've got access to one, take pictures
of intricate assemblies during the disassembly process and refer to
them during assembly for tips on part orientation.
2. Over-torauina (or under-torauina). While it is more common for over-
torquing to cause damage, under-torquingmay allow a fastener to vibrate
loose causing serious damage. Especially when dealing with plastic and
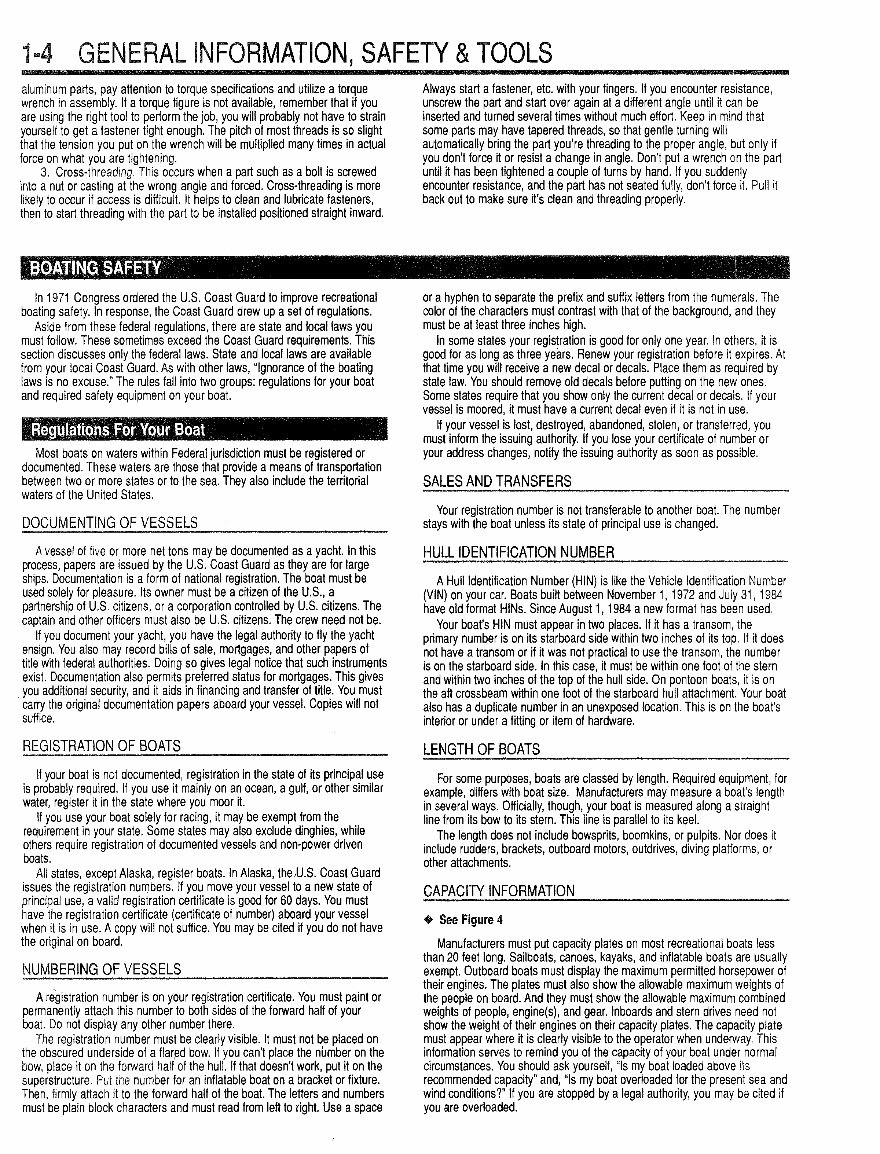
Fig. 3 Parts catalogs, giving application and part number
information, are provided by manufacturers for most replacement
parts
Page: 8 - Suzuki Outboards 1996-07 2.5-300HP 4-stroke Repair Manual - http://www.ReadManuals.Com
aluminum parts, pay attention to torque specifications and utilize a torque
wrench in assembly. If a torque figure is not available, remember that if you
are using the right tool to perform the job, you will probably not have to strain
yourself to get a fastener tight enough. The pitch of most threads is so slight
that the tension you put on the wrench will be multiplied many times in actual
force on what you are tightening.
3. Cross-threading, This occurs when a part such as a bolt is screwed
into a nut or casting at the wrong angle and forced. Cross-threadingis more
likely to occur if access is difficult. It helps to clean and lubricate fasteners,
then to start threading with the part to be installed positioned straight inward.
Always start a fastener, etc. with your fingers. If you encounter resistance,
unscrew the part and start over again at a different angle until it can be
inserted and turned several times without much effort. Keep in mind that
some parts may have tapered threads, so that gentle turning will
automatically bring the part you're threading to the proper angle, but only if
you don't force it or resist a change in angle. Don't put a wrench on the part
until it has been tightened a couple of turns by hand. If you suddenly
encounter resistance, and the part has not seated fully, don't force it. Pull it
back out to make sure it's clean and threading properly.
In 1971 Congress ordered the US. Coast Guard to improve recreational
boating safety. In response, the Coast Guard drew up a set of regulations.
Aside from these federal regulations, there are state and local laws you
must follow. These sometimes exceed the Coast Guard requirements. This
section discusses only the federal laws. State and local laws are available
from your local Coast Guard. As with other laws, "Ignorance of the boating
laws is no excuse." The rules fall into two groups: regulations for your boat
and required safety equipment on your boat.
Most boats on waters within Federaljurisdiction must be registered or
documented. These waters are those that provide a means of transportation
between two or more states or to the sea. They also include the territorial
waters of the United States.
DOCUMENTING OF VESSELS
A vessel of five or more net tons may be documented as a yacht. In this
process, papers are issued by the US. Coast Guard as they are for large
ships. Documentation is a form of national registration. The boat must be
used solely for pleasure. Its owner must be a citizen of the U.S., a
partnership of U.S. citizens, or a corporation controlled by US. citizens. The
captain and other officers must also be US. citizens. The crew need not be.
If you document your yacht, you have the legal authority to fly the yacht
ensign. You also may record bills of sale, mortgages, and other papers of
title with federal authorities. Doing so gives legal notice that such instruments
exist. Documentation also permits preferred status for mortgages. This gives
you additional security, and it aids in financing and transferoftitle. You must
carry the original documentationpapers aboard your vessel. Copies will not
suffice.
REGISTRATION OF BOATS
If your boat is not documented, registration in the state of its principal use
is probably required. If you use it mainly on an ocean, a gulf, or other similar
water, register it in the state where you moor it.
If you use your boat solely for racing, it may be exempt from the
requirement in your state. Some states may also exclude dinghies, while
others require registration of documented vessels and non-power driven
boats.
All states, except Alaska, register boats. In Alaska, theAJ.S. Coast Guard
issues the registration numbers. If you move your vessel to a new state of
principal use, a valid registration certificate is good for 60 days. You must
have the registration certificate (certificate of number) aboard your vessel
when it is in use. A copy will not suffice. You may be cited if you do not have
the original on board.
NUMBERING OF VESSELS
A registration number is on your registrationcertificate. You must paint or
permanently attach this number to both sides of the forward half of your
boat. Do not display any other number there.
The registration number must be clearly visible. It must not be placed on
the obscured underside of a flared bow. If you can't place the number on the
bow, place it on the forward half of the hull. If that doesn't work, put it on the
superstructure. Put the number for an inflatable boat on a bracket or fixture.
Then, firmly attach it to the forward half of the boat. The letters and numbers
must be plain block characters and must read from left to right. Use a space
or a hyphen to separate the prefix and suffix letters from the numerals. The
color of the characters must contrast with that of the background, and they
must be at least three inches high.
In some states your registration is good for only one year. In others, it is
good for as long as three years. Renew your registration before it expires. At
that time you will receive a new decal or decals. Place them as required by
state law. You should remove old decals before putting on the new ones.
Some states require that you show only the current decal or decals. If your
vessel is moored, it must have a current decal even if it is not in use.
If your vessel is lost, destroyed, abandoned, stolen, or transferred, you
must inform the issuing authority. If you lose your certificate of number or
your address changes, notify the issuing authority as soon as possible.
SALES AND TRANSFERS
Your registration number is not transferable to another boat. The number
stays with the boat unless its state of principal use is changed.
HULL IDENTIFICATIONNUMBER
A Hull Identification Number (HIN) is like the Vehicle Identification Number
(VIN) on your car. Boats built between November 1, 1972 and July 31, 1984
have old format HINs. Since August 1,1984 a new format has been used.
Your boat's HIN must appear in two places. If it has a transom, the
primary number is on its starboard side within two inches of its top. If it does
not have a transom or if it was not practical to use the transom, the number
is on the starboard side. In this case, it must be within one foot of the stern
and within two inches of the top of the hull side. On pontoon boats, it is on
the aft crossbeam within one foot of the starboard hull attachment. Your boat
also has a duplicate number in an unexposed location. This is on the boat's
interior or under a fitting or item of hardware.
LENGTH OF BOATS
For some purposes, boats are classed by length. Required equipment, for
example, differs with boat size. Manufacturers may measure a boat's length
in several ways. Officially, though, your boat is measured along a straight
line from its bow to its stem. This line is parallel to its keel.
The length does not include bowsprits, boomkins, or pulpits. Nor does it
include rudders, brackets, outboard motors, outdrives, diving platforms, or
other attachments.
CAPACITY INFORMATION
@ See Figure 4
Manufacturers must put capacity plates on most recreational boats less
than 20 feet long. sailboats, canoes; kayaks, and inflatable boats are usually
exemot. Outboard boats must disolav the maximum permitted horseuower of
their engines. The plates must also show the allowable maximum weights of
the people on board. And they must show the allowable maximum combined
weights of people, engine(s), and gear. Inboards and stem drives need not
show the weight of their engines on their capacity plates. The capacity plate
must appear where it is clearly visible to the operator when underway. This
information serves to remind you of the capacity of your boat under normal
circumstances. You should ask yourself, "Is my boat loaded above its
recommended capacity" and, "Is my boat overloadedfor the present sea and
wind conditions?" If you are stopped by a legal authority, you may be cited if
you are overloaded.
Page: 9 - Suzuki Outboards 1996-07 2.5-300HP 4-stroke Repair Manual - http://www.ReadManuals.Com
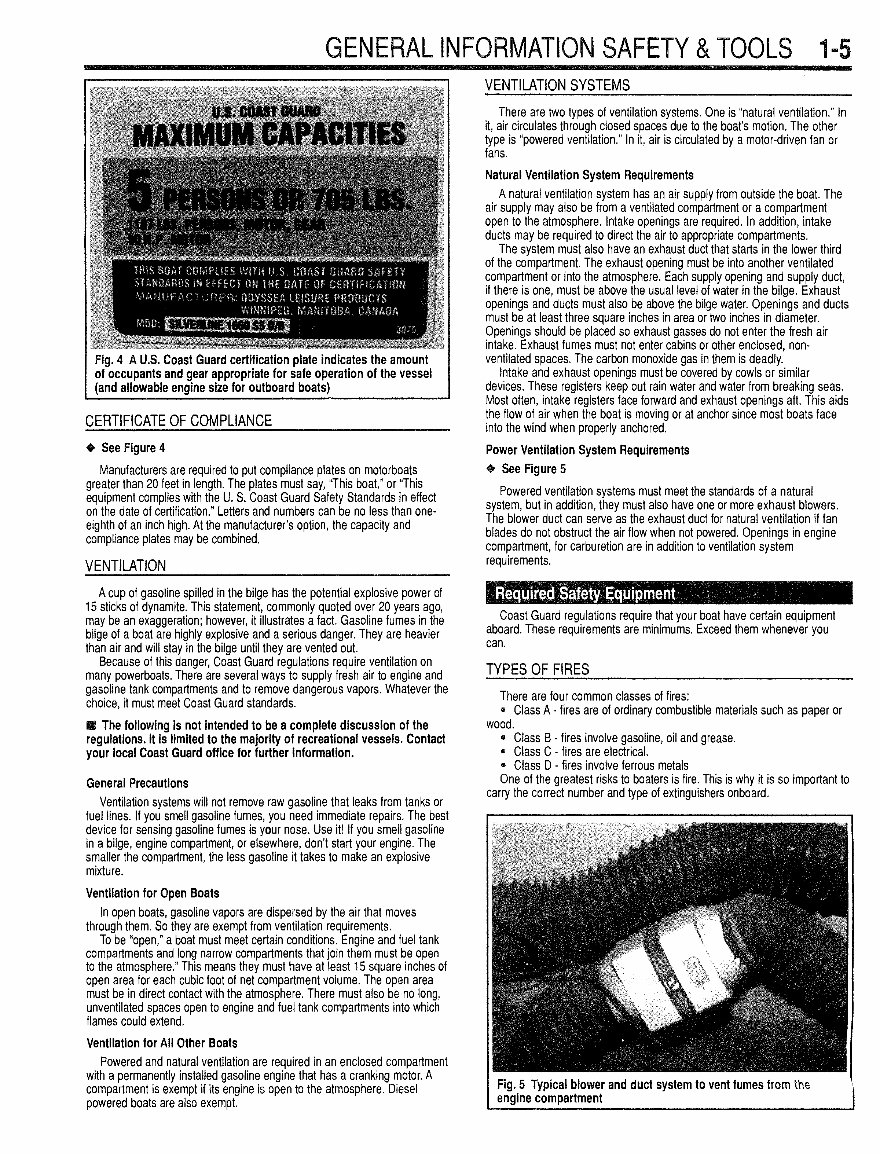
Fig. 4 A U.S. Coast Guard certification plate indicates the amount
of occupants and gear appropriate for safe operation of the vessel
CERTIFICATE OF COMPLIANCE
See Figure 4
Manufacturers are required to put compliance plates on motorboats
greater than 20 feet in length. The plates must say, "This boat," or "This
equipment complies with the U. S. Coast Guard Safety Standards in effect
on the date of certification." Letters and numbers can be no less than one
eighth of an inch high. At the manufacturer's option, the capacity and
compliance plates may be combined.
VENTILATION
A cup of gasoline spilled in the bilge has the potential explosive power of
15 sticks of dynamite. This statement, commonly quoted over 20 years ago,
may be an exaggeration; however, it illustrates a fact. Gasoline fumes in the
bilge of a boat are highly explosive and a serious danger. They are heavier
than air and will stay in the bilge until they are vented out.
Because of this danger, Coast Guard regulations require ventilation on
many powerboats. There are several ways to supply fresh air to engine and
gasoline tank compartments and to remove dangerous vapors. Whatever the
choice, it must meet Coast Guard standards.
B The following is not intended to be a complete discussion of the
regulations. It is limited to the majority of recreational vessels. Contact
your local Coast Guard office for further information.
General Precautions
Ventilation systems will not remove raw gasoline that leaks from tanks or
fuel lines. If you smell gasoline fumes, you need immediate repairs. The best
device for sensing gasoline fumes is your nose. Use it! If you smell gasoline
in a bilge, engine compartment, or elsewhere, don't start your engine. The
smaller the compartment, the less gasoline it takes to make an explosive
mixture.
Ventilation for Open Boats
In open boats, gasoline vapors are dispersed by the air that moves
through them. So they are exempt from ventilation requirements.
To be "open," a boat must meet certain conditions. Engine and fuel tank
compartments and long narrow compartments that join them must be open
to the atmosphere." This means they must have at least 15 square inches of
on area open area for each cubic foot of net compartment volume. The op-
must be in direct contact with the atmosphere. There must also be no long,
unventilated spaces open to engine and fuel tank compartments into which
flames could extend.
Ventilation for All Other Boats
Powered and natural ventilation are required in an enclosed compartment
with a permanently installed gasoline engine that has a cranking motor. A
compartment is exempt if its engine is open to the atmosphere. Diesel
powered boats are also exempt.
VENTILATION SYSTEMS
There are two types of ventilation systems. One is "natural ventilation." In
it, air circulates through closed spaces due to the boat's motion. The other
type is "powered ventilation." In it, air is circulated by a motor-driven fan or
fans.
Natural Ventilation System Requirements
A natural ventilation system has an air supply from outside the boat. The
air supply may also be from a ventilated compartment or a compartment
open to the atmosphere. Intake openings are required. In addition, intake
ducts may be required to direct the air to appropriate compartments.
The system must also have an exhaust duct that starts in the lower third
of the compartment. The exhaust opening must be into another ventilated
compartment or into the atmosphere. Each supply opening and supply duct,
if there is one, must be above the usual level of water in the bilge. Exhaust
openings and ducts must also be above the bilge water. Openings and ducts
must be at least three square inches in area or two inches in diameter.
Openings should be placed so exhaust gasses do not enter the fresh air
intake. Exhaust fumes must not enter cabins or other enclosed, non-
ventilated spaces. The carbon monoxide gas in them is deadly.
Intake and exhaust openings must be covered by cowls or similar
devices. These registers keep out rain water and water from breaking seas.
Most often, intake registers face forward and exhaust openings aft. This aids
the flow of air when the boat is moving or at anchor since most boats face
into the wind when properly anchored.
Power Ventilation System Requirements
See Figure 5
Powered ventilation systems must meet the standards of a natural
system, but in addition, they must also have one or more exhaust blowers.
The blower duct can serve as the exhaust duct for natural ventilation if fan
blades do not obstruct the air flow when not powered. Openings in engine
compartment, for carburetion are in addition to ventilation system
requirements.
Coast Guard regulations require that your boat have certain equipment
aboard. These requirements are minimums. Exceed them whenever you
can.
TYPES OF FIRES
There are four common classes of fires:
* Class A - fires are of ordinary combustible materials such as paper or
wood.
* Class B - fires involve gasoline, oil and grease.
Class C - fires are electrical.
* Class D - fires involve ferrous metals
One of the greatest risks to boaters is fire. This is why it is so important to
carry the correct number and type of extinguishers onboard.
Fig. 5 Typical blower and duct system to vent fumes from the
!
engine compartment 1
Page: 10 - Suzuki Outboards 1996-07 2.5-300HP 4-stroke Repair Manual - http://www.ReadManuals.Com
You're Reading a Preview
What's Included?
Fast Download Speeds
Online & Offline Access
Access PDF Contents & Bookmarks
Full Search Facility
Print one or all pages of your manual
$32.99
Viewed 66 Times Today


Secure transaction
What's Included?
Fast Download Speeds
Online & Offline Access
Access PDF Contents & Bookmarks
Full Search Facility
Print one or all pages of your manual
$32.99
- This workshop service repair manual covers all repairs A-Z, both mechanical and electrical.
- It includes tons of detailed pictures and diagrams to aid in the repair process.
- All pages are printable, allowing you to print only what you need.
- It is suitable for both professional mechanics and DIY enthusiasts.
- The manual provides information on routine maintenance, tune-up procedures, specifications, engine removal/installation, and more.
- It covers all models for the specified years and engine types, offering specific, detailed information.
- Delivery of this manual is instant upon payment, with no shipping involved.
- Using this manual can help save significant amounts of money by enabling DIY repairs.
- The manual is in PDF format and is compatible with any PC/MAC computer using Microsoft Windows.
This workshop service repair manual is a valuable resource for anyone looking to better understand their vehicle's parts and repair procedures, and to perform their own servicing and repairs.


