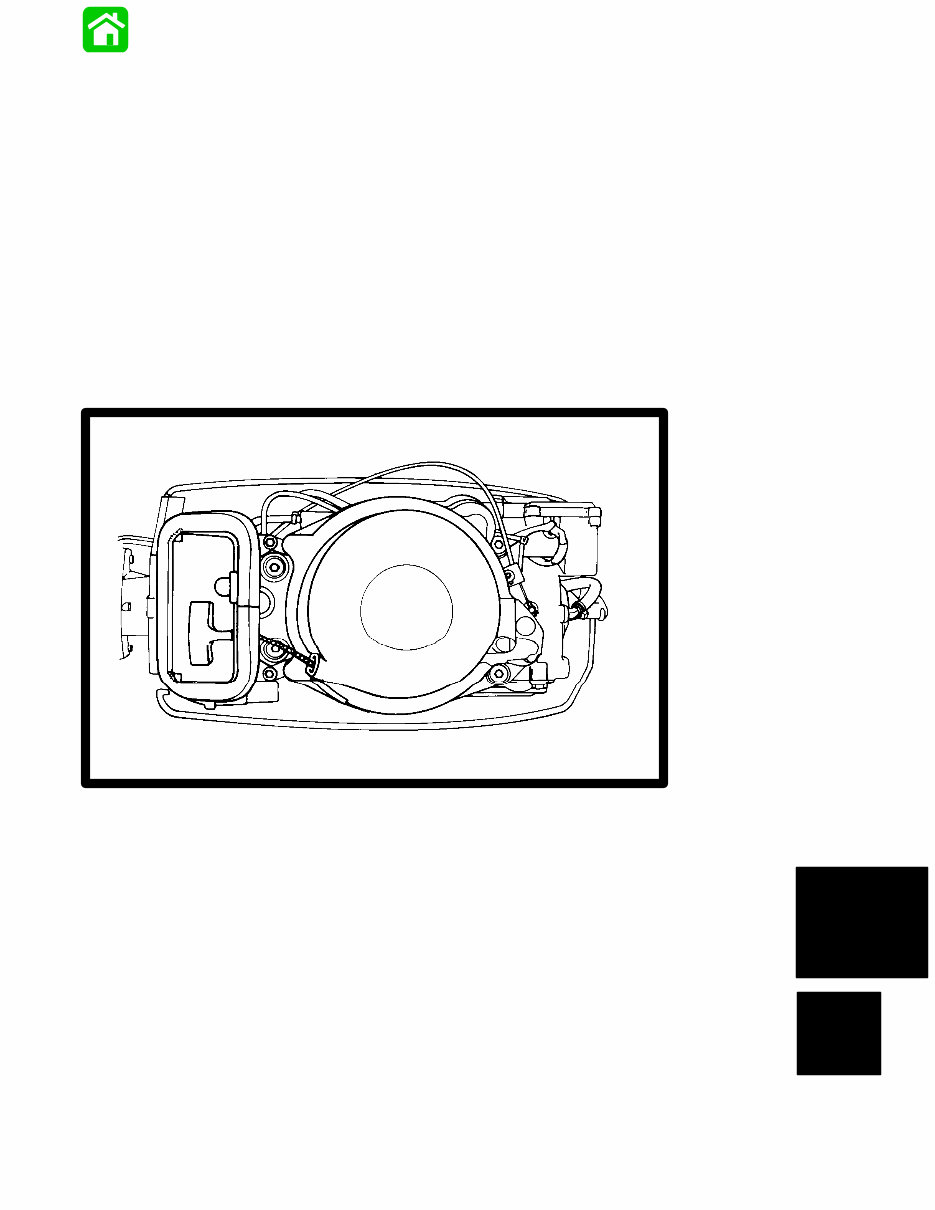
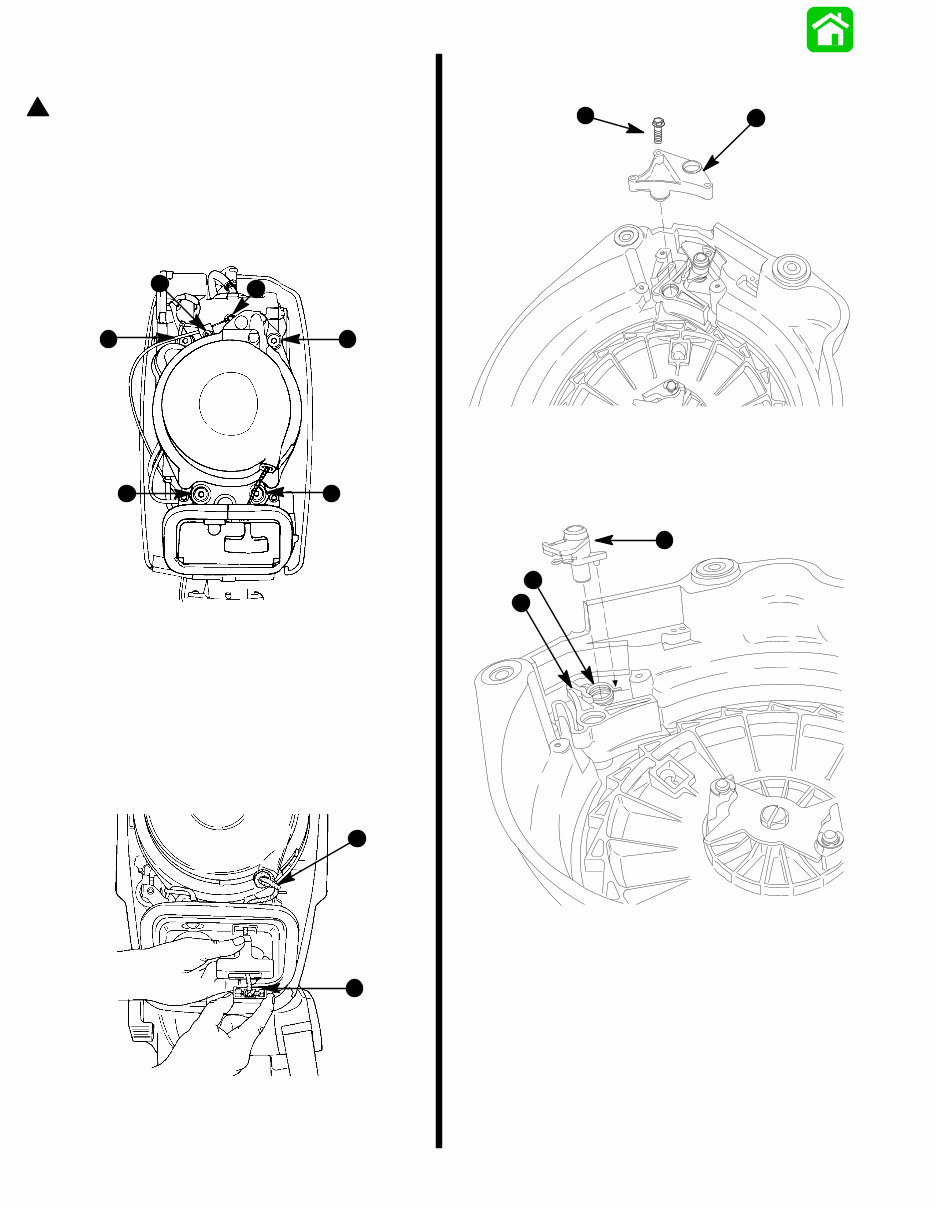
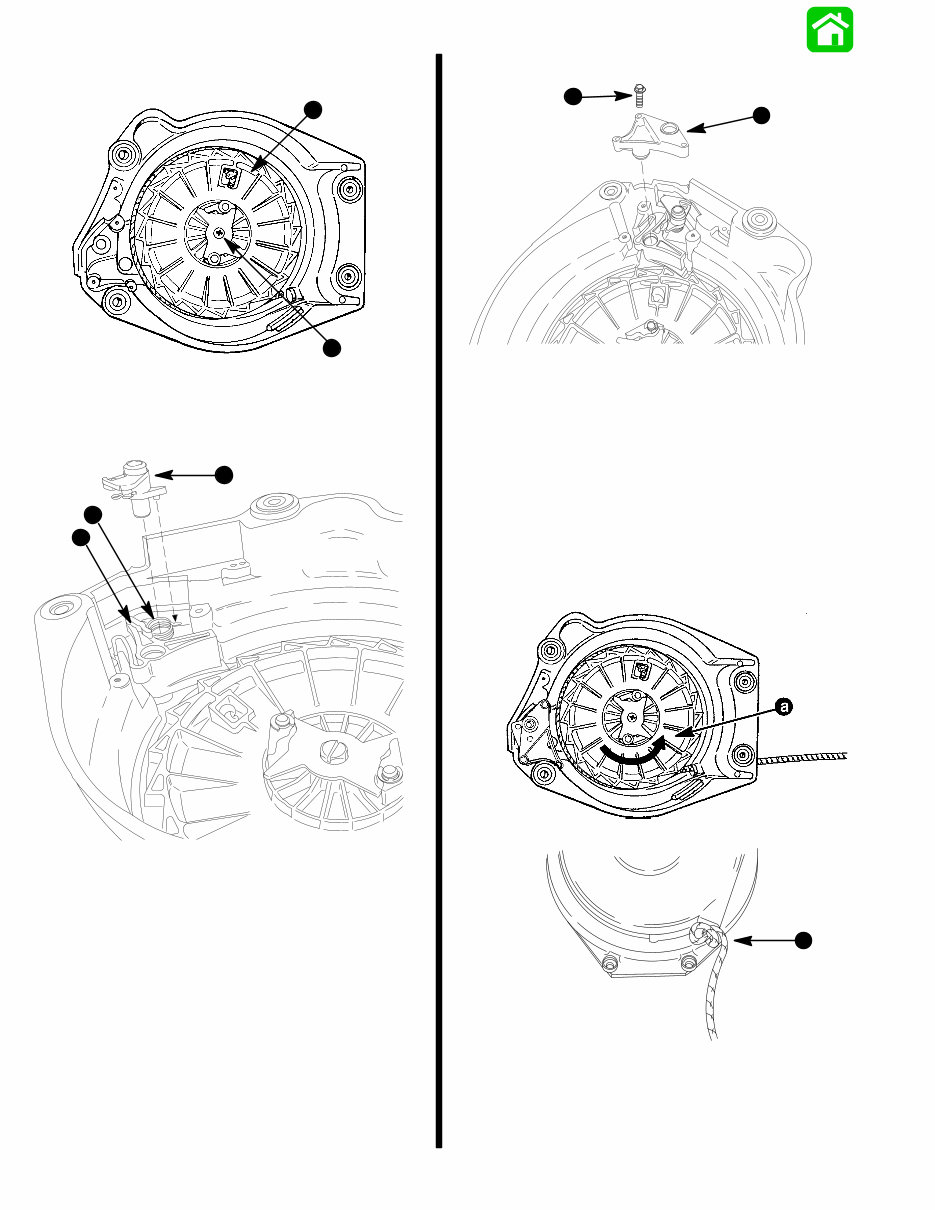
7C-4 - OUTBOARD INSTALLATION/ATTACHMENTS 90-817643R1 DECEMBER 1996 Rewind Starter Disassembly ! WARNING When disassembling and reassembling rewind start- er, SAFETY GLASSES must be worn in case rewind spring uncoils out of the housing. 1. Remove retaining clip and attaching screw which se- cures shift interlock cable to starter housing. 2. Remove bolts (4) securing rewind starter to engine. 51606 b c a c c c a - Retaining Clip b - Screw c - Bolts (4) 3. Slowly pull the starter rope out from the handle rest approximately 2 feet (60 cm) and tie an overhand knot between the rewind housing and the handle rest. 4. Remove retainer from rope handle and untie the rope handle knot. 5. Remove the rewind starter. a b a - Overhand Knot b - Retainer 6. Remove cam retainer. 28374 a b a - Screws (3) b - Cam Retainer 7. Remove cam lever, cam lever spring, and interlock le- ver. 28375 a b c a - Cam Lever b - Cam Lever Spring c - Interlock Lever
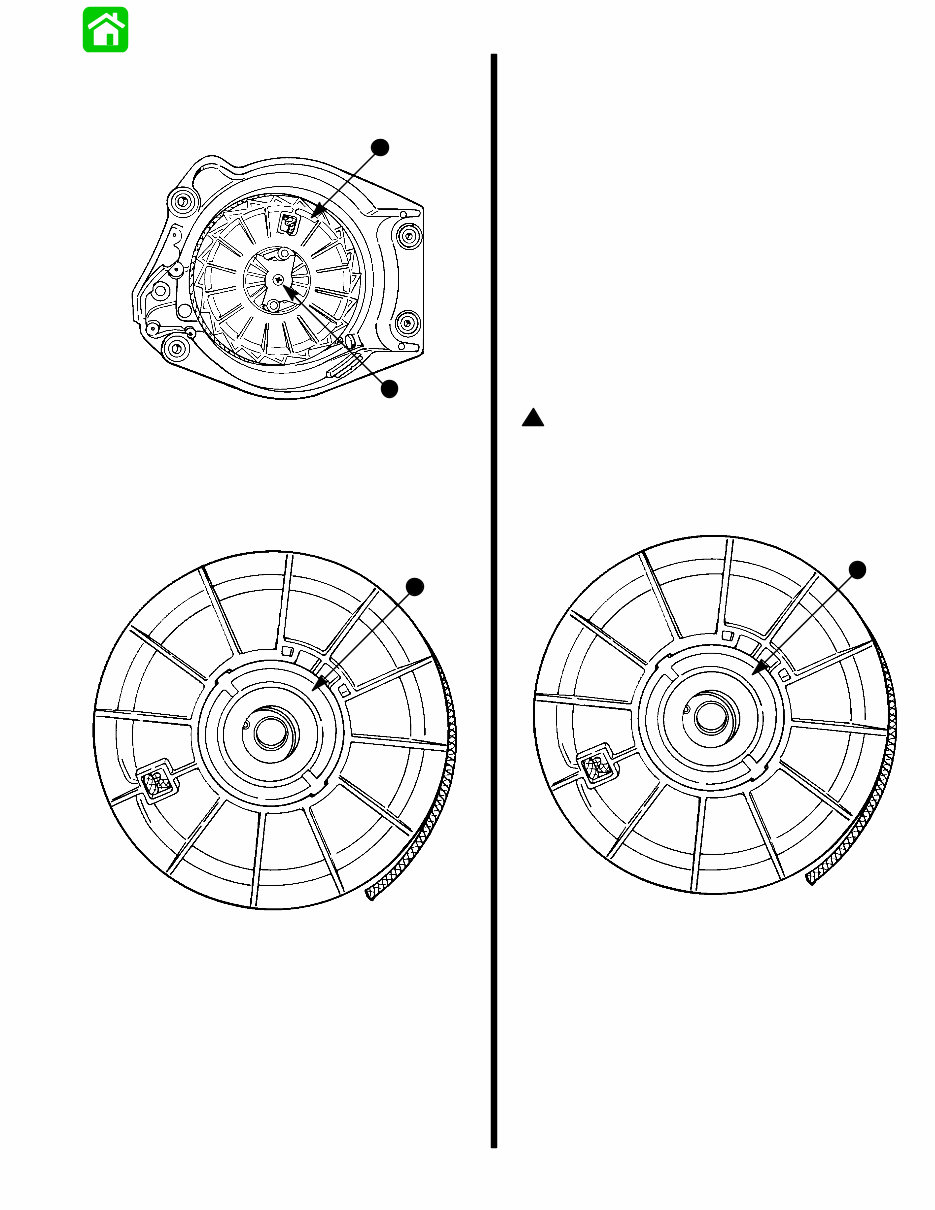
OUTBOARD INSTALLATION/ATTACHMENTS - 7C-5 90-817643R1 DECEMBER 1996 8. Remove starter sheave. 51605 b a a - Starter Sheave b - Screw 9. Spring is replaced as a spring/cover assembly. 51607 a a - Spring/Cover Assembly Cleaning and Inspection 1. Clean components in solvent and dry with compressed air. 2. Inspect rewind spring for kinks, burrs, corrosion of breakage. 3. Inspect starter sheave, rope guide and starter housing for nicks, grooves, cracks, wear or distortion, especial- ly area of rope travel. 4. Inspect bushing, starter drive pawl and spring for wear or damage. 5. Inspect starter rope for wear. 6. Replace components as necessary. Rewind Starter Reassembly ! WARNING When reassembling rewind starter, SAFETY GLASSES must be worn in case rewind spring uncoils out of the housing. 1. Install spring/cover assembly into sheave. 51607 a a - Spring/Cover Assembly
7C-6 - OUTBOARD INSTALLATION/ATTACHMENTS 90-817643R1 DECEMBER 1996 2. Install starter sheave to housing and secure in place with screw. Torque to 135 lb. in. (15.3 N·m). 51605 b a a - Starter Sheave b - Screw 3. Install interlock lever, position cam spring into recess of starter housing and reinstall cam lever. 28375 a b c a - Cam Lever b - Cam Lever Spring c - Interlock Lever 4. Reinstall cam retainer and secure with screws (3). 28374 a b a - Screws (3) b - Cam Retainer Adjusting Rewind Spring Tension 1. Rotate sheave counterclockwise until it stops (coil is bound). Then back off one full turn, plus what is needed to align rope end with hole in housing. Never back off sheave less than one full turn. 2. Route starter rope thru rope guide in housing. Tie a overhand knot in rope approximately 12 in. (305 mm) from end of rope. b a - Rotate Counterclockwise and Back Off at Laest One Full Turn b - Tie Off Starter Rope 12 Inches (305 mm) from End with Overhand Knot
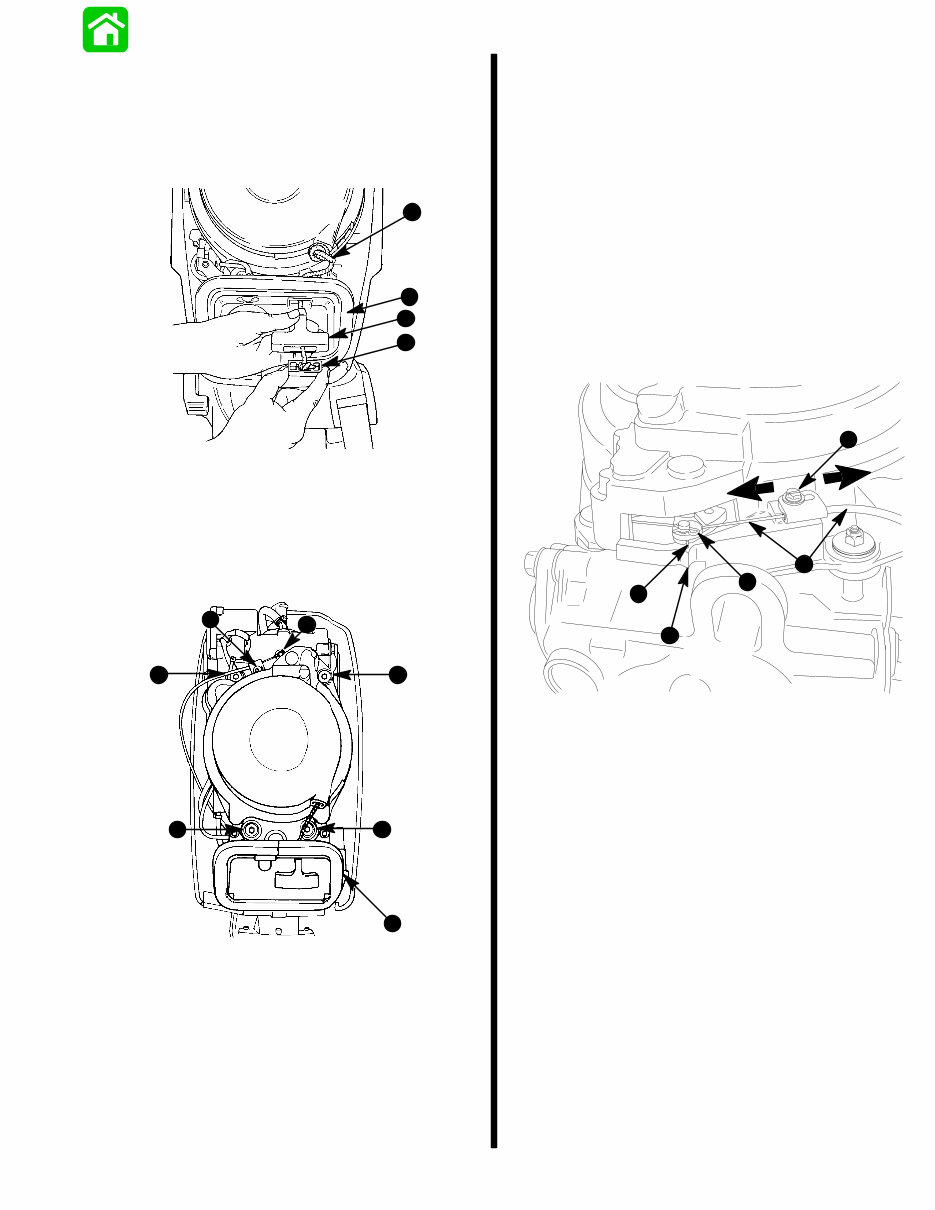
OUTBOARD INSTALLATION/ATTACHMENTS - 7C-7 90-817643R1 DECEMBER 1996 NOTE: Check operation of rewind and rewind tension be- fore outboard installation. 3. Place rewind starter on engine. 4. Pull starter rope thru bracket, handle, and starter rope retainer. Secure starter rope to starter rope retainer with knot. a b c d a - Starter Rope b - Bracket c - Handle d - Starter Rope Retainer 5. Secure rewind starter to engine bolts (4), torque to 90 lb. in. (10 N·m). Secure interlock lock cable with retaining clip and screw. 51606 b c a c c c d a - Retaining Clip b - Screw c - Bolts (4) Torque to 90 lb. in. (10 N·m) d - Bracket Starter Interlock Cable Adjustment IMPORTANT: Lubricate core wire of interlock cable with light oil prior to making adjustments. 1. While rotating the propeller shaft, place the gear shift lever into REVERSE. 2. Return the gear shift lever to NEUTRAL without going past neutral detent. 3. Place end of interlock cable over pin of cam lever and secure with retaining pin. 4. Secure interlock cable to starter housing using adjust- ing screw. Do not tighted screw at this time. 5. Adjust interlock cable to align raised mark of cam lever with pointer of rewind housing. 28376 a b c d e a - Interlock Cable b - Retaining Pin c - Adjustment Screw d - Raised Mark of Cam Lever e - Pointer of Rewind Housing 6. Tighten cable adjustment screw and check adjustment after 4 or 5 shift cycles.
Performing outboard maintenance and repairs is made easier with this comprehensive manual. It includes troubleshooting and replacement procedures recommended by the manufacturer, complete with step-by-step instructions, clear images, and exploded-view illustrations.
Regular maintenance is essential for your outboard's longevity, and over time, certain parts will require replacement. A reliable repair manual provides manufacturer-recommended troubleshooting charts and replacement procedures, ensuring a prompt return to the water. With this manual, you can save on repairs, enhance your outboard's reliability, and prevent issues from arising.
Please note:
This is not a generic repair manual. It is the official manual used by professional technicians for outboard service and maintenance. The manual encompasses all troubleshooting and replacement procedures, featuring step-by-step instructions, exploded-view illustrations, and clear images.
Conveniently searchable and portable, this manual offers an advantage over traditional bound manuals. It is also printable for those who prefer a physical copy.
Printable: Yes Language: English Compatibility: Compatible with various electronic devices, including PC & Mac computers, Android and Apple smartphones & tablets, etc. Requirements: Adobe Reader (free)