- MODEL XQG50-11(110V) FRONT LOADING WASHING MACHINE Service Manual Features CAPACITY 5kg WASH SPIN AND DRY Haier Group MANUAL CODE HMJG0211-02 DITION 2002.12.25
CONTENTS 1 Content--------------------------------------------------------------------------------------1 2 Product code illumination and series introduct------------------------------------1 3 Features ------------------------------------------------------------------------------------2 4 Specification -------------------------------------------------------------------------------2 5 Safety caution -----------------------------------------------------------------------------4 6 Net dimention -----------------------------------------------------------------------------6 7 Installation and accessory parts------------------------------------------------------7 8 Parts and Functions---------------------------------------------------------------------10 9 Function Schedule------------------------------------------------------------------------11 10 Program diagram------------------------------------------------------------------------12 11 Maintenance service and trouble shooting---------------------------------------14 12 Wiring diagram---------------------------------------------------------------------------21 13 Exploded View---------------------------------------------------------------------------22 14 List of Parts ------------------------------------------------------------------------------26 Product code illumination and series introduct X Q G 50- 11 X: washing machine Q:ordinarily G:drum 50:washing capacity 5kg 11:apperance code 1
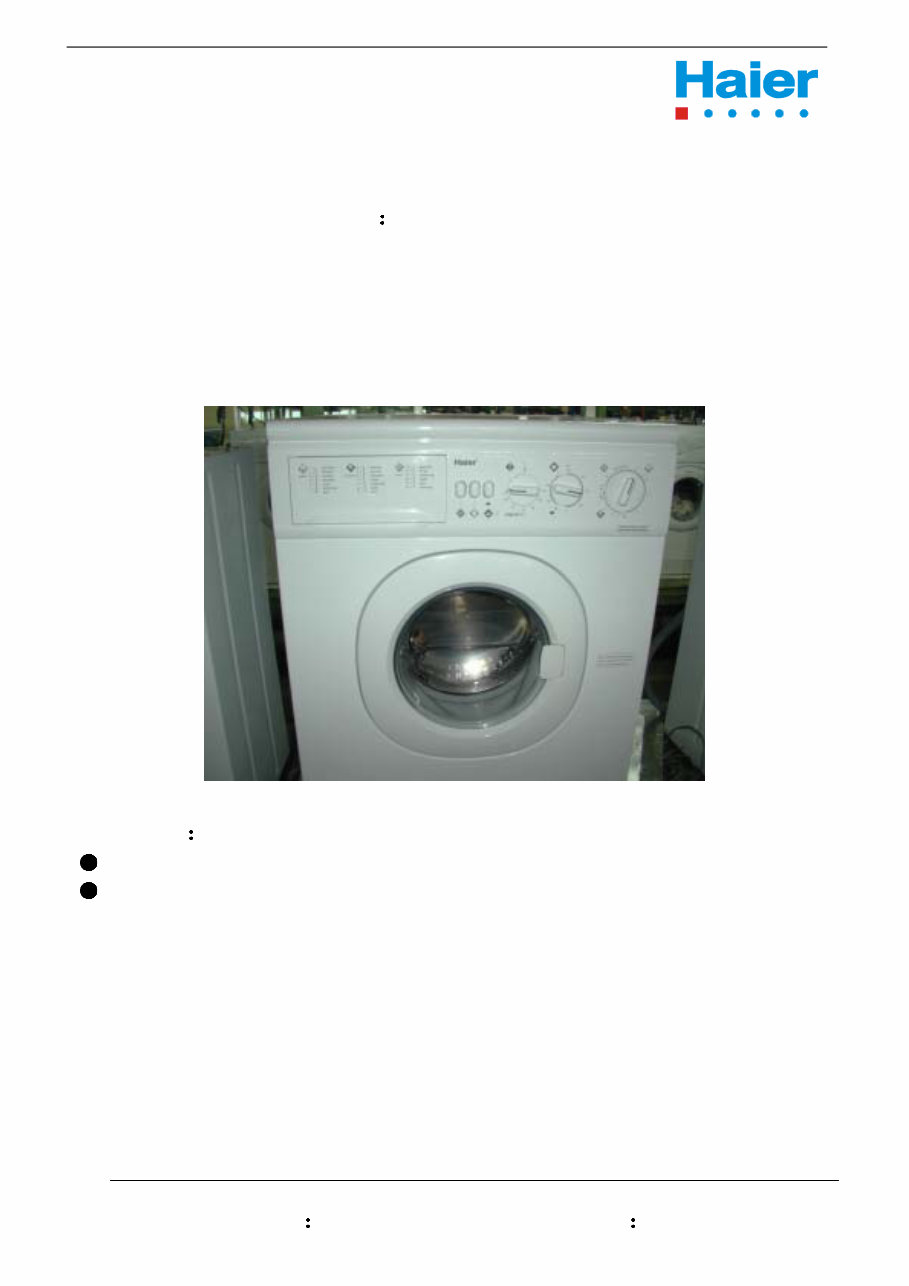
Features CAPACITY 5kg 5-kilogram wash load WASH SPIN AND DRY This washing machine can wash spin and dry Specifications Front loaders washing machines, push button opening door XQG50-11 Last update 2002-5-13 1. Product identification Description of appliance Washing machine Type of appliance (FS = standing, BI = built-in) FS Supplier own brand Haier Supplier bar code EAN TBC Mares computer code Commercial Brand / Model Commercial bar code EAN 2. Key-Features Energy efficiency class B Washing performance class C Spin efficiency class C Programs n° 18 Capacity Kg 5 Spin speed (max. / optional) rpm 800 Noise level dB(A) 70 Energy consumption per wash circle * kWh 1 07 Water consumption* l 78 Residual dampness (spin result) % 62% Spin speed selector switch (steps) rpm - Spin speed variator (stepless) rpm z Adjustable thermostat (water temp. adjust from - to) °C Drum capacity dry laundry / water kg / l 45 Auto water level adjust (depending on volume of filled in laundry) AWL - Washing time (max.) min 160 Washing temperatures (program-controlled) °C Certification's (CE / ISO 9001 / ISO 9002) Approvals (VDE/GS / TÜV/GS / IMQ) * EN 60456 (60°C cycle, full load without pre-wash) 7= COLD 3. Basics data nit dimensions (H x W x D) cm 85 x 59,5 x 55 Net weight kg 72 Voltage/frequency V/Hz 220-230V~50Hz Input power / main fuse (intensity) W / A 1300/15 Work top / removable z/z Control M = electromechanical, E = electronic, F = fuzzy M Drum S = stainless steel / Z = zinc coated S Tub P = Polyprop./ S = stainless steel S Door: aesthetic (R = round, Y = big eye, Q = square) R Diameter cm 30 Outer door frame S= stainless steel / M = metal / P = plastic P Inner door G= glass / P= plastic G
Detergent compartments n° 4 Removable compartment for liquid detergent - Delay timer (from - to) h - Self cleaning suds pump z Water inlet hose cold water / hot water z Water drain hose / -support z/z Adjustable feet n° 4 4. Safety systems Auto door lock ADL z Motor overheating protection MOP z No heating without water NHW z Auto water cool-down (before drain 90°C boiled water) AWC z Water return protection WRP - Acqua Stop kit - Child protection - 5. Programs 1) Strong action /cotton cycles n° 7 2) Normal action / synthetics n° 6 3) Delicate action / wooll cycles n° 5 Pre-wash / wash z/z Quick wash / super quick wash z/z Rinse / soften z/z Delicate / hand wash z/- Wool / cashmere z/- Soak / spin z/z Drain z Optional function keys (additional program settings) ON/OFF button z Half load z- Eco Spin exclusion z- Spin reduction rpm - High water level - No Soak - Rinse stop Delicate - Cold wash 7 - 6. Packing dimensions & loadability Packing dimensions (H x W x D) cm 88 x 66 x 60.8 Gross weight kg 78 40' Container load pcs 40' HC load capacity pcs 150 7. Built-in dimension Requested measure of niche (H x W x D) cm Dimensions of door cm 8. Logistic / recicling information RS Packing weight kg 6 Packing materials / Recycling symbols REzY Carton (weight) gr 4,500 Polistyren (weight) gr 1,000 Polyetylene foil (weight) gr 500 Other packing materials (weight) gr 0 Wood (weight) kg 0.00 9. Service RS REzY ser instruction (languages) GBL Max. failure rate (12 Months after sales to end customer) % 3
Safety caution This appliance should be used only for the purpose for which it was designed,that is as a washing machine for home use,manufactured according to C.E.I.safety regulations. Any other use is not correct and therefore dangerous The manufacturer assumes no responsibility for damages caused by improper,incorrect and irrational use. Certain basic rules must be respected when using electrical appliances. The following are especially important: never touch the appliance with wet/damp hands or feet; never use the appliance with bare feet; take special precautions when using in rooms such as bathrooms or showers; never pull the power supply cable of the appliance to unplug the cable from the mains; never leave the appliance outdoors or exposed to weather conditions (rain,sun etc.); never allow children or disabled persons to use the washing machine without supervision. if the supply cord is damaged,it must be replaced by the manufacture or its service agent or a similarly qualified person in order to avoid hazard. for safety,please switch off power if washing machines are not used for long time. The washing machine should be installed by qualified staff according to the instructions provided by the manufacturer. The manufacturer declines all responsibility for damage to persons,animals or property caused by incorrect installation. Warning: 1.If the supply cord is damaged,it must be replaced by a special cord or assembly available from the manufacturer or its service agent. 2.If a stationary appliance is provided with a supply cord and a plug,the instructions shall state that the appliance must be positioned so that the plug is accessible. 4
Safety caution Note:this requirement dose not apply if the appliance incorporates other means for disconnection from the supply. 3.For washing machines with ventilation openings in the base, that a carpet must not obstruct the openings. 4.The instructions shall state that the appliance is to be connected to the water mains using new hose-sets and that old hose-sets should not be reused. Note:this instructions is not required if the hoses are permanentiy attached to the appliance. 5.When connecting the washing machine for water supply and drainage,make sure the plug of it is within reach. 6.Keep the vent outlet at the bottom of the washing machine from being blocked. 7.To prevent danger,damaged electrical cable must be replaced by the manufacturer or its authorized servicemen. 5
Installation Unpacking leveling and positioning Remove the package and check that the washer dryer is undamaged. If you have any doubts,do not use the washer dryer and call on a qualified technician.Keep all packing parts (plastic bag,foam rubber,screws etc.)out of the reach of children since they could be dangerous. Important:The inside of the washer dryers which consists of a floating unit,is fixed with screws at the back of the cabinet .during transport.Before starting the machine remember to release the floating unit by removing the above screws and.To prevent water spray from entering the machine,remember to close the holes left open by the screws with the plastic caps provided in the packet containing the owner ’s manual.It is important for the machine to be perfectly level (the angle of inclination on the work surface must not be more than 2 degrees).For this reason the machine is fitted with adjustable feet used for levelling the machine before use.In case of flooring with carpeting,remember to check that the ventilation in the support area is not plugged. Electric Connection Connect the plug to a socket provided with efficient earthing.(Warning:this appliance must be earthed as a safety measure according to the law).Make sure that the voltage and frequency available corre-spond with the values stated on the data plate located at the back of the machine and that the electric system is dimensioned to withstand the maximum current shown on the data plate.If the socket connected to the machine does not correspond with the plug,replace the plug with a suitable one and avoid using adaptors or shunts since they could cause overheating and burning out. Connection of tap and loading hose Connect the inlet hose to a cold water tap and check that it is tightly screwed to the tap. If the water piping is new or has not been used for a long time,before making the connection,let the water run until it is clear and free from impurities. This step is necessary to ensure that the incoming water does not clog and possibly damage the machine. Check the connections Turn the tap to maximum to check if any leakage.If the answer is yes,reassemble it then. 7
Installation Note:1 The connect and the inlet hose can be re-assemble many times. 2 If the pipe is new or long absent from use,let go the dirty,rustywater first till it turns clean. Connecting the Drain Hose Connect the drain hose to a drain duct (with internal diameter of at least 4 cm.)or place it for drainage into a sink or a tub,ensuring that there are no kinks or bends.The free end must be at a height of between 80 and 100 cm.Should it be necessary to fix the end of the hose at a height of no less than 80 cm from the floor,the hose must be fixed in the appropriate hook on the upper part of the back panel or use the sup- plied support to fix the drain hose. Connecting water suppy Insert stainless steel screen washers into end of each supply hose and attach that end of supply hose to your 3/4" water tap spigot.Note:Home Centers also have ”Y ” connectors and “Couplings ” which enable you to connect the machine to your sinks faucet. Note: The water outlet should not be submerged in water. 2.Filling hose 1).Connect one end of the filling hose to the faucet and the other to the water electromagnetic valve of the washer. 2).If the pipe of tap water is new or has not been used for a long time, turn on the faucet until the water is clean. 3).Do not disconnect the filling hose frequently after it is joined with the faucet. Open the faucet before operation to check if the faucet joint leaks to prevent accident. Unpack and installation 3.Earth lead 1).The washer should be properly earthed during operation. 2).If the socket has earth wire, no auxiliary earth wire is needed. 3).If the socket has no earth wire, connect the auxiliary earth wire to the auxiliary earth terminal at upper left on the back of the washer and then earth the wire correctly. Note: It is strictly prohibited to connect the earth wire to the tap water pipes or heating pipes. Cleaning and maintenance Cleaning and maintenance 8
Installation Cleaning Please clean the inner tub regularly to keep it clean. The steps are as follows: 1).Shut off the power supply before cleaning. 2).To clean the detergent dispenser, draw it out (see the left figure) and clean it with water. 3).To wash the body and rubber components, use a wet cloth with a little soapy water. Attention: Never use gasoline or other solvent for cleaning. When not in use If the washer is not to be used for a long time,unplug it and turn off the faucet. Keep the door open to prevent odors. It's recommended that the door is opened slightly when the washer is not being used. Transportation For transportation, assemble the fastening bolts as specified below so as to protect the inner components from being vibrated. 9
Repair your HAIER XQG50 / 11 (PART: AC-8888-25) FRONT LOADING WASHING MACHINE without high repair fees with this comprehensive repair manual. This manual is a valuable resource for both professional mechanics and DIY enthusiasts, providing detailed troubleshooting and repair instructions similar to those used by technicians.
Product Code Illumination and Series Introduction
Features
Specification
Safety Cautions
Dimension
Installation and Accessory Parts
Parts and Functions
Function Schedule
Guide for Selecting Programmes
Maintenance Service and Troubleshooting
PLUS MORE...
Total Pages: 26
Format: PDF
Language: English
Compatible: Win/Mac
The manual is compatible with all PC-based Windows operating systems and Mac. It is printable, allowing you to have the necessary information with you wherever you go.
This easy-to-understand manual is filled with diagrams and pictures, making it simple to follow. There's no need to wait for CD ROMs to arrive via mail - simply order and get instant access.