

DYSON DC05 VACUUM Electric MOTOR Replacement Manual
What's Included?
Fast Download Speeds
Online & Offline Access
Access PDF Contents & Bookmarks
Full Search Facility
Print one or all pages of your manual
Dyson DC05 :: Electric Motor Replacement ::
file:///C|/...20Man/Downloads/Dyson%20DC05%20Motor%20repalce/Dyson%20DC05%20%20%20Electric%20Motor%20Replacement.htm[04/11/2013 14:18:19]
MANUAL-DEPO
D.I.Y. Dyson DC05 :: Electric Motor Replacement
Dyson DC05 Motor Replacement is a little more involved and you should
read all of the way through this tutorial first. Like the cable replacment, you
cannot obtain any literature from Dyson about how to do it - this is for
'trained engineers only'. Still, whilst we all like to make money and, like the
cable replacement, this one is not a job that is so difficult that only trained
personnel can do it.
So, without any warranty and trusting that you are able enough to carry out
this procedure yourself and safely, here is how to save yourself a small
packet on changing the electric motor.
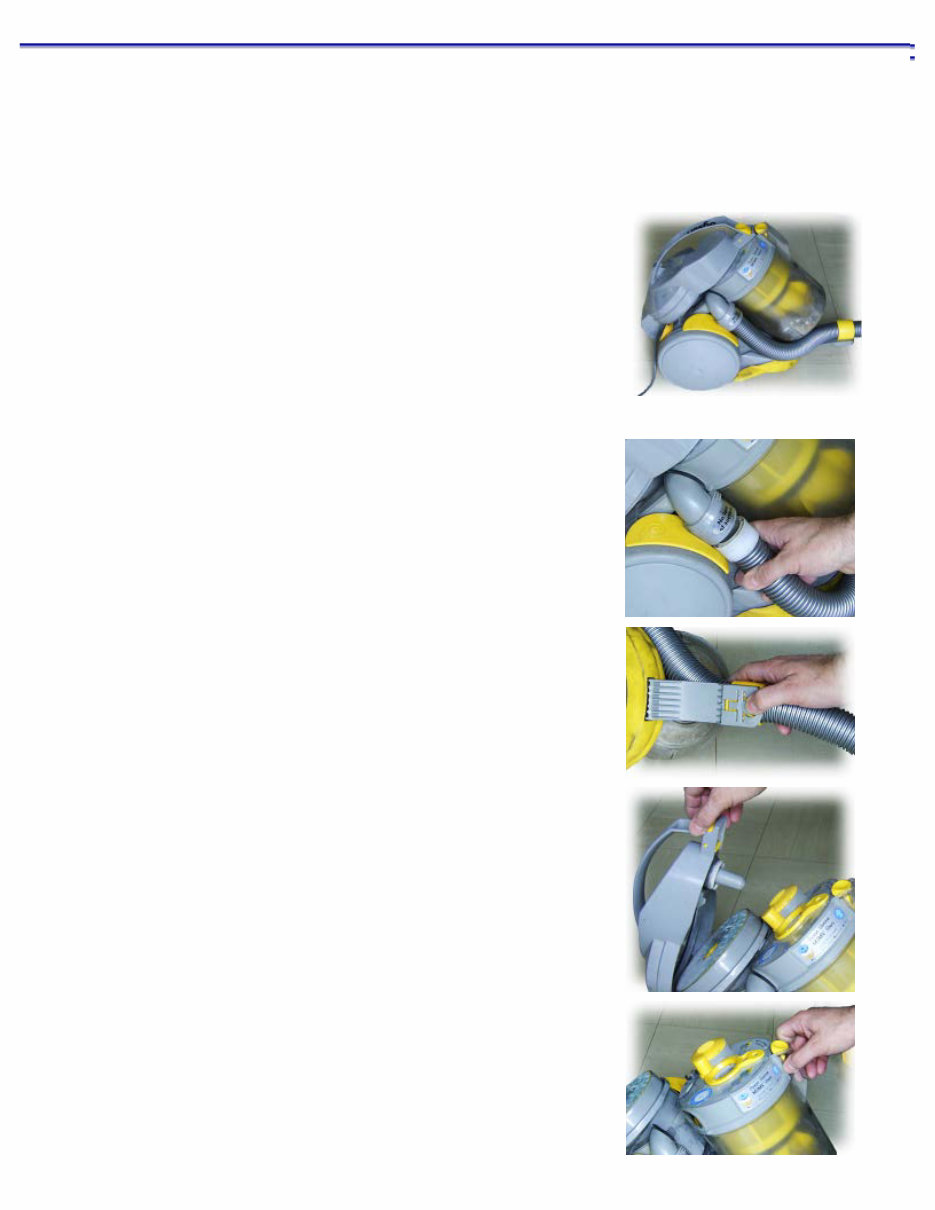
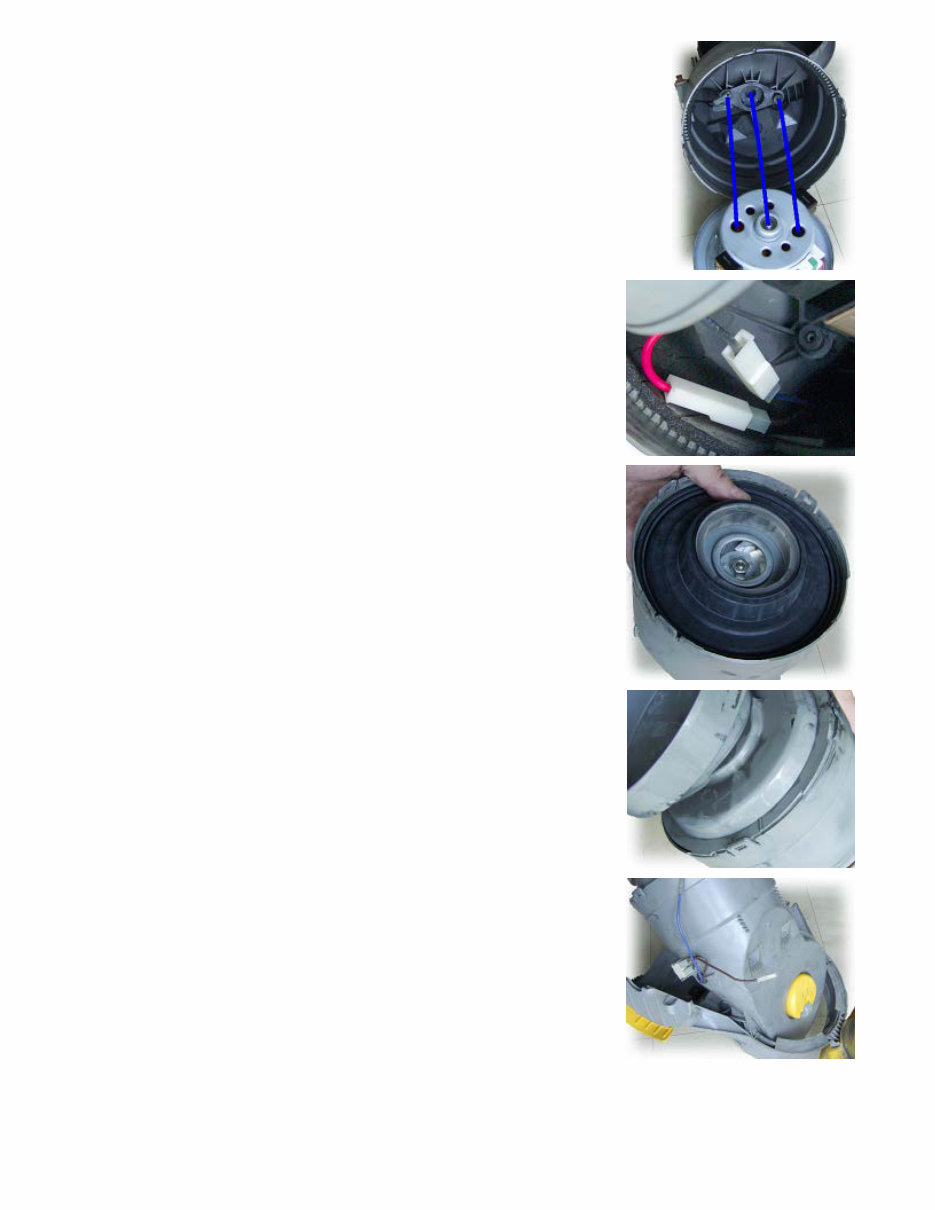
First of all, pull the flexible hose out of its socket where it goes into the
main cyclone
Next, turn it onto its side and on the support bracket, press the little lever
- the end furthest from the body of the cleaner - pulling the bracket out.
Put the hose assembly to one side.
Next, open the top...
...remove the cyclone...
Dyson DC05 :: Electric Motor Replacement ::
file:///C|/...20Man/Downloads/Dyson%20DC05%20Motor%20repalce/Dyson%20DC05%20%20%20Electric%20Motor%20Replacement.htm[04/11/2013 14:18:19]
...and take out the filter, putting them to one side.
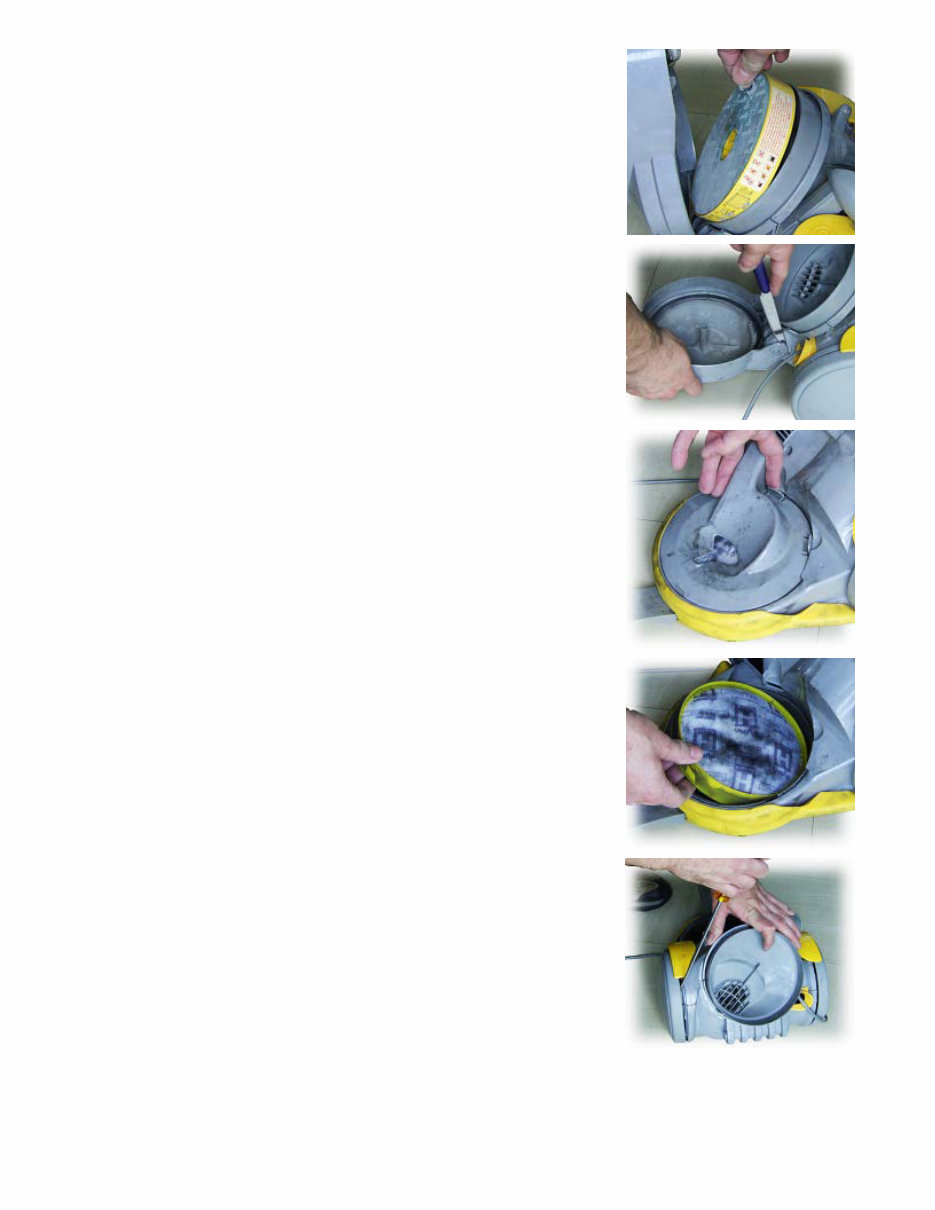
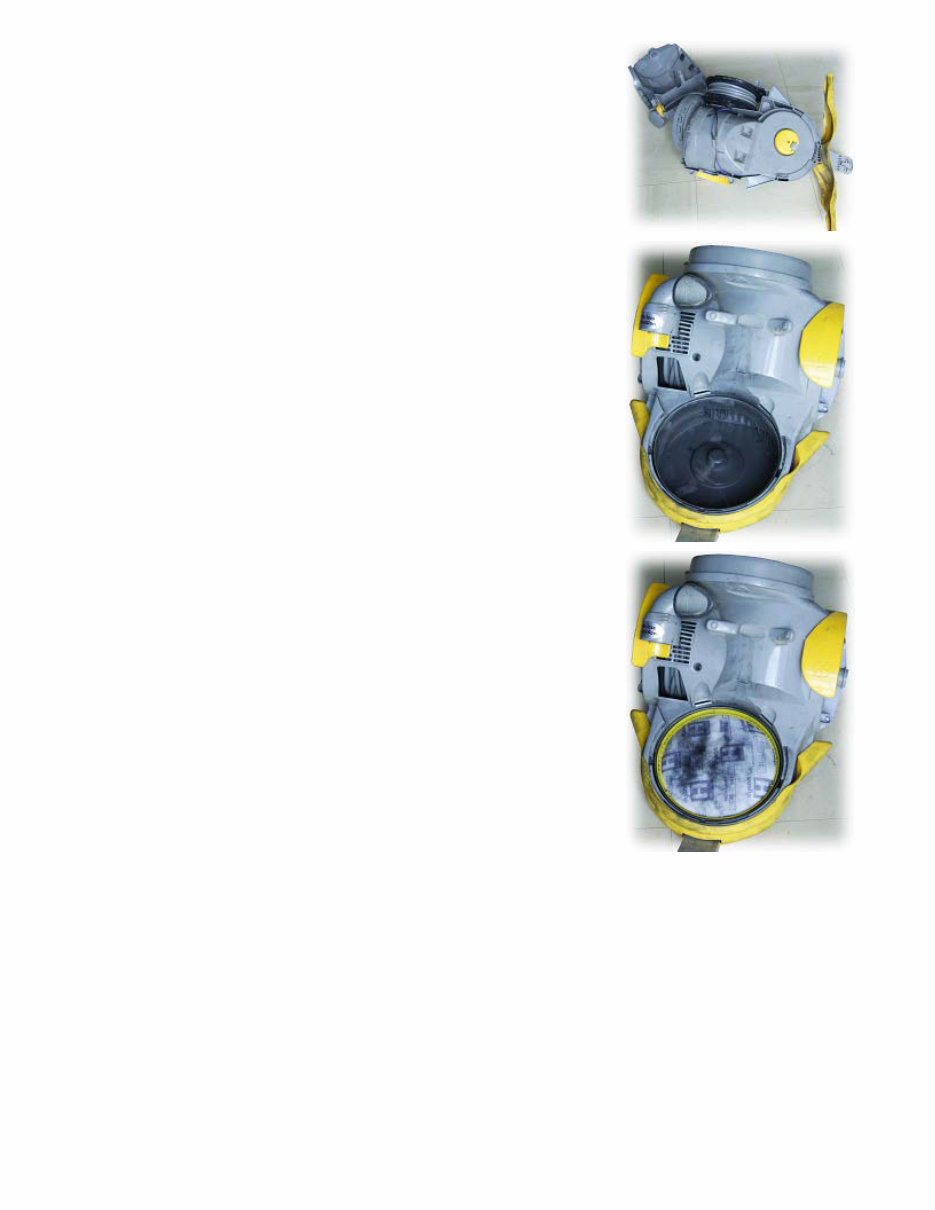
Next, using a blunt knife (or other flat, but not sharp, object), gently force
the hinge open. You can see that the amount you have to bend the hinge
is only small and remember - somebody in a factory assembled it just by
pushing it together so it must be able to bend that much without breaking.
Now, remove the air guide that sits underneath the clear cyclone. Release
it by pressing the two tabs - one of which you can see by my index finger.
Once these are freed, just pull it out.
Next, lift out the filter that sits underneath the air guide. Dyson might not
have a bag across which air pressure can be lost but they do have plenty
of filters.
Next, you need to take off the wheels - this is because there are screws
under there that hold the two parts of the body together. Basically, all you
do is put something between the body and the wheel and pull the wheel
off. I used a screwdriver this time and it didn't seem to do any harm.
I have received several emails informing me that on some models, there is
a plastic insert at the centre of each wheel that needs removing before the
wheel can be taken off but there was none on mine. If you have the
plastic insert, I am advised that it can be removed by drilling a small hole
in the plug which makes it more flexible - this also allows for somewhere
to insert a screwdriver into the plug to act as a lever should this become necessary.
Now unscrew the four screws that were hidden behind the wheels. These
have hexagonal sockets in them so you can use one of the specialised
screwdrivers for this purpose but, if you want, you can use an Allen Key
Dyson DC05 :: Electric Motor Replacement ::
file:///C|/...20Man/Downloads/Dyson%20DC05%20Motor%20repalce/Dyson%20DC05%20%20%20Electric%20Motor%20Replacement.htm[04/11/2013 14:18:19]
like I have here.
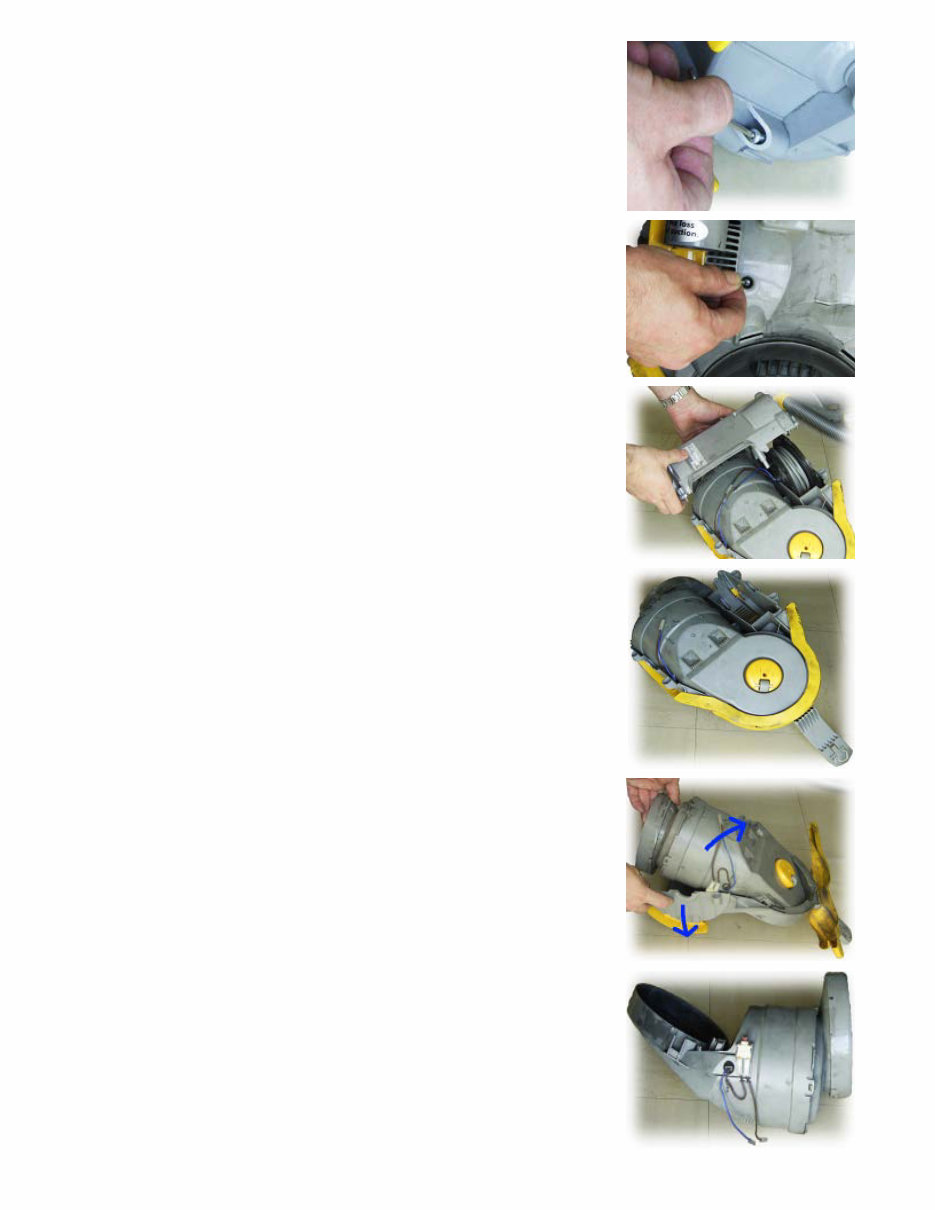
Now, remove the screw that is in the middle. This one is quite deep but it
is not impossible to get to.
Now take off the casing - you might find that the cable drum wants to
come off as well so unclip the two connectors that run across the middle
and remove it, along with the casing.
This is what it should look like now.
At this point, just check that your mains lead works - if it is that that is at
fault, chop off the plug and around 6 inches (15cm) of cable and check
for continuity again. If you have it, you probably just need to repace the
plug and you've saved yourself the cost of buying a new motor (if you
don't, try chopping off another six inches and trying again).
Assuming that the mains lead turned out all right, pull the halves apart
like so.
And, this is what it looks like.

Dyson DC05 :: Electric Motor Replacement ::
file:///C|/...20Man/Downloads/Dyson%20DC05%20Motor%20repalce/Dyson%20DC05%20%20%20Electric%20Motor%20Replacement.htm[04/11/2013 14:18:19]
Now, you have to take off the end so that you can get to the motor. The
end is held in place with four little latches and bending them slightly -
testing them one at a time - will allow you to take out the end.
And this is what is underneath. It is a large, circular rubber contruction
that seals around the edge, on a metal surface below and on the surface
above. Lift this out and put it to one side.
Now, you can see what it seals against. This is the air intake end of the
motor and inside the hole, you can see the end of the motor shaft and the
inside of the impellar.
When you pull it out, you can see that the motor is connected with similar
connectors to the leads on the outside of this plastic cylinder. However,
the leads are short - there is a valid reason for this and that is that if they
were much longer, they would catch in the motor.
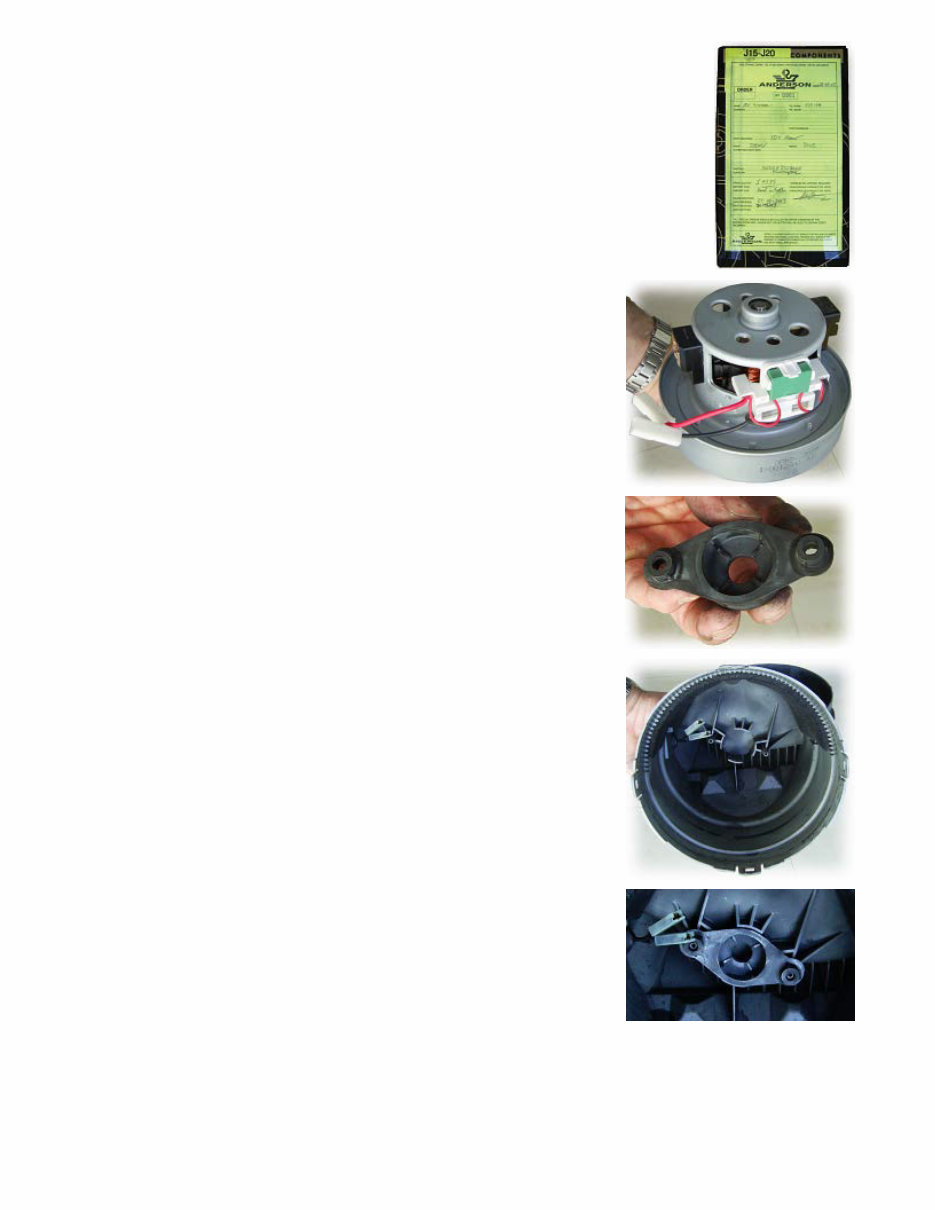
And this is it. Make a note of the number that you find on the side. There
are two types of motor for the DC05 and you need the right one. Note
that there is a rubber moulding on the top of this - take that off because
you will need it.
This is what the new cable drum box looks like (so that you know that you've been
sent the right thing). The Dyson (manufacturer's) part number is 911933-01 - "JDK
Dyson DC05 :: Electric Motor Replacement ::
file:///C|/...20Man/Downloads/Dyson%20DC05%20Motor%20repalce/Dyson%20DC05%20%20%20Electric%20Motor%20Replacement.htm[04/11/2013 14:18:19]
YV-2100-1 240V MOTOR" for Dyson DC05 (£49.99).
And this is the new one. This is a breath of fresh air compared to the old
one. Again, note the short leads. Also, note that there is no rubber
moulding on this.
This is what the new moulding in the middle looks like.
And this is what the pins on the inside of the cylinder look like. You need
to slide the moulding in place so that it can take the end of the motor.
And this is it in the right place. (Don't bother trying to put it on the motor
first because when you push the motor into the cylinder, it most likely
won't align properly.)
This is how it should line up.
Dyson DC05 :: Electric Motor Replacement ::
file:///C|/...20Man/Downloads/Dyson%20DC05%20Motor%20repalce/Dyson%20DC05%20%20%20Electric%20Motor%20Replacement.htm[04/11/2013 14:18:19]
This is the only really tricky part of the whole assembly. You need to
plug the wires into their respective sockets which means bringing the
motor up close to the plastic housing. This doesn't leave a lot of space to
get your fingers in. I presume that at the factory, either they use women
with very slim hands to do this or they use a machine. Once it is in place,
you can push the motor into the plastic housing and it will locate
positively.
Next, you need to insert the rubber gasket that holds the motor in place
and forms various seals. This just pushes into lace but make sure that it is
all of the way in and that the motor is located centrally.
Now, put the housing onto the end. This can only go on one way because
of the tiny castellations around the rim.
Slot the motor unit into the frame and rotate it down - doing the opposite
of what you did earlier to get it out.
Put the cable drum back in place, making sure that the cable release is
aligned properly. Plug in the blue and brown wires and push them into
the comb on the body. Next, swing the lower part of the outer casing into
place.
Dyson DC05 :: Electric Motor Replacement ::
file:///C|/...20Man/Downloads/Dyson%20DC05%20Motor%20repalce/Dyson%20DC05%20%20%20Electric%20Motor%20Replacement.htm[04/11/2013 14:18:19]
Turn the machine over so that it is the right way up and put the four
screws that would be hidden by the wheels into their holes along with the
fifth screw in the middle of the body, screwing them down but not tightly.
Finish tightening the five screws therefore making sure that the body is
not put under undue stress.
Next, put the filter in place with the large gap at the bottom.
Then, put the air duct in place, making sure that the two clips hold it.
Dyson DC05 :: Electric Motor Replacement ::
file:///C|/...20Man/Downloads/Dyson%20DC05%20Motor%20repalce/Dyson%20DC05%20%20%20Electric%20Motor%20Replacement.htm[04/11/2013 14:18:19]
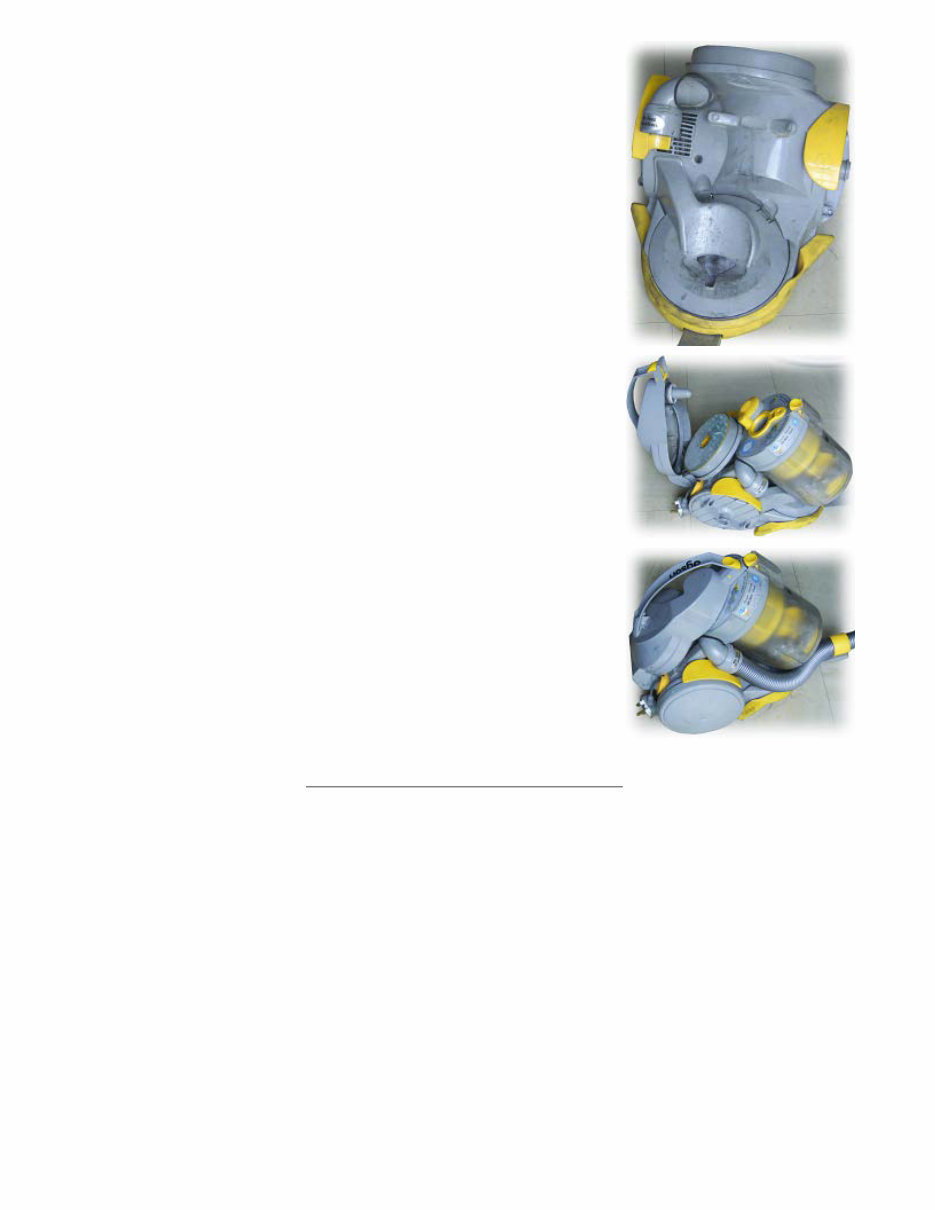
After that, put the end on, insert the green filter and put the cylinder in
place.
Finally, put the wheels on and re-attach the flexible hose and you are
ready.
Hope you have know repaired your motor ;-)
MANUAL-DEPO 2013
You're Reading a Preview
What's Included?
Fast Download Speeds
Online & Offline Access
Access PDF Contents & Bookmarks
Full Search Facility
Print one or all pages of your manual
$36.99
$48.99
Viewed 62 Times Today


Secure transaction
What's Included?
Fast Download Speeds
Online & Offline Access
Access PDF Contents & Bookmarks
Full Search Facility
Print one or all pages of your manual
$36.99
$48.99
This digital manual provides a comprehensive guide for replacing the electric motor/engine of the Dyson DC05 vacuum cleaner. It includes detailed step-by-step instructions accompanied by helpful photos. Whether you are a professional mechanic or a DIY enthusiast, this manual is an invaluable resource for maintaining and repairing your vacuum cleaner.


