EP3513 ORDER NO.HPD0509U24C1 - 2 - CONTENTS Page 1 COMPONENTS IDENTIFICATION…………………………………………………………………………………………………………………………3 2 MASSAGE RANGE(MOVEMENT RANGE OF MASSAGE WHEELS)………………………………………………………………………………5 3 TURNING ON THE POWER………………………………………………………………………………………………………………………………6 4 REQUIRED TOOLS…………………………………………………………………………………………………………………………………………7 5 DISPLAY METHOD OF MASSARG BLOCK TOTAL USE TIME AND OPERATION TIME…………………………………………………………8 6 DISASSEMBLY………………………………………………………………………………………………………………………………………………12 7 ACTUAL WIRING DIAGRAM……………………………………………………………………………………………………………………………52 8 CHECKING…………………………………………………………………………………………………………………………………………………55 9 GREASE……………………………………………………………………………………………………………………………………………………60 10 EXPLODED VIEW…………………………………………………………………………………………………………………………………………63 11 REPLACEMENT PARTS LIST……………………………………………………………………………………………………………………………70
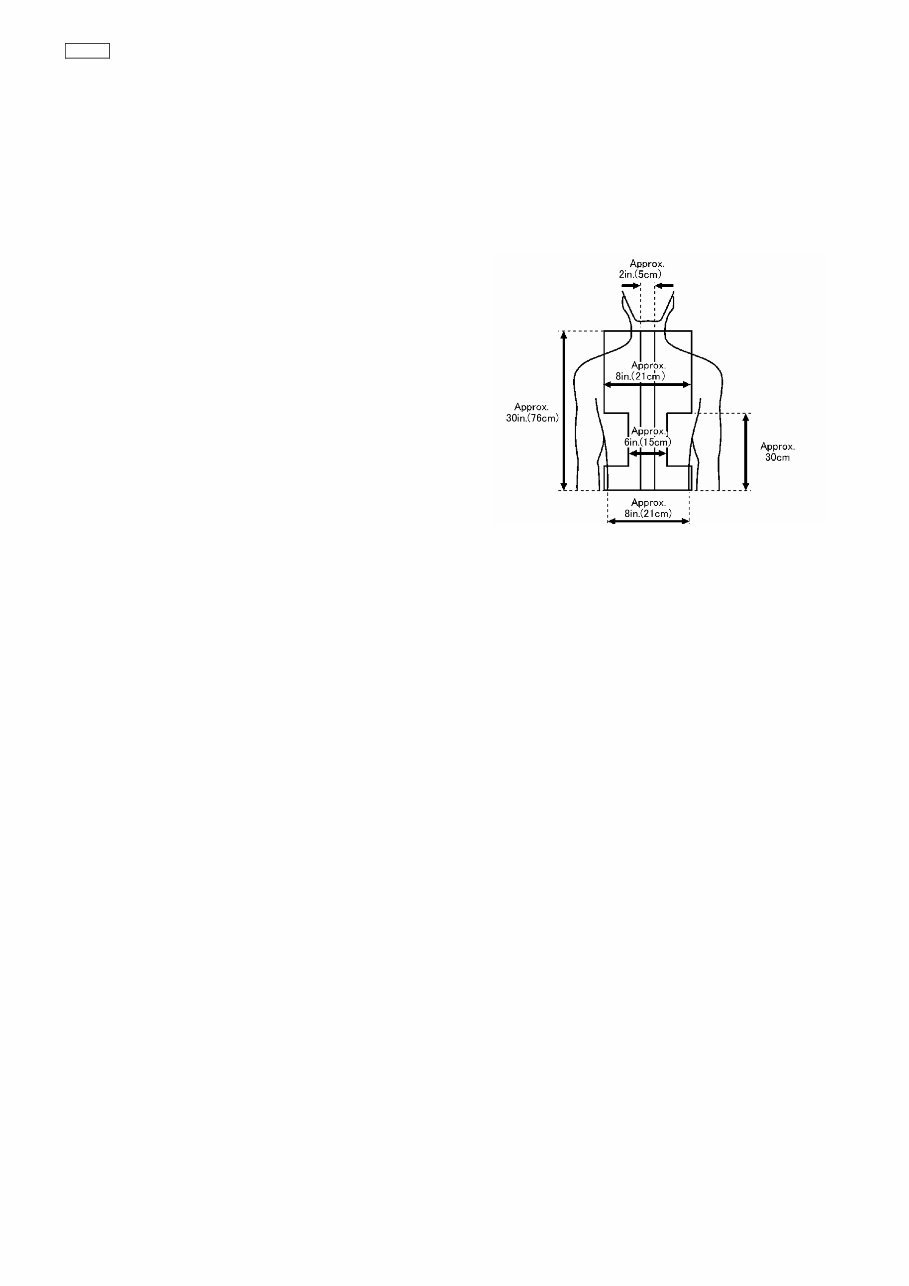
EP3513 ORDER NO.HPD0509U24C1 - 5 - 2. MASSAGE RANGE(MOVEMENT RANGE OF MASSAGE WHEELS)SHIATSU MASSAGE, SWEDISH MASSAGE, KNEADING, VIBRATING, TAPPING A, TAPPING B, WHOLE BACK ROLLING, REGIONAL ROLLING Width adjustment Approx.2in. to 8in. (5cm to 21cm) Intensity adjustment Shiatsu, Swedish, Knead, Tap A, Tap B, whole back roll, and Regional roll (from gentle to strong) :2in. (5cm) - wide adjustability where massage heads push out toward body as intensity increases.
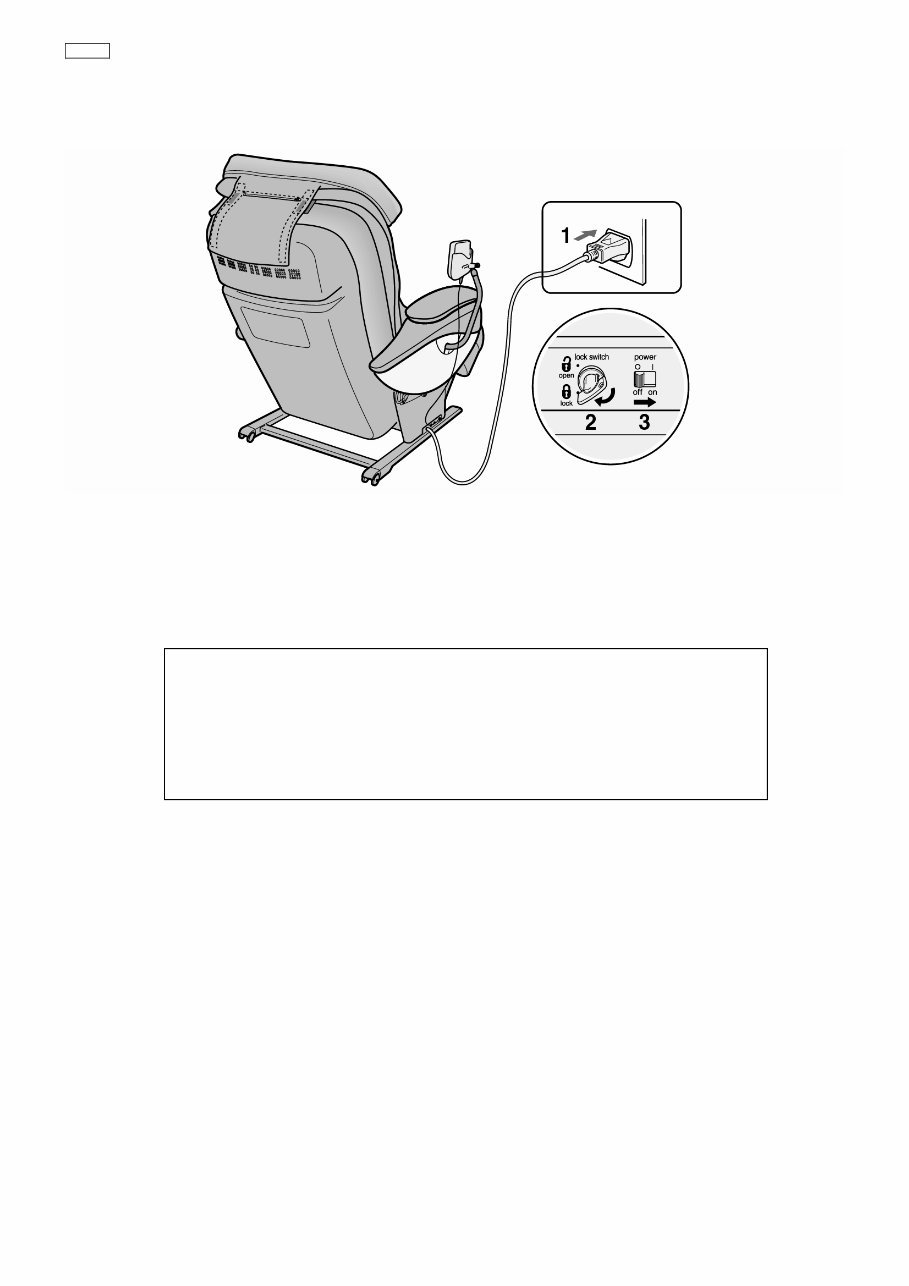
EP3513 ORDER NO.HPD0509U24C1 - 6 - 3. TURNING ON THE POWER 1. Plug the power plug into the power socket. 2. Turn the lock switch to the open position. 3. Turn on the power switch on the back of the unit. ・ When the operating lock switch is pointing toward ‘lock’, the power switch cannot be moved to the ‘on’ position. Timer When the on/off button is pushed, a timer begins to prevent overuse. After approximately 15 minutes, time expires and the massage wheel goes into storage position. After each use. ・ Be sure to turn the power switch to ‘off’. ・ To prevent children from using this unit, lock the power switch by moving the operating lock switch to the ‘lock’ position. ・ As a further caution, unplug the power cord from the power socket after each use.
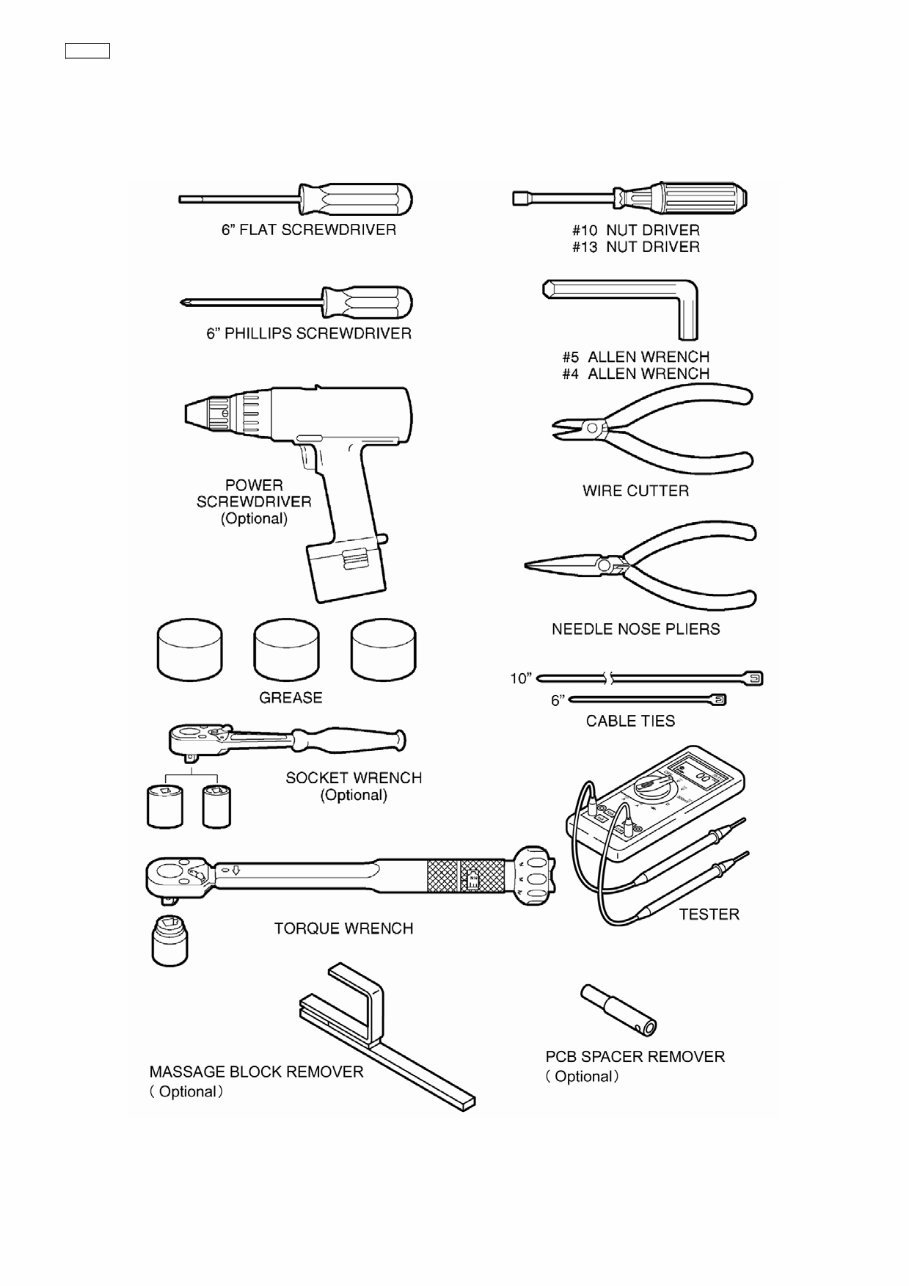
EP3513 ORDER NO.HPD0509U24C1 - 7 - 4. REQUIRED TOOLS
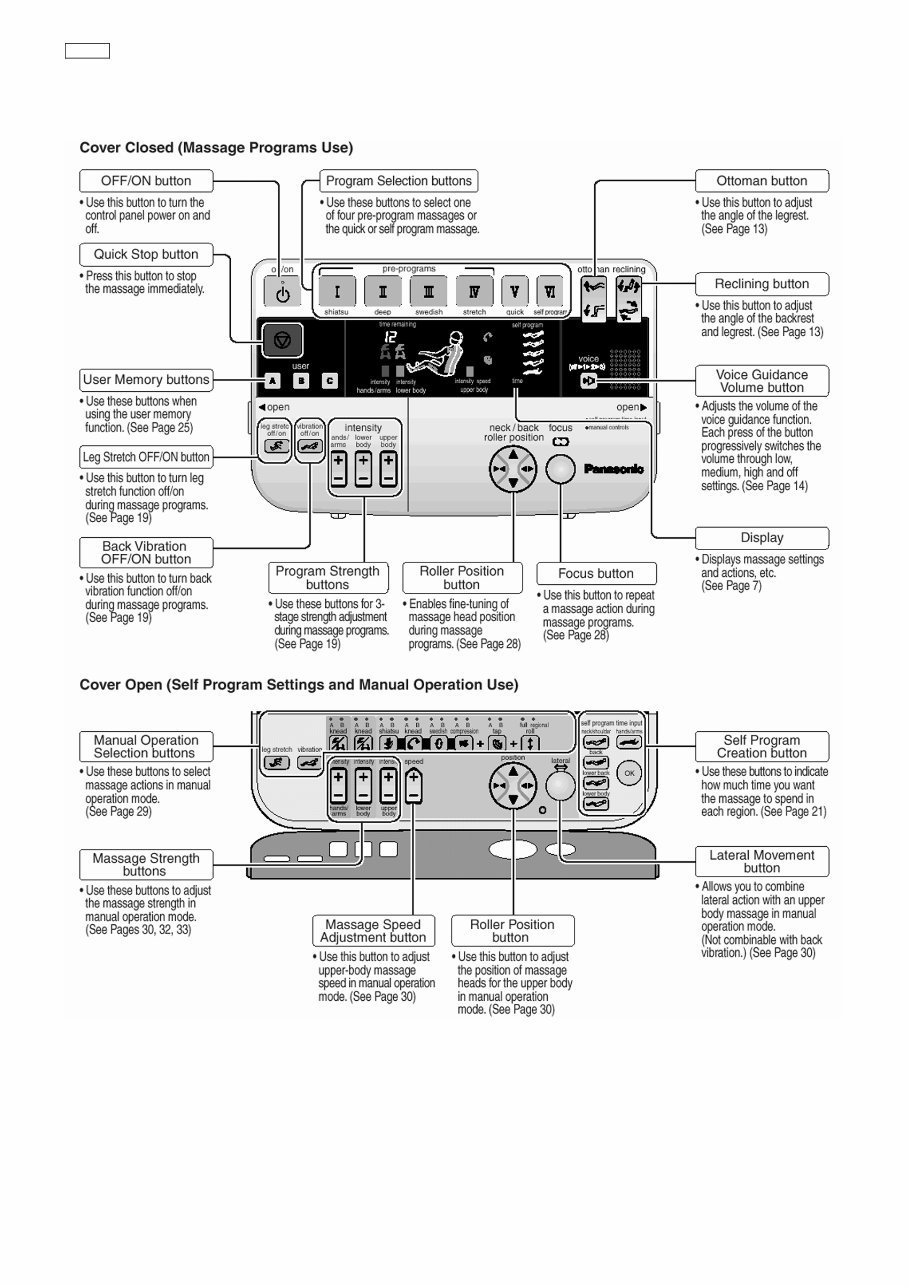
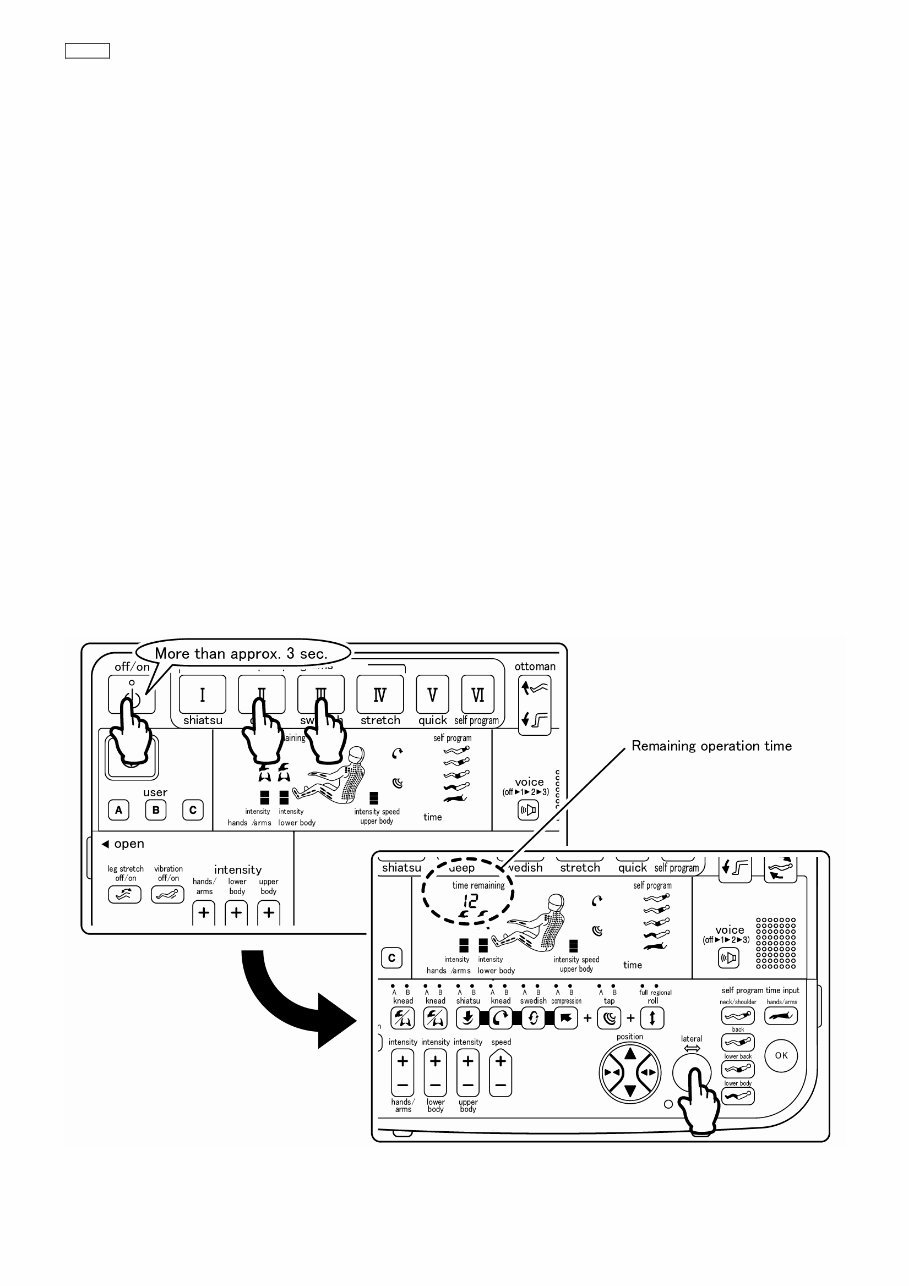
EP3513 ORDER NO.HPD0509U24C1 - 8 - 5. DISPLAY METHOD OF MASSAGE BLOCK TOTAL USE TIME AND OPERATION TIME 5.1 ADJUSTMENT OF PRESSURE SENSOR How to adjust the Pressure sensor The adjustment of the Pressure sensor is necessary every time after the Main PCB or Massage mechanism block are replaced or repaired disassembled & reassembled. First, keep the Massage mechanism block unloaded without pressure and move it upward halfway. - If the Massage mechanism block is at the highest or lowest position, you cannot arrange the pressure sensor correctly because the fabric becomes tense with pressure. - Keep the Controller cover closed. 1. Insert the Power plug into the power source and turn on the switch of the Power source switch block. 2. While pushing the buttons of Ⅱ and Ⅲ, continue to push the On/off button for more than approximately three seconds. 3. After the buttons of Ⅱ and Ⅲ light, open the Controller cover and push the Lateral button. - On the screen of remaining operation time, the current pressure is shown (0-3), which the Massage balls are enduring. 4. Close the Controller cover and push the Focus button. - The load on the Massage balls when the switch is pushed is considered basic point, and from then the scanning and the sensing the body pressure are executed based on the basic point. - When the adjustment of pressure sensor is finished, the remaining time is shown ‘0’ and the buttons of Ⅱ and Ⅲ go off.
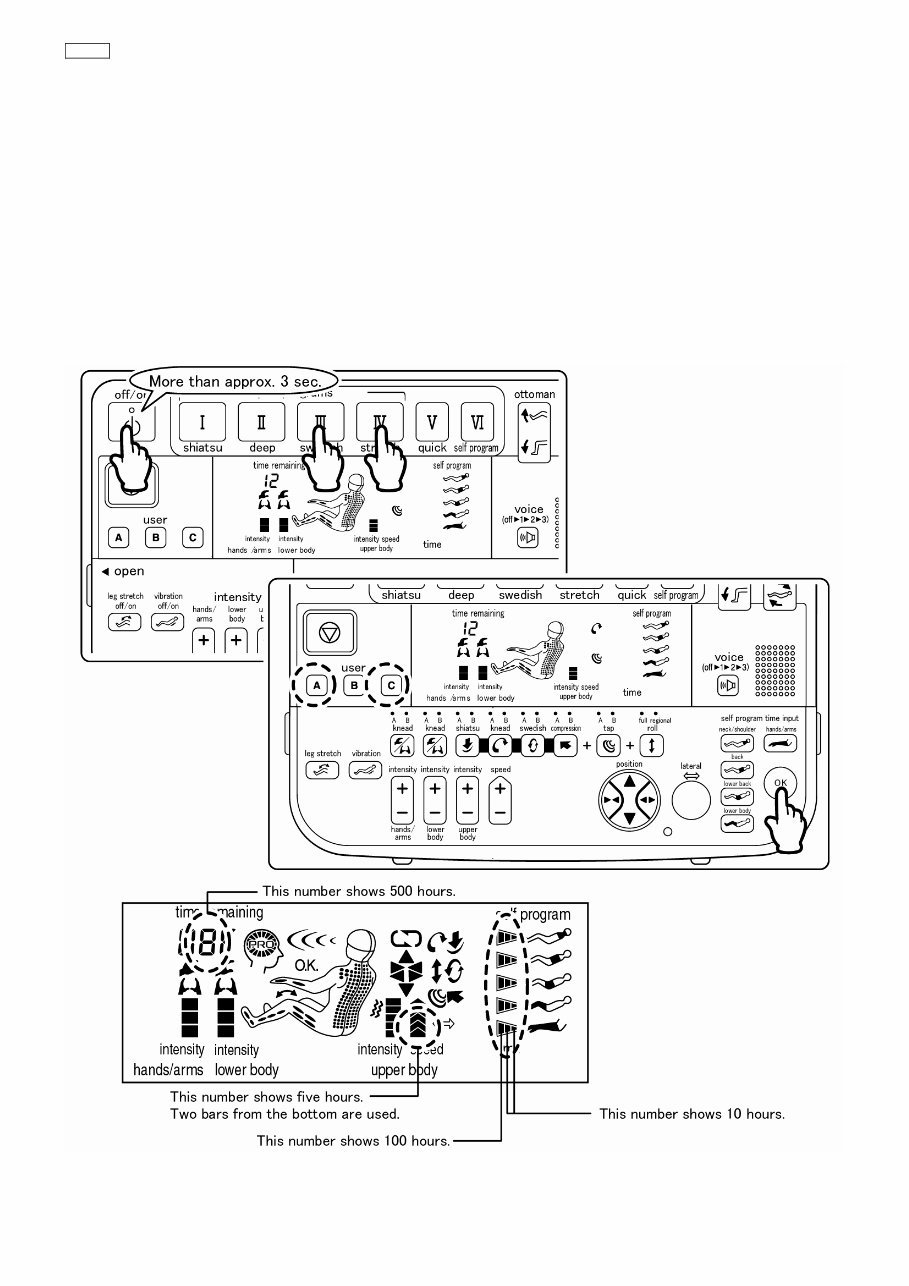
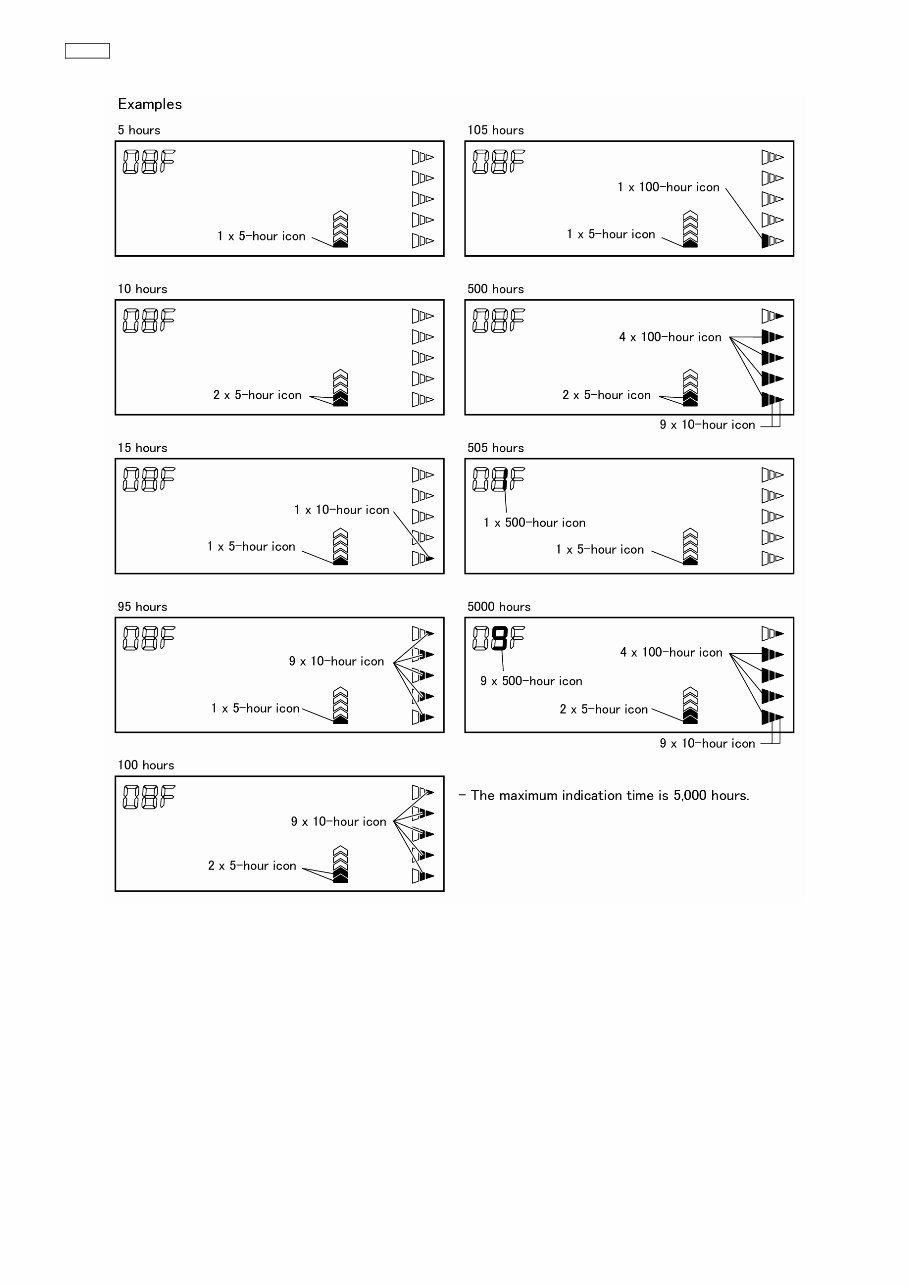
EP3513 ORDER NO.HPD0509U24C1 - 9 - 5.2 DISPLAY METHOD OF MASSAGE BLOCK TOTAL USE TIME 1. Insert the Power plug into the power source and turn on the switch of the Power source switch block. 2. Close the Controller cover. 3. While pushing the buttons of Ⅲ and Ⅳ, continue to push the On/off button for more than approximately three seconds. 4. After the buttons of User A and User C light, open the Controller cover and push the OK button. - The accumulative usage time is shown on the Controller. - If the accumulative usage time is less than five hours, it does not show anything.If it is less than 10 hours, it is shown five hours. - The maximum indication time is 5,000 hours.
Are you experiencing issues with your Panasonic EP-3513 Massage Chair? Instead of spending a significant amount on repairs or replacements, why not take matters into your own hands?
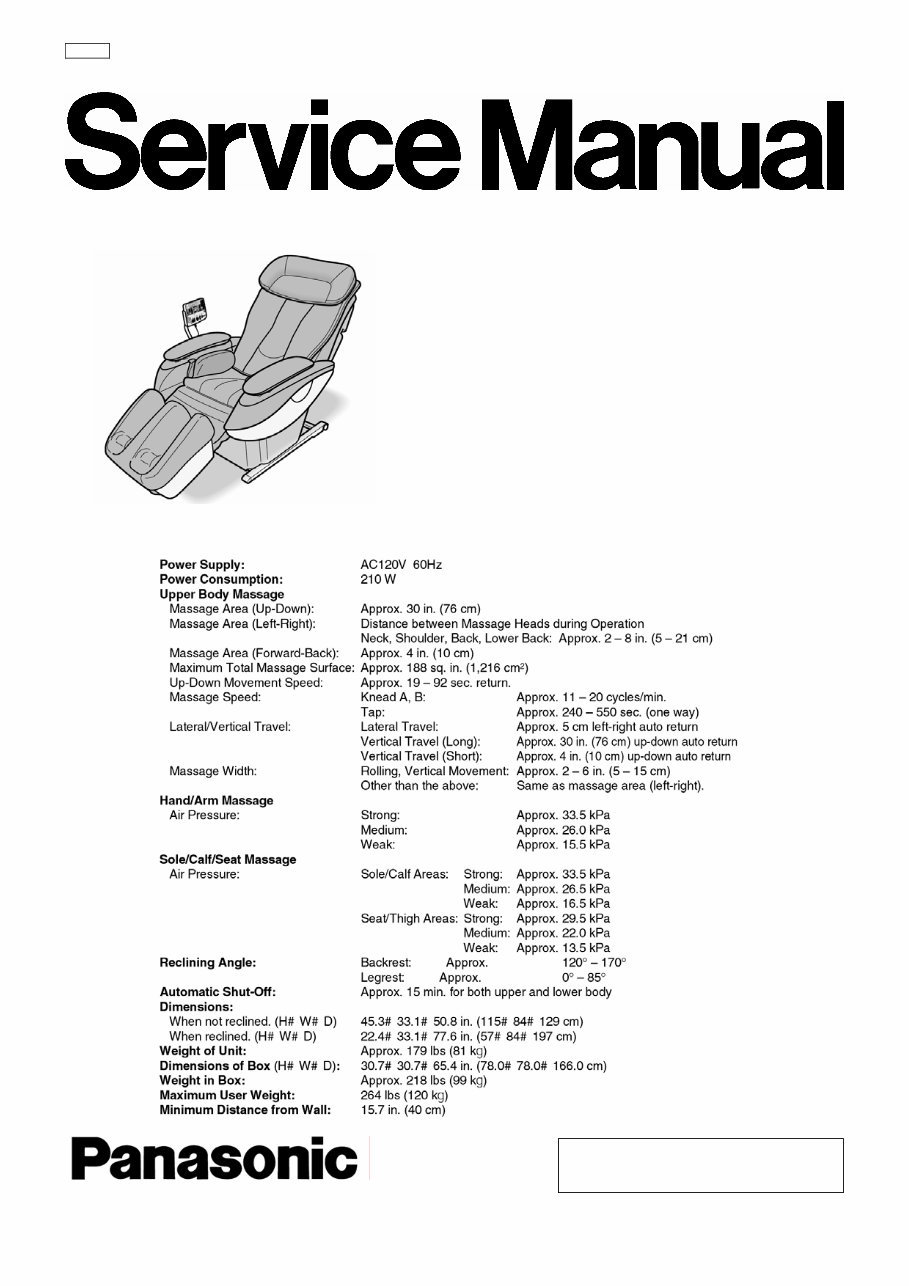
This comprehensive service and repair manual is utilized by certified Panasonic technicians and is designed to assist you in troubleshooting and fixing your Massage Lounger.
The manual includes the following content:
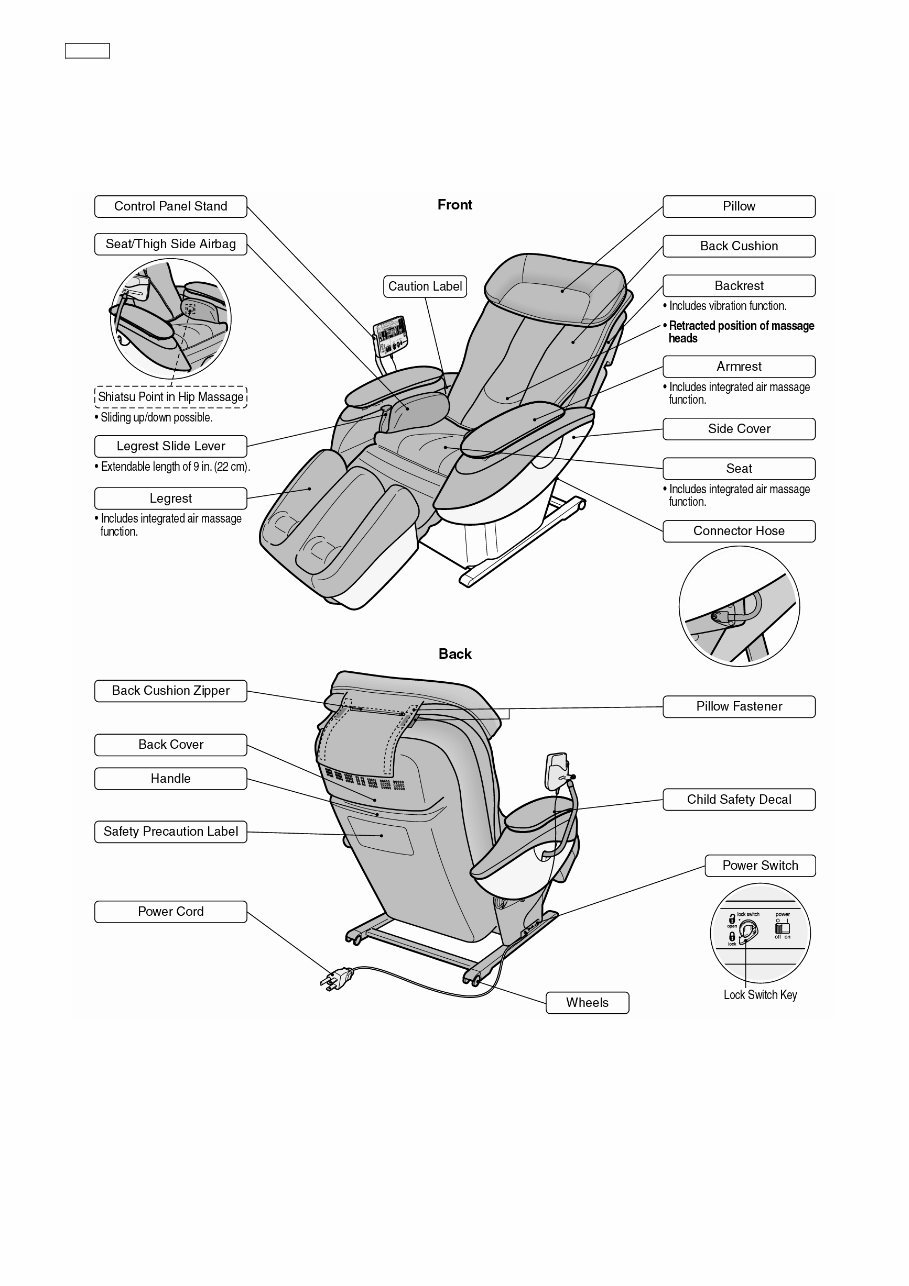
Components Identification
Massage Range (Movement Range Of Massage Wheels)
Turning On The Power
Required Tools
Display Method of Massager Block Total Use Time and Operation Time
Disassembly
Actual Wiring Diagram
Checking
Grease
Exploded View
Replacement Parts List
This manual is applicable to the Panasonic EP3513-U1 Massage Lounger model.
It is a highly detailed manual, complete with illustrations, pictures, and step-by-step instructions for effective repair and servicing.
You can conveniently print this manual from any computer and printer. Please note that this is the official service and repair manual in PDF format, ensuring the highest resolution for quality printing.
Gain instant access to the manual after payment, eliminating shipping fees and waiting time. You can commence your repairs promptly!
Specifications:
Language: English
Format: PDF
Pages: 74
Platform: Windows and MAC
If you are in search of a specific service manual, feel free to reach out to us with your request. With one of the most extensive service manual databases, we are likely to assist you!



 Lifetime Access




