DISHWASHER SERVICE MANUAL BEFORE SERVICING THE UNIT, PLEASE READ THIS MANUAL CAREFULLY FOR SAFETY AND CORRECT SERVICES. NOTE MODEL : LD-1420T1 (LD-4204T1)
- 3 - 1. CAUTION ......................................................................................................................... 4 2. SPECIFICATIONS ........................................................................................................... 5 3. PARTS NAME .................................................................................................................. 6 4. FEATURES & TECHNICAL EXPLANATION ................................................................... 7 5. WIRING DIAGRAM ...................................................................................................... 19 6. PROGRAM CHART (SCHEMATIC DIAGRAM) ............................................................ 20 7. HOW TO DISASSEMBLE ............................................................................................ 21 8. TROUBLE SHOOTING METHODS .............................................................................. 34 A. TROUBLE SHOOTING ACCORDING TO DISPLAYED ERROR MESSAGE .......... 34 B. TROUBLE DIAGNOSES AND REPAIR BY SYMPTOM........................................... 36 9. INSTALLATION INSTRUCTION ................................................................................... 40 10. EXPLODED VIEW .......................................................................................................44 11. REPLACEMENT PART LIST ........................................................................................51 CONTENTS
- 4 - DISCONNECT POWER CORD BEFORE SERVICING RECONNECT ALL GROUNDING DEVICES IMPORTANT SAFETY NOTICE ! This service information is intended for individuals possessing adequate backgrounds of electrical, electronic and mechanical experience. Any attempt to repair this appliance may result in personal injury and property damage. The manufacturer or seller can not be responsible for the interpretation of this information, nor can it assume any liability in connection with its use. CAUTION !
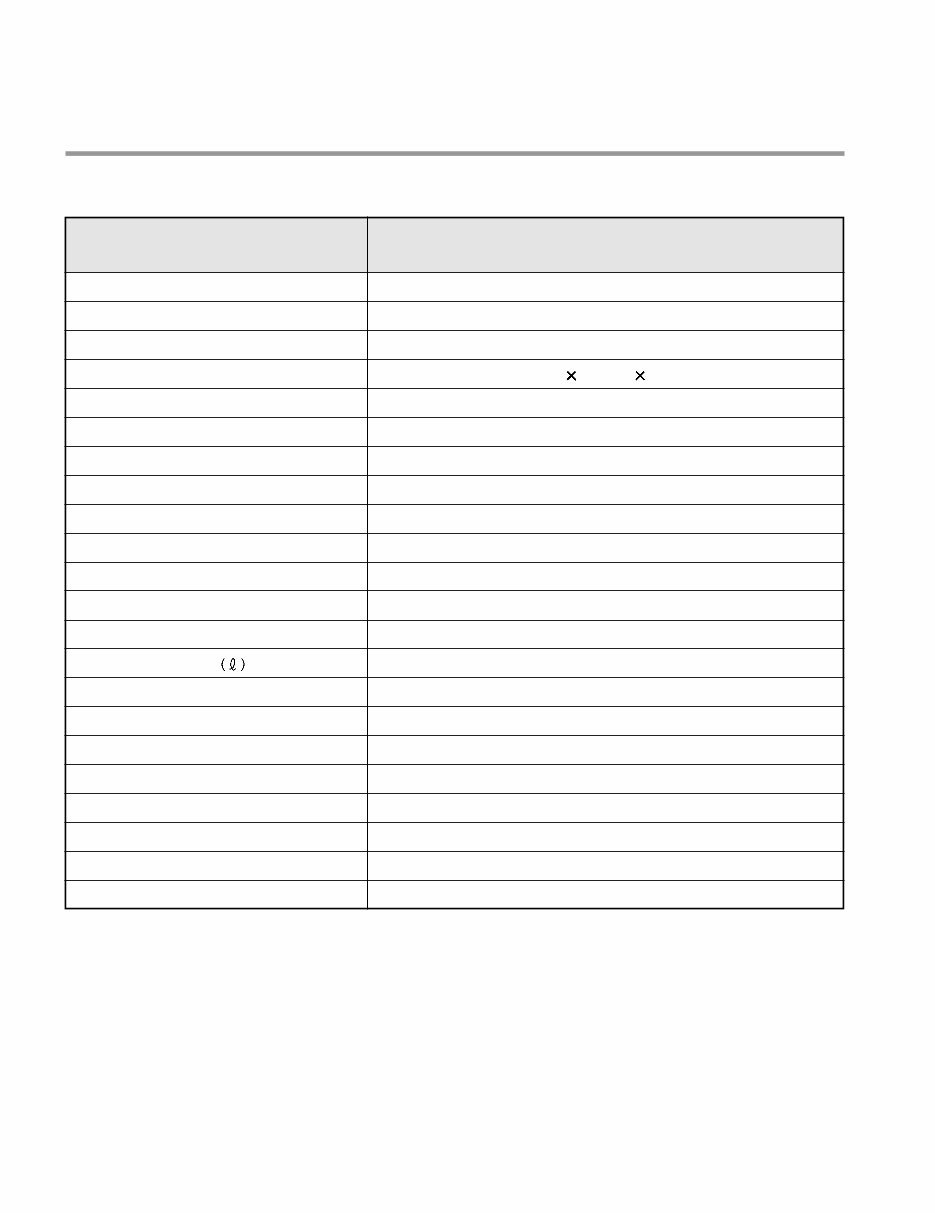
- 5 - 2. SPECIFICATION ITEM SPECIFICATION Rated Voltage / Frequency Installation Place Settings Product Dimension(mm) Product Weight(Kg) Color Tub Material Control Rated Power(Watt) Heater Power(Watt) Programs Upper Rack Lower Rack Water Consumption Power Consumption (kWh) Operating Time (min) Fan Dry System Delay Start Function Auto-Off Power Switch Process Monitor Wash Level Operating Water Pressure (MPa) AC 240V/50Hz Freestanding 14 600(W) 600(D) 850(H) 60 Stainless Stainless Steel Electronic 1,540 1,500 6 Adjustable, Nylon Coating 50% Fold down, Removal Rack, Nylon Coating 13.90 (Eco 50 – Strong) 0.885 (Eco 50 – Strong) 222 (Eco 50 – Strong) Yes Yes Yes Yes 5 0.05 ~ 0.8
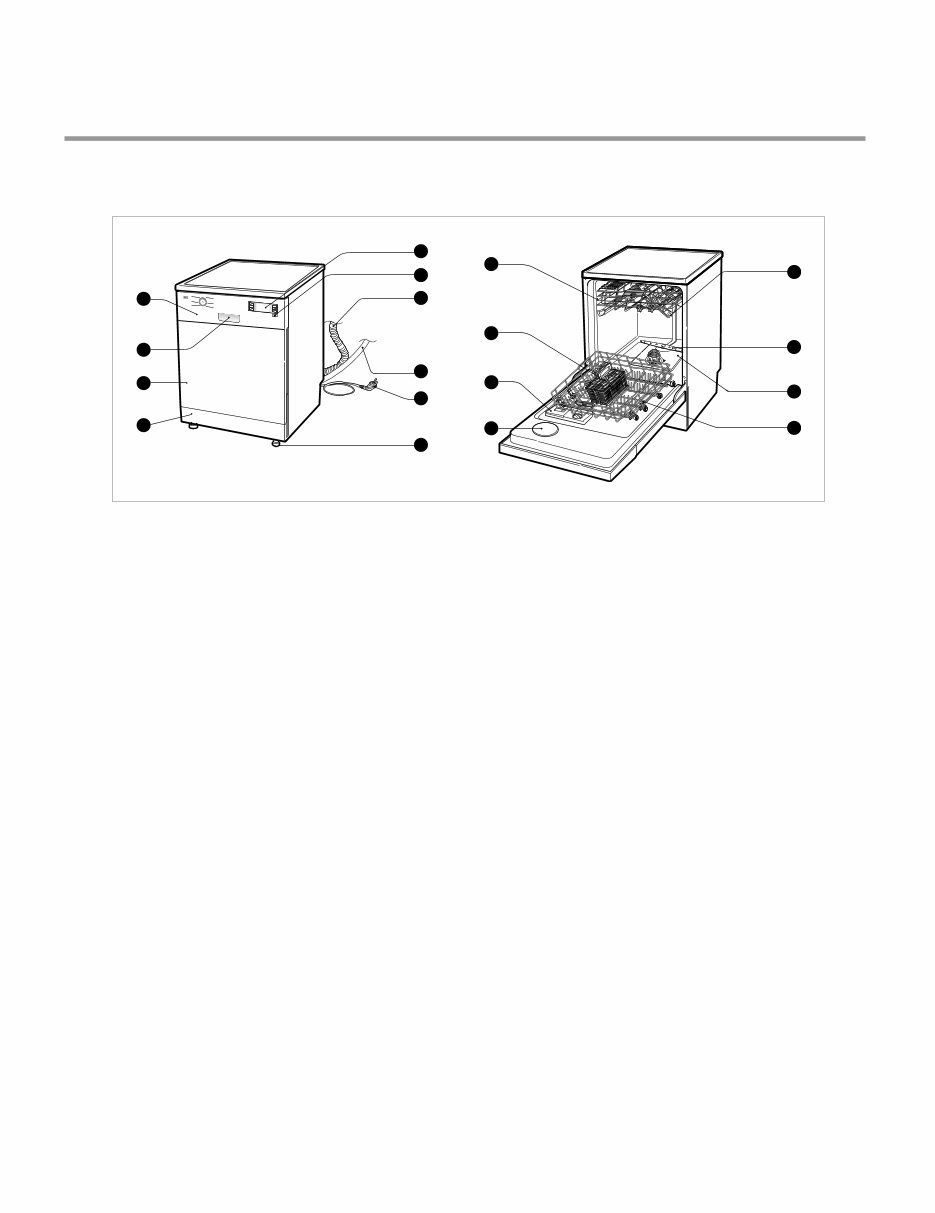
- 6 - 3. PARTS NAME 1 3 4 5 6 7 8 2 19 18 9 10 11 13 14 15 16 12 1. Control Panel 2. Front Cover 3. Display Window 4. Power Button 5. Drain Hose 6. Inlet Hose 7. Power Cord 8. Adjust Leg 9. Upper Rack 10. Cutlery Rack 11. Detergent And Rinse Aid Dispenser 12. Vapor Vent Cover 13. Upper Spray Arm 14. Lower Spray Arm 15. Filter ASM 16. Lower Rack 17. Door Handle 18. Lower Cover
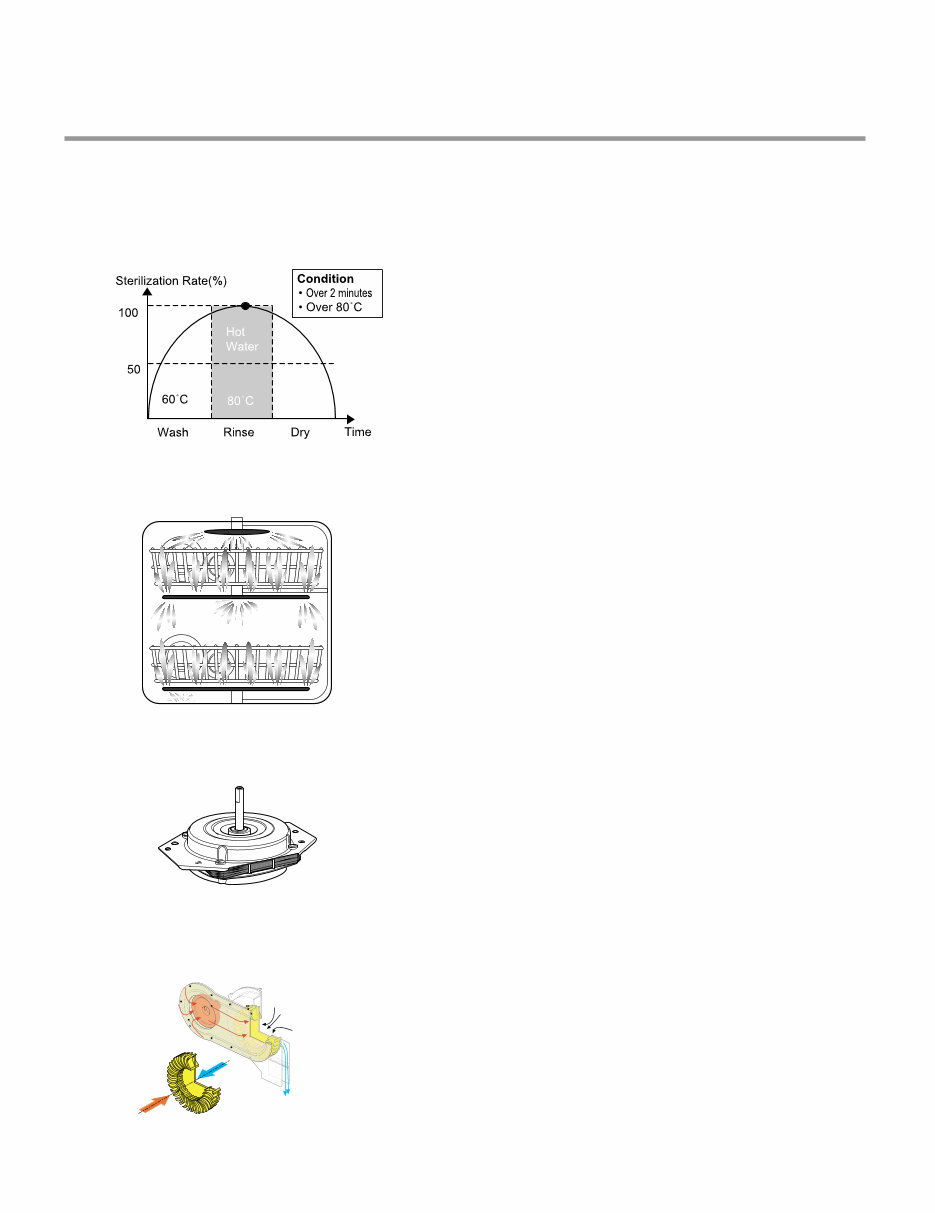
4. FEATURES & TECHNICAL EXPLANATION 4-1 New Technology Introduction • During the high temp. Rinse course, water temperature in an dishwasher reaches 80°C, considerably higher than the average rinse temperature in conventional dishwashers(65°C). This is how Rinse 80°C can eliminate some bacteria such as salmonella. 4-1-1. High Temperature Rinsing (Extra Hot function) • With the Dual Wash System you can select different water pressure levels not only for the lower basket, but also for the upper basket. So you can get strong water pressure for the big pots in the lower basket and soft water pressure to protect your delicate or valuable dishes in the upper basket. 4-1-2. Dual Wash • Newly introduced Slim Direct Inverter motor is inverter-controlled. Speed is controlled based on program selection. It also offers high energy efficiency to minimize energy loss. 4-1-3. Slim Direct Inverter Motor Moist Air Dry Air Mixed Air • This is one of the best performance solutions for drying dishes because it minimizes venting humid air to the outside of the dishwasher. In addition, this system ensures better drying results compared to the condensing drying system. 4-1-4. Hybrid Drying System - 7 -
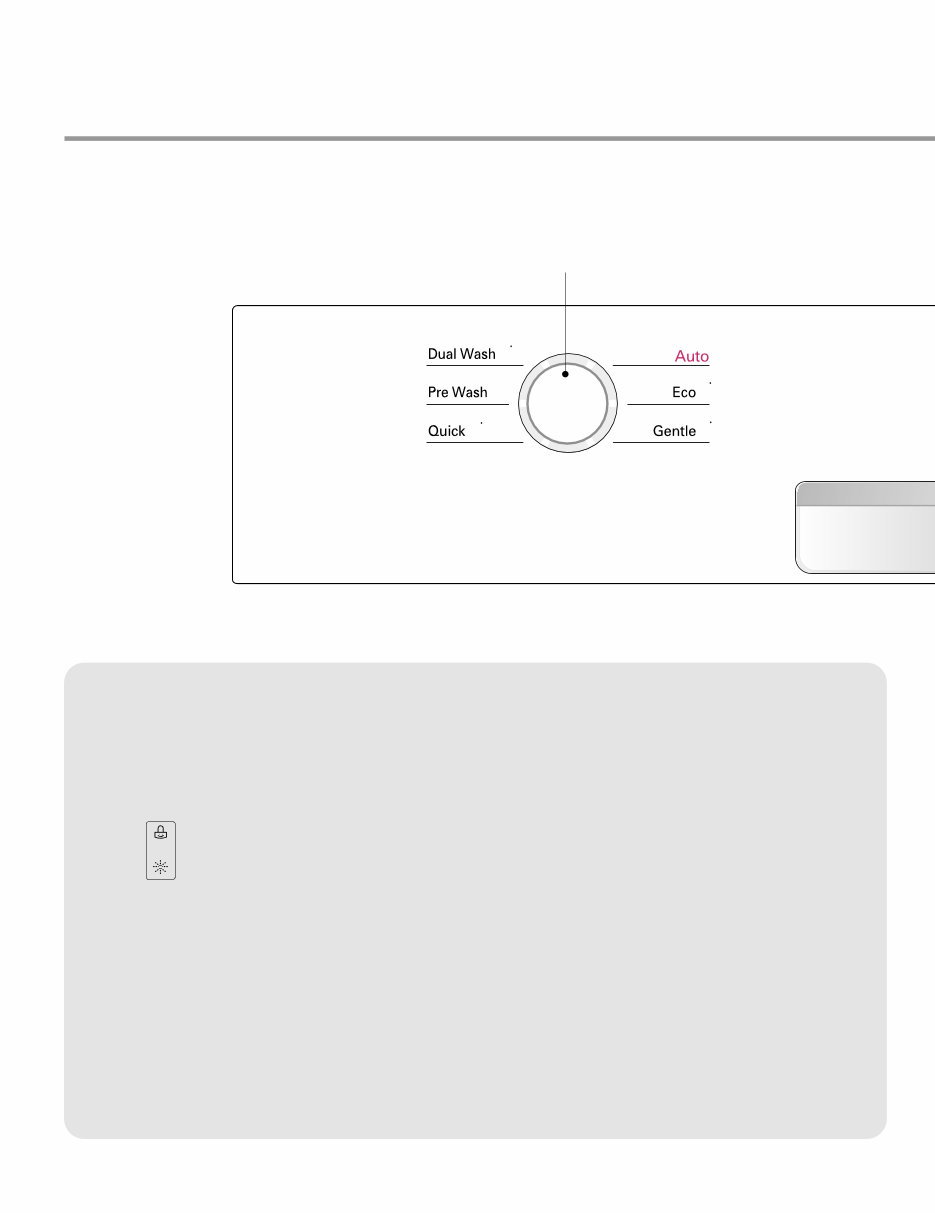
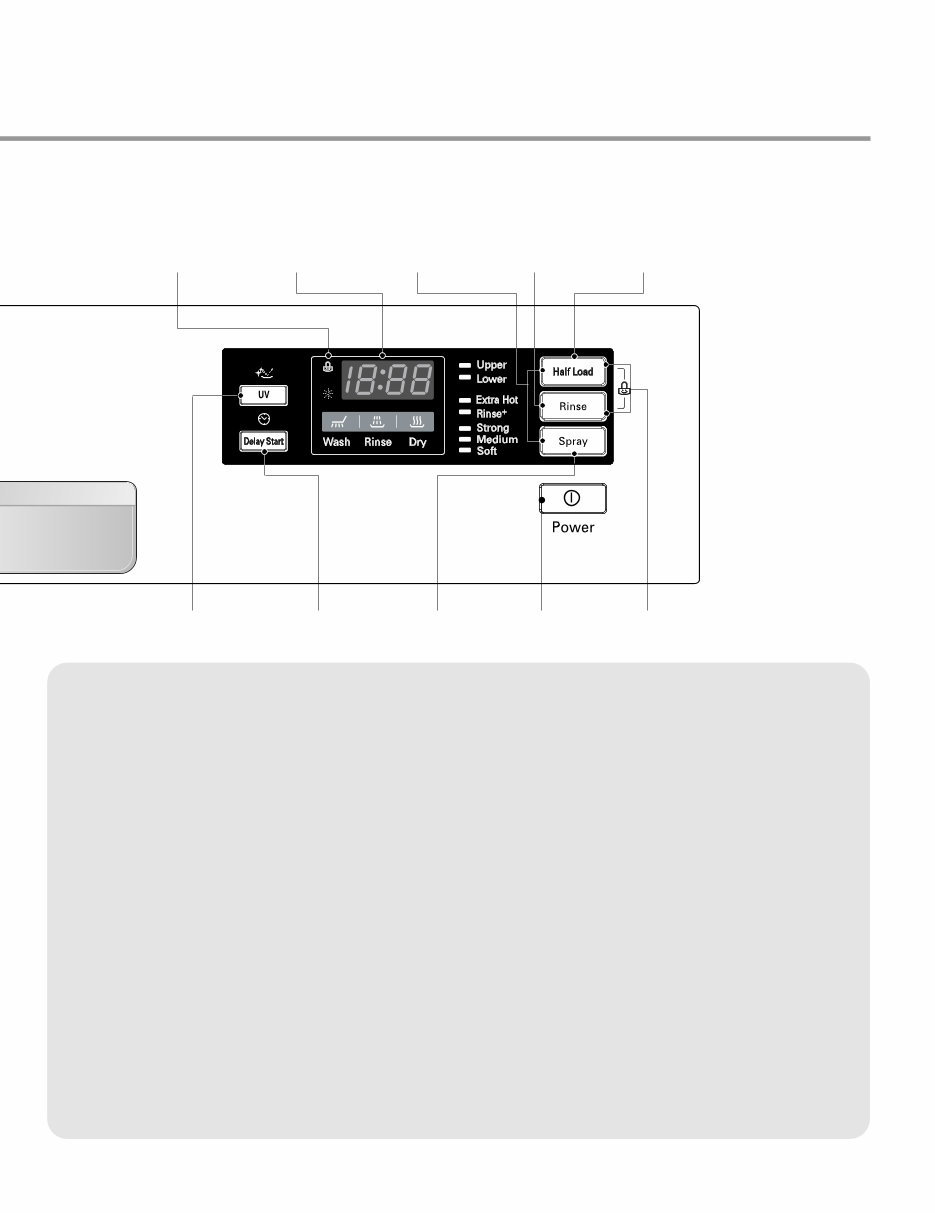
4-2 Display Panel - 8 - ①PROGRAM • When you want to select program, press this button. ②UV • If you want to sterilize the dishes, press UV button. • After drying cycle, sterilizer will be performed by UV lamp. ③Indicator • Child Lock. • Refill with rinse aid. ④Time Left • Before starting, the display window shows the running time of the selected program. • After starting, the display window shows the remaining time. • If the dishwasher has a trouble, the trouble type is displayed. “OE”, “FE”, “IE”, “EI”, “HE”, “CE”, “LE”, “tE” • If this error letters are displayed, please refer to the trouble shooting guide page 22 and follow the guide. ⑤BEEP ON/OFF • The dishwasher must be switched on. • The beep on/off function can be set by pressing the Half Load and Spray button simultaneously for a few seconds. Then, a “On” will appear in the display. • The beep on/off function is automatically canceled when power failure occur. 70 70 65 65 65 65 55 55 ①PROGRAM
- 9 - ⑥Rinse • Repeated pressing of the Rinse button will select Extra Hot, Rinse+, Extra Hot & Rinse+. • If you select the Extra Hot function, the operationg temperature will be up to 80°C (Dual wash, Auto, Eco) • When you select Rinse+, an additional rinse cycle is added. ⑦Half Load • In case of small load, use upper or lower rack only to save energy. • With each press, can select Upper or Lower rack only. • In case you don’t select this button, the machine always works vario washing, which operate upper and lower spray arm alternately. ⑧Child Lock • Used to lock or unlock the control buttons to prevent all the setting from being changed by a child. • For locking/ unlocking, press Half Load and Rinse button for a few seconds simultaneously. ⑨Power • For operating, press this button first for power on. • After operating, this button automatically switches off for safety and energy saving. • In case of irregular surge disturbance to the machine, the power may be automatically turned off for safety. ⑩Spray • With each press, the level of water jet is changed to Strong, Medium and Soft in a sequence. ⑪Delay Start • If you want to delay the start of selected program, press this button. • Pressing this button will increase time by 1 hour. • The delay start time can be adjusted from 1 hour to 19 hours. ③Indicator ④Time Left ⑦Half Load ⑤BEEP ON/OFF ⑥Rinse ⑪Delay Start ②UV ⑨Power ⑧Child Lock ⑩Spray
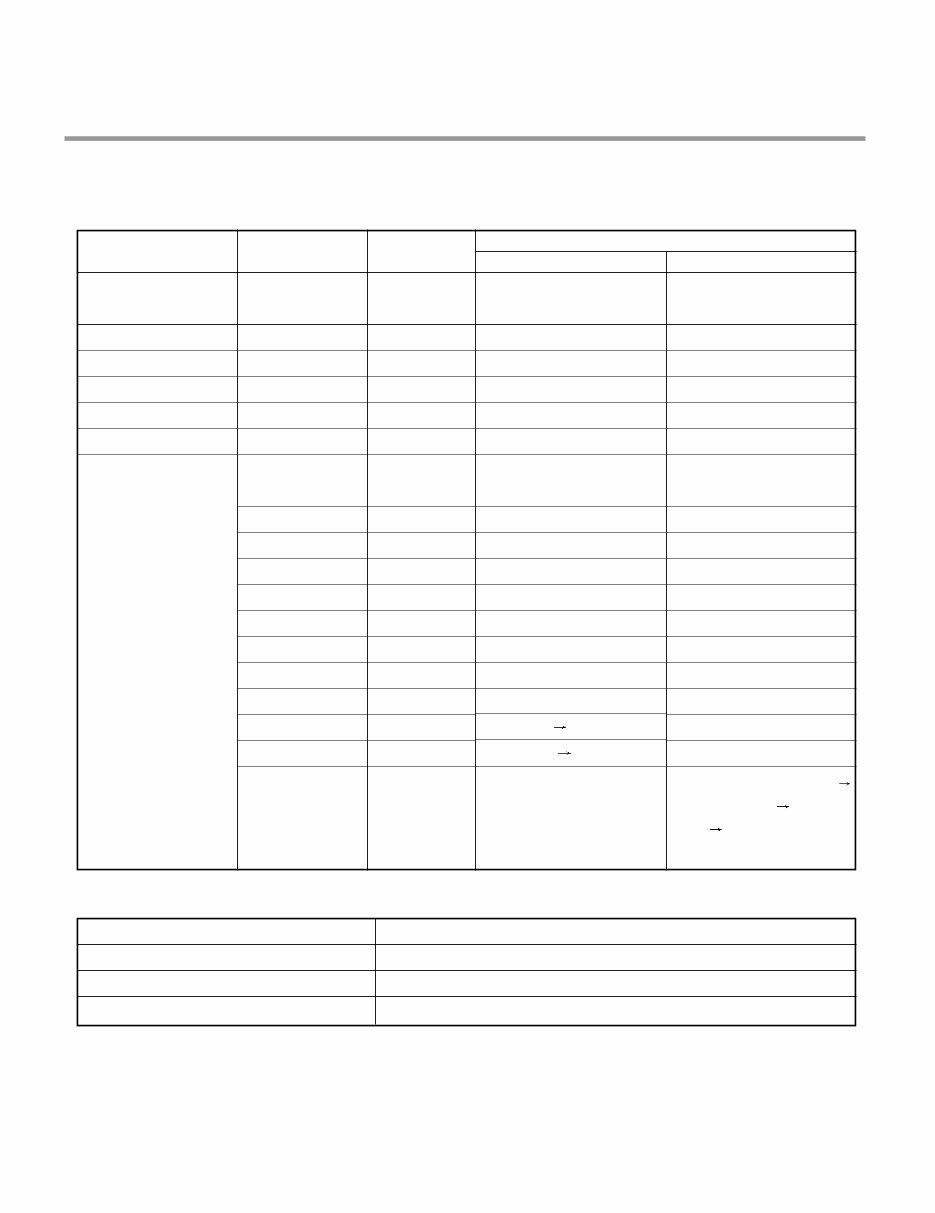
- 10 - 4-3 TEST MODE CHECK PROGRAM(START IN THE STATE OF THE CLOSED DOOR) ※ CHECK MODE BUTTON BUTTON OPERATION Half Load + Spray Program Button + UV Program Button + Delay Start Buzz On/Off Display Inner Temperature Display Water Supply Frequency The number of pushing button DISPLAY Load LED Checking points Half Load + Rinse + POWER Button Program Button Cool Dry Button Delay Start Button Half Load Button Rinse Button Spray Button 1 TIME n1H : 1U00 All LEDs are lighting 1 TIME 1 TIME 1 TIME 1 TIME 1 TIME 1 TIME 2 TIME 3 TIME 4 TIME 5 TIME 6 TIME 7 TIME 8 TIME 9 TIME 10 TIME 11 TIME 12 TIME 11 : 11 12 : 22 13 : 33 14 : 44 15 : 55 - n12 n13 Frequency n15 n16 Temperature n18 n19 n1A n1B n1C - Washing Motor Drain Pump Inlet Valve Dispenser Heater(for 10 sec.) Fan Motor Regeneration Valve UV Lamp (UV lamp use only) Vario motor Vario S/W OFF Vario motor Vario S/W ON AUTO OFF S/W Dual Wash Cool Dry Delay Start Half Load Rinse Auto, Eco, Gentle, Quick Pre Wash, Dual Wash UV Delay Start Child Lock, Salf Refill, Rinse Refill Wash Rinse Dry Upper Lower Extra Hot, Rinse+ Strong, Medium, Soft Operate C1 mode(for 1min.) Drain(for 42sec.) Supply water Push Spray Button (Auto Off) Micro S/W must be ON to operate HEATER
Why replace or spend an absurd amount of money on repairs when you can upgrade or repair? This service and repair manual is used by the Official Certified LG Technicians. It will help you to troubleshoot and repair your dishwasher!
You will learn about:
Product Operations, Specifications
Features & Technical Explanation
Disassembly Instructions
Troubleshooting
Error Messages
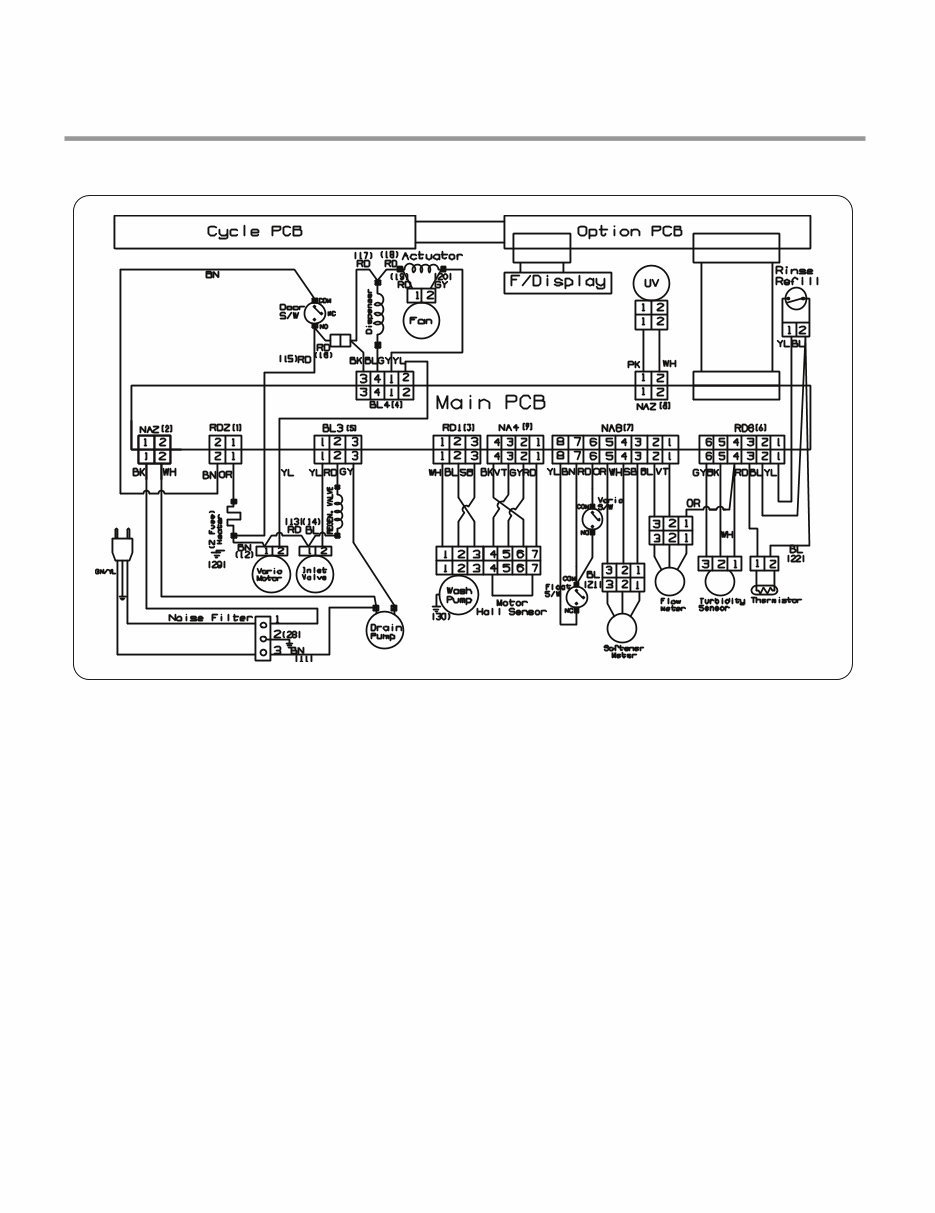
Wiring Diagrams
Program Charts
Exploded Views
Please note this is the OFFICIAL service and repair manual, no scanned-in or bootlegged copy. This manual is made in the highest resolution, so when you print the pages you need it is all in great quality!
INSTANT access! After your payment, you will have instant access to your access. No shipping fee, no waiting on postal delivery, you can start doing your repairs today!
Specifications
Language: English
Format: PDF
Pages: 43
Platform: Windows and MAC
Looking for a service manual but can't find it anywhere? Please contact us with your request! As you can see we've got the largest and most comprehensive service manual database out there, so a good chance we can help you out!





 Lifetime Access




