

Black Decker Breadmaker Parts Model BMH200 Instruction Manual Recipes
What's Included?
Fast Download Speeds
Online & Offline Access
Access PDF Contents & Bookmarks
Full Search Facility
Print one or all pages of your manual

Important safeguards
When using electrical appliances, in order
to reduce the risk of fire, electric shock,
and/or injury to persons, basic safety
precautions should always be followed,
including the following:
For Your Safety
Read all instructions carefully, even if you feel
you are quite familiar with this type of
appliance.
• To protect against the risk of electric shock
DO NOT IMMERSE any part of this appliance
(except the lid which may be removed and
immersed in water), plug or cord set in water or
other liquid:
• Always disconnect the appliance from the
power outlet when filling with water, when
emptying, during cleaning and when not in use.
Take special care not to spill water over the
appliance when filling.
• Do not cover the appliance with a towel or
similar material. The viewing window does
incorporate a vent which allows steam to
escape during the baking cycle. Covering the
appliance may prevent steam from escaping.
• Do not operate in the presence of explosive
and/or flammable liquids or fumes.
• Extreme caution must be used when moving
an appliance containing hot food, water, or
other hot liquids.
• Close supervision is necessary when any
appliance is'used near children. Not intended
for use by children, infirmed persons or invalids
without supervision. Never leave an appliance
unattended when in use.
• Switch off and remove the plug from the
power outlet before cleaning or when not in use.
To unplug, grasp plug and pull from power
outlet. Never pull cord.
• Do not operate any appliance with a damaged
cord or plug after the appliance malfunctions, or
is dropped or damaged in any manner.
• Do not let cord hang over edge of table or
counter, or touch hot surfaces. Do not operate
or place any part of this appliance on or near a
hot gas or electric burner or in a heated oven.
• While in use do not place hands inside the
mixing bowl.
• The use of attachments or accessories not
recommended or sold by the manufacturer
may cause fire, electric shock or injury.
• Allow to cool before cleaning. Do not touch
hot surfaces. Ensure to use handles and knobs.
• Operated on a heat resistant level surface.
Operating on sinks, drainboards or uneven
surfaces must be avoided.
• Do not use an appliance for anything other
than its intended use. This product is intended
for household use only.
• Do not use outdoors.
• Do not abuse the cord. Never carry the
appliance by the cord or yank it to disconnect it
from an outlet; instead, grasp the plug and pull
to disconnect.
• When using an extension cord with your
appliance make sure the extension cord is
correctly wired and rated for its use.
• Do not attempt to repair or disassemble the
appliance. There are no user serviceable parts.
This product has not been designed for any
uses other than those specified in this booklet.
Save these instructions
Congratulations on the purchase of your
Breadmaker. Before first using the
breadmaker, it is most important that you read
and follow the instructions in this Use & Care
booklet, even if you feel you are quite familiar
with this type of appliance. ~ind a place and
keep this booklet handy for future reference.
Attention is particularly drawn to the section
dealing with "Your Safety".
This appliance has been designed to operate
from a standard domestic power outlet. It is not
intended for industrial or commercial use.

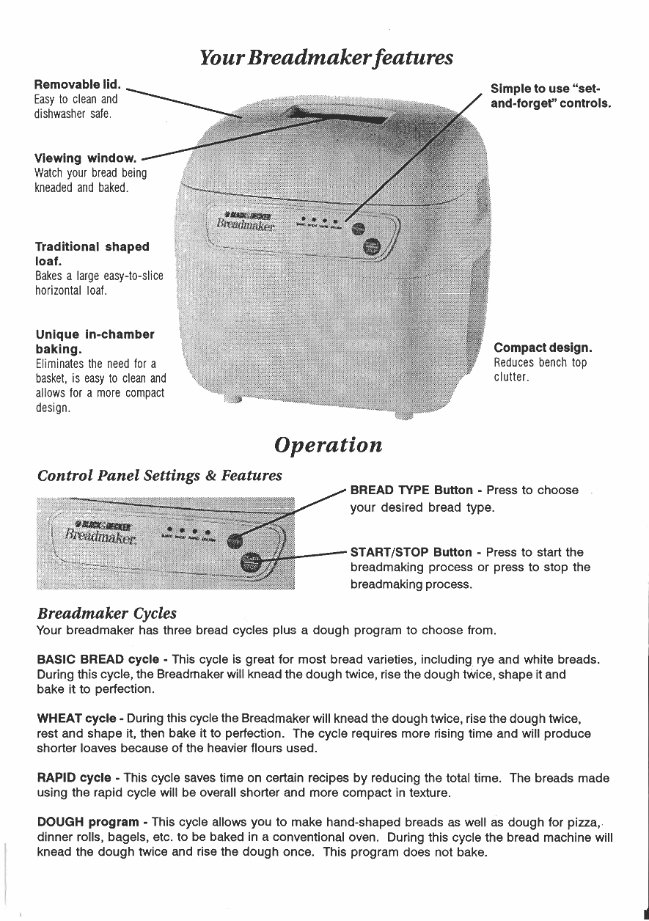
Your Breadmaker features
Removable lid.
Easy to clean and
dishwasher safe.
Viewing window.
Watch your bread being
kneaded and baked.
Traditional shaped
loaf.
Bakes a large easy-to-slice
horizontal loaf.
Unique in-chamber
baking.
Eliminates the need for a
basket, is easy to clean and
allows for a more compact
design.
Operation
Control Panel Settings & Features
Simple to use "set-
and-forger' controls.
Compact design.
Reduces bench top
clutter.
BREAD TYPE Button - Press to choose
your desired bread type.
START/STOP Button - Press to start the
breadmaking process or press to stop the
breadmaking process.
Breadmaker Cycles
Your breadmaker has three bread cycles plus a dough program to choose from.
BASIC BREAD cycle - This cycle is great for most bread varieties, including rye and white breads.
During this cycle, the Breadmaker will knead the dough twice, rise the dough tWice, shape it and
bake it to perfection.
WHEAT cycle· During this cycle the Breadmaker will knead the dough twice, rise the dough twice,
rest and shape it, then bake it to perfection. The cycle requires more rising time and will produce
shorter loaves because of the heavier flours used.
RAPID cycle - This cycle saves time on certain recipes by reducing the total time. The breads made
using the rapid cycle will be overall shorter and more compact in texture.
DOUGH program - This cycle allows you to make hand-shaped breads as well as dough for pizza,
dinner rolls, bagels, etc. to be baked in a conventional oven. During this cycle the bread machine will
knead the dough twice and rise the dough once. This program does not bake.
Using Your Breadmaker (cont.)
4. Plug the Breadmaker into a 230-240
volt outlet and switch power on.
*When the power is turned on, all the
"Bread Type" lights will flash.
5. Select the desired setting:
*Press the BREAD TYPE button until your
choice is illuminated.
6. Press START. The Breadmaker will begin
mixing the dough according to the setting
selected. To cancel operation at any time,
press and hold the STOP button for 5
seconds.
7. Open the lid fully. To remove bread, use the
loaf lifter tool provided to go up under the
loaf, squeeze lightly together and lift loaf
out.
USE CAUTION WHEN TOUCHING HOT
SURFACES
The bread and the interior of the machine will be
extremely hot after baking. It is therefore
recommended that pot holders or oven mitts be
used when removing the bread.
IMPORTANT: Always cool machine thoroughly
before using a second time. Either leave the lid
open and let the machine cool for one hour or
pour cold water and ice into the machine to
speed up the cooling.
Making Dough
The DOUGH program allows you to create a
variety of doughs to shape by hand and bake in
a conventional oven.
To set the DOUGH only mode:
1. Using the BREAD TYPE button select
DOUGH.
2. Press START to begin operation. To cancel
operation at any time, press and hold STOP
button for 5 seconds.
3. When the cycle is complete open the lid
and remove the dough. Shape and bake
as directed in recipe. The Breadmaker will
not be hot.
Cooling Loaves
Place the bread on a wire rack and allow to cool.
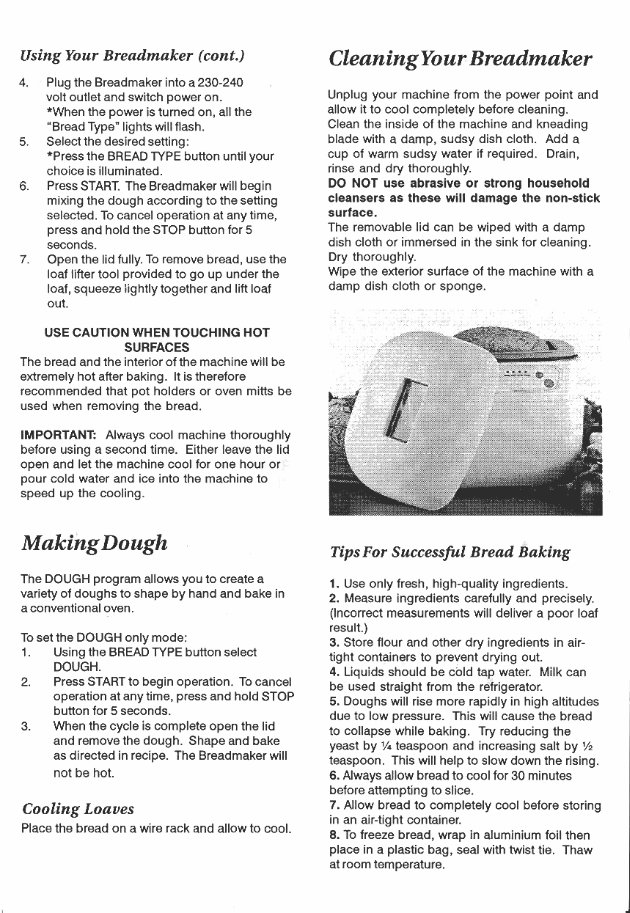
Cleaning Your Breadmaker
Unplug your machine from the power point and
allow it to cool completely before cleaning.
Clean the inside of the machine and kneading
blade with a damp, sudsy dish cloth. Add a
cup of warm sudsy water if required. Drain,
rinse and dry thoroughly.
DO NOT use abrasive or strong household
cleansers as these will damage the non-stick
surface.
The removable lid can be wiped with a damp
dish cloth or immersed in the sink for cleaning.
Dry thoroughly.
Wipe the exterior surface of the machine with a
damp dish cloth or sponge.
Tips For Successful Bread Baking
1. Use only fresh, high-quality ingredients.
2. Measure ingredients carefully and precisely.
(Incorrect measurements will deliver a poor loaf
result.)
3. Store flour and other dry ingredients in air-
tight containers to prevent drying out.
4. Liquids should be cold tap water. Milk can
be used straight from the refrigerator.
5. Doughs will rise more rapidly in high altitudes
due to low pressure. This will cause the bread
to collapse ,while baking. Try reducing the
yeast by V. teaspoon and increasing salt by %
teaspoon. This will help to slow down the rising.
6. Always allow bread to cool for 30 minutes
before attempting to slice.
7. Allow bread to completely cool before storing
in an air-tight container.
8. To freeze bread, wrap in aluminium foil then
place in a plastic bag, seal with twist tie. Thaw
at room temperature.
The Essential Ingredients
Flour
The flour used should be ei'ther plain flour,
baker's flour or bread flour. It is not necessary
to sift the flour. Plain flour is the most readily
available and works well in the Breadmaker. Do
not use self-raising flour as the bread will not
rise and will be crumbly in texture.
Sugar
Sugar adds sweetness, flavour, browns the
crust and provides food for the yeast. White
sugar, brown sugar, honey, golden syrup or
dried fruits are all suitable for use. If using
honey or golden syrup it must be counted as
part of additional liquid.
Powdered: Milk
The milk and milk products used enhance the
flavour and also add to the nutritional value.
Powdered milk is the most commonly used in
recipes and is convenient and easy to use.
Fresh milk should not be substituted for
powdered milk unless stated in the recipe.
Salt
The salt adds flavour, but more important:; it
inhibits the rising of the bread. Extra care
should therefore be taken when measuring.
Fats .
Fats add flavour and moisture. Butter, marga-
rine or oil can be used.
Yeast
Without yeast the bread will not rise. Yeast
needs liquid to activate it, sugar to feed on and
warmth to grow and rise. Dried yeast is the
most convenLent and has been used in all the
recipes in this use and care booklet. Always
check the "use-by" date as stale yeast will not
give bread its rise.
There's nothing quite like the taste of
home baked bread.
The ingredients that go into basic bread are
quite simple - but they all perform a speeific
task that leads to a special flavour in the final
outcome.
It is therefore very important to use the right
ingredients, in their freshest form and in the
exact proportions to ensure you achieve the
most delicious results.
The basic ingredients that go into making bread
are flour, sugar, salt, a liquid such as milk or
water, a fat such as butter or oil and, of course,
yeast.
You can see from these ingredients that no
artificial flavours, colours or preservatives have
been used - that's why homemade bread tastes
so good. For this reason also you will find the
life of your home baked bread shorter than that of
commercially baked loaves. It is best to eat
home baked bread the day it is baked. If you
., require longer life, we suggest wrapping in
aluminium foiling, sealing in an airtight bag and
freezing - it is best to slice prior to freezing to
enable more convenient use as required.
Hope you enjoy your baking.
NEW ZEALAND CUSTOMERS ONLY
NOTE:
Following extensive testing of New Zealand
ingredi€'rlts, we make the following recommenda-
tions:
• Use Highgrade Plain Flour or Elfin Bread
Premix.
• Use Edmonds Surebake Active YeastMixture
(RedCap) or Elfin Instant DryYeast.j3achets.
• It is important to note that in New Zealand
the standard size tablespoon is 15ml and
does vary from.Australia (20mI).
RECIPES FOR NEW ZEALAND BREAD
PREMIX
When using Bread Premix, please use the
following recipes.
WHITE BREAD MIX (New Zealand)
1 cup & 2 tablespoons of water
1 tablespoon of sugar
3% cups of White Bread Premix
1 tablespoon of Edmonds Red Cap Surebake
Yeast OR 1 sachet of Elfin Dry Yeast
MULTIGRAIN BREAD MIX (New
Zealand)
1v. cups of water
1 table~spoonof sugar
3% cups of Multigrain Bread Premix
1 tablespoon of Edmonds Red Cap Surebake
Yeast OR 1 sachet of Elfin Dry Yeast
IMPORTANT (New Zealand)
If using Edmonds Surebake Active Yeast
Mixture (Red Cap) with any other recipe in the
booklet - add 2 additional teaspoons of Yeast
(i.e. 1 tablespoon plus 2 teaspoons).
Recipes for your Breadmaker
Bread Pre-Mix Recipes
Pre-packaged Bread Mixes are available from
most supermarkets. The recipes in the section
are for use with pre-packaged Bread Mixes
only. We recommend the Lowan Brand of
Bread Mixes in Australia.
Procedure
Place ingredients into bread pan, in the order
listed in the recipe.
Wipe spills from the outer edge of pan and
close the lid.
Press the BREAD TYPE button to the cycle that
best suits the bread mix you are using. For
example, if using Multigrain bread mix press the
"WHEAT" cycle.
Press START.
Bread Pre-Mix Recipes
WHITE BREAD MIX
1 cup & 2 tablespoons Water
3 V2 cups White Bread Mix Flour
2 % teaspoons Yeast
Mode: Basic
WHOLEMEAL BREAD MIX
1 % cups Water
4 cups Wholemeal Bread Mix Flour
2 % teaspoons Yeast
Mode: Basic
RYE BREAD MIX
1 % cups Water
4 cups Rye Bread Mix Flour
2 % teaspoons Yeast
Mode: Basic
MULTIGRAIN BREAD MIX
1 % cups Water
4 cups Multigrain Bread Mix Flour
2. % teaspoons Yeast
Mode: Basic
FRUIT LOAF BREAD MIX
1 % cups Water
4 cups Fruit Loaf Bread Mix Flour
1 % teaspoons Yeast
1 % packets Fruit
Mode: Basic
White Breads
White bread recipes can be baked on the
BA~IC cycle and also on the RAPID cycle.
Procedure
Place ingredients into bread pan, in the order
listed in the recipe.
Wipe spills from the outer edge of pan and
close the lid.
Press the BREAD TYPE button to Basic Bread
cycle.
Press START.
Basic White Loaf
1v. cups water
2 tabl::;spoons butter or oil
2 tablespoons & 2 teaspoons milk powder
2% teaspoons salt
3 tablespoons & 2 teaspoons sugar
4 cups plain flour
1 tablespoon dry active yeast
Onion Bread
1V. cups water.
2 tablespoons butter or oil
2 tablespoons & 2 teaspoons milk powder
2% teaspoons salt
3 tablespoons & 2 teaspoons sugar
% cup finely chopped onion
4 cups plain flour
1 tablespoon dry active yeast
Italian Bread
1 cup & 2 tablespoons water
2 tablespoons butter or oil
2 teaspoons milk powder
1 teaspoon salt
3 tablespoons & 2 teaspoons sugar
V. cup tomato paste
4 cups plain flour
3 teaspoons dried basil
1 tablespoon dry active yeast
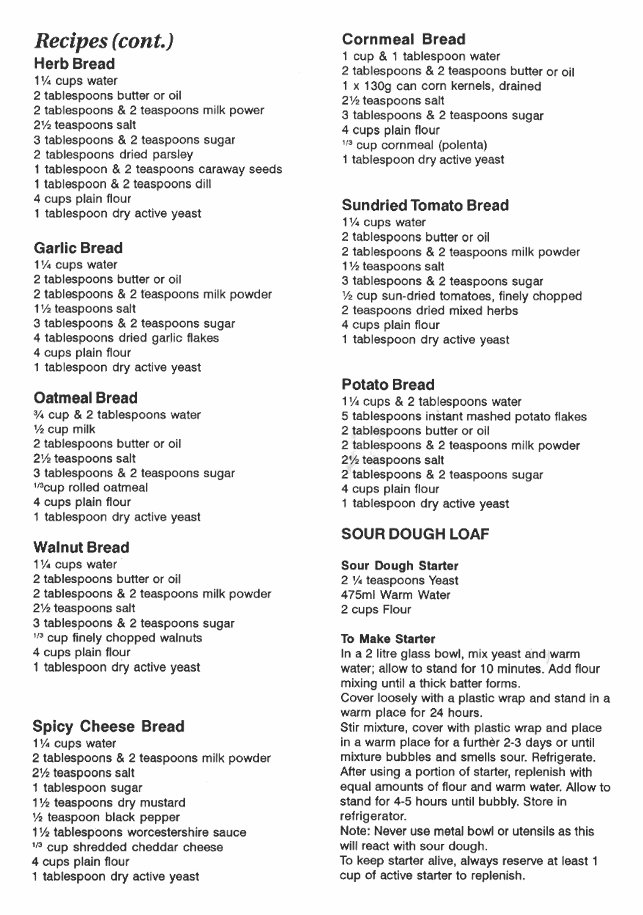
Recipes (cont.)
Herb Bread
1V4 cups water
2 tablespoons butter or oil
2 tablespoons & 2 teaspoons milk power
2% teaspoons salt
3 tablespoons & 2 teaspoons sugar
2 tablespoons dried parsley
1 tablespoon & 2 teaspoons caraway seeds
1 tablespoon & 2 teaspoons dill
4 cups plain flour
1 tablespoon dry active yeast
Garlic Bread
1v. cups water
2 tablespoons butter or oil
2 tablespoons & 2 teaspoons milk powder
1% teaspoons salt
3 tablespoons & 2 teaspoons sugar
4 tablespoons dried garlic flakes
4 cups plain flour
1 tablespoon dry active yeast
Oatmeal Bread
% cup & 2 tablespoons water
% cup milk
2 tablespoons butter or oil
2% teaspoons salt
3 tablespoons & 2 teaspoons sugar
l/3CUp rolled oatmeal
4 cups plain flour
1 tablespoon dry active yeast
Walnut Bread
1V4 cups water
2 tablespoons butter or oil
2 tablespoons & 2 teaspoons milk powder
2% teaspoons salt
3 tablespoons & 2 teaspoons sugar
1/3 cup finely chopped walnuts
4 cups plain flour
1 tablespoon dry active yeast
Spicy Cheese Bread
1V4 cups water
2 tablespoons & 2 teaspoons milk powder
2% teaspoons salt
1 tablespoon sugar
1% teaspoons dry mustard
% teaspoon black pepper
1% tablespoons worcestershire sauce
1/3 cup shredded cheddar cheese
4 cups plain flour
1 tablespoon dry active yeast
Cornmeal Bread
1 cup & 1 tablespoon water
2 tablespoons & 2 teaspoons butter or oil
1 x 130g can corn kernels, drained
2% teaspoons salt
3 tablespoons & 2 teaspoons sugar
4 cups plain flour
1/3cup cornmeal (polenta)
1 tablespoon dry active yeast
Sundried Tomato Bread
1V4 cups water
2 tablespoons butter or oil
2 tablespoons & 2 teaspoons milk powder
1% teaspoons salt
3 tablespoons & 2 teaspoons sugar
% cup sun-dried tomatoes, finely chopped
2 teaspoons dried mixed herbs
4 cups plain flour
1 tablespoon dry active yeast
Potato Bread
1V4 cups & 2 tablespoons water
5 tablespoons instant mashed potato flakes
2 tablespoons butter or oil
2 tablespoons & 2 teaspoons milk powder
2% teaspoons salt
2 tablespoons & 2 teaspoons sugar
4 cups plain flour
1 tablespoon dry active yeast
SOUR DOUGH LOAF
Sour Dough Starter
2 V4 teaspoons Yeast
475ml Warm Water
2 cups Flour
To Make Starter
In a 2 litre glass bowl, mix yeast and warm
water; allow to stand for 10 minutes. Add flour
mixing until a thick batter forms.
Cover loosely with a plastic wrap and stand in a
warm place for 24 hours.
Stir mixture, cover with plastic wrap and place
in a warm place for a further 2-3 days or until
mixture bubbles and smells sour. Refrigerate.
After using a portion of starter, replenish with
equal amounts of flour and warm water. Allow to
stand for 4-5 hours until bubbly. Store in
refrigerator.
Note: Never use metal bowl or utensils as this
will react with sour dough.
To keep starter alive, always reserve at least 1
cup of active starter to replenish.
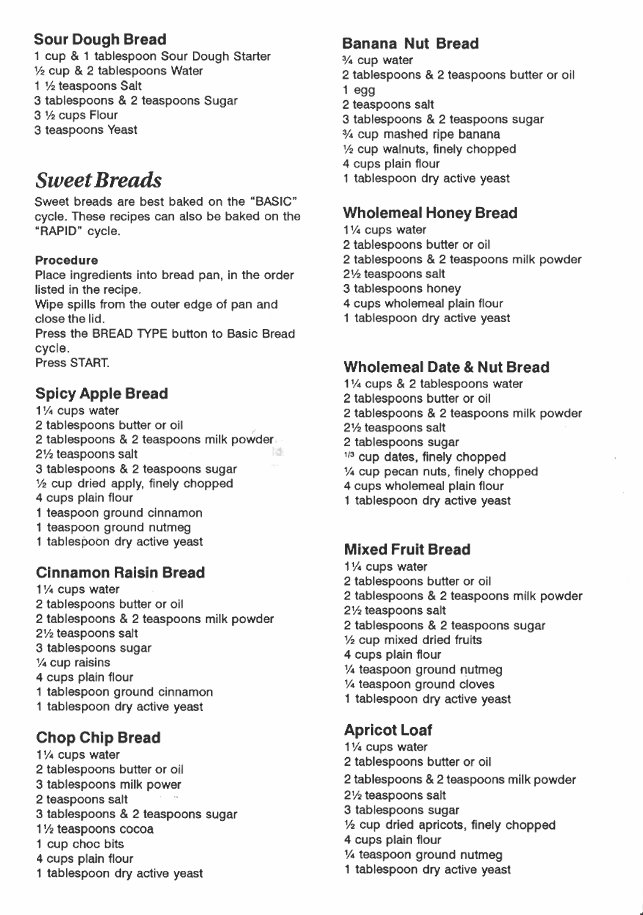
Sour Dough Bread
1 cup & 1 tablespoon Sour Dough Starter
V2 cup & 2 tablespoons Water
1 % teaspoons Salt
3 tablespoons & 2 teaspoons Sugar
3 % cups Flour
3 teaspoons Yeast
Sweet Breads
Sweet breads are best baked on the "BASIC"
cycle. These recipes can also be baked on the
"RAPID" cycle.
Procedure
Place ingredients into bread pan, in the order
listed in the recipe.
Wipe spills from the outer edge of pan and
close the lid.
Press the BREAD TYPE button to Basic Bread
cycle.
Press START.
Spicy Apple Bread
1v. cups water
2 tablespoons butter or oil
2 tablespoons & 2 teaspoons milk powder
2% teaspoons salt
3 tablespoons & 2 teaspoons sugar
% cup dried apply, finely chopped
4 cups plain flour
1 teaspoon ground cinnamon
1 teaspoon ground nutmeg
1 tablespoon dry active yeast
Cinnamon Raisin Bread
1v. cups water
2 tablespoons butter or oil
2 tablespoons & 2 teaspoons milk powder
2% teaspoons salt
3 tablespoons sugar
V. cup raisins
4 cups plain flour
1 tablespoon ground cinnamon
1 tablespoon dry active yeast
Chop Chip Bread
1v. cups water
2 tablespoons butter or oil
3 tablespoons milk power
2 teaspoons salt
3 tablespoons & 2 teaspoons sugar
1V2 teaspoons cocoa
1 cup choc bits
4 cups plain flour
1 tablespoon dry active yeast
Banana Nut Bread
% cup water
2 tablespoons & 2 teaspoons butter or oil
1 egg
2 teaspoons salt
3 tablespoons & 2 teaspoons sugar
% cup mashed ripe banana
% cup walnuts, finely chopped
4 cups plain flour
1 tablespoon dry active yeast
Wholemeal Honey Bread
1 v. cups water
2 tablespoons butter or oil
2 tablespoons & 2 teaspoons milk powder
2% teaspoons salt
3 tablespoons honey
4 cups wholemeal plain flour
1 tablespoon dry active yeast
Wholemeal Date & Nut Bread
1V. cups & 2 tablespoons water
2 tablespoons butter or oil
2 tablespoons & 2 teaspoons milk powder
2% teaspoons salt
2 tablespoons sugar
1/3 cup dates, finely chopped
V. cup pecan nuts, finely chopped
4 cups wholemeal plain flour
1 tablespoon dry active yeast
Mixed Fruit Bread
1v. cups water
2 tablespoons butter or oil
2 tablespoons & 2 teaspoons milk powder
2% teaspoons salt
2 tablespoons & 2 teaspoons sugar
% cup mixed dried fruits
4 cups plain flour
V. teaspoon ground ~utmeg
V. teaspoon ground cloves
1 tablespoon dry active yeast
Apricot Loaf
1v. cups water
2 tablespoons butter or oil
2 tablespoons & 2 teaspoons milk powder
2% teaspoons salt
3 tablespoons sugar
% cup dried apricots, finely chopped
4 cups plain flour
V. teaspoon ground nutmeg
1 tablespoon dry active yeast
Hot Cross Buns
1v. cups Water
2 tablespoons Oil
2% teaspoons Salt
3 tablespoons & 2 teaspoons Brown Sugar
4 cups Flour
3 tablespoons Mixed Spice
1 tablespoons Cinnamon
1 tablespoon Yeast
1V. cups Sultanas
V. cup Mixed Peel
Place all ingredients in bread pan in order
listed, select DOUGH cycle and press START.
When cycle is cornplete, remove dough from
bread pan.
Divide dough into 18 equal pieces and roll into
balls. .
Cover the balls with plastic wrap and allow to
rise for 20 minutes or until double in size.
Remove the wrap and proceed to make the
mixture for the crosses as follows:
CROSSES
2 tablespoons Water
V. cup Flour
Blend to a smooth batter, place in a piping bag
and pipe individual crosses over each roll.
Place in a pre-heated oven (2000C). Bake for
12-15 minutes or until golden brown.
Remove from oven, allow to cool slightly and if
desired apply a Glaze to the finished Hot Cross
Buns.
GLAZE
% cup Icing Sugar
V. teaspoon All Spice
V. teaspoon Cinnamon
1 tablespoon Water
Combine until smooth and thin enough to drizzle
and brush over the hot buns. Allow to stand for
up to 10 minutes prior to serving.
Wholemeal Breads
Wholemeal breads are best baked on the
"WHEAT" cycle, as wholemeal breads are
usually denser, they do not rise as high as white
breads due to the nature of the flour. To
improve the rise of wholemeal bread a "bread
improver" or gluten can be added to the mix.
These are generally available from health food
stores. These recipes can also be baked on the
"RAPID" cycle but this causes them to be even
denser.
Procedure
Place ingredients into bread pan, in the order
listed in the recipe.
Wipe spills from the outer edge of pan and
close the lid.
Press the BREAD type button to Wheat cycle.
Press START.
Wholemeal Bread
1v. cups water
2 tablespoons butter or oil
2 tablespoons & 2 teaspoons milk powder
2V2 teaspoons salt
3 tablespoons & 2 teaspoons sugar
4 cups wholemeal plain flour
1 tablespoon dry active yeast
*As a variation and to give a wholemeal loaf
not so dense in texture, use 2 cups
wholemeal plain flour and 2 cups plain flour.
Seven Grain Bread
1V. cups water
2 tablespoons butter or oil
2 tablespoons & 2 teaspoons milk powder
2% teaspoons salt
2 ,ablespoons molasses
% cup 7 grain cereal
4 cups wholemeal plain flour
1 tablespoon dry active yeast
Double Bran Bread
1V. cups water
2 tablespoons butter or oil
2 tablespoons & 2 teaspoons milk powder
2% teaspoons salt
1/3 tablespoon brown sugar
% cup bran flakes
1/3 cup toasted bran
4 cups plain flour
1 tablespoon dry active yeast
Cracked Wheat & Sunflower
Bread
1v. cups water
2 tablespoons butter or oil
2 tablespoons & 2 teaspoons milk powder
2% teaspoons salt
1 tablespoon sugar
1% tablespoons honey
1/3 cup cracked wheat cereal
1/3 cup sunflower seeds
4 cups plain flour
% tablespoon dry active yeast
Bran Breaa
1V. cups water
2 tablespoons butter or oil
2 tablespoons & 2 teaspoons milk powder
2% teaspoons salt
2 tablespoons & 2 teaspoons brown sugar
V. cup wheat bran
4 cups plain flour
1 tablespoon dry active yeast
Doughs
The recipes in this section are all made on the
"DOUGH" setting. They do not cook in the unit
and require further preparation after removing
from the machine.
Many of the recipes in this section will require
you to rest the dough the after removing from
the machine and then instruct you to "punch
down" - to do this, use your fist and punch
dough one to release air.
Procedure
The procedure and preparation of doughs will
vary from recipe to recipe. Follow each recipe
procedure carefully.
Bread Rolls
1 cup & 2 tablespoons water
2 tablespoons & 2 teaspoons butter or oil
2 teaspoons salt
3 tablespoons sugar
1 egg
4 cups plain flour
1 tablespoon dry active yeast
Place all ingredients in bread pan in order
listed, select DOUGH cycle and press START.
When cycle is complete, remove dough from
bread pan.
Divide dough into 12 equal pieces and roll into
desired shapes. Place 2-3 cm apart on a
greased baking tray and brush with milk.
Cover the rolls with plastic wrap and allow to
rise for 30 minutes until double in size.
Place in a pre-heated oven (200°C). Bake for
12-15 minutes or until golden brown.
Croissants
1V. cups water
2 tablespoons butter or oil
2 tablespoons & 2 teaspoons milk powder
2 teaspoons salt
2 tablespoons & 2 teaspoons sugar
4 cups plain flour
1 tablespoon dry active yeast
250g butter
1 egg
2 tablespoons milk
Place the first 7 ingredients in the bread pan in
the order listed. Select the DOUGH cycle and
press START.
When the cycle is complete, remove dough
from the bread pan and place in a butter bowl.
Cover with plastic wrap and allow to stand on
the bench to let the dough rise for 30 minutes.
Place the 250g of butter between 2 pieces of
plastic wrap and roll the butter with a rolling pin
to 2.5cm thick. Chill until firm. Punch the
dough down and roll into a 25 x 30cm rect-
angle.
Place the sheet of chilled butter onto the dough,
leaving 2.5cm on 3 sides.
Fold in 3 parts by folding the unbuttered section
over the centre buttered portion and then fold
the buttered third over the centre.
On a floured surface, roll the pastry into a 25 x
35cm rectangle.
Cut into 8 equal sized triangles.
Starting from the base of the triangle, roll the
dough up to the tip.
Turn ends in to form the traditional crescent
shape.
Place on a greased baking tray and allow to
stand on the bench for an hour to rise. Com-
bine beaten egg with milk for glaze.
Preheat oven to 200°C.
Brush each pastry with glaze and bake for 10
minutes or until golden.
Cool in a wire rack.
Focaccia Bread
1 cup water
3 tablespoons butter or 011
2 teaspoons salt
1 tablespoon sugar
3% cups plain flour
1 tablespoon dry active yeast
2 tablespoons rosemary, chopped
2 tablespoons chives, chopped
2 tablespoons minced garlic
2/3 cup olive oil Cant ...
You're Reading a Preview
What's Included?
Fast Download Speeds
Online & Offline Access
Access PDF Contents & Bookmarks
Full Search Facility
Print one or all pages of your manual
$27.99
Viewed 40 Times Today


Secure transaction
What's Included?
Fast Download Speeds
Online & Offline Access
Access PDF Contents & Bookmarks
Full Search Facility
Print one or all pages of your manual
$27.99
Discover the Instruction Manual Recipes for the Black Decker Breadmaker Parts Model BMH200. This manual is a valuable resource for professional mechanics and DIY enthusiasts alike, offering detailed guidance on the operation and utilization of the breadmaker's components.
Designed for ease of use, the manual presents clear, step-by-step instructions to help you achieve consistent, high-quality bread. It also features a variety of delightful recipes for you to explore and experiment with.
Be sure to take note of the specific models referenced in the manual to ensure it aligns with your requirements.


