

Briggs & Stratton Micro Engines Service & Repair Manual
What's Included?
Fast Download Speeds
Online & Offline Access
Access PDF Contents & Bookmarks
Full Search Facility
Print one or all pages of your manual

Micro Engine
Repair Manual
For Briggs & Stratton Discount Parts Call 606-678-9623 or 606-561-4983
www.mymowerparts.com


GENERAL INFORMATION Section 1 . . . . . . . . . . . . . . . . . . . . . . . . . . . . . . . . . . . . . .
DISASSEMBLY AND REPAIR Section 2 . . . . . . . . . . . . . . . . . . . . . . . . . . . . . . . . . . .
TABLE OF CONTENTS
I

SECTION CONTENTS
II
1
Section 1
General Information
In The Interest Of Safety
Briggs & Stratton Numerical Identification System
Engine Identification
Fuel and Oil Recommendations
Gasoline
Lubrication
Maintenance
Check Oil
Change Oil
Air Cleaner
Breather Check Valve
Replace Spark Plug
Cooling System
Troubleshooting
Systematic Check
Check Ignition
Check Carburetion
Check Compression
Equipment Affecting Engine Operation
Hard Starting, Kickback or Will Not Start
Vibration
Power Loss
2
Section 2
Disassembly and Repair
General Information
Rewind Assembly
Inspect Starter Rope
Remove Blower Housing – Direct Drive Engine
Replace Starter Rope
Install Blower Housing – Direct Drive Engine
Remove Blower Housing – Clutch Drive Engine
Install Blower Housing – Clutch Drive Engine
Ignition Coil
Remove Coil
Install Coil
Adjust Air Gap
Flywheel
Remove Flywheel – Direct Drive Engine
Install Flywheel – Direct Drive Engine
Remove Flywheel – Clutch Drive Engine
Install Flywheel – Clutch Drive Engine
Fuel Tank
Remove Fuel Tank
Install Fuel Tank
Cylinder Head
Remove Cylinder Head
Install Cylinder Head
Muffler
Replace Muffler
Carburetor
Remove Carburetor
Install Carburetor
Idle Speed Adjustment

1
Section 1
General Information
Section Contents
Page
IN THE INTEREST OF SAFETY 1 . . . . . . . . . . . . . . . . . . . . . . . . . . . . . . . . . . . . . . . . . . . . . . . . . . . . . . .
BRIGGS & STRATTON NUMERICAL IDENTIFICATION SYSTEM 4 . . . . . . . . . . . . . . . . . . . . . . . . .
ENGINE IDENTIFICATION 5 . . . . . . . . . . . . . . . . . . . . . . . . . . . . . . . . . . . . . . . . . . . . . . . . . . . . . . . . . . . .
FUEL AND OIL RECOMMENDATIONS (Gasoline, Lubrication) 5 . . . . . . . . . . . . . . . . . . . . . . . . . . . .
MAINTENANCE 6 . . . . . . . . . . . . . . . . . . . . . . . . . . . . . . . . . . . . . . . . . . . . . . . . . . . . . . . . . . . . . . . . . . . . .
Check Oil 6 . . . . . . . . . . . . . . . . . . . . . . . . . . . . . . . . . . . . . . . . . . . . . . . . . . . . . . . . . . . . . . . . . . . . . . . . . . . . . . . .
Change Oil 7 . . . . . . . . . . . . . . . . . . . . . . . . . . . . . . . . . . . . . . . . . . . . . . . . . . . . . . . . . . . . . . . . . . . . . . . . . . . . . . .
Air Cleaner 7 . . . . . . . . . . . . . . . . . . . . . . . . . . . . . . . . . . . . . . . . . . . . . . . . . . . . . . . . . . . . . . . . . . . . . . . . . . . . . .
Replace Spark Plug 7 . . . . . . . . . . . . . . . . . . . . . . . . . . . . . . . . . . . . . . . . . . . . . . . . . . . . . . . . . . . . . . . . . . . . . .
Cooling System 8 . . . . . . . . . . . . . . . . . . . . . . . . . . . . . . . . . . . . . . . . . . . . . . . . . . . . . . . . . . . . . . . . . . . . . . . . . .
TROUBLESHOOTING 8 . . . . . . . . . . . . . . . . . . . . . . . . . . . . . . . . . . . . . . . . . . . . . . . . . . . . . . . . . . . . . . . .
Systematic Check 8 . . . . . . . . . . . . . . . . . . . . . . . . . . . . . . . . . . . . . . . . . . . . . . . . . . . . . . . . . . . . . . . . . . . . . . . .
Check Ignition (With Engine Starter) 8 . . . . . . . . . . . . . . . . . . . . . . . . . . . . . . . . . . . . . . . . . . . . . . . . . . . . . . .
Check Ignition (Engine Running) 9 . . . . . . . . . . . . . . . . . . . . . . . . . . . . . . . . . . . . . . . . . . . . . . . . . . . . . . . . . .
Check Carburetion 9 . . . . . . . . . . . . . . . . . . . . . . . . . . . . . . . . . . . . . . . . . . . . . . . . . . . . . . . . . . . . . . . . . . . . . . .
Check Compression 9 . . . . . . . . . . . . . . . . . . . . . . . . . . . . . . . . . . . . . . . . . . . . . . . . . . . . . . . . . . . . . . . . . . . . . .
Equipment Affecting Engine Operation 9 . . . . . . . . . . . . . . . . . . . . . . . . . . . . . . . . . . . . . . . . . . . . . . . . . . . .
Hard Starting, Kickback or Will Not Start 9 . . . . . . . . . . . . . . . . . . . . . . . . . . . . . . . . . . . . . . . . . . . . . . . . . . .
Vibration 10 . . . . . . . . . . . . . . . . . . . . . . . . . . . . . . . . . . . . . . . . . . . . . . . . . . . . . . . . . . . . . . . . . . . . . . . . . . . . . . .
Power Loss 10 . . . . . . . . . . . . . . . . . . . . . . . . . . . . . . . . . . . . . . . . . . . . . . . . . . . . . . . . . . . . . . . . . . . . . . . . . . . . .
The Briggs & Stratton engine is made of the finest material in a state-of-the-art manufacturing facility. Please un-
derstand that Briggs & Stratton sells engines to original equipment manufacturers. It also sells to others in the
distribution chain who may sell to the ultimate consumer, an equipment manufacturer, another distributor or a
dealer. As a result, Briggs & Stratton does not necessarily know the application on which the engine will be placed.
For that reason, carefully read and understand the operating instructions of the equipment before you repair or
operate.
Y ou should also understand that there are equipment applications for which Briggs & Stratton does not approve
the use of its engines. Briggs & Stratton engines are not to be used on vehicles with less than 4 wheels. This
includes motor bikes, aircraft products and All Terrain Vehicles. Moreover, Briggs & Stratton does not approve
of its engines being used in competitive events. FOR THAT REASON, BRIGGS & STRATTON ENGINES ARE
NOT AUTHORIZED FOR ANY OF THESE APPLICATIONS. Failure to follow this warning could result in death,
serious injury (including paralysis) or property damage.
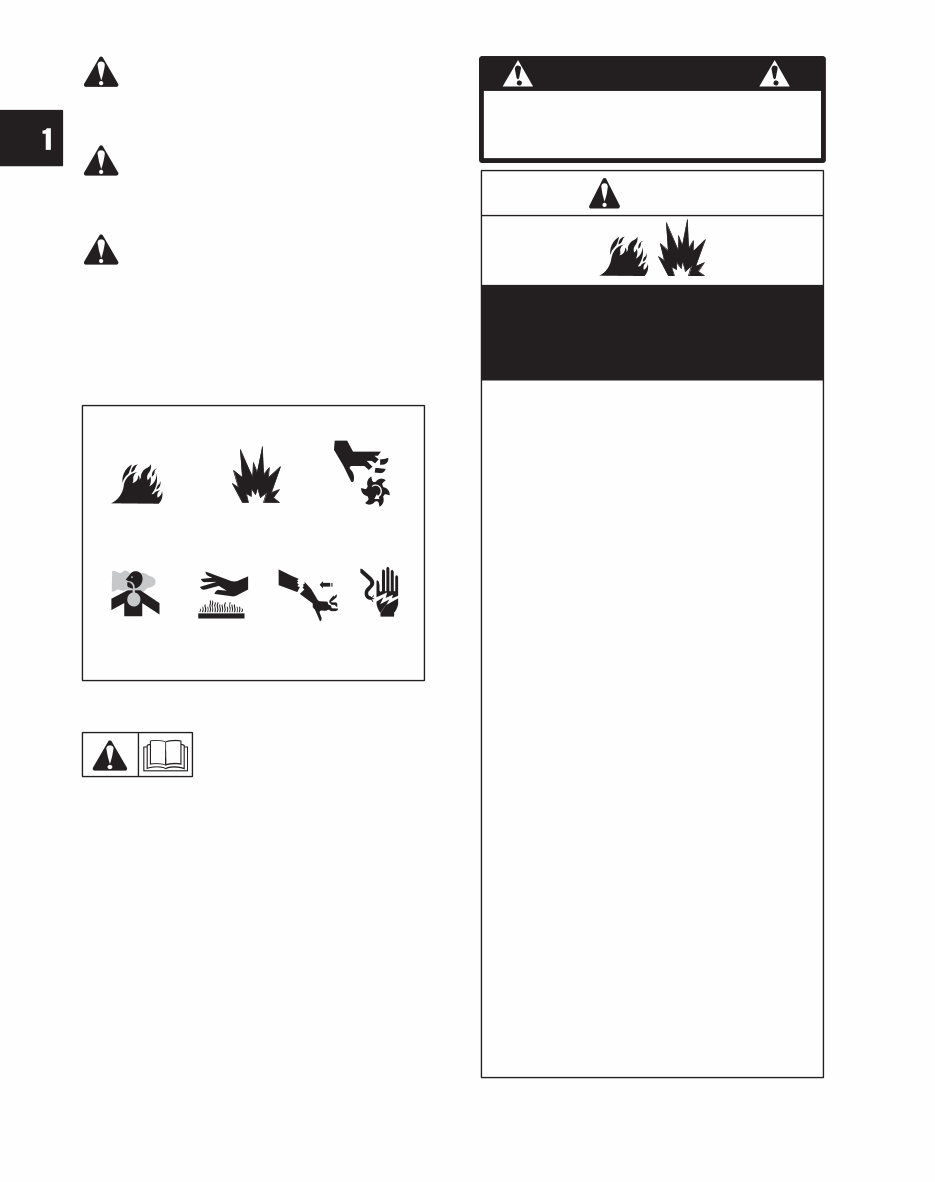
IN THE INTEREST OF SAFETY
The safety alert symbol ( ) is used to identify
safety information about hazards that can result in
personal injury.
A signal word (DANGER, WARNING or CAUTION) is
used with the alert symbol to indicate the likelihood and
the potential severity of injury. In addition, a hazard
symbol may be used to represent the type of hazard.
2
DANGER indicates a hazard which, if not
avoided, will result in death or serious
injury.
WARNING indicates a hazard which, if
not avoided, could result in death or
serious injury.
CAUTION indicates a hazard which, if not
avoided, might result in minor or
moderate injury.
CAUTION, when used without the alert
symbol, indicates a situation that could
result in damage to the engine.
Moving
Parts
HAZARD SYMBOLS AND MEANINGS
Explosion
Toxic Fumes Shock Hot
Surface
Kickback
Fire
4Prior to work, read and understand the section(s)
of this manual that pertain to the job. Follow all safety
warnings.
4WEAR suitable eye protection (safety glasses,
goggles or face shield when performing repair pro-
cedures).
4PREVENT ACCIDENTAL STARTING by remov-
ing spark plug wire from spark plug when servicing
engine or equipment.
4PERIODICALLY clean engine. Keep carburetor
parts free of dirt, grass and other debris which can
affect engine speed.
4USE fresh gasoline. Stale fuel can gum carburetor
and cause leakage.
4CHECK fuel lines and fittings frequently for cracks
or leaks. Replace if necessary.
WARNING:
The engine exhaust from this product
contains chemicals known to the State
of California to cause cancer, birth
defects, or other reproductive harm.
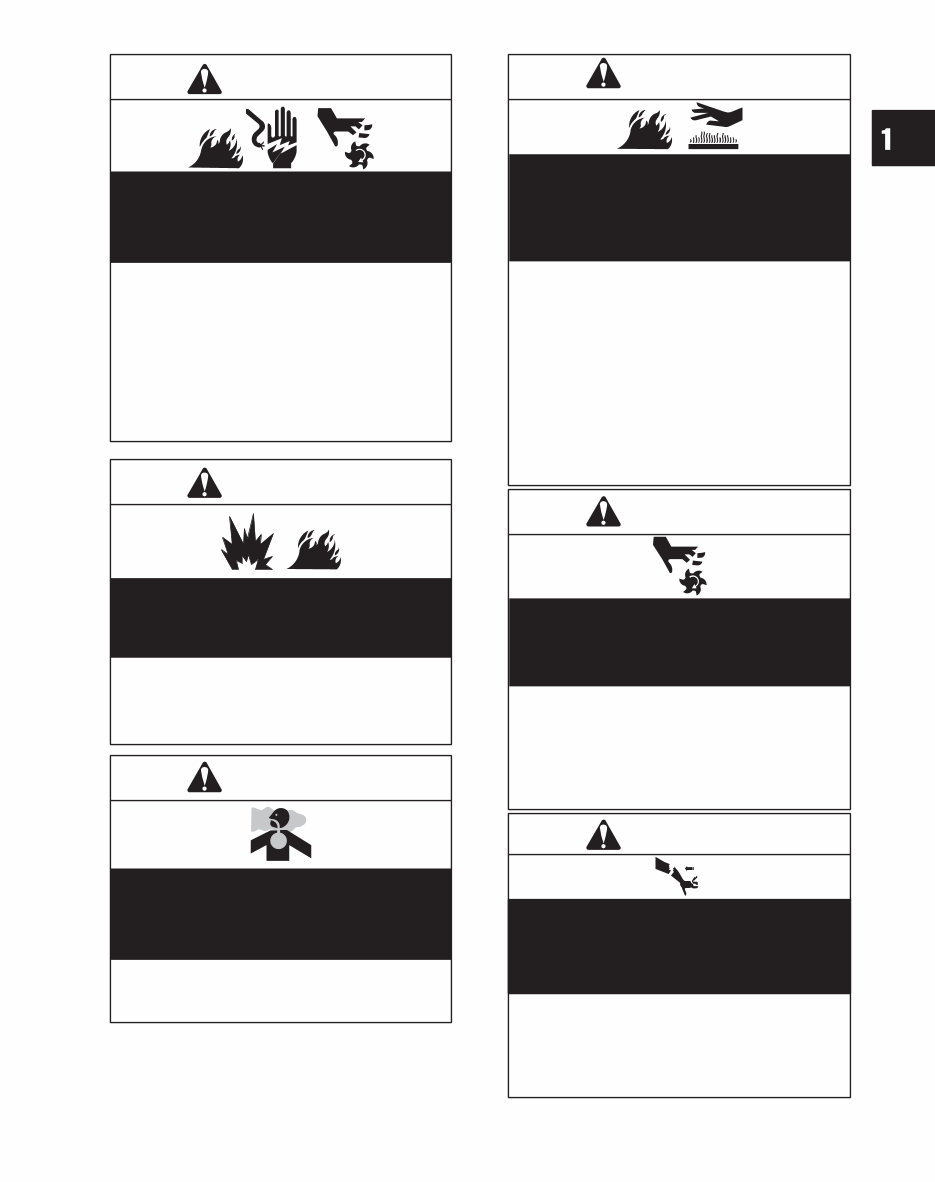
WARNING
Gasoline and its vapors are extremely
flammable and explosive.
Fire or explosion can cause severe burns or
death.
WHEN ADDING FUEL
• Turn engine OFF and let engine cool at least
2 minutes before removing gas cap.
• Fill fuel tank outdoors or in well-ventilated
area.
• Do not overfill fuel tank. Fill tank to
approximately 1-1/2 inches below top of
neck to allow for fuel expansion.
• Keep gasoline away from sparks, open
flames, pilot lights, heat, and other ignition
sources.
• Check fuel lines, tank, cap, and fittings
frequently for cracks or leaks. Replace if
necessary.
WHEN STARTING ENGINE
• Make sure spark plug, muffler, fuel cap and
air cleaner are in place.
• Do not crank engine with spark plug
removed.
• If fuel spills, wait until it evaporates before
starting engine.
• If engine floods, set choke to OPEN/RUN
position, place throttle in FAST and crank
until engine starts.
WHEN OPERATING EQUIPMENT
• Do not tip engine or equipment at angle
which causes gasoline to spill.
• Do not choke carburetor to stop engine.
WHEN STORING GASOLINE OR EQUIP-
MENT WITH FUEL IN TANK
• Store away from furnaces, stoves, water
heaters or other appliances that have pilot
light or other ignition source because they
can ignite gasoline vapors.
3
WARNING
Unintentional sparking can result in fire or
electric shock.
Unintentional start-up can result in entangle-
ment, traumatic amputation, or laceration.
BEFORE PERFORMING ADJUSTMENTS
OR REPAIRS
• Disconnect spark plug wire and keep it away
from spark plug.
WHEN TESTING FOR SPARK
• Use approved spark plug tester.
• Do not check for spark with spark plug
removed.
WARNING
Starting engine creates sparking.
Sparking can ignite nearby flammable gases.
Explosion and fire could result.
• If there is natural or LP gas leakage in area,
do not start engine.
• Do not use pressurized starting fluids
because vapors are flammable.
WARNING
Engines give off carbon monoxide, an
odorless, colorless, poison gas.
Breathing carbon monoxide can cause
nausea, fainting or death.
• Start and run engine outdoors.
• Do not start or run engine in enclosed area,
even if doors or windows are open.
WARNING
Running engines produce heat. Engine parts,
especially muffler, become extremely hot.
Severe thermal burns can occur on contact.
Combustible debris, such as leaves, grass,
brush, etc. can catch fire.
• Allow muffler, engine cylinder and fins to cool
before touching.
• Remove accumulated combustibles from
muffler area and cylinder area.
• Install and maintain in working order a spark
arrester before using equipment on
forest-covered, grass-covered, brush-covered
unimproved land. The state of California
requires this (Section 4442 of the California
Public Resources Code). Other states may
have similar laws. Federal laws apply on
federal land.
WARNING
Rotating parts can contact or entangle hands,
feet, hair, clothing, or accessories.
Traumatic amputation or severe laceration can
result.
• Operate equipment with guards in place.
• Keep hands and feet away from rotating parts.
• Tie up long hair and remove jewelry.
• Do not wear loose-fitting clothing, dangling
drawstrings or items that could become
caught.
• When starting engine, pull cord slowly until
resistance is felt, then pull rapidly.
• Direct coupled equipment components such
as, but not limited to, blades, impellors,
pulleys, sprockets, etc., must be securely
attached.
Rapid retraction of starter cord (kickback) will
pull hand and arm toward engine faster than
you can let go.
Broken bones, fractures, bruises or sprains
could result.
WARNING

4
YOUR KEY TO THE WORLD’S FINEST ENGINES
This chart explains the unique Briggs & Stratton numerical model designation system. It is possible to determine most
of the important mechanical features of the engine by merely knowing the model number. Here is how it works:
A. The first one or two digits indicate the approximate CUBIC INCH DISPLACEMENT.
B. The first digit after the displacement indicates the BASIC DESIGN SERIES, relating to
cylinder construction, ignition, general configuration, etc.
C. The second digit after the displacement indicates ORIENTATION OF CRANKSHAFT.
D. The third digit after the displacement indicates TYPE OF BEARINGS, and whether or not
the engine is equipped with REDUCTION GEAR or AUXILIARY DRIVE.
E. The last digit indicates the TYPE OF STARTER.
BRIGGS & STRATTON MODEL NUMBERING SYSTEM
FIRST DIGIT
AFTER DISPLACEMENT
SECOND DIGIT
AFTER DISPLACEMENT
THIRD DIGIT
AFTER DISPLACEMENT
FOURTH DIGIT
AFTER DISPLACEMENT
A B C D E
CUBIC INCH
DISPLACEMENT
BASIC
DESIGN SERIES
CRANKSHAFT
ORIENTATION
PTO BEARING,
REDUCTION GEAR,
AUXILIARY DRIVE,
LUBRICATIONă TYPE OF STARTER
ă6
ă8
ă9
10
11
12
13
16
18
19
20
21
22
23
24
25
28
29
30
31
32
35
38
40
42
43
44
46
47
52
54
58
0
1
2
3
4
5
6
7
8
9
A to Z
0 to 4 - Horizontal Shaft
5 to 9 - Vertical Shaft
A to G - Horizontal Shaft
H to Z - Vertical Shaft
0 - Plain Bearing/DU
NonĆFlange Mount
1 - Plain Bearing
Flange Mounting
2 - Sleeve Bearing
Flange Mounting
Splash Lube
3 - Ball Bearing
Flange Mounting
Splash Lube
4 - Ball Bearing
Flange Mounting
Pressure Lubrication
5 - Plain Bearing
Gear Reduction
(6 to 1) CCW Rotation
Flange Mounting
6 - Plain Bearing
Gear Reduction
(2 to 1) CCW Rotation
7 - Plain Bearing
Pressure Lubrication
8 - Plain Bearing
Auxiliary Drive (PTO)
Perpendicular to
Crankshaft
9 - Plain Bearing
Auxiliary Drive
Parallel to Crankshaft
A - Plain Bearing
Pressure Lubrication
Without Oil Filter
0 - Without Starter
1 - Rope Starter
2 - Rewind Starter
3 - Electric Starter Only
110 or 230 Volt Gear
Drive
4 - Electric Starter/110 or
230 Volt Gear Drive
with Alternator
5 - Electric Starter Only
12 or 24 Volt Gear
Drive
6 - Alternator Only
7 - Electric Starter
12 or 24 Volt Gear
Drive with Alternator
8 - Vertical Pull Starter or
Side Pull Starter
9 - Mechanical Starter
A - Electric Starter
12 or 24 Volt Gear
Drive with Alternator
and Inverter
EXAMPLE - To identify Model 303447:
30 3 4 4 7
30 Cubic Inch Design Series 3 Horizontal Shaft Ball Bearing
Flange Mounting
Pressure Lubrication
Electric Starter
12 or 24 Volt Gear Drive
with Alternator
TYPE 1234Ć01 , The type number identifies the engines mechanical parts, color of paint, decals, governed speed, and
Original Equipment Manufacturer.
CODE 01061201 , The code is the manufacturing date and is read as follows:
YEAR MONTH DAY ASSEMBLY LINE AND MANUFACTURING PLANT
01 06 12 01
Revised 5/03
5
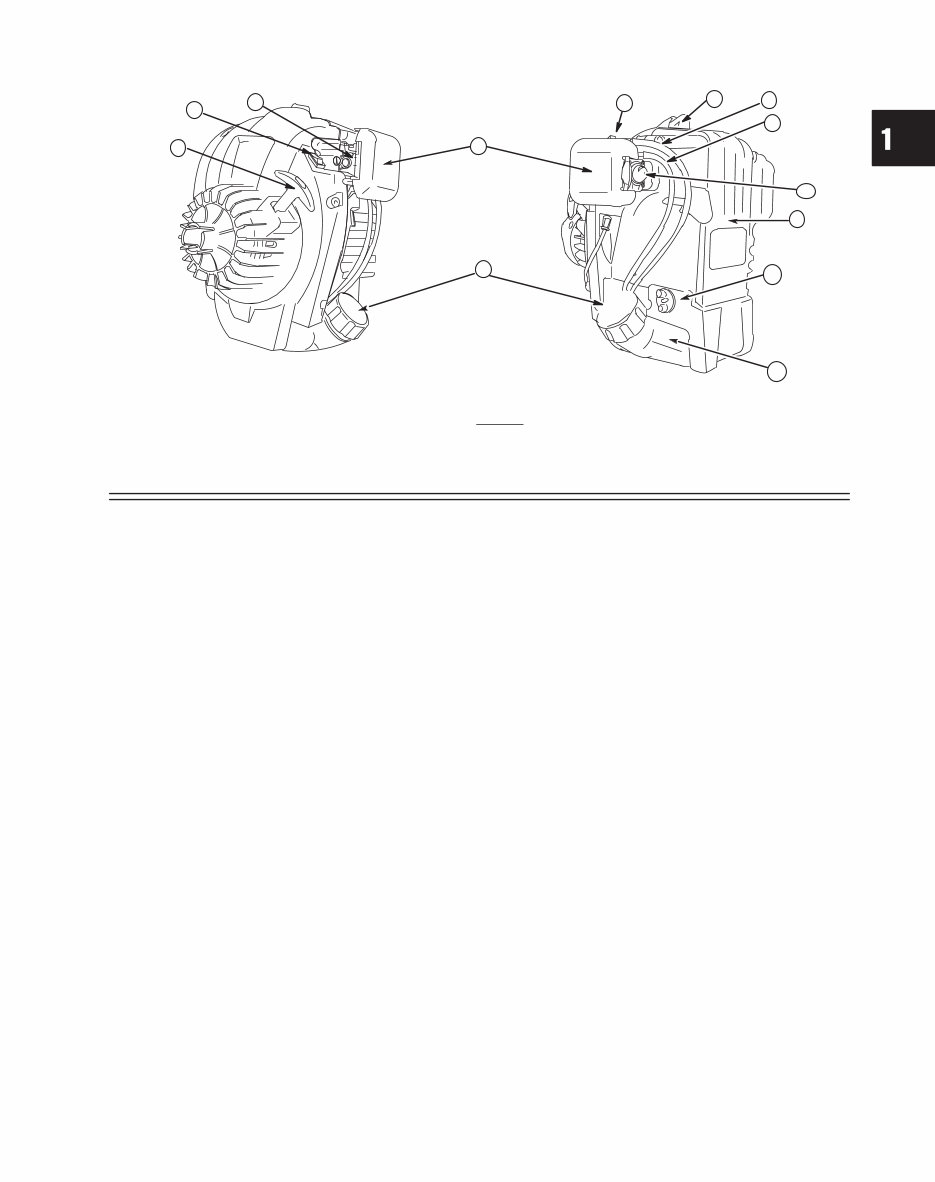
ENGINE IDENTIFICATION
1. Carburetor
2. Stop switch
3. Rope handle
4. Fuel fill
5. Air cleaner
6. Choke lever
7. Spark plug
8. Fuel return hose
9. Fuel intake hose
10. Primer bulb
11. Engine Model Type Code
xxxxxx xxxx xxxxxxxx
12. Oil fill / dipstick
13. Fuel tank
1
7
10
4
13
5
2
3
6
8
9
11
12
FUEL AND OIL RECOMMENDATIONS
Gasoline
These engines are certified to operate on unleaded
gasoline. Use clean, fresh, regular unleaded
gasoline with a minimum of 85 octane. Do not mix oil
with gasoline. Fresh fuel prevents gum from forming
in fuel system or on essential carburetor parts.
Purchase fuel in quantity that can be used within 30
days to assure fuel freshness. We recommend the
use of Briggs & Stratton Gasoline Additive. (See
your Authorized Briggs & Stratton Service Dealer
for Part No. 5041 or the single-use pouch.)
In countries other than U.S.A., leaded gasoline may
be used if it is commercially available and unleaded
is unavailable.
NOTE: Some fuels, called oxygenated or reformu-
lated gasolines, are gasoline blended with
alcohols or ethers. Excessive amounts of
these blends can damage the fuel system or
cause performance problems. Do not use
gasoline containing Methanol. If any undesir-
able operating symptoms occur, use gasoline
with a lower percentage of alcohol or ether.
Lubrication
Oil has four purposes. It cools, cleans, seals and
lubricates. During normal operation, small particles
of metal from the cylinder walls, pistons, bearings
and combustion deposits will gradually contaminate
the oil. Dust particles from the air also contaminate
the oil forming an abrasive mixture which can cause
wear to all of the internal moving parts of the engine,
if the oil is not changed regularly. Fresh oil also
assists in cooling. Old oil gradually becomes thick
and loses its cooling ability as well as its lubricating
qualities.
Oil Recommendations
Use a high quality detergent oil classified “For Ser-
vice SF, SG, SH, SJ” or higher. Briggs & Stratton
strongly recommends the use of synthetic oil such
as Briggs & Stratton (#100030C) or equivalent. If
synthetic oil is not available, Briggs & Stratton non-
synthetic 30 weight oil is an acceptable substitute.
No special additives should be used with recom-
mended oils.
Do not mix oil with gasoline.
6
SAE VISCOSITY GRADES
°C -30
STARTING TEMPERATURE RANGE ANTICIPATED BEFORE NEXT OIL
CHANGE
°F -20 0 20 40 60 80 100
-20 -10 0 10 20 30 40
**
32
* Air cooled engines run hotter than
automotive engines. Use of non-synthetic
multi-viscosity oils (10W-30, etc.) in
ambient temperatures above 40° F (4° C)
will result in high oil consumption. If
multi-viscosity oil is used, check oil level
more frequently to prevent engine damage
due to lack of lubrication.
** SAE 30 oil, if used below 40° F (4° C), will
result in hard starting and possible engine
damage due to inadequate lubrication.
Note: Synthetic oil meeting ILSAC
GF-2, API certification mark and
API service symbol (shown at left)
with “SJ/CF ENERGY CONSERV-
ING” or higher, is an acceptable oil
at all temperatures. Use of syn-
thetic oil does not alter required
oil change intervals.
MAINTENANCE
If you perform any maintenance on the engine, first
disconnect the spark plug wire from the spark plug
to prevent unintentional sparking. Unintentional
sparking can result in fire or electric shock.
Unintentional start-up can result in entanglement,
traumatic amputation or laceration. Use only
correct tools.
WARNING
Maintenance Schedule
Daily 10
Hours
or
Every
Season
25
Hours
or
Every
Season
50
Hours
or
Every
Season
Check
oil level
4
Change
oil
4*
Service
air
filter
4**
Replace
spark
plug
4
* Change oil after first 4 hours of use, then every
8 hours or every season. Change oil every 4 hours
when operating the engine under heavy load or in
high temperatures.
** Clean more often under dusty conditions or when
airborne debris is present. Replace air cleaner parts,
if very dirty.
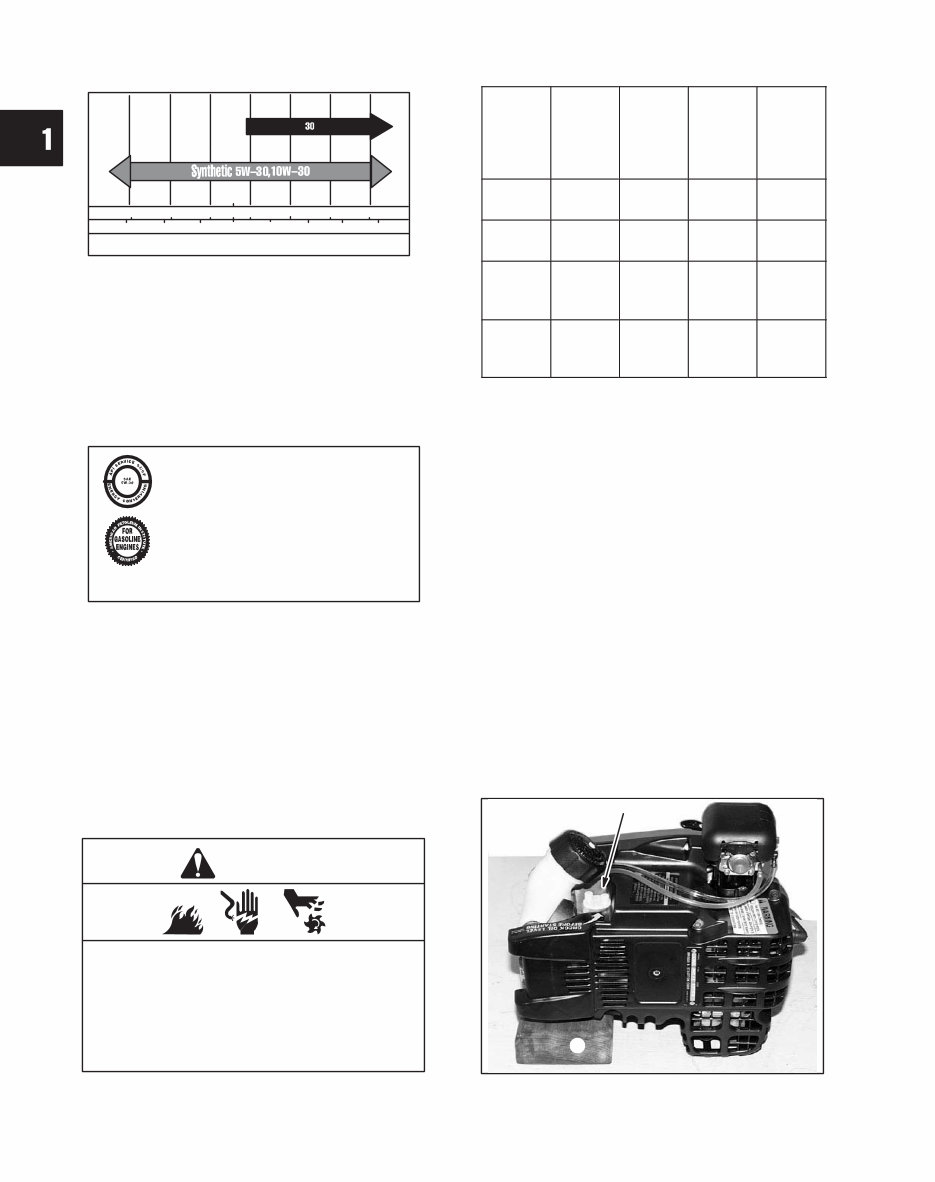
Check Oil
1. Place the warm engine with the dipstick facing
up. If necessary use a support (2) to level the
engine, Fig. 1.
NOTE: The engine MUST be level to obtain an ac-
curate oil level measurement.
2. Unscrew the dipstick (1) and wipe it with a rag.
3. Replace the dipstick, thread the dipstick in
completely.
4. Unscrew the dipstick to check the oil.
Fig. 1
You're Reading a Preview
What's Included?
Fast Download Speeds
Online & Offline Access
Access PDF Contents & Bookmarks
Full Search Facility
Print one or all pages of your manual
$27.99
Viewed 74 Times Today


Secure transaction
What's Included?
Fast Download Speeds
Online & Offline Access
Access PDF Contents & Bookmarks
Full Search Facility
Print one or all pages of your manual
$27.99
Enhance Your Expertise: Improve your skills in maintaining and repairing Briggs & Stratton Micro Engines with this detailed Service & Repair Manual. Perfect for small engine technicians and DIY enthusiasts, it offers comprehensive instructions for routine upkeep, troubleshooting, and repair of these reliable power machines.
- Step-by-step instructions with vivid images and detailed exploded-view diagrams for clear understanding.
- In-depth guidance on carburetor adjustments, ignition system repairs, engine rebuilds, and more.
- Expert advice directly from the manufacturer's procedures and insights to ensure optimal care and repair.
- Designed to be an essential resource for both routine servicing and complex engine overhauls.
Printable: Yes
Language: English
Device Compatibility: Accessible on a wide range of devices including PCs, Macs, smartphones, and tablets.


