Page 1 of 87 WARNING!!! KEEP YOURSELF AND YOUR XBOX SAFE! First of all if you have not opened your Xbox and you are having problems, think about using your warranty if it’s still covered. If you open the box it will invalidate your warranty. CONTENTS WARNING!!! Keep Yourself and Your Xbox SAFE! page 2 DVD Repair page 3 Determine the manufacturer of your Xbox DVD drive page 4 Determine Version of Xbox page 6 Xbox Power Supply Compatibility page 7 Power Supply Failure page 8 Convert a PSU 1.0/1.1 to a 1.2-1.5 page 9 Xbox Version Detection page 11 Xbox Version Detection – (Step1 Image1) page 13 Cleaning your Xbox DVD drive page 20 Crack open that Xbox page 24 Removing the Xbox Front Panel (AKA bezel/face plate) page 29 Thomson Xbox Laser Installation page 30 Thompson DVD Tray Removal and Realignment page 33 Phillips Xbox DVD Drive Complete Disassembly page 36 Phillips Laser Installation page 42 Samsung DVD Complete Disassembly page 49 Thompson Potentiometer (Pot) Adjustment page 54 Ejecting DVD drive Manually (Emergency Eject) page 57 Explanation of Error Codes page 59 Repairing Traces and Lifted Pads page 76 Original Xbox Controller Repair page 78 Xbox Locks Up / Flashing Red/Orange page 82 1.6 Xbox will not power on page 84 Fan Replacement -- Alternate Power Source for Fan page 85 The Short Xbox Diagnosis Answer List page 86 DVD Drive failure page 87
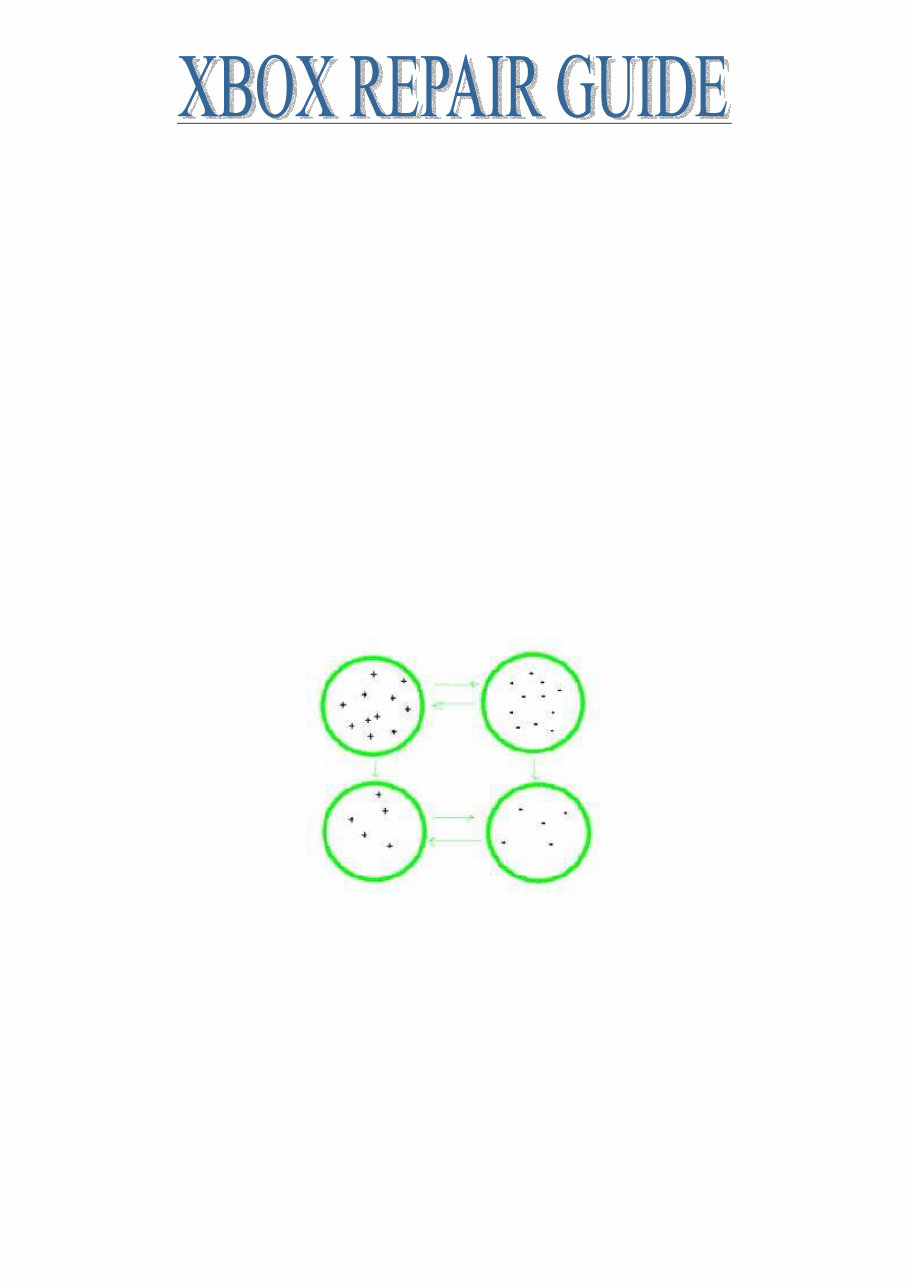
Page 2 of 87 Warnings Read the warning labels on the case and internal components Microsoft puts those there to indemnify from responsibility because it is in fact dangerous in there. The power supply is exposed, when it is not plugged in it can still hold a significant amount of power, it can shock you, if it is plugged in and you touch it, it WILL shock you. Taking proper precautions it can be perfectly safe. A few things to consider. Damage to you High voltage electrical shock hazard, touching almost any part of the power supply while it is connected will result in a shock. Even a brief shock at just the right moment/voltage etc can result in messed up heart rhythm and death. Consider wrapping the power cord into a bundle, when the case is open the cord stays under the lid in a bundle. When the lid is on you can un-bundle the cord and plug it in. This may sound like an exaggeration but you need to be very responsible with your actions. Damage to your Xbox Electro Static Discharge ESD Low humidity increases static charge build up (more accurately it decreases the ability for the air to dissipate charge); movement of one object across another creates a difference in static charge. You know what clothes you have that create static electricity, don't wear those when working on electronics. It’s not the static charge that causes damage to electronics; it is the difference in charge, and specifically the rapid change in charge that damages equipment. Each ring represents any object, lets think of one of them as you and one of them as your Xbox, regardless of whether you are positive or negatively charged or both objects are either positive or both negative, the charge wants to equalize itself when the two objects meet causing a static spark. You don't need to create a spark to do damage to your precious electronics. Imagine an aquarium with a divider in the middle, one side is filled half way full and the other is filled completely full, if the divider were suddenly removed the water would slosh in both directions until it equalized and again became still. The trick is to see your Xbox is not the aquarium! The most common method is to ground oneself this guarantees that you are at a lower potential than the equipment you are working on, any static charge leaves the equipment and enters you. This can still cause problems so ideally both the equipment you are working on and yourself are grounded. For safety reasons use an approved static wrist strap, these are designed to "break" if too many amps go through them.
Page 3 of 87 DVD REPAIR If your Xbox is freezing during games or returning the dreaded Dirty Disc Error you have a DVD drive problem. If this all sounds like too much work you can always buy a replacement drive. First off, DO NOT BLOW CANNED AIR INTO THE DRIVE WITHOUT OPENING IT! This will almost certainly make things worse, you just assure that the dust will be redistributed evenly inside the drive and this includes a coating on the optics you are trying to clean. Steps to take in order to resolve Dirty Disk Errors 1. Use a standard CD/DVD Cleaner; they look like a normal CD but with two miniature brushes on them. This will only clean the lens. Sometimes this is all you need to be up and running. 2. Use this information to figure out what drive you are working with and what must be done to clean the lens in the next step. Determine the manufacturer of your Xbox DVD drive – see page 4 3. Clean the lens and mirror manually. 4. Adjust the Potentiometer (pot) on the laser - see page 54 5. Replace the Laser in the DVD drive. 6. If none of the above options revive your drive you can rest assured you have tried it all get a new drive, they do go dead You may notice that some of your games play fine while others do not. This is usually because some games are on DVD media and some are on CD media. CD's are single layer media while DVD's are multi layer media. This means it is easier to read a CD than it is to read a DVD. The concept of a DVD is to have several semi transparent layers of data. It is sort of like taking a few CD's stacking them together into a single disc. To read the 2-4 layers of data you must ignore the previous layers and pay attention to ones deeper in the disc. Obviously this is a more complex task and more subject to read errors. For instance the double disk of Jet Set Radio Future is a CD while Halo is on a DVD. Most often you will notice the bottom of the media is one of two colors, gold DVD's and Silver CD's. It is not 100% that gold=DVD and silver=CD so if you find this rule of thumb to not be true in every case. If you know you have a DVD problem because the drive will not open or close, stay opened or closed or makes grinding and popping noises The number one quick fix for the DVD drive is to re-align the tray. This is common with CD players, CD changers as well. Many times just from normal use a gear will skip or something will jump track, unless all the pieces are in the right place at the time it powers up it will not work. So by removing the tray, aligning the internal parts to their starting position and reinserting the tray you can often bring a drive back from the dead - see Tray Alignment Procedure page 33
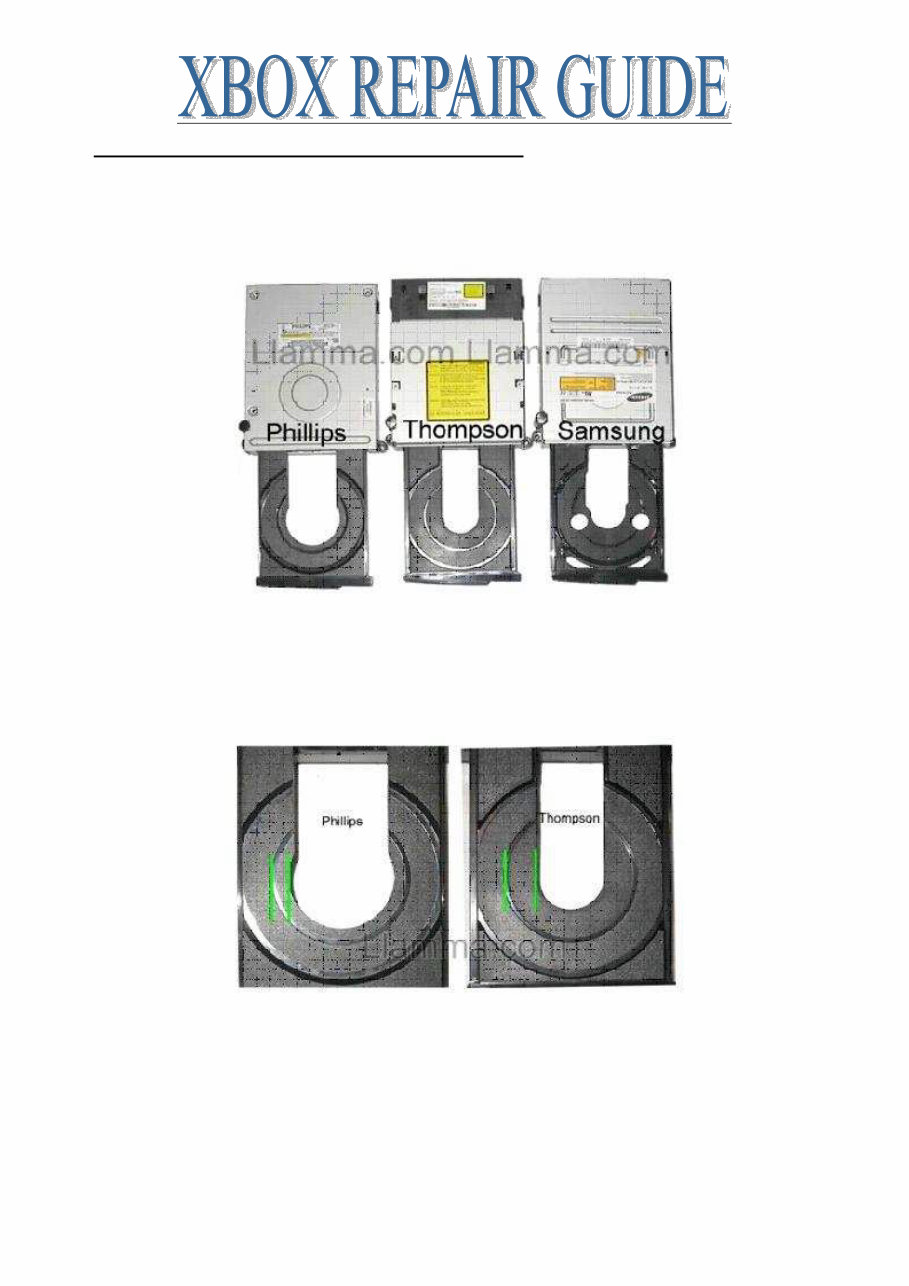
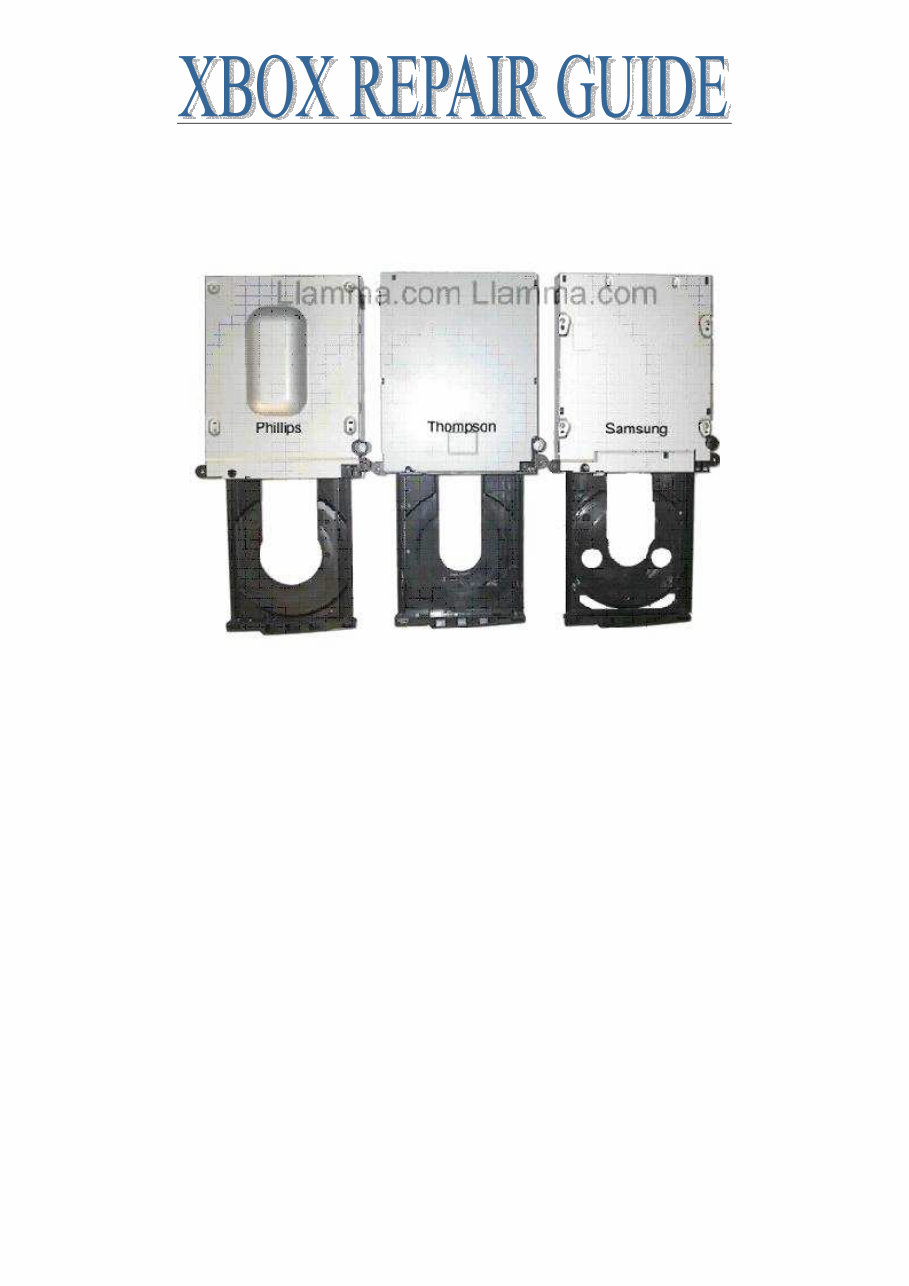
Page 4 of 87 Determine the manufacturer of your X-Box DVD drive Check Xbox DVD version without opening your Xbox. All DVD drives listed are compatible with all versions of X-Box Console 1.0-1.5 See “how to fix dirty disc errors” for more info. Hit eject on your X-Box and check out the tray. The Samsungs extra cut-outs are pretty obvious so that is easy to pick out. If you have a Thompson or Phillips compare the size of the inner space, the Thompson’s is narrower and this makes the inner ring for small size disc’s look to be about halfway from the centre space to the outer tray, while the Phillips is narrower. Also look at the interior empty space, the Phillips tray is somewhat keyhole shaped while the Thompson is a smooth arch. Just for further documentation here is a shot of the bottom of the drives. Notice the big hump on the bottom of the Philips, what the heck is that thing there for? It’s like a little secret compartment for smuggling or something, totally empty in the interior. My best guess is that it just leaves extra space under the optics and becomes a little dust pocket to help route dust away from the lens.
Page 5 of 87 Updated some time ago, Phillips came out with a new drive that makes use of this hump. The laser is positioned vertically and the PCB is designed to allow the laser to pass through the board and make use of this empty area. Apparently, this was the design they intended to initially use when designing the X-Box DVD drive case and only implemented the changes to the internals recently.
Page 6 of 87 DETERMINE VERSION OF X-BOX There are currently 7 versions of X-Box on the market today (10/24/04). These are referred to as 1.0, 1.1, 1.2, 1.3, 1.4, 1.5 and 1.6 • All original X-Box DVD drives work in all consoles regardless of version • Only 1.0 versions have or need USB daughterboard’s. • power supplies are compatible with 1.0-1.1 motherboards • 1.2-1.5 power supplies are compatible with 1.2-1.5 motherboards • 1.6 power supplies are ONLY compatible with 1.6 motherboards (see third photo for visible differences • Note: 1.0/1.1 to 1.2-1.5 power supply conversion – see page 9
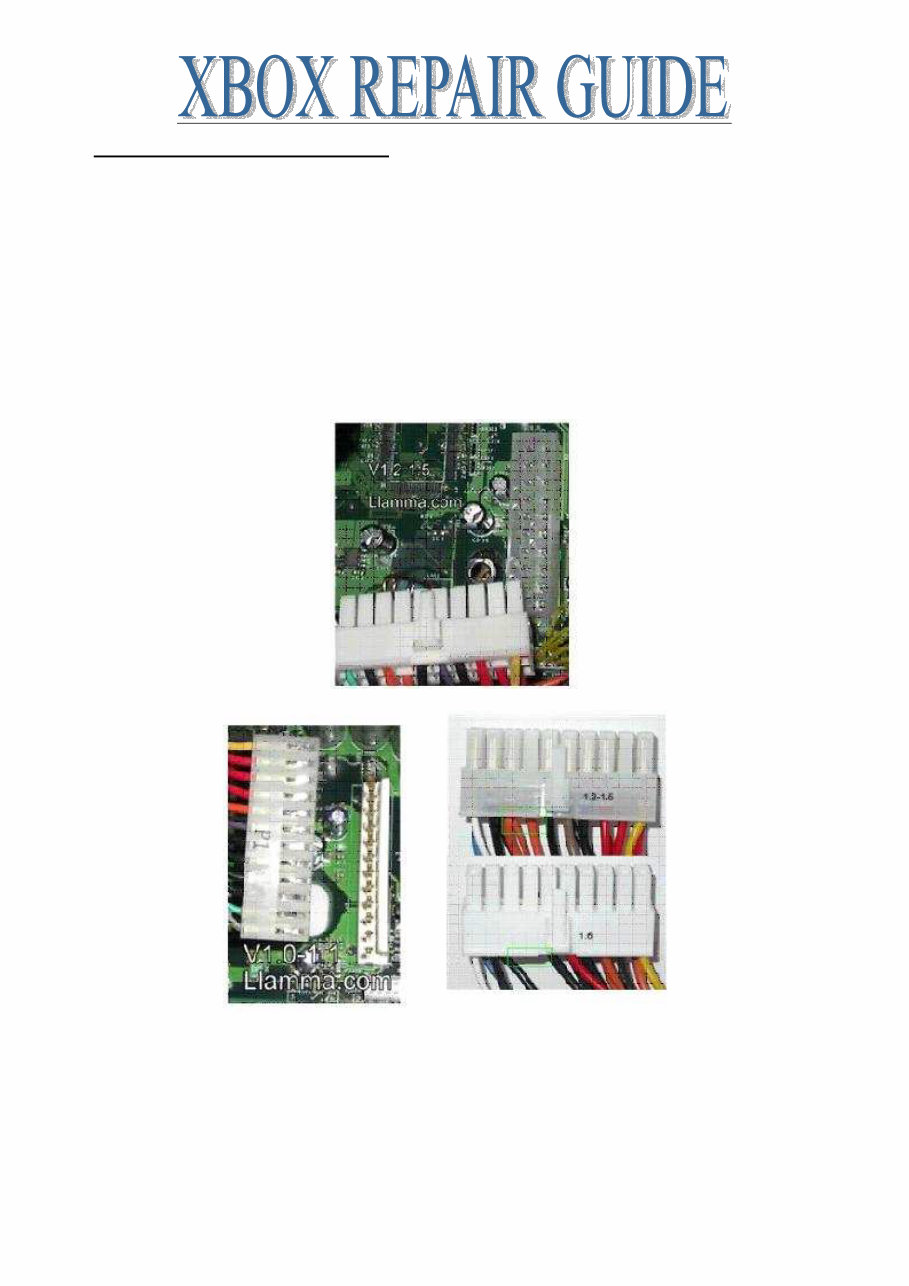
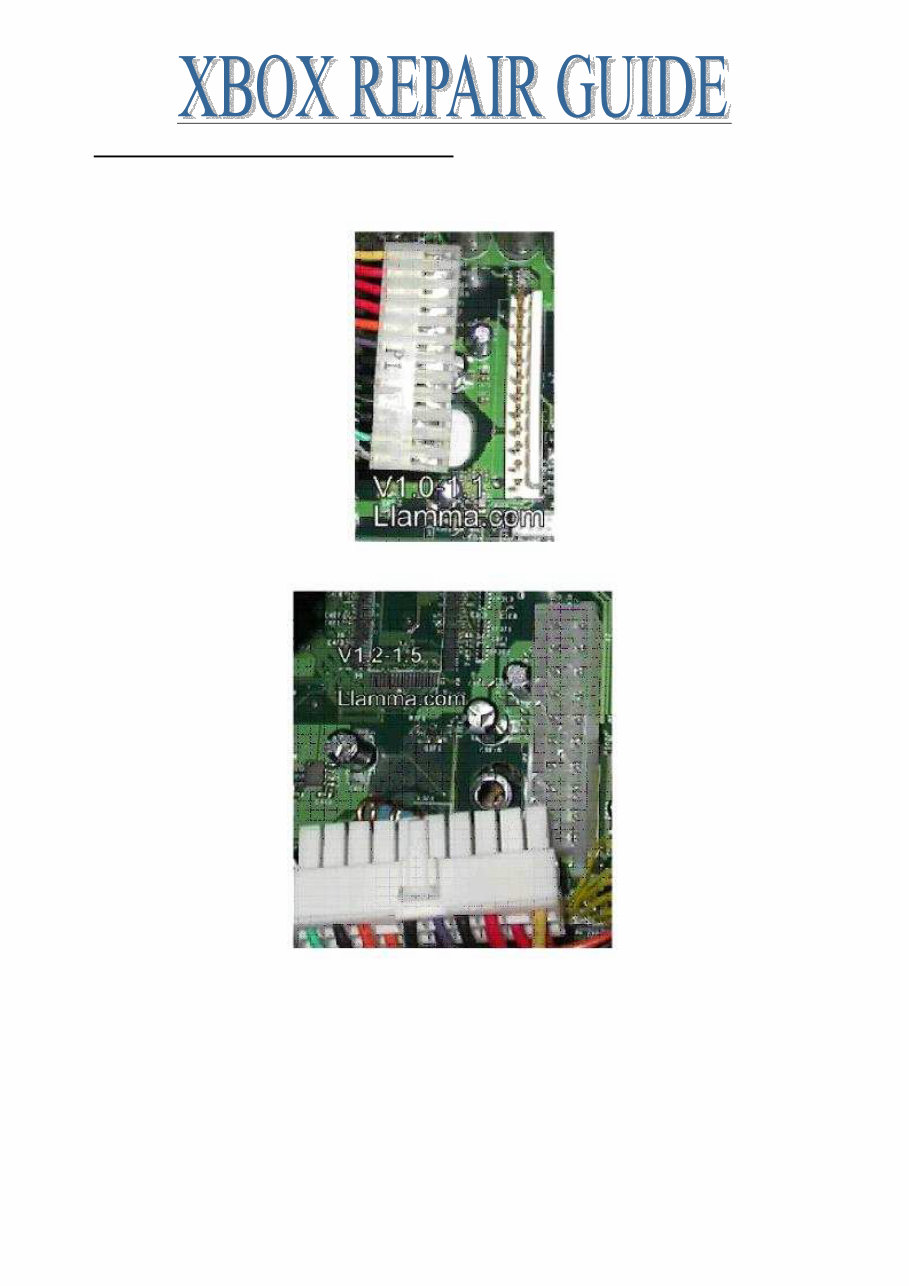
Page 7 of 87 XBOX POWER SUPPLY COMPATIBILITY You can convert a 1.0/1.1 to a 1.2-1.5 by using this diagram 1.0-1.1 Consoles have power supplies with an AT style connector (one row of pins) 1.2-1.5 Consoles have power supplies that have an ATX style connector (two rows of pins)
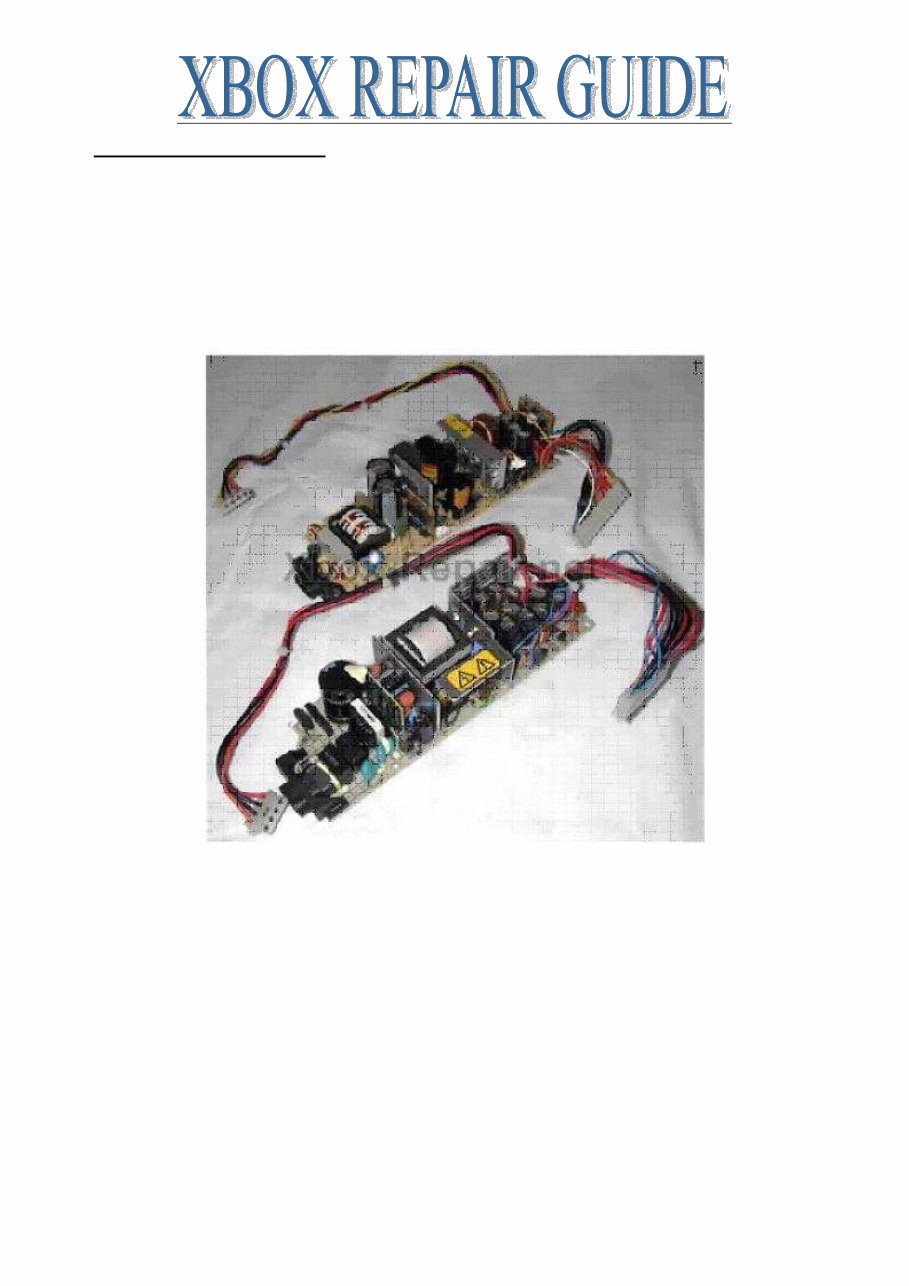
Page 8 of 87 POWER SUPPLY FAILURE Power supply failure, the darn thing just won’t turn on. Usually proceeded by a popping sound right after attempting to turn on. In addition to the pop there is usually a hot smell and possibly faint smoke. Check out this link if you want to take a crack at repairing. I find this to be a waste of time since most often the fuse blew for a reason and if you do not fix the cause it will just blow again or swap it out. If you do not mind an ugly pile sitting next to the TV you could try to use a standard AT power supply. Here is a picture of a Delta Power Supply on top and Mineba on the bottom. All power supplies I carry are for 1.0-1.1 consoles and are interchangeable. The manufacturer makes no difference, to keep costs down we do not distinguish between one brand and another when stocking/shipping. If you order a power supply and install it I suspect you will have a working X-Box again. Occasionally not, sometimes the lightning may have damaged the mother board as well. I always feel guilty when telling people what to do I would guess 75-90% of the time the power supply fixes it but if I answer 100 mails that's like 10-25 people that followed what I said and it didn't work out. Did everything in the house get fried, only the X-Box or the X- Box and some other stuff? I think the degree of damage to other appliances may give you some clues, if the lightning struck the wire between your house and the pole I would say that is the worst case and everything in the house probably got ruined including the motherboard, if the X- Box was the only equipment affected I would say that is the best case and replacing the power supply will probably fix it.
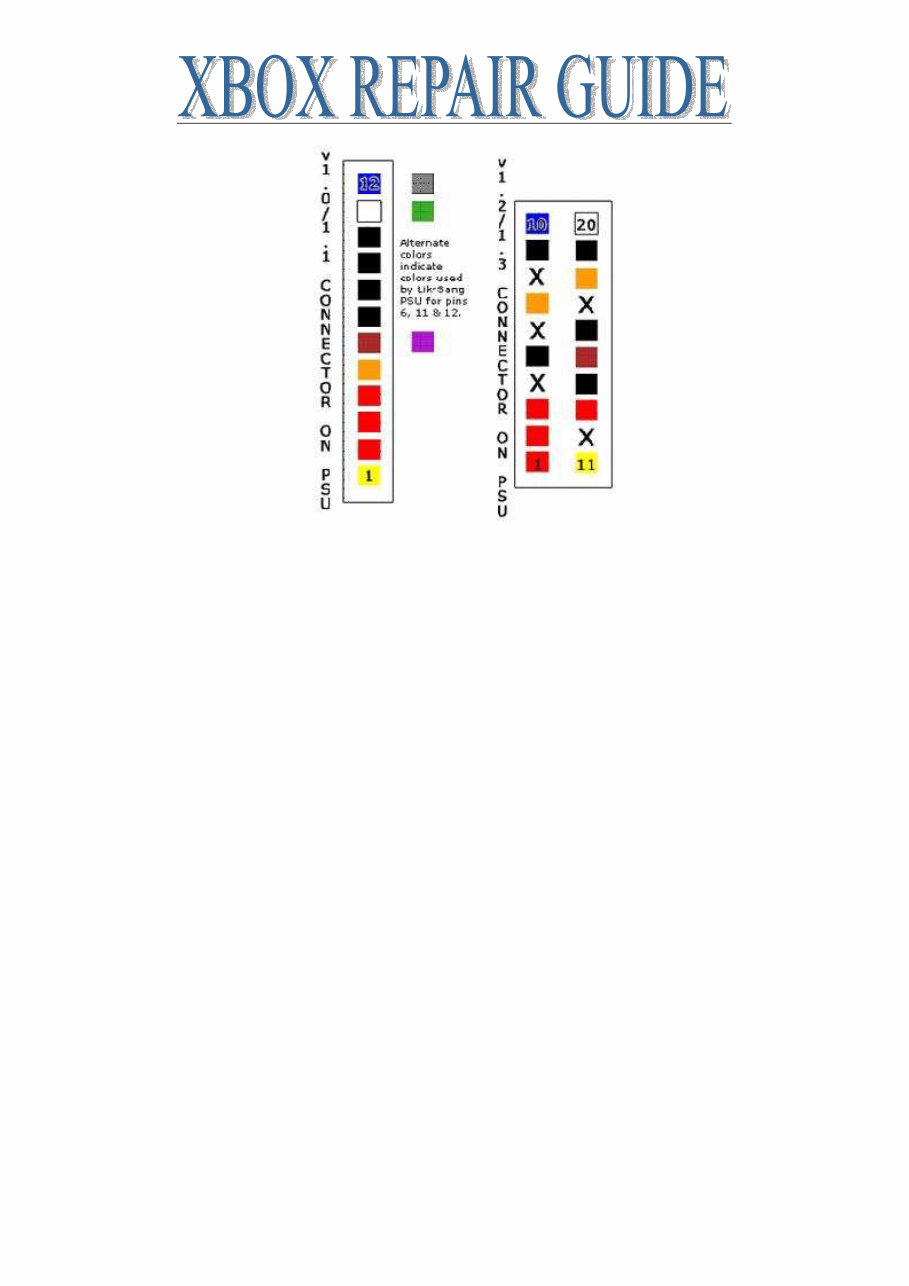
Page 9 of 87 CONVERT A PSU 1.0/1.1 TO A 1.2-1.5 Use v1.0/v1.1 PSU for v1.2/1.3 console (v0.1) For those of you that have a blown & irreparable v1.2/1.3 X-Box power supply unit, you can now use a v1.0/v1.1 Xbox power supply unit to replace it. Lik-Sang offer a replacement v1.0/v1.1 (variable input) power supply. What you will need: Connector from v1.2/1.3 power supply or Connector from ATX 20 pin PC power supply. Soldering iron & solder Heat shrink or electrical tape v1.0/v1.1 Xbox power supply The v1.0/1.1 PSU connector has got 12 wires connecting to the motherboard. The v1.2/1.3 PSU connector has got 15 wires (extra wire colors are: 1 x Black/1 x Orange/1 x Red) connecting to the motherboard. We want to connect the 1.2/1.3 PSU connector to the 1.0/1.1 PSU by connecting the following: Pin assignment of the connecting Xbox V1.0/V1.1 PSU to v1.2/1.3 PSU: V1.0/1.1 V1.2/1.3 PIN 1 CONNECTS TO PIN 11 PIN 2 CONNECTS TO PIN 1 PIN 3 CONNECTS TO PIN 2 PIN 4 CONNECTS TO PIN 3 & PIN 13 PIN 5 CONNECTS TO PIN 7 & PIN 18 PIN 6 CONNECTS TO PIN 15 PIN 7 CONNECTS TO PIN 5 PIN 8 CONNECTS TO PIN 9 PIN 9 CONNECTS TO PIN 14 PIN 10 CONNECTS TO PIN 16 & PIN 19 PIN 11 CONNECTS TO PIN 20 PIN 12 CONNECTS TO PIN 10 Pin configurations are as follows: This is looking from above at the CONNECTOR at the end of the PSU not from above the connector on the motherboard - have a look at your PSU connector and it will be as clear as day. The colors shown are the original PSU colors, and the other 3 colors on the v1.0 are the only 3 different colours that the generic PSU supplied by Lik-Sang uses. The 'X' indicates pins that are not required for the version 1.2/1.3.
Page 10 of 87 Join each wire, soldering each one, and insulate with heat shrink or insulation tape. Plug it in and go!
This is a comprehensive X-Box repair guide provided in a clear and easy-to-use format. It offers step-by-step instructions and includes detailed blow-up images, making it useful for both professional mechanics and DIY enthusiasts. The manual covers a wide range of topics, including fixing DVD & CD loading errors, disassembling and reassembling the Xbox console, cleaning and maintaining the console, adjusting the DVD drive laser, repairing controllers, addressing LED error messages/codes, and providing a repair guide for the X-Box 1.6 motherboard. The manual consists of 25 pages and is available in English language. It is compatible with both Windows and Mac platforms. Upon payment via PayPal, an instant link to access the manual will be provided via email. The manual contains numerous printable pages with plenty of pictures and diagrams, making it convenient to use at home or in the office. By following the easy-to-understand instructions, users can save money by performing their own repairs.