

ELMO 16 CL 16MM PROJECTOR Manual
What's Included?
Fast Download Speeds
Online & Offline Access
Access PDF Contents & Bookmarks
Full Search Facility
Print one or all pages of your manual
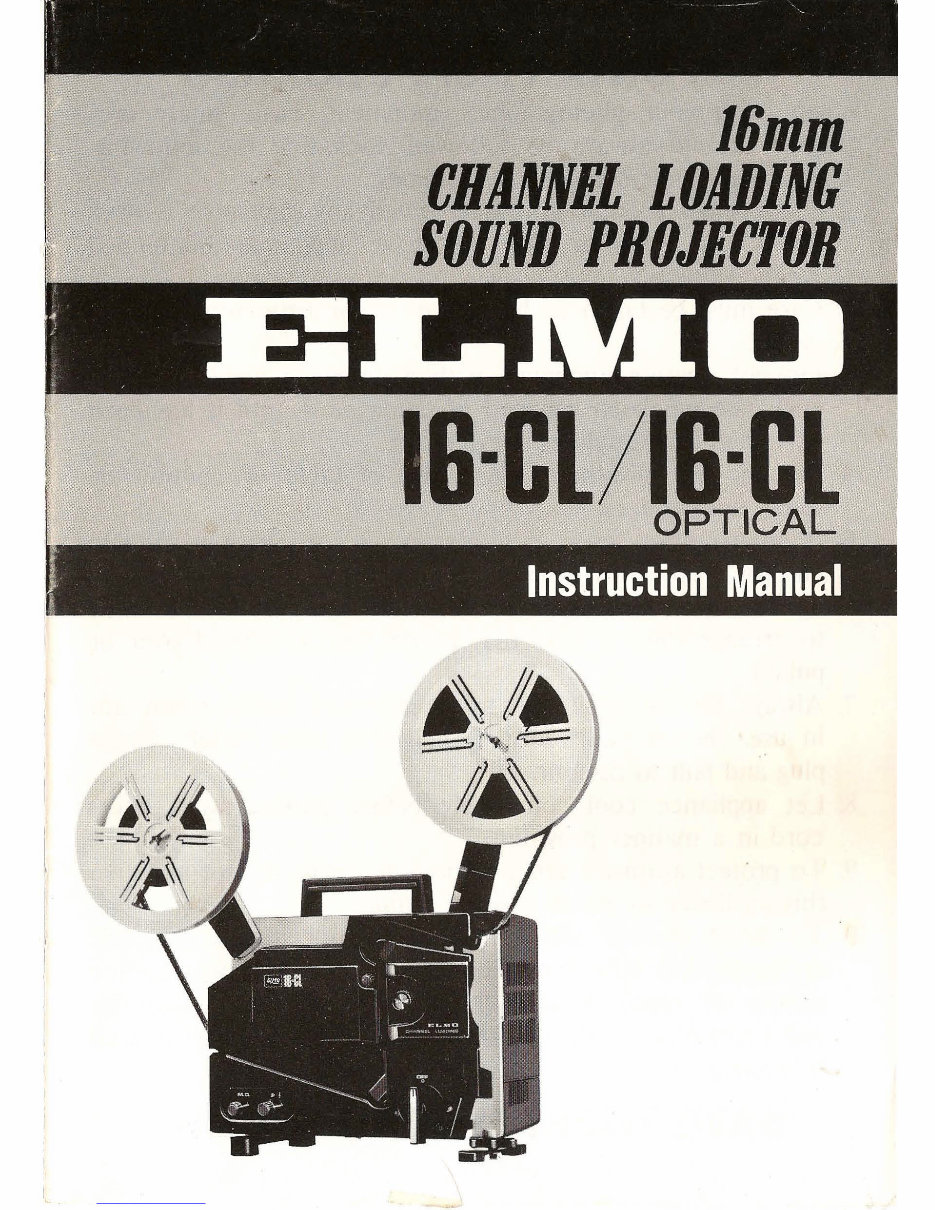
16mm
CHANNEL LOAD/Ne
~O[JfD ·. PBOJECTOB
IG-Cl/IG-CL
. OPTICAL
1 Instruction Manual
Downloaded from www.Manualslib.com manuals search engine
IMPORTANT SAFEGUARDS
W hen using your photographic equipment, basic safety pre-
cautions should always be followed, including the following:
1. Read and understand all instructions.
2. Close supervision is necessary when any appliance is used
by or near children. ' Do not leave appliance unattended
while in use.
"- 3. Care must be taken as burns can occur from touching hot
parts.
4. Do not operate appliance with a damaged cord or if the
appliance has been dropped or damaged - until it has been
examined by a qualified serviceman.
5. Do not let cord hang over edge of table or counter or
touch hot surfaces.
6. If an extension cord is necessary, a cord with a suitable
current rating should be used. Cords rated for less amper-
age than the appliance may overheat. Care should be taken
to arrange the cord so that it will not be tripped over or
pUlled.
7. Always unplug appliance from electrical outlet when not
in use. Never yank cord to pull plug from outlet. Grasp
plug and pull to disconnect.
8. Let appliance cool completely before putting away. Store
cord in a manner provided.
9. To protect against electrical shock hazards, do not immerse
this appliance in water or other liquids.
to. To avoid electric shock hazard, do not disassemble this
appliance, but take it to a qualified serviceman when some
service or repair work is required. Incorrect reassembly
can cause electric shock hazard when the appliance is used
subsequently.
SAVE THESE INSTRUCTIONS
!
Downloaded from www.Manualslib.com manuals search engine
Congratulations and thank you on joining the large nation-wide
family of ELMO 16-CL sound projector owners.
You have selected a precision-engineered projector that will give
you the quality picture and sound reproduction you expected
from ELMO. However, to enjoy your ELMO projector be sure to
read this entire manual for important, helpful information.
CONTENTS
Major parts descriptions . . . . . . . . . . . . . . . . . . . . . . . . . . . .. 2
Preparation for projection ........................... 4
Film threading .................................... 6
Projection ........................................ 8
Various projections ............ , . . . . . . . . . . . . . . . . . . . .. 9
When using extension speaker ......................... 10
Public address system ............................... 11
Rewinding ........................................ 12
Maintenance ...................................... 13
Replacing lamp and fuse ........................... . . 17
Trouble-shooting hints ....................... . ...... 20
Accessories ....................................... 22
Specifications ................................ .. ... 25
PLEASE NOTE
The instructions in this manual apply to Model 16-CL MO
(Optical/magnetic reproduction), to Model 16-CL 0 (Optical
reproduction only) and to Model 16-CL(H) (Optical/magnetic
reproducti on).
Note information as applies to specific model.
Downloaded from www.Manualslib.com manuals search engine
2
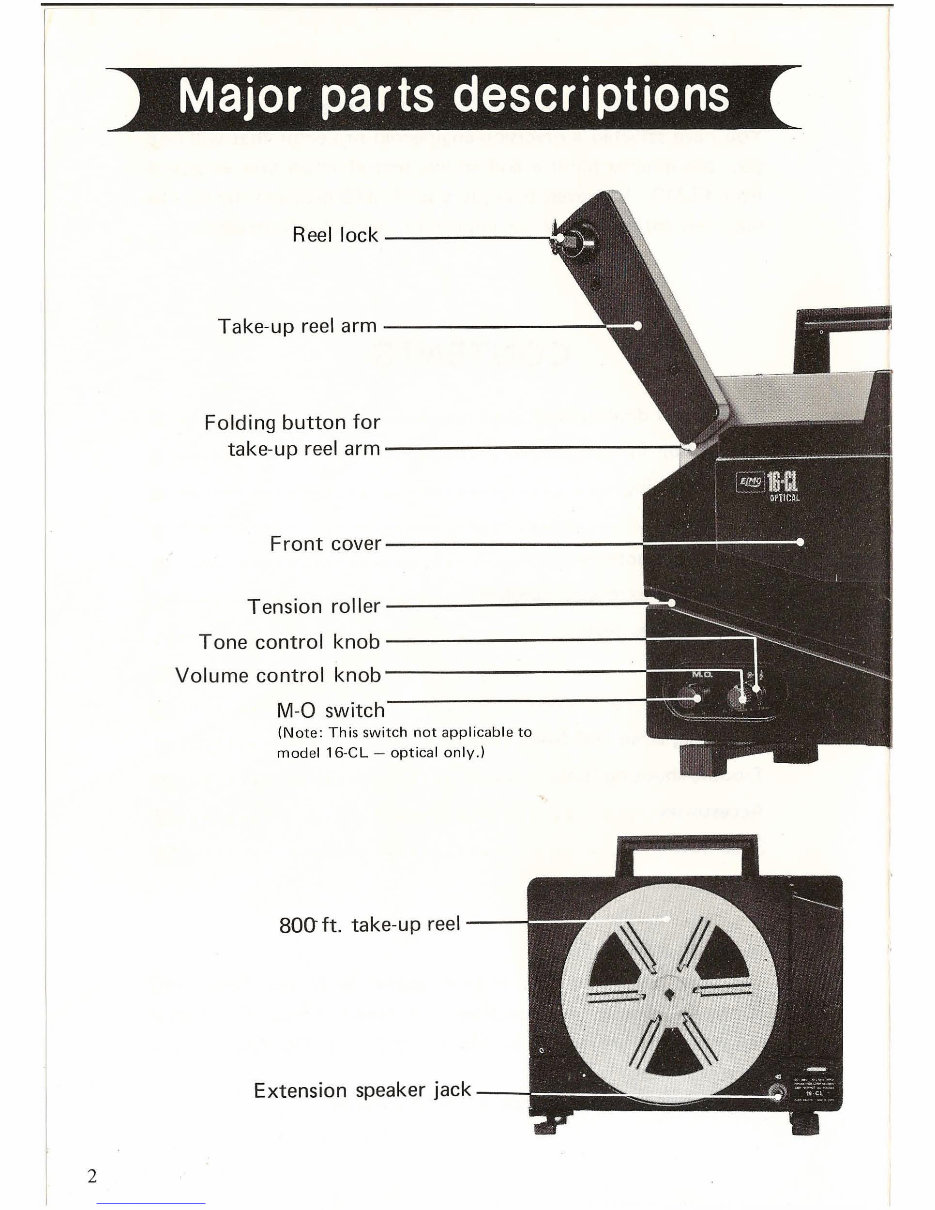
Major parts descriptions
Reel lock ------~
Take-up reel arm -------- ..... :
Folding button for
take-up reel arm--------------i
Front cover---------~
Tension roller ------------i
Tone control knob----------
Volume control knob----------
M-O switch
(Note: This switch not applicab le to
model 16-CL - optica l on ly .)
80o-ft. take-up reel-~
Extension speaker jack
Downloaded from www.Manualslib.com manuals search engine
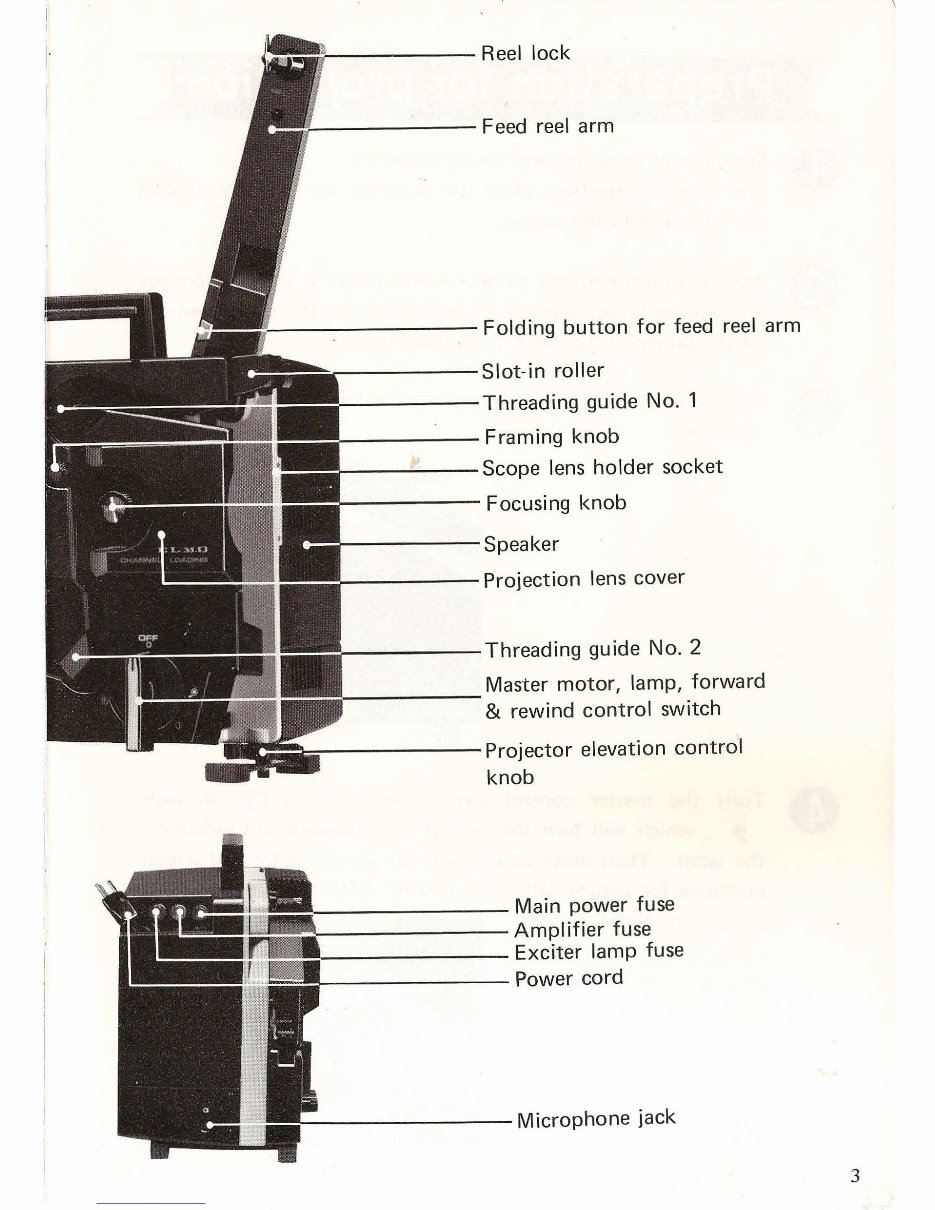
~~!!!~----- Reel lock
'1- ------ Feed reel arm
: --------- Folding button for feed reel arm
,.-------Slot-in roller
------ Threading guide No .1
------ Framing knob
------Scope lens holder socket
f------- Focusing knob
------ Speaker
------ Projection lens cover
,- ____ Threading guide No.2
f------- Master motor, lamp, forward
& rewind control switch
::------- Projector elevation control
knob
!
1!. Q!i! --------- Main power fuse
,.--_______ Amplifier fuse
=~~ _______ Exciter lamp fuse
=~ ________ Power cord
r---------Microphone jack
3
Downloaded from www.Manualslib.com manuals search engine
o
4
Preparation for projection
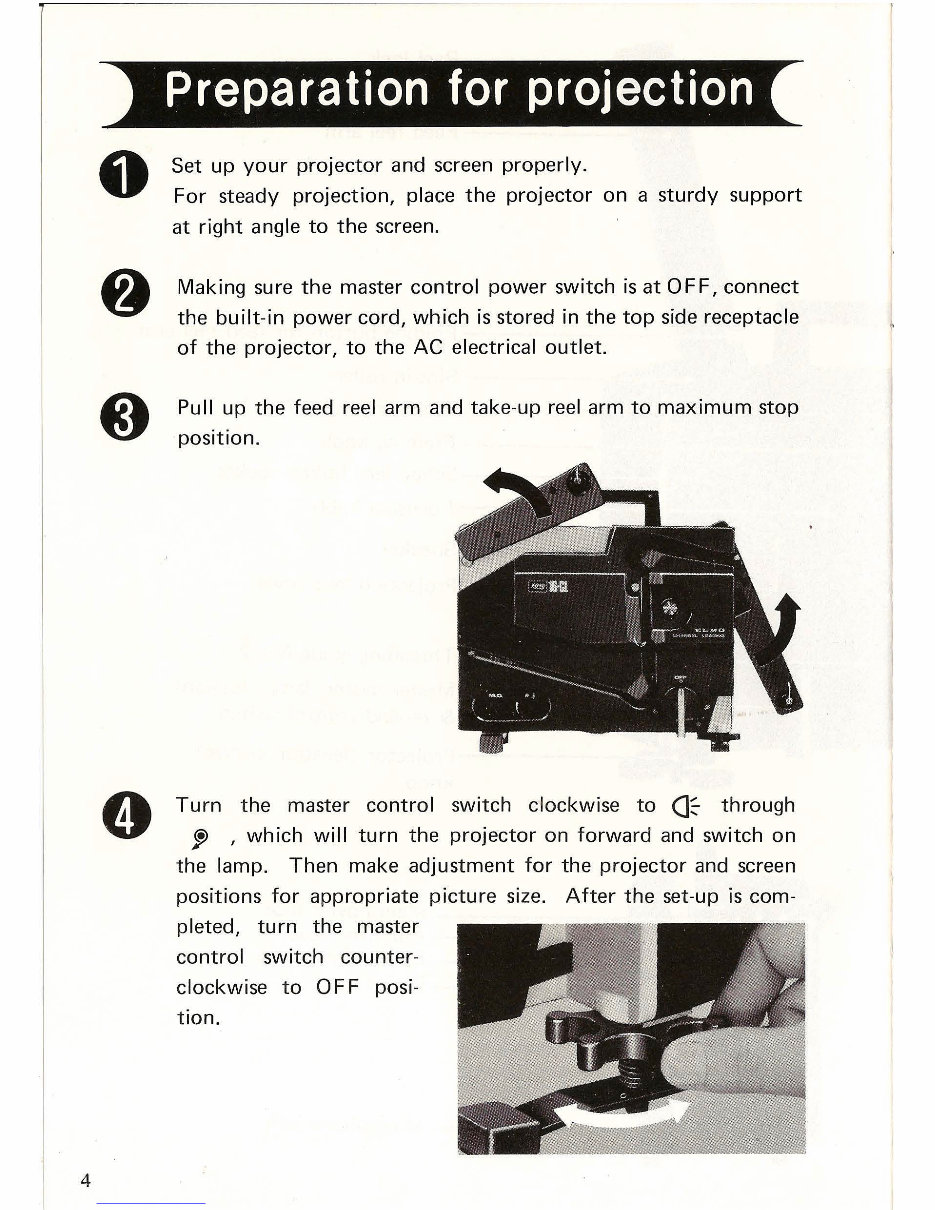
Set up your projector and screen properly.
For steady projection, place the projector on a sturdy support
at right angle to the screen.
Making sure the master control power switch is at OFF, connect
the built-in power cord, which is stored in the top side receptacle
of the projector, to the AC electrical outlet.
Pull up the feed reel arm and take-up reel arm to maximum stop
position.
Turn the master control switch clockwise to a~ through
, , which will turn the projector on forward and switch on
the lamp. Then make adjustment for the projector and screen
positions for appropriate picture size. After the set-up is com-
pleted, turn the master
control switch counter-
clockwise to 0 F F posi-
tion.
Downloaded from www.Manualslib.com manuals search engine
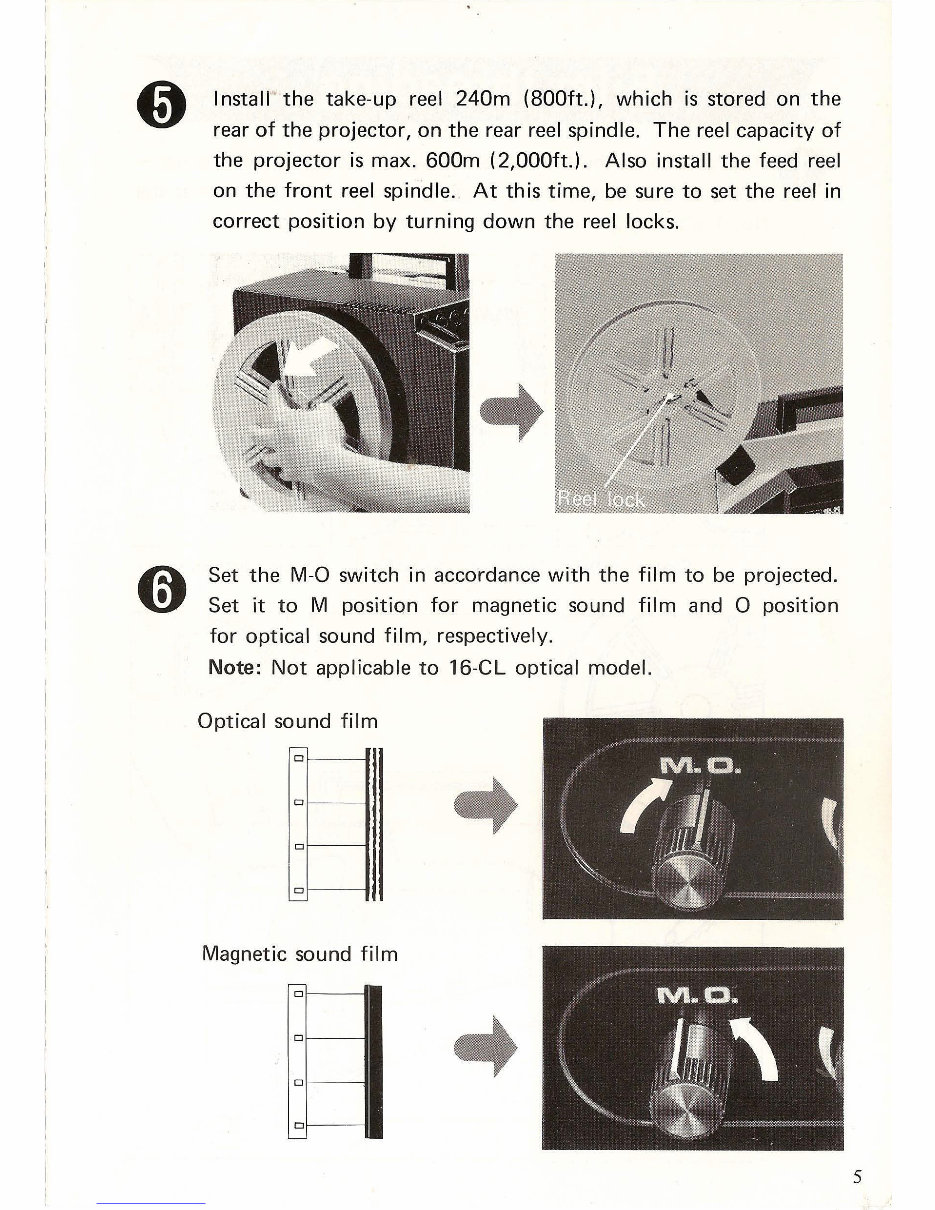
Install the take-up reel 240m (800ft.), which is stored on the
rear of the projector, on the rear reel spindle. The reel capacity of
the projector is max. 600m (2,OOOft.). Also install the feed reel
on the front reel spindle. At this time, be sure to set the reel in
correct position by turning down the reel locks.
Set the M-O switch in accordance with the film to be projected.
Set it to M position for magnetic sound film and 0 position
for optical sound film, respectively.
Note: Not applicable to 16-CL optical model.
Optical sound film
,-
0
0
0
0
~
Magnetic sound film
o
o
o
o
5
Downloaded from www.Manualslib.com manuals search engine
6
Film threading
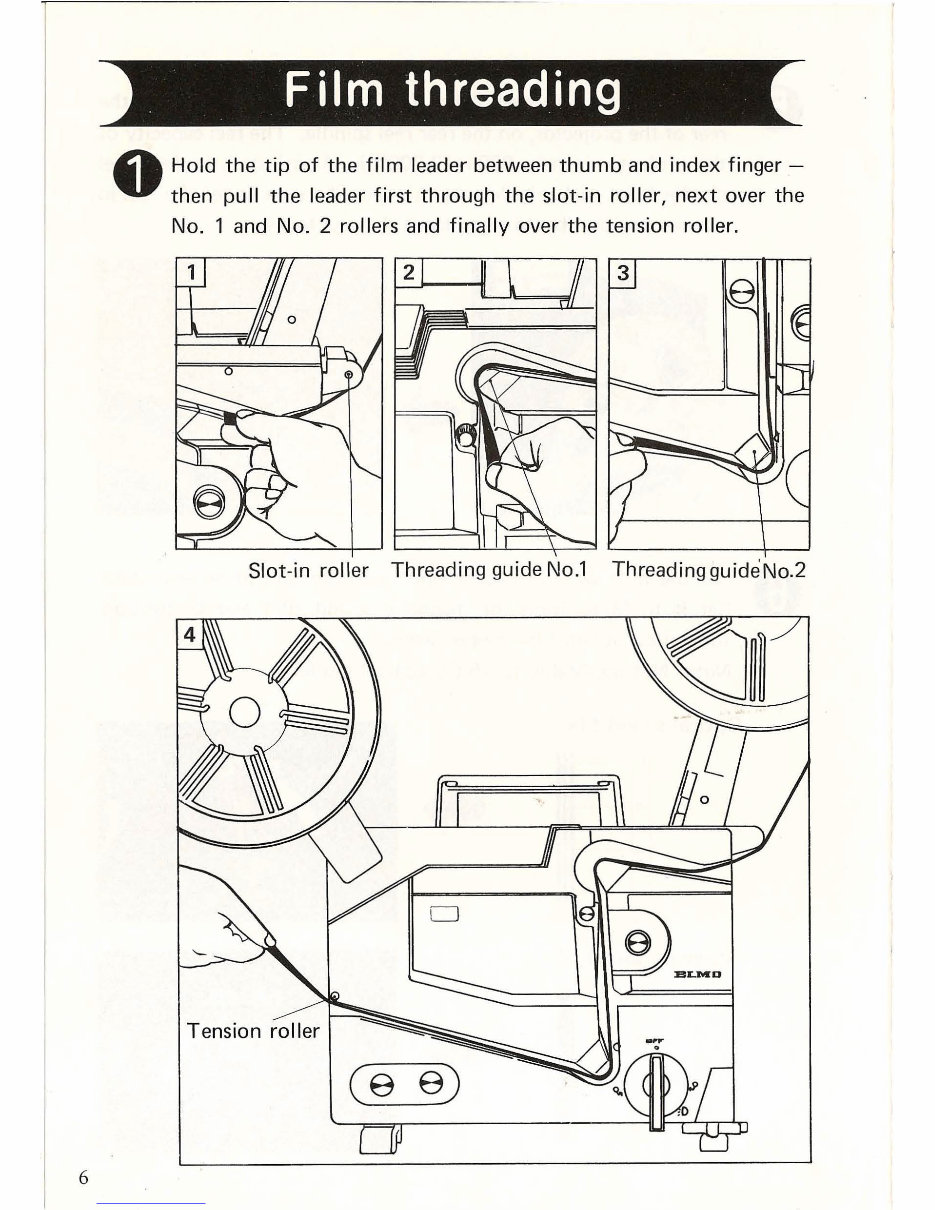
O
Hold the tip of the film leader between thumb and index finger -
then pull the leader first through the slot-in roller, next over the
No.1 and No.2 rollers and finally over the tension roller.
Slot-in roller Threading guide No.1 Threading guide No.2
Downloaded from www.Manualslib.com manuals search engine
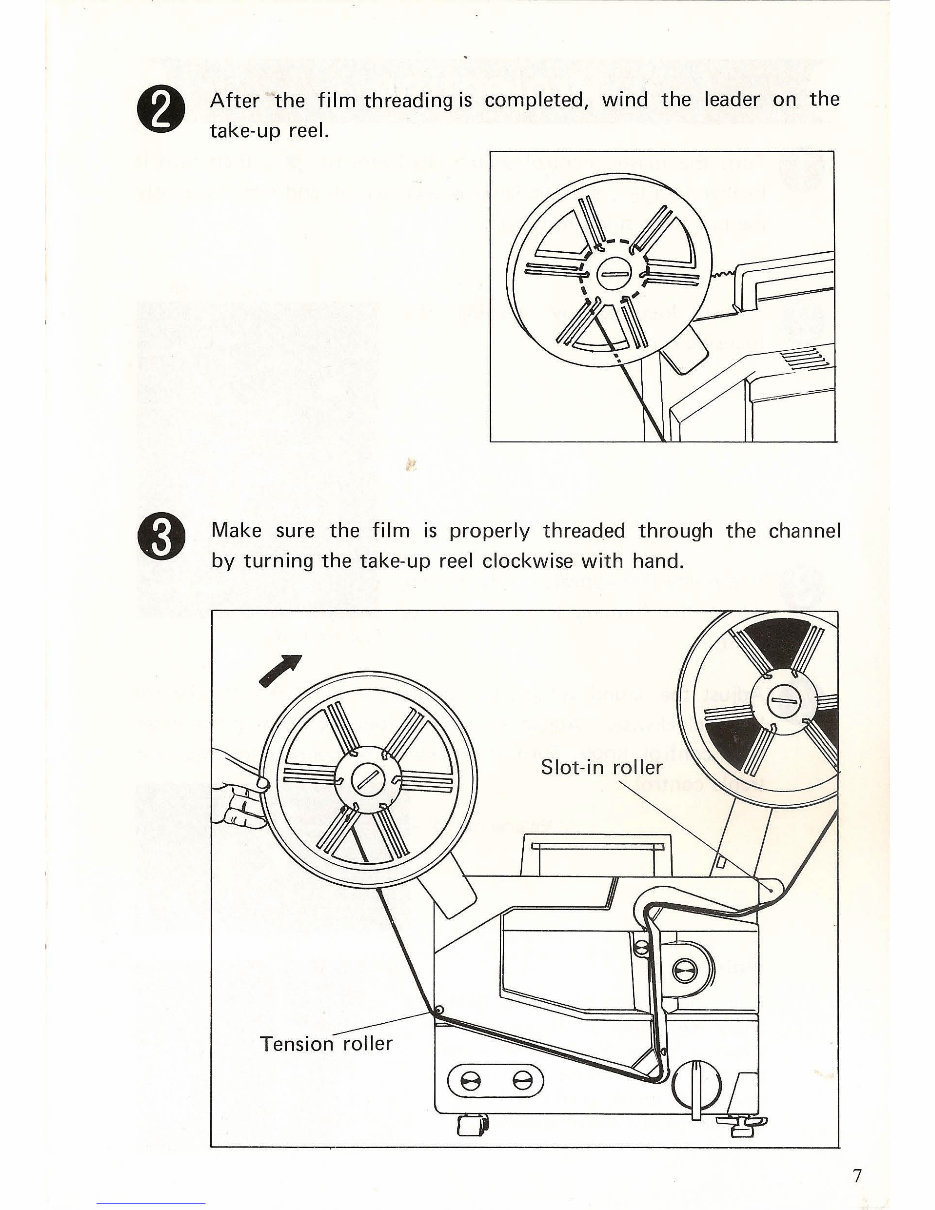
After the film threading is completed, wind the leader on the
take-up reel.
Make sure the fi 1m is properly threaded through the channel
by turning the take-up reel clockwise with hand.
Slot-in rol le r
Tension roller
(8
7
Downloaded from www.Manualslib.com manuals search engine
8
Projection
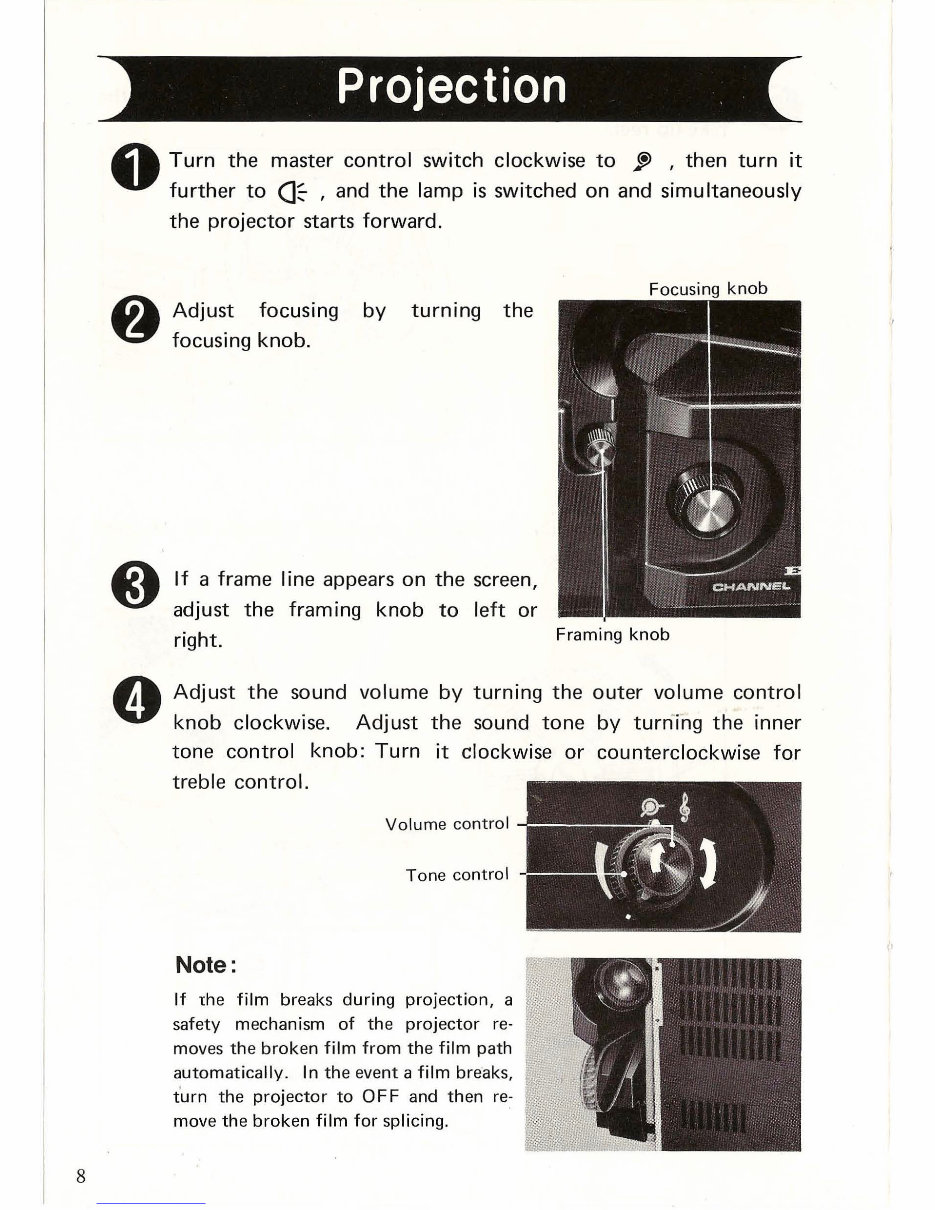
o Turn the master control switch clockwise to ffJ ,then turn it
further to (]~ , and the lamp is switched on and simultaneously
the projector starts forward.
Adjust focusing
focusing knob.
by turning the
If a frame I ine appears on the screen,
adjust the framing knob to left or
right.
Framing knob
Adjust the sound volume by turning the outer volume control
knob clockwise. Adjust the sound tone by turn -ing the inner
tone control knob: Turn it clockwise or counterclockwise for
treble control.
Volume control
Tone control
Note:
If the film breaks during projection, a
safety mechanism of the projector re-
moves the broken film from the film path
automatically_ In the event a film breaks,
t' urn the projector to OFF and then re-
move the broken film for splicing.
Downloaded from www.Manualslib.com manuals search engine
You're Reading a Preview
What's Included?
Fast Download Speeds
Online & Offline Access
Access PDF Contents & Bookmarks
Full Search Facility
Print one or all pages of your manual
$30.99
Viewed 68 Times Today


Secure transaction
What's Included?
Fast Download Speeds
Online & Offline Access
Access PDF Contents & Bookmarks
Full Search Facility
Print one or all pages of your manual
$30.99
Access the complete English manual for your vehicle, directly scanned from the original owner's manual. This resource is invaluable for both professional mechanics and DIY enthusiasts. Whether you prefer the convenience of a .PDF file or the versatility of a .OVA file, this manual provides comprehensive information for car repair and maintenance.


