

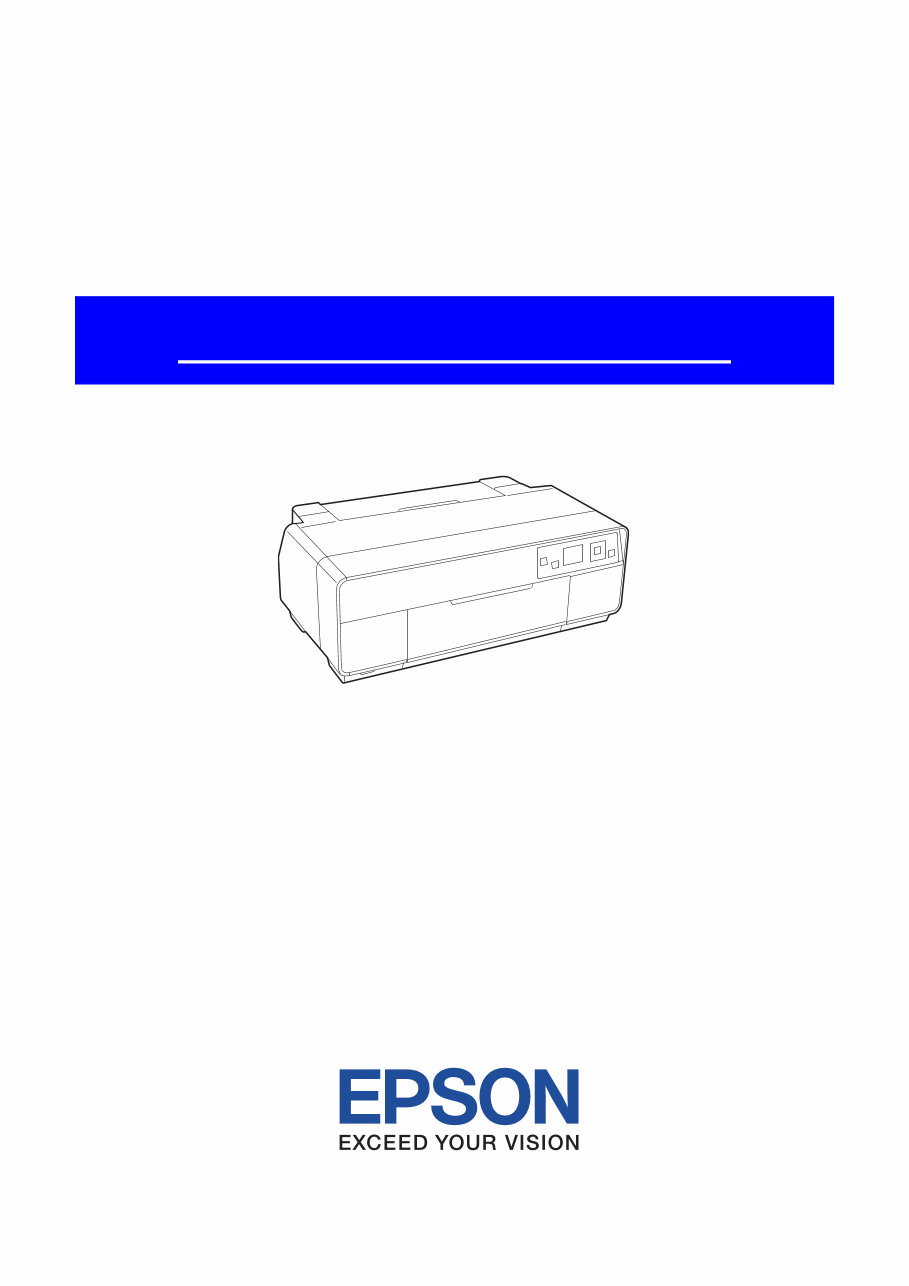
SERVICE MANUAL
CONFIDENTIAL
Color Inkjet Printer
Epson Stylus Photo R3000
SEMF10-002

Confidential
Notice:
All rights reserved. No part of this manual may be reproduced, stored in a retrieval system, or transmitted in any form or
by any means, electronic, mechanical, photocopying, recording, or otherwise, without the prior written permission of
SEIKO EPSON CORPORATION.
All effort have been made to ensure the accuracy of the contents of this manual. However, should any errors be
detected, SEIKO EPSON would greatly appreciate being informed of them.
The contents of this manual are subject to change without notice.
The above not withstanding SEIKO EPSON CORPORATION can assume no responsibility for any errors in this
manual or the consequences thereof.
EPSON is a registered trademark of SEIKO EPSON CORPORATION.
Note :Other product names used herein are for identification purpose only and may be trademarks or registered
trademarks of their respective owners. EPSON disclaims any and all rights in those marks.
Copyright 2010 SEIKO EPSON CORPORATION
IJP CS Quality Assurance Department

Confidential
Safety Precautions
All safety procedures described here shall be strictly adhered to by all parties servicing and maintaining this
product.
DANGER
Strictly observe the following cautions. Failure to comply could result in serious bodily injury or loss of life.
1. Always disconnect the product from the power source and peripheral devices when servicing the product or
performing maintenance.
2. When performing works described in this manual, do not connect to a power source until instructed to do so.
Connecting to a power source causes high voltage in the power supply unit and some electronic components
even if the product power switch is off. If you need to perform the work with the power cable connected to a
power source, use extreme caution to avoid electrical shock.
WARNING
Strictly observe the following cautions. Failure to comply may lead to personal injury or loss of life.
1. Always wear protective goggles for disassembly and reassembly to protect your eyes from ink in working. If
any ink gets in your eyes, wash your eyes with clean water and consult a doctor immediately.
2. When using compressed air products; such as air duster, for cleaning during repair and maintenance, the use
of such products containing flammable gas is prohibited.
PRECAUTIONS
Strictly observe the following cautions. Failure to comply may lead to personal injury or damage of the product.
1. Repairs on Epson product should be performed only by an Epson certified repair technician.
2. No work should be performed on this product by persons unfamiliar with basic safety knowledge required for
electrician.
3. The power rating of this product is indicated on the serial number/rating plate. Never connect this product to
the power source whose voltages is different from the rated voltage.
4. Replace malfunctioning components only with those components provided or approved by Epson;
introduction of second-source ICs or other non-approved components may damage the product and void any
applicable Epson warranty.
5. In order to protect sensitive microprocessors and circuitry, use static discharge equipment, such as anti-static
wrist straps, when accessing internal components.
6. Do not tilt this product immediately after initial ink charge, especially after performing the ink charge several
times. Doing so may cause ink to leak from the product because it may take some time for the waste ink pads
to completely absorb ink wasted due to the ink charge.
7. Never touch the ink or wasted ink with bare hands. If ink comes into contact with your skin, wash it off with
soap and water immediately. If you have a skin irritation, consult a doctor immediately.

Confidential
8. When disassembling or assembling this product, make sure to wear gloves to avoid injuries from metal parts
with sharp edges.
9. Use only recommended tools for disassembling, assembling or adjusting the printer.
10. Observe the specified torque when tightening screws.
11. Be extremely careful not to scratch or contaminate the following parts.
Nozzle plate of the printhead
Ink Supply Unit
CR Scale
PF Scale
Coated surface of the PF Roller
Gears
Rollers
LCD
Exterior parts
12. Never use oil or grease other than those specified in this manual. Use of different types of oil or grease may
damage the component or give bad influence on the printer function.
13. Apply the specified amount of grease described in this manual.
14. Make the specified adjustments when you disassemble the printer.
15. When cleaning this product, follow the procedure described in this manual.
16. When transporting this product after filling the ink in the printhead, pack the printer without removing the
ink cartridges in order to prevent the printhead from drying out.
17. Make sure to install antivirus software in the computers used for the service support activities.
18. Keep the virus pattern file of antivirus software up-to-date.

Confidential
About This Manual
This manual, consists of the following chapters, is intended for repair service personnel and includes information
necessary for properly performing maintenance and servicing the product.
CHAPTER 1. DISASSEMBLY / REASSEMBLY
Describes the disassembly/reassembly procedures for main parts/units of the product, and provides the
standard operation time for servicing the product.
CHAPTER 2. ADJUSTMENT
Describes the required adjustments for servicing the product.
CHAPTER 3. MAINTENANCE
Describes maintenance items and procedures for servicing the product.
CHAPTER 4. APPENDIX
Provides the following additional information for reference:
Power-On Sequence
Connector Diagram
Symbols Used in this Manual
Various symbols are used throughout this manual either to provide additional information on a specific topic or
to warn of possible danger present during a procedure or an action. Pay attention to all symbols when they are
used, and always read explanation thoroughly and follow the instructions.
Indicates an operating or maintenance procedure, practice or condition that, if not strictly observed,
could result in serious injury or loss of life.
Indicates an operating or maintenance procedure, practice, or condition that, if not strictly observed,
could result in bodily injury, damage or malfunction of equipment.
May indicate an operating or maintenance procedure, practice or condition that is necessary to
accomplish a task efficiently. It may also provide additional information that is related to a specific
subject, or comment on the results achieved through a previous action.
For Chapter 1 “Disassembly/Reassembly”, symbols other than indicated above are used to show additional
information for disassembly/reassembly. For the details on those symbols, see “1.2 Disassembly/Reassembly
Procedures (p12)”.

Confidential
Revision Status
Revision Date of Issue Description
A December 24, 2010 First Release

7
Epson Stylus Photo R3000 Revision A
Confidential
Contents
Chapter 1 Disassembly/Reassembly
1.1 Overview ................................................................................................................................................................... 9
1.1.1 Tools ................................................................................................................................................................. 9
1.1.2 Jigs .................................................................................................................................................................... 9
1.1.3 Precautions before Disassembling .................................................................................................................. 10
1.1.4 Preparation before Returning the Unit to the User ......................................................................................... 11
1.2 Disassembly/Reassembly Procedures ..................................................................................................................... 12
1.2.1 Standard Operation Time for servicing the product (TBD) ........................................................................... 13
1.2.2 Disassembly/Reassembly Flowchart .............................................................................................................. 15
1.2.2.1 Housing Part .......................................................................................................................................... 15
1.2.2.2 Printer Mechanism Part ......................................................................................................................... 16
1.3 Detailed Disassembly/Reassembly Procedure for each Part/Unit ........................................................................... 19
1.4 Routing FFCs/cables ............................................................................................................................................... 29
Chapter 2 Adjustment
2.1 Required Adjustments ............................................................................................................................................. 33
2.2 Details of Adjustments (TBD) ................................................................................................................................ 38
2.2.1 PF Timing Belt Tension Adjustment .............................................................................................................. 38
2.2.2 PF Roller Shaft Center Support Position Adjustment (TBD)......................................................................... 39
2.2.3 ASF Guide Roller LDs position adjustment ................................................................................................... 44
2.2.4 PG Adjustment ............................................................................................................................................... 47
2.2.5 Mist Recovery check ...................................................................................................................................... 51
2.2.6 MAC address setting ...................................................................................................................................... 52
2.2.7 Head Angular Adjustment CR/PF (TBD) ...................................................................................................... 53
2.2.8 Colorimetric Calibration ................................................................................................................................. 55
2.2.8.1 Overview of the Colorimetric Calibration ............................................................................................. 56
2.2.8.2 Adjusting Method of the Colorimetric Calibration................................................................................ 58
Chapter 3 Maintenance
3.1 Overview ................................................................................................................................................................. 65
3.1.1 Cleaning .......................................................................................................................................................... 65
3.1.2 Lubrication...................................................................................................................................................... 65
3.2 Lubrication Points and Instructions ......................................................................................................................... 66
Chapter 4 Appendix
4.1 Power-On Sequence ................................................................................................................................................ 70
4.2 Connector Diagram ................................................................................................................................................. 73

Confidential
CHAPTER 1
DISASSEMBLY/REASSEMBLY

Confidential
Disassembly/Reassembly Overview 9
Epson Stylus Photo R3000 Revision A
1.1 Overview
This chapter describes procedures for disassembling the main parts/units of Stylus Photo R3000. Unless
otherwise specified, disassembled parts/units can be reassembled by reversing the disassembly procedure. See
the cautions or tips for disassembly/reassembly described in “1.3 Detailed Disassembly/Reassembly Procedure
for each Part/Unit (p19)”.
Read the “Safety Precautions (p3)” before disassembling and reassembling.
When you have to remove units or parts that are not described in this chapter, see the exploded diagrams of SPI
(Service Parts Information).
1.1.1 Tools
Use only specified tools to avoid damaging the printer.
Note *1: Some of the tools listed above are commercially available.
*2: EPSON provides the tools listed with EPSON part code.
1.1.2 Jigs
Note *1: The jigs above are used for adjustment (See Chapter 2 “ Adjustment (p32)”.) No jigs are required for disassembling/
reassembling this printer.
*2: Some of the tools listed above are commercially available.
Name Availability
*1
EPSON Part Code
*2
(+) Phillips screwdriver #1 O 1080530
(+) Phillips screwdriver #2 O ---
Flathead screwdriver O ---
Flathead Precision screwdriver #1 O ---
Tweezers O ---
Longnose pliers O ---
Acetate tape --- 1003963
Nippers O ---
Name
*1
Q’ty Availability
*2
EPSON Part Code
Sonic tension gauge 1 --- 1294120
PF roller shaft position adjustment jig 1 --- TBD
Level block 1 --- 1304994
Adjustment gauge for PG adjustment 1 --- 1276333
Tester 1 O ---
Calibrator (i1 Basic UV-Cut) 1 O ---
Confidential
Disassembly/Reassembly Overview 10
Epson Stylus Photo R3000 Revision A
1.1.3 Precautions before Disassembling
Unlocking the carriage
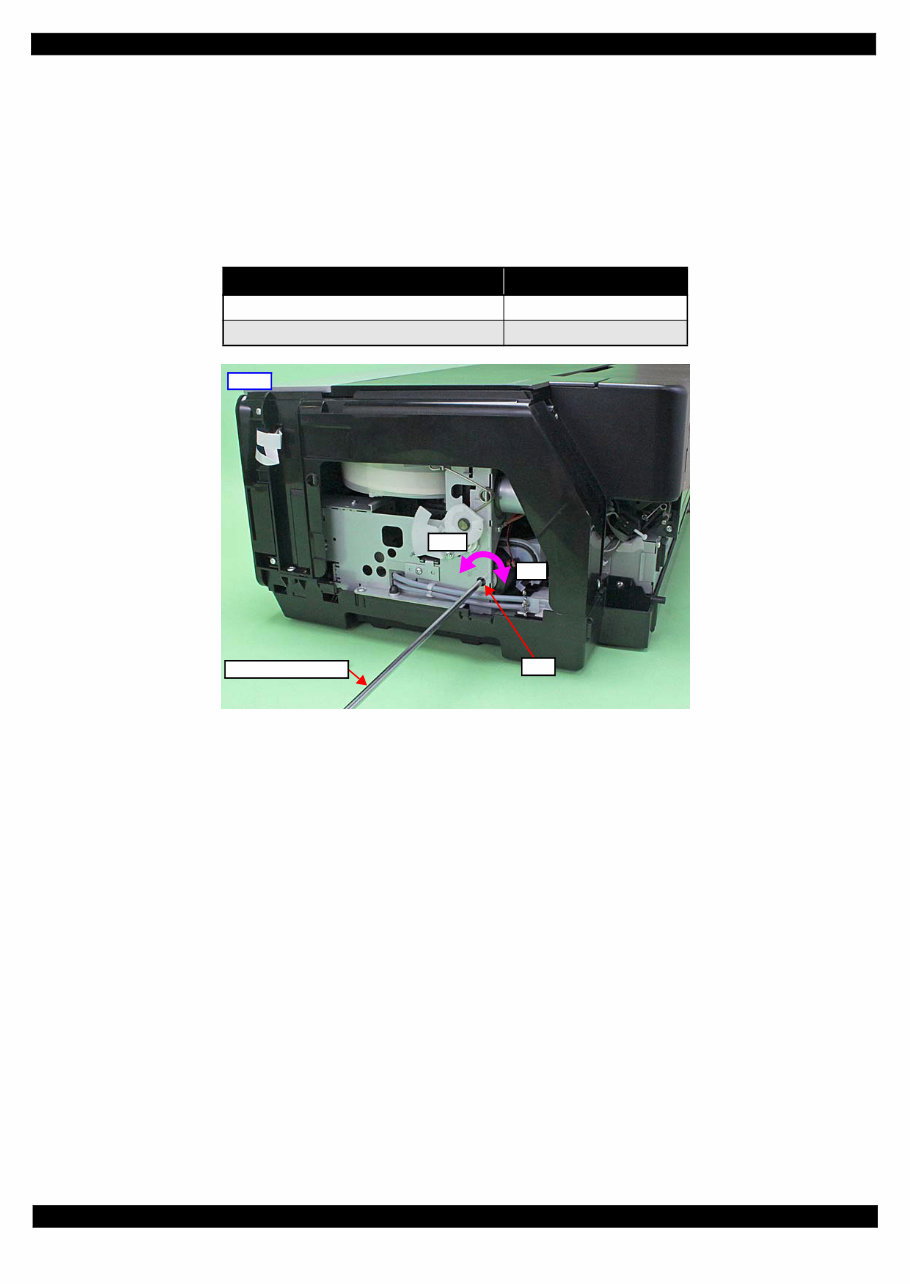
Unlock the carriage by following the procedure below.
1. Remove the Rear Housing, Right Cover, and Right Decoration Plate.
2. Insert a phillips screwdriver into the hole of the frame on the right side of the printer, and rotate the white
shaft of the Ink System.
Figure 1-1. Unlock the Carriage
Handling the Ink Supply Unit
In order to prevent ink leakage, be careful of the following when handling the Ink Supply Unit.
(See “Ink Supply Unit (p22)” and “CR Contact Module (p22)” for details.)
Unless otherwise specified in this manual, do not disassemble the Ink Supply Unit any further than specified as an
ASP. Otherwise, replace the Ink Supply Unit with a new one.
Be careful not to damage the film of the ink path.
When disassembling/reassembling the printer, be careful not to apply extra force on the joint part of the ink tube
and I/C Holder Unit, and on that of the ink tube and Ink Selector.
Table 1-1. Carriage Lock/Unlock
Direction of Rotation Carriage
Clockwise (CW) Locked
Counterclockwise (CCW) Unlocked
Right
Hole
Phillips screwdriver
CW
CCW
You're Reading a Preview
What's Included?
 Lifetime Access
Fast Download Speeds
Online & Offline Access
Access PDF Contents & Bookmarks
Full Search Facility
Print one or all pages of your manual
$30.99
Epson Stylus Photo R3000, Service Manual
Viewed 70 Times Today

What's Included?
Lifetime Access
Fast Download Speeds
Online & Offline Access
Access PDF Contents & Bookmarks
Full Search Facility
Print one or all pages of your manual
$30.99

Secure transaction
What's Included?
Lifetime Access
Fast Download Speeds
Online & Offline Access
Access PDF Contents & Bookmarks
Full Search Facility
Print one or all pages of your manual
Description
The Epson Stylus Photo R3000 Service Manual is a comprehensive guide with detailed diagrams, pictures, and procedures for diagnosing and repairing the copier. It is a valuable resource for professional mechanics and DIY enthusiasts alike.
The manual includes:
- Chapter 1: Disassembly/Reassembly
- Overview
- Tools
- Jigs
- Precautions before Disassembling
- Preparation before Returning the Unit to the User
- Disassembly/Reassembly Procedures
- Standard Operation Time for servicing the product (TBD)
- Disassembly/Reassembly Flowchart
- Housing Part
- Printer Mechanism Part
- Detailed Disassembly/Reassembly Procedure for each Part/Unit
- Routing FFCs/cables
- Chapter 2: Adjustments
- Required Adjustments
- Details of Adjustments (TBD)
- PF Timing Belt Tension Adjustment
- PF Roller Shaft Center Support Position Adjustment (TBD)
- ASF Guide Roller LDs position adjustment
- PG Adjustment
- Mist Recovery check
- MAC address setting
- Head Angular Adjustment CR/PF (TBD)
- Colorimetric Calibration
- Overview of the Colorimetric Calibration
- Adjusting Method of the Colorimetric Calibration
- Chapter 3: Maintenance
- Overview
- Cleaning
- Lubrication
- Lubrication Points and Instructions
- Chapter 4: Appendix
- Power-On Sequence
- Connector Diagram
The manual consists of 73 pages and provides essential information for maintaining and repairing the Epson Stylus Photo R3000 copier.


