Dell Precision™ T3500 Service Manual--Working on Your Computer file:///C|/Biz%20Client/2015/NewBalance/Info%20Dev%20Root/New%20Balance/SM/A00/EN/Source/work.htm[5/15/2015 11:40:56 AM] Working on Your Computer Dell™ Precision™ T3500 Service Manual Before Working Inside Your Computer Recommended Tools Turning Off Your Computer After Working Inside Your Computer Before Working Inside Your Computer Use the following safety guidelines to help protect your computer from potential damage and to help to ensure your personal safety. Unless otherwise noted, each procedure included in this document assumes that the following conditions exist: You have performed the steps in Working on Your Computer. You have read the safety information that shipped with your computer. A component can be replaced or—if purchased separately—installed by performing the removal procedure in reverse order. WARNING: Before working inside your computer, read the safety information that shipped with your computer. For additional safety best practices information, see the Regulatory Compliance Homepage at www.dell.com/regulatory_compliance. CAUTION: Only a certified service technician should perform repairs on your computer. Damage due to servicing that is not authorized by Dell is not covered by your warranty. CAUTION: To avoid electrostatic discharge, ground yourself by using a wrist grounding strap or by periodically touching an unpainted metal surface, such as a connector on the back of the computer. CAUTION: Handle components and cards with care. Do not touch the components or contacts on a card. Hold a card by its edges or by its metal mounting bracket. Hold a component such as a processor by its edges, not by its pins. CAUTION: When you disconnect a cable, pull on its connector or on its pull-tab, not on the cable itself. Some cables have connectors with locking tabs; if you are disconnecting this type of cable, press in on the locking tabs before you disconnect the cable. As you pull connectors apart, keep them evenly aligned to avoid bending any connector pins. Also, before you connect a cable, ensure that both connectors are correctly oriented and aligned. NOTE: The color of your computer and certain components may appear differently than shown in this document. To avoid damaging your computer, perform the following steps before you begin working inside the computer. 1. Ensure that your work surface is flat and clean to prevent the computer cover from being scratched. 2. Turn off your computer (see Turning Off Your Computer ). CAUTION: To disconnect a network cable, first unplug the cable from your computer and then unplug the cable from the network device. 3. Disconnect all network cables from the computer. 5. Disconnect your computer and all attached devices from their electrical outlets. 6. Press and hold the power button while the system is unplugged to ground the system board. 7. Remove the computer cover (see Removing and Replacing the Computer Cover ). CAUTION: Before touching anything inside your computer, ground yourself by touching an unpainted metal surface, such as the metal at the back of the computer. While you work, periodically touch an unpainted metal surface to dissipate static electricity, which could harm internal components. Recommended Tools
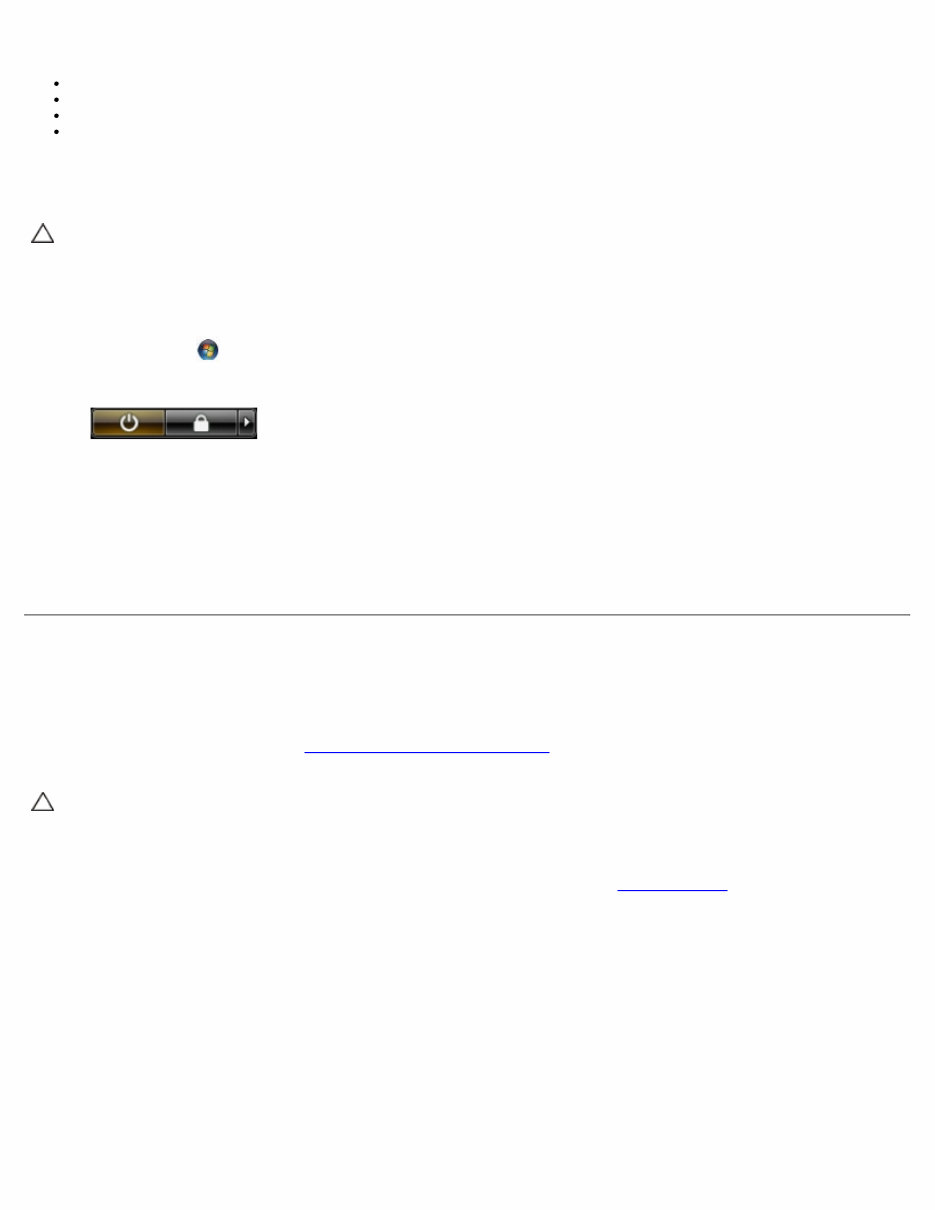
Dell Precision™ T3500 Service Manual--Working on Your Computer file:///C|/Biz%20Client/2015/NewBalance/Info%20Dev%20Root/New%20Balance/SM/A00/EN/Source/work.htm[5/15/2015 11:40:56 AM] The procedures in this document may require the following tools: Small flat-blade screwdriver Phillips screwdriver Small plastic scribe Flash BIOS update program CD (see the Dell Support website at support.dell.com) Turning Off Your Computer CAUTION: To avoid losing data, save and close all open files and exit all open programs before you turn off your computer. 1. Shut down the operating system: In Windows Vista: Click Start , then click the arrow in the lower-right corner of the Start menu as shown below, and then click Shut Down. In Windows XP: Click Start® Turn Off Computer® Turn Off . The computer turns off after the operating system shutdown process is complete. 2. Ensure that the computer and all attached devices are turned off. If your computer and attached devices did not automatically turn off when you shut down your operating system, press and hold the power button for about 6 seconds to turn them off. After Working Inside Your Computer After you complete any replacement procedure, ensure you connect any external devices, cards, and cables before turning on your computer. 1. Replace the computer cover (see Removing and Replacing the Cover ). 2. Connect any telephone or network cables to your computer. CAUTION: To connect a network cable, first plug the cable into the network device and then plug it into the computer. 3. Connect your computer and all attached devices to their electrical outlets. 4. Turn on your computer. 5. Verify that the computer works correctly by running the Dell Diagnostics. See Dell Diagnostics .
Dell Precision™ T3500 Service Manual: Adding and Replacing Parts file:///C|/Biz%20Client/2015/NewBalance/Info%20Dev%20Root/New%20Balance/SM/A00/EN/Source/parts.htm[5/15/2015 11:40:56 AM] Adding and Replacing Parts Dell Precision™ T3500 Service Manual Cover Front Bezel Hard Drive Memory Shroud Battery Video Card Heat Sink and Processor I/O Panel Power Supply Drives Bezel Optical Drive Memory Expansion Card Fan Assembly Systemboard
Dell Precision™ T3500 Service Manual--Specifications file:///C|/Biz%20Client/2015/NewBalance/Info%20Dev%20Root/New%20Balance/SM/A00/EN/Source/specs.htm[5/15/2015 11:40:57 AM] Specifications Dell Precision™ T3500 Service Manual Processors System Information Memory Video Audio Expansion Bus Drives Connectors Controls and Lights Power Physical Environmental NOTE: Offerings may vary by region. For more information regarding the configuration of your Tablet-PC, click Start (or Start in Windows XP)® Help and Support, and then select the option to view information about your Tablet-PC. Processor Processor types Intel® Xeon® Processor 3500 series Intel Xeon Processor 5500 series System Information System chipset Intel X58+ ICH10 Data bus width 64 bits Memory Memory module connectors Six Memory module capacities 1 GB, 2 GB, or 4 GB Memory type DDR3 1066 MHz & 1333 MHz (Both ECC and Non-ECC) Minimum memory 1 GB Maximum memory 24 GB Video Video type: Discrete Two PCI Express 2.0 x16 slots Note: Support for discrete full length full height graphics option through PCIe x16 graphics card slot Audio Audio type ADI1984A integrated audio Expansion Bus Bus type PCI 2.3 PCI Express 2.0 (PCIe-x16) PCI Express 1.1 (PCIe-x1) SATA 1.0 and 2.0 USB 2.0
Dell Precision™ T3500 Service Manual--Specifications file:///C|/Biz%20Client/2015/NewBalance/Info%20Dev%20Root/New%20Balance/SM/A00/EN/Source/specs.htm[5/15/2015 11:40:57 AM] eSATA Bus speed 133 MB/s (PCI) x1-slot bidirectional speed - 500 MB/s (PCI Express) x16-slot bidirectional speed - 8 GB/s (PCI Express) 1.5 Gbps and 3.0 Gbps (SATA) 480-Mbps high speed, 12-Mbps full speed, 1.2-Mbps Low speed (USB) PCI Connectors connectors Two connector size 124 pins connector data width (maximum) 32 bits PCI Express x8 connector Two connector size 98 pins PCI Express x16 connector Two connector size 164 pins Drives Externally accessible One 3.5-inch drive bay (FlexBay), Two 5.25-inch drive bays Internally accessible Two 3.5-inch SATA drive bays Note: The platform can accommodate third and fourth 3.5-inch hard drives in the flex bay or the optical drive bay. (4 HDD support is limited to SATA only & tower orientation only, SAS is limited to 3 HDD) Available devices 3.5-inch SATA hard drives SATA DVD, SATA CD-RW/DVD Combo, SATA DVD+/-RW, SATA BD Combo (Blu- Ray playback only), SATA Blu-ray R/W One 3.5-inch USB media card reader with Bluetooth® Internal USB floppy drive Connectors External connectors: Video (Depending on video card) DVI connector Display port Network adapter RJ-45 connector USB USB 2.0 compliant, support 2.0 A sustained charge to power external USB devices Two internal connectors Two in front Six at the back Audio Two rear connectors for line-in and line- out
Dell Precision™ T3500 Service Manual--Specifications file:///C|/Biz%20Client/2015/NewBalance/Info%20Dev%20Root/New%20Balance/SM/A00/EN/Source/specs.htm[5/15/2015 11:40:57 AM] Two front-panel connectors for headphones and microphone Serial One 9-pin connectors; 16550C- compatible PS/2 Two 6-pin mini-DIN connector IEEE 1394a One front-panel 6-pin connector (with optional card) System board connectors: Serial ATA Seven 7-pin connectors Internal USB device One 10-pin connector Processor fan One 4-pin connector Chassis fan One 3-pin connector HDD cage fan One 3-pin connector PCI 2.3 Two 124-pin connectors PCI Express x8 Two 98-pin connector PCI Express x16 Two 164-pin connector Front panel control (USB included) One 40-pin connector Front panel audio HDA header One 10-pin connector Processor One 1366-pin connector Memory Six 240-pin connectors Processor Power One 8-pin connector Power One 24-pin connector Controls and Lights Front of the computer: Power button Push button Power light Amber light . Solid amber indicates a problem with an installed device; blinking amber indicates an internal power problem. Green light . Blinking green in sleep state; solid green for power-on state. Drive activity light Green light . A blinking green light indicates the computer is reading data from or writing data to the SATA hard drive or CD/DVD. Network link light Green light . Solid green indicates a connection to an active network
Dell Precision™ T3500 Service Manual--Specifications file:///C|/Biz%20Client/2015/NewBalance/Info%20Dev%20Root/New%20Balance/SM/A00/EN/Source/specs.htm[5/15/2015 11:40:57 AM] Off (no light) . System is not connected to a network Back of the computer: Link integrity light (on integrated network adapter) Green . A good connection at 10Mbs exists between the network and the computer. Orange . A good connection at 100Mbs exists between the network and the computer. Yellow . A good connection at 1000Mbs exists between the network and the computer. Off . The computer is not detecting a physical connection to the network. Network activity light (on integrated network adapter) Yellow blinking light Power DC power supply: Wattage 525 W Maximum heat dissipation (MHD) 1194 BTU/hr Voltage 115/230 VAC, 50/60 Hz, 6.0/3.0 A Coin-cell battery 3 V CR2032 lithium coin cell Physical Height 44.8 cm (17.6 inches) Width 17.2 cm (6.8 inches) Depth 46.8 cm (18.4 inches) Weight 17.3 kg (38.0 lb) Environmental Temperature range: Operating 10° to 35°C (50° to 95°F) Storage -40° to 65°C (-40° to 149°F) Relative humidity (maximum): 20% to 80% (noncondensing) Maximum vibration (using a random- vibration spectrum that simulates user environment): Operating 5 to 350 Hz at 0.0002 G²/Hz Storage 5 to 500 Hz at 0.001 to 0.01 G²/Hz Maximum shock (measured with hard drive in head-parked position and a 2- ms half-sine pulse):
Dell Precision™ T3500 Service Manual--Specifications file:///C|/Biz%20Client/2015/NewBalance/Info%20Dev%20Root/New%20Balance/SM/A00/EN/Source/specs.htm[5/15/2015 11:40:57 AM] Operating 40 G +/- 5% with pulse duration of 2 msec +/- 10% (equivalent to 51 cm/sec [20 in/sec]) Storage 105 G +/- 5% with pulse duration of 2 msec +/- 10% (equivalent to 127 cm/sec [50 in/sec]) Altitude (maximum): Operating -15.2 to 3048 m (-50 to 10,000 ft) Storage -15.2 to 10,668 m (-50 to 35,000 ft) Airborne contaminant level G2 or lower as defined by ISA-S71.04-1985
Dell Precision™ T3500 Service Manual--LED Codes file:///C|/Biz%20Client/2015/NewBalance/Info%20Dev%20Root/New%20Balance/SM/A00/EN/Source/diags.htm[5/15/2015 11:40:58 AM] Diagnostics Dell Precision™ T3500 Service Manual Dell Diagnostics Power Button Light Codes Diagnostic Light Codes Beep Codes Dell Diagnostics When to Use the Dell Diagnostics It is recommended that you print these procedures before you begin. NOTE: The Dell Diagnostics software works only on Dell computers. NOTE: The Drivers and Utilities disc is optional and may not ship with your computer. Enter system setup (see Entering System Setup ), review your computer's configuration information, and ensure that the device you want to test displays in System Setup and is active. Start the Dell Diagnostics from either your hard drive or from the Drivers and Utilities disc. Starting the Dell Diagnostics From Your Hard Drive 1. Turn on (or restart) your computer. 2. When the DELL logo appears, press <F12> immediately. NOTE: If you see a message stating that no diagnostics utility partition has been found, run the Dell Diagnostics from your Drivers and Utilities disc. If you wait too long and the operating system logo appears, continue to wait until you see the Microsoft® Windows® desktop. Then shut down your computer (see Turning Off Your Computer ), and try again. 3. When the boot device list appears, highlight Boot to Utility Partition and press <Enter>. 4. When the Dell Diagnostics Main Menu appears, select the test that you want to run. Starting the Dell Diagnostics From the Drivers and Utilities Disc 1. Insert the Drivers and Utilities disc . 2. Shut down and restart the computer. When the DELL logo appears, press <F12> immediately. If you wait too long and the Windows logo appears, continue to wait until you see the Windows desktop. Then shut down your computer and try again. NOTE: The next steps change the boot sequence for one time only. On the next startup, the computer boots according to the devices specified in the system setup program. 3. When the boot device list appears, highlight Onboard or USB CD-ROM Drive and press <Enter>. 4. Select the Boot from CD-ROM option from the menu that appears and press <Enter>.
The Precision T3500 Service Manual provides step-by-step methods for repairing or replacing any internal part of your desktop PC. This comprehensive repair and service guide includes text instructions along with high-quality graphics and pictures where necessary.
Disassembly and reassembly instructions
Repair and upgrade procedures
Part replacement notices
Service information
Troubleshooting guidance
Part replacement and disassembly details
Software updating instructions
Adjustments and corrections
These manuals are highly detailed and are utilized by both professional technicians and DIY enthusiasts. They are fully illustrated with pictures and provide comprehensive step-by-step instructions. All pages are printable, allowing you to have the necessary information with you wherever you go, be it at home, in the office, or at the repair shop.
By using this guide, you can perform your own repairs, ultimately saving money. Additionally, you can utilize this manual to repair others' desktop PCs and even explore modifications for your own desktop PC. Furthermore, it will enhance your understanding of your desktop PC's internal components.





 Lifetime Access




