

Service Source
© 2006 Apple Computer, Inc. All rights reserved.
Mac Pro
Updated: 4 March 2008

ii
Mac Pro
Contents
Basics
Overview 6
Serial Number Location 7
Take Apart
General Information 9
Opening the Computer 10
Hard Drives 12
Optical Drive Carrier and Optical Drives 15
Memory (FB-DIMMs) and Memory Riser Cards 19
PCI Express/Graphics Card 23
Power Supply 29
Power Supply Fan 38
AirPort Extreme Card 47
Bluetooth Card 50
Battery 52
Processor Heatsink Cover 54
Front Fan Assembly 59
Mac Pro RAID Card & Battery 62
Processor Heatsinks 68
Memory Cage with Rear Fan 73
Processors 76

iii
Speaker Assembly 83
USB Cable 87
Logic Board 90
Front Panel Board 100
Power Button 105
AirPort Antenna Board with Cables 110
Optical Drive Power Cable 114
Optical Drive Data (Ribbon) Cable 117
Ambient Board 120
Ambient Board Cable 122
Bluetooth Antenna Board and Cable 124
Hard Drive Cable Harness 127
Hard Drive Temperature Sensor Cable 130
Hard Drive Temperature Sensor 133
Power Cable Harness 136
Troubleshooting
General Information 140
Memory 140
PCI Express Cards 141
Internal Cabling Matrix 141
Thermal Calibration 143
Block Diagram 144
Resetting the Logic Board 145
Power-On Self Test: RAM and Processor Verification 146
Diagnostic LEDs 147
Power Supply Verification 152
Mac Pro Firmware Updates 152
Symptom Charts 154
How to Use the Symptom Charts 154
Startup Failures 154
Fans 157
Other Failures 158

iv
Upgrades
AirPort Extreme Card 162
Bluetooth Card 165
PCI Express/Graphics Card 167
Views
Exploded View 172
External Views 174
Screw Matrix 176
Service Source
© 2006 Apple Computer, Inc. All rights reserved.
Basics
Mac Pro
Mac Pro Basics 6
Overview
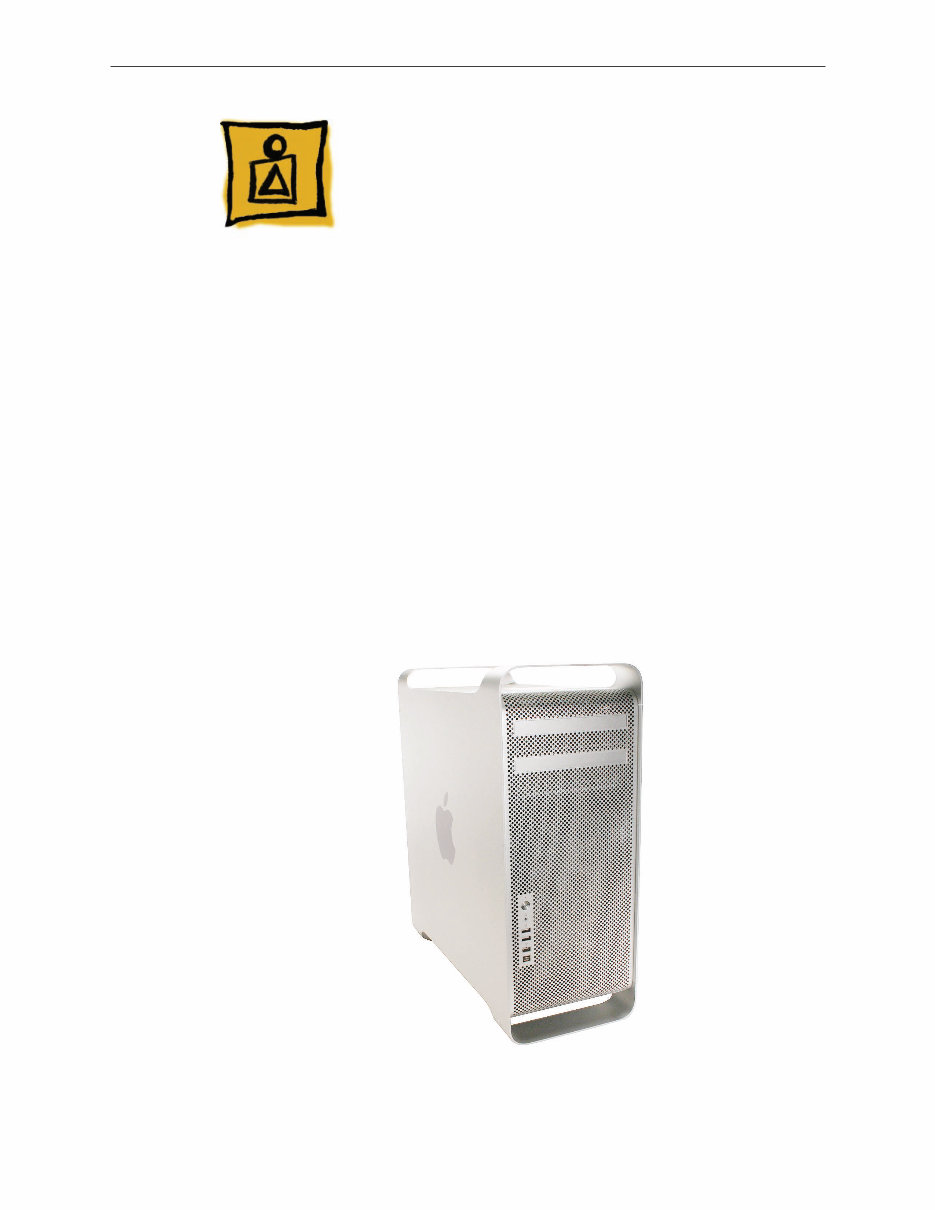
The Mac Pro form factor is similar to that of earlier Power Mac G5 models. However, the Mac Pro
includes several new hardware features, including:
Two dual-core Intel processors •
All Mac Pro models have two dual-core Intel Xeon processors, effectively making them quad
processor computers.
FB-DIMM memory supporting ECC and up to 16 GB of RAM •
Higher performance memory with support for error correction and greater capacity means
more room to grow when using high-performance computing applications.
Four internal hard drives •
Mac Pro supports up to four serial ATA (SATA) hard drives in easy-to-install drive carriers.
Two optical drives •
Mac Pro offers support for two cable-select optical drives
In addition to the features above, Mac Pro includes logic board diagnostic LEDs that help you
better diagnose hardware issues.
Mac Pro Basics 7
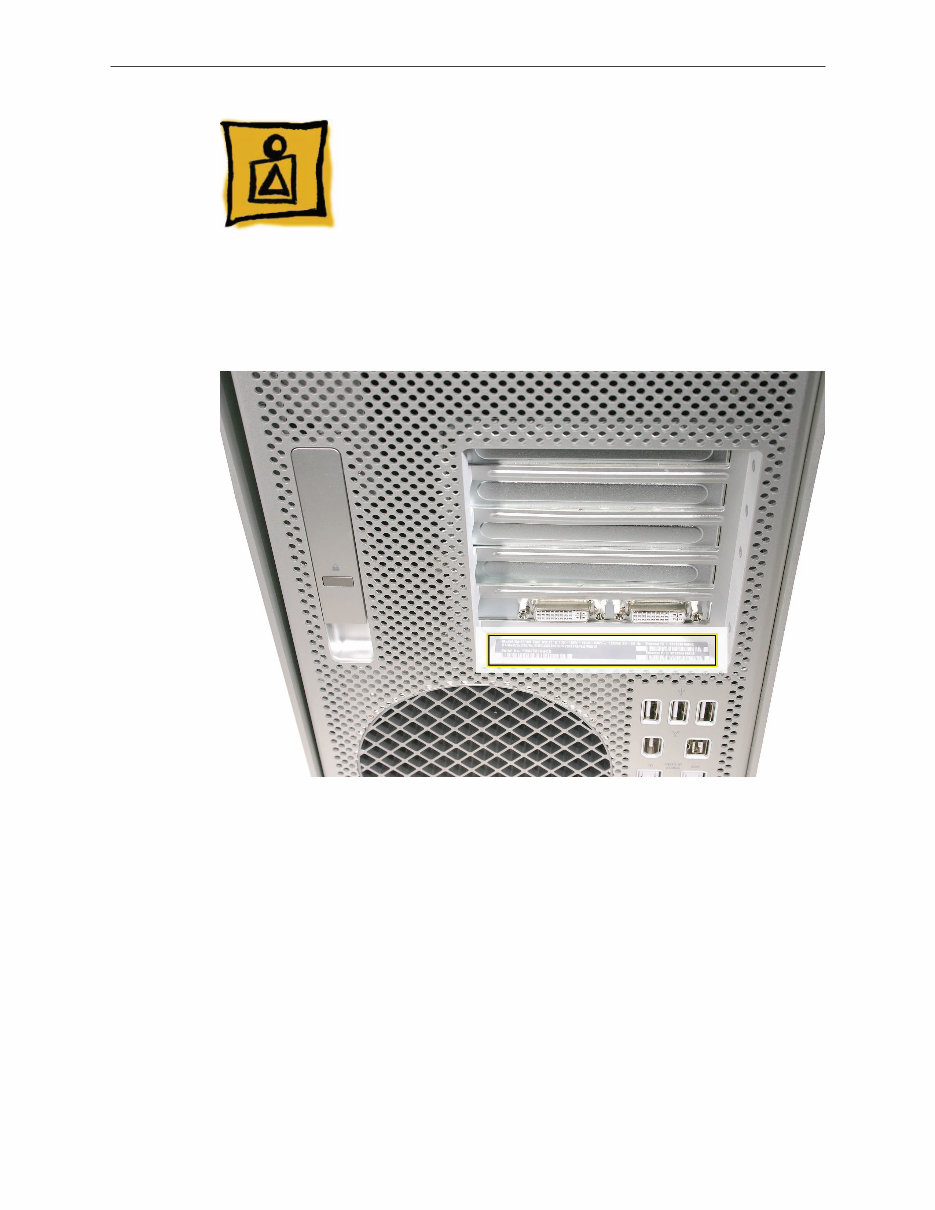
Serial Number Location
To identify a particular Mac Pro computer, check the computer’s serial number. You can find the
serial number within the model’s configuration label, which is located on the computer’s back
panel directly below the video ports.

Service Source
© 2006 Apple Computer, Inc. All rights reserved.
Take Apart
Mac Pro

Mac Pro Take Apart — General Information 9
General Information
Orientation
For most take-apart procedures, it is recommended that you lay the computer on its side before
removing or installing the part. For proper operation, however, Apple recommends that the
unit be run in the upright position. The computer should never be operated on its side with the
access panel facing down.
Tools
The following tools are required to service all configurations of the computer:
Long-handled magnetized Phillips #1 screwdriver •
Long-handled magnetized 3 mm flathead hex screwdriver •
Short-handled, magnetized 2.5 mm hex wrench •
Flat-blade screwdriver •
Magnetized jewelers Phillips #1 screwdriver •
Magnetized jeweler’s Phillips #0 screwdriver •
Jeweler’s flat-blade screwdriver •
Socket wrench •
Apple Mac Pro wrench (part number 922-8025) •
Needlenose pliers •
Scissors or wire cutters •
Xacto knife •
Nylon probe tool (black stick) •
Tape (for temporarily holding cables out of the way) •
Small mirror (for seeing small boards inside the enclosure) •
Soft cloth (for protecting the enclosure from scratches) •
Parts Requiring Enclosure Replacement
The following are not separate, orderable parts. To replace them, you must replace the enclosure.
Media shelf •
Rear panel latch •

Mac Pro — Opening the Computer 10
Opening the Computer
Tools
No tools are required for this procedure.
Preliminary Steps
Shut down the computer. 1.
Warning: Always shut down the computer before opening it to avoid damaging its internal
components or the components you are installing. Do not open the computer or attempt to
install items inside it while it is on.
Wait 5 to 10 minutes to allow the computer’s internal components to cool. 2.
Warning: After you shut down the system, the internal components can be very hot. You
must let the computer cool down before continuing.
Unplug all external cables from the computer except the power cord. 3.
Touch the metal PCI access covers on the back of the computer to discharge any static 4.
electricity from your body.
Important: Always discharge static before you touch any parts or install any components
inside the computer. To avoid generating static electricity, do not walk around the room until
you have finished working and closed the computer.
Unplug the power cord. 5.
Warning: To avoid damaging its internal components or the components you want to
install, always unplug the computer before attempting any take-apart procedure.
Put on an ESD wrist strap. 6.
You're Reading a Preview
What's Included?
 Lifetime Access
Fast Download Speeds
Online & Offline Access
Access PDF Contents & Bookmarks
Full Search Facility
Print one or all pages of your manual
$36.99
2006 Apple Mac Pro desktop PC service repair workshop manual
Viewed 57 Times Today

What's Included?
Lifetime Access
Fast Download Speeds
Online & Offline Access
Access PDF Contents & Bookmarks
Full Search Facility
Print one or all pages of your manual
$36.99

Secure transaction
What's Included?
Lifetime Access
Fast Download Speeds
Online & Offline Access
Access PDF Contents & Bookmarks
Full Search Facility
Print one or all pages of your manual
Description
Get the official service manual for the 2006 Apple Mac Pro desktop PC. This comprehensive manual spans 163 pages and is an invaluable resource for professional mechanics and DIY enthusiasts alike.


