Brother My Custom Design 1.0 Embroidery Data Creation Software Instructrion Manual
What's Included?
Lifetime Access
Fast Download Speeds
Online & Offline Access
Access PDF Contents & Bookmarks
Full Search Facility
Print one or all pages of your manual
My Custom Design ver.1.0 Embroidery Data Creation Software Instruction Manual • Before using this software, be sure to read this Instruction Manual for information on the correct use of the software. • Keep this Instruction Manual in a safe place for future reference.
1 Introduction Thank you for using our embroidery design software My Custom Design. My Custom Design enables you to create original embroidery patterns from the screen of your Brother household computerized sewing machine equipped with an embroidery function. Carefully read the instructions contained in this manual in order to fully understand each of the various functions and the correct operation of this software. Note: This Instruction Manual does not contain explanations on the operation of the sewing machine. For details on using the sewing machine functions to edit embroidery patterns, refer to the Instruction Manual for the sewing machine. Important: Use of this software for unauthorized duplication of optional embroidery cards or newspapers, magazines, etc. for commercial purposes may be unlawful and violate copyright laws. This application is protected by copyright laws. The use and duplication of this software is regulated by copyright laws. This software is for household use only. Safety Precautions Note: For safety precautions concerning the sewing machine, refer to the Instruction Manual provided with the sewing machine. Use the sewing machine safely and correctly, as described in the Instruction Manual.
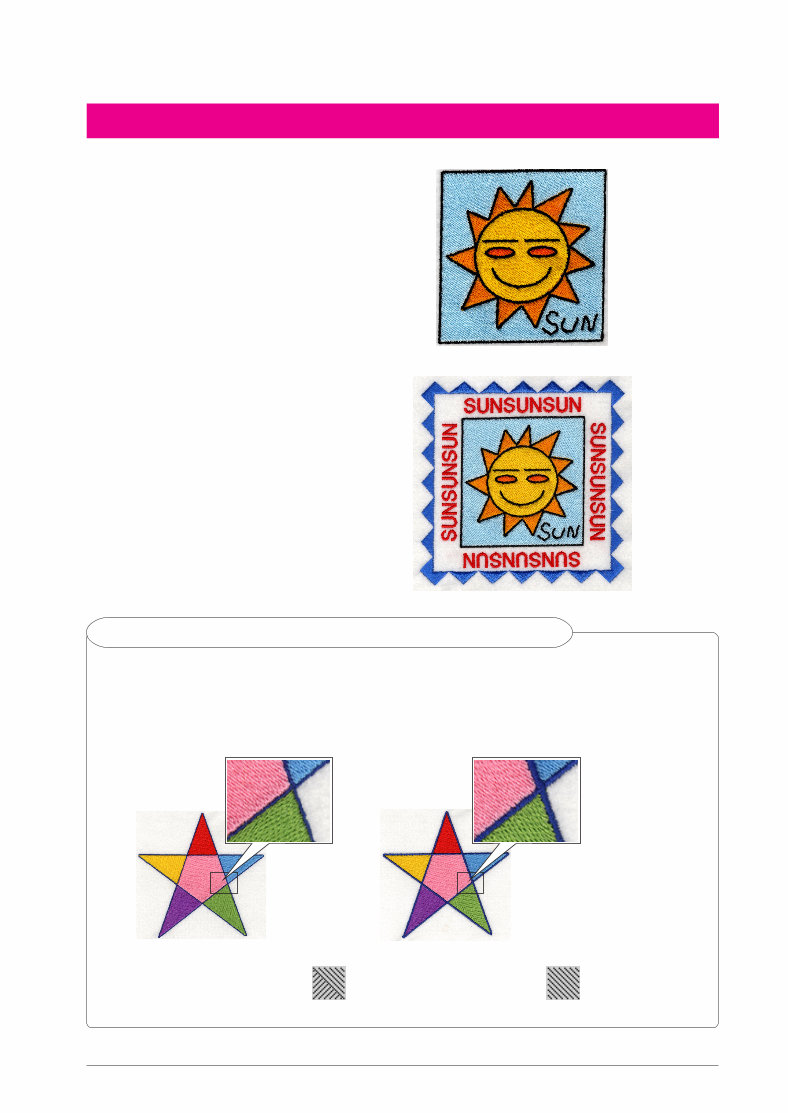
2 What You Can Do With This Software This software allows you to create original patterns just by using the pen to draw images and text on the screen of the sewing machine and painting the drawing with the desired colors as easily as drawing images and text on paper with a pen. Until now, you could select various characters from those available, combine them, and then embroider the characters. However, now you can write your signature on the screen, and then embroider it. The created embroidery patterns can be resized, combined with characters and images and freely arranged in the sewing machine’s embroidering or embroidery- editing screen in the same way that built-in embroidery patterns are. Embroidery patterns that can be created with this software Lines of the drawing are sewn with satin stitches and areas are sewn with fill stitches. The following settings can be specified. 1 Satin stitch (lines): thickness and stitch density 2 Fill stitch (areas): sewing direction and stitch density Line thickness: 1.0 mm Fill stitch sewing direction: Line thickness: 3.0 mm Fill stitch sewing direction:
3 Chapter 1 Before Use CHECKING Sewing Machine 1 My Custom Design can be used with any of the following sewing machines. Check that your sewing machine model and its program version meets the following requirements. Models: Innov-ís 4000D/4000 Program version: Ver. 1.2 or later * The program version can be checked by pressing (Setting) key. For more details, refer to the Instruction Manual provided with the sewing machine. 1 Displayed here For upgrade information, consult with your nearest Brother sales representative or check the Brother Web site (www.brother.com).
4 Precautions on the Use of the Display • Only touch the screen with your finger or the pen included with the sewing machine. Do not use a mechanical pencil, screwdriver or any other hard or sharp object. In addition, do not press the screen with extreme pressure, otherwise the screen may be damaged. • All or part of the screen may sometimes become darker or lighter due to changes in the surrounding temperature or other changes in the environment. This is not a sign of a malfunction. If the screen is difficult to read, adjust its brightness. • The screen may be dark immediately after the sewing machine is turned on. This is a normal characteristic of the backlight and is not a malfunction. After approximately 10 minutes, the screen should reach its normal level of brightness. • If you are not directly facing the screen, the colors may be distorted or the screen may be difficult to read. This is a normal characteristic of the screen and is not a malfunction. Be sure to sit in front of the screen while using it. USB Media Important: Since all data saving media, including USB media, may sometimes fail, we recommend that you make backup copies for all saved data. The sewing machine reads this software and starts it up from USB media. In addition, data created with this application is stored on the USB media. Follow the precautions below when handling the USB media. • For details about available USB media, refer to “USB memory stick.pdf” in the “Innov-ís 4000D/ 4000” section on our web site. • Since all data saving media, including USB media, may sometimes fail, we recommend that you make backup copies for all saved data. • Do not insert USB media containing pattern data other than those saved using our application. (Only .pm6 and .phc data can be used.) • If the file name of embroidery data cannot be identified, for example, the name contains special characters, the names are not displayed. If this occurs, change the name of the file. • Do not create folders in USB media. If embroidery data is stored in a folder, that embroidery data cannot be displayed by the sewing machine.
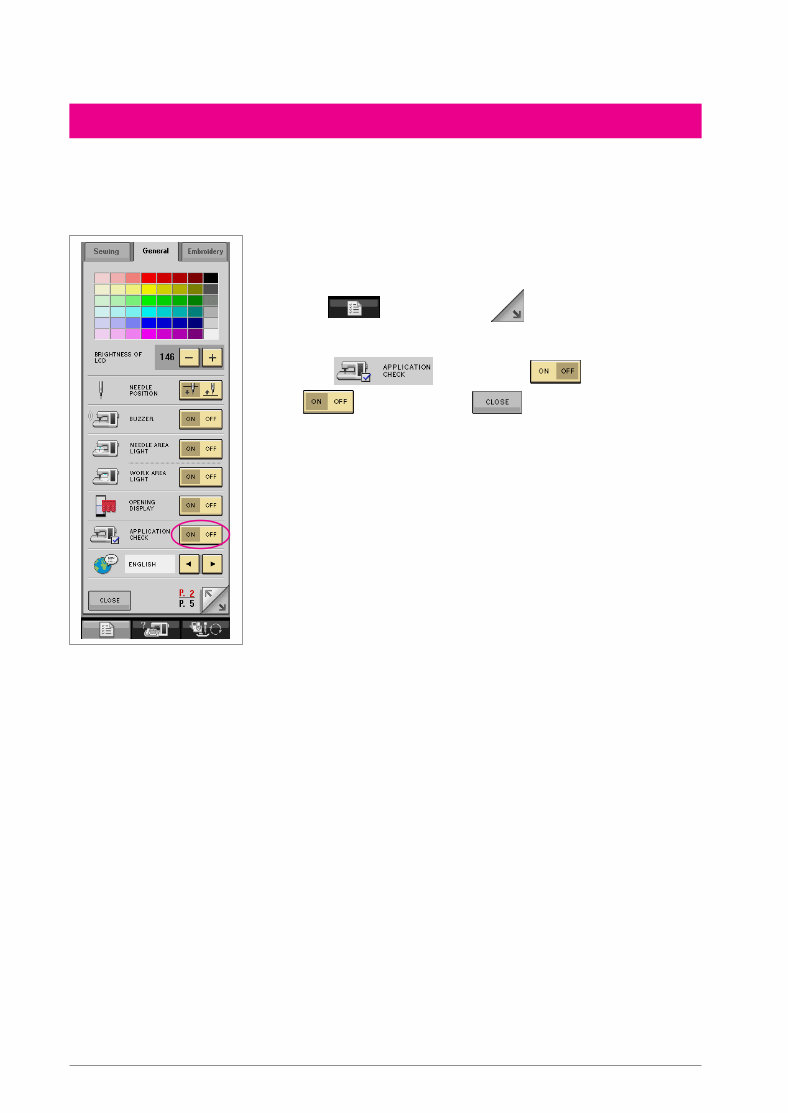
5 The sewing machine must first be set so that My Custom Design can be started up. APPLICATION CHECK on the settings screen must be set to ON. If the sewing machine is turned on with USB media inserted, the machine checks the software on the USB media, and then starts it up. 1 Turn on the sewing machine. 2 Press , and then press to display the next screen. 3 On the display, press so that it changes to , and then press . 4 Turn off the machine. SETTING THE SEWING MACHINE TO START UP THE SOFTWARE
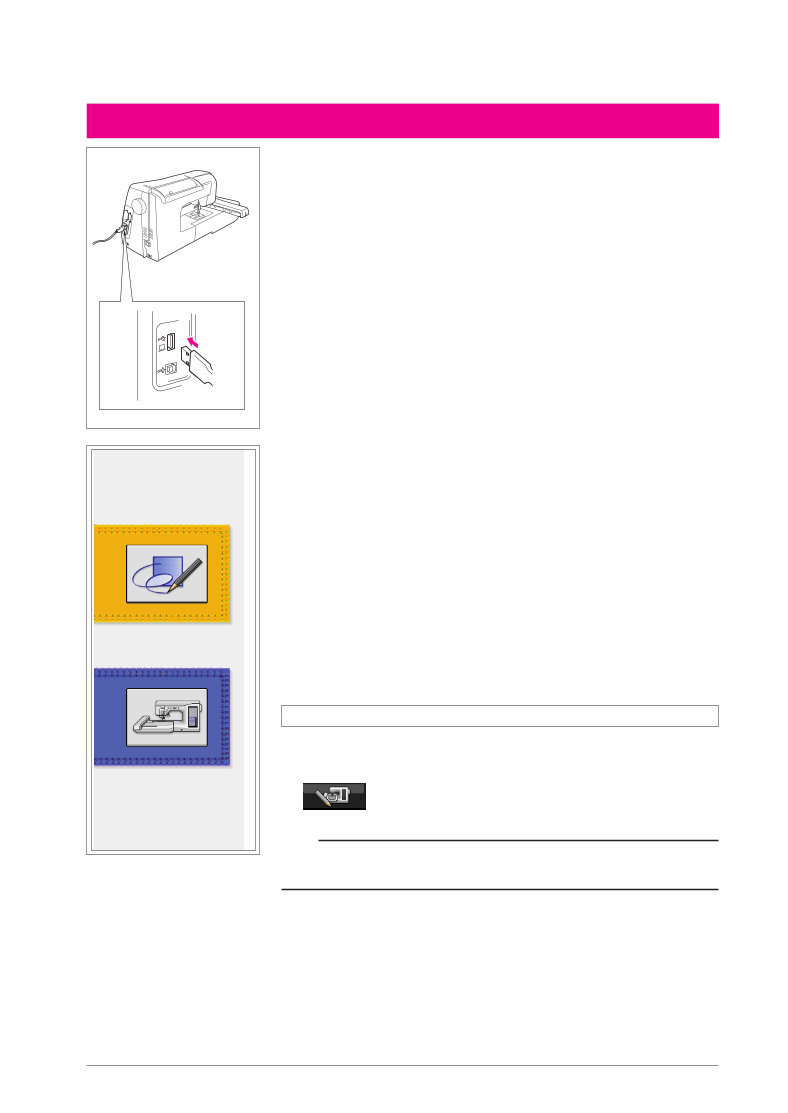
6 STARTING UP MY CUSTOM DESIGN 1 Insert the USB media containing the application into the USB port connector for media on the right side of the machine. Caution • The connectors on the USB cable can only be inserted into a connector in one direction. • Do not insert USB media containing pattern data other than those saved using our application. (Only .pm6 and .phc data can be used.) 2 Turn on the sewing machine. 3 With your finger, lightly press the opening screen. A screen that allows you to select the application or sewing machine, like that shown at the left, appears. * If USB media that does not contain the application is inserted, the Utility Stitch screen appears. 4 Press the icon for the application. My Custom Design starts up. * Startup takes about 20 seconds. Caution Do not turn off the machine or eject the USB media while the application is starting up, otherwise the USB media may be damaged. Closing the Application 1 To close My Custom Design, turn off the sewing machine. To close the application to use the sewing machine, press . (Refer to page 43.) Notes • When the application is closed, the currently displayed data is deleted. Be sure to save any necessary data before closing the application. 1
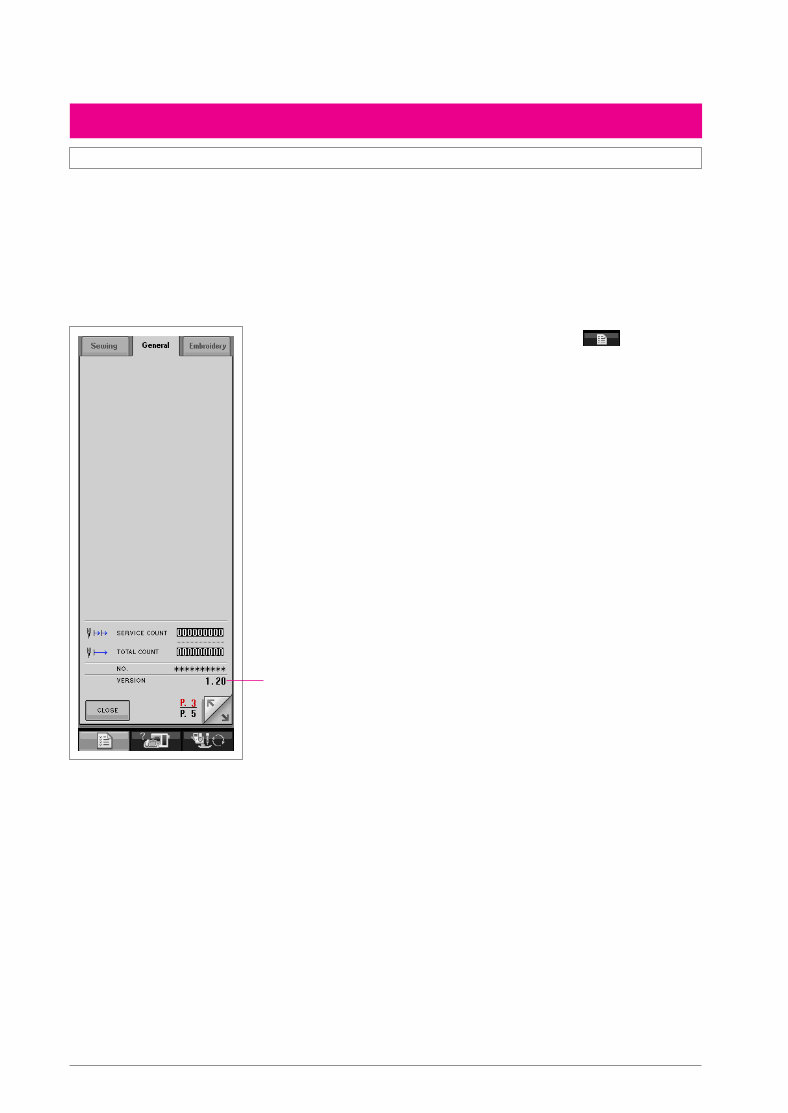
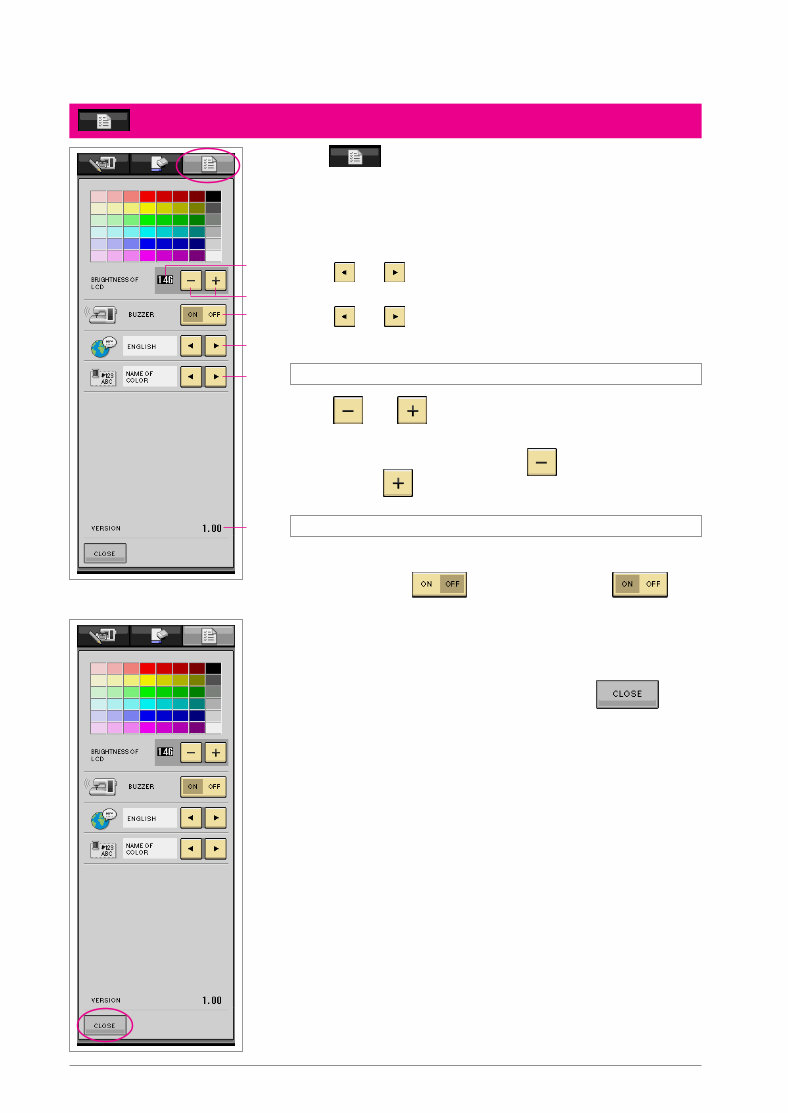
7 KEY OPERATIONS (ADJUSTING THE SCREEN, CHANGING THE BUZZER SETTTING AND CHECKING THE VERSION NUMBER) 1 Press to display the screen shown at the left. 1 Allows you to adjust the density/brightness of the screen 2 Current density setting 3 Turns on/off the buzzer 4 Changes the display language Use and to choose the display language. 5 Changes the thread color display (thread brands only) Use and to choose the thread color display. 6 Displays the version information for My Custom Design 1 2 3 6 Adjusting the Screen Press and to adjust the brightness of the screen so that adjustments can be clearly viewed. To make the screen lighter, press . To make the screen darker, press . Buzzer When set to ON, a beeping sound is produced each time a key is pressed. Press so that it changes to . * The screen brightness and the buzzer settings depend on the settings of the sewing machine. If the settings are changed in My Custom Design, the sewing machine settings are changed in the same way. 2 After the desired settings are specified, press . 5 4
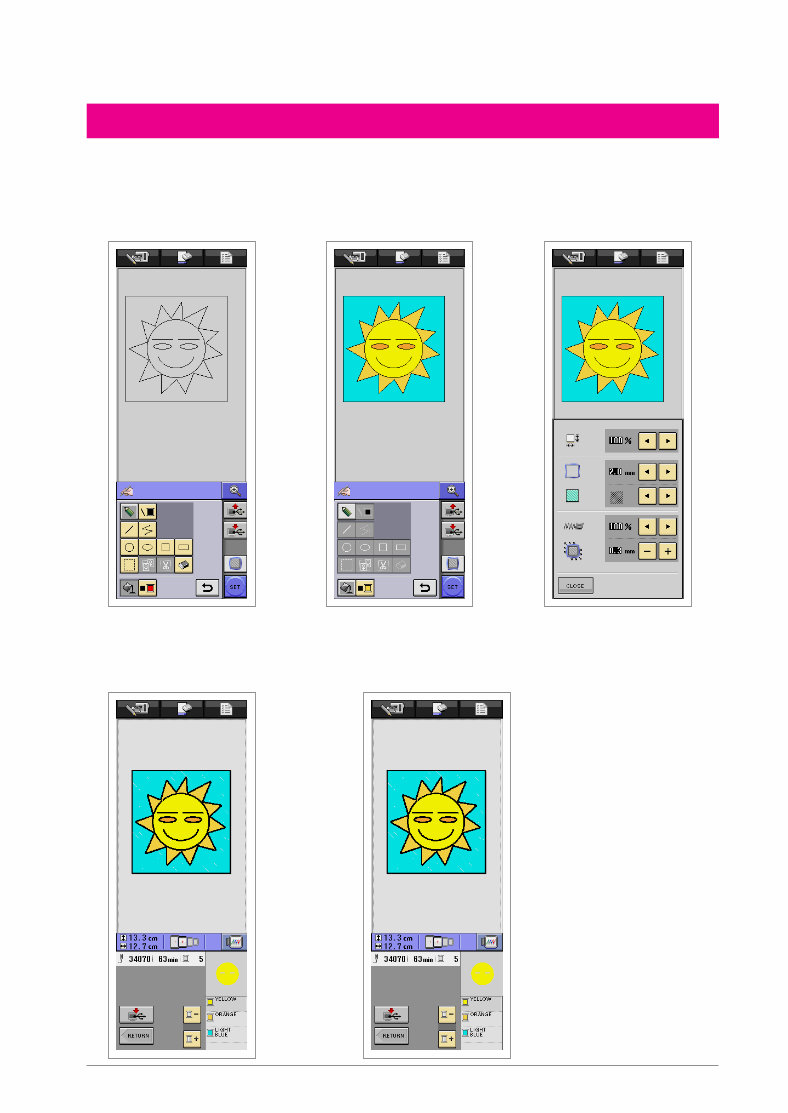
8 BASIC PROCEDURE OVERVIEW The basic procedure is described below. For details, refer to the indicated page. 1 Draw the lines of the pattern in the pattern drawing screen. (→ page 12) 2 Add color to the pattern. (→ page 24) 3 Specify the stitching settings. Specify the width of the satin stitches and the sewing direction of the fill stitches. (→ page 29) 4 Convert the image data to embroidery data. The embroidery data check screen appears. (→ page 33) 5 Save the embroidery data on USB media. (→ page 35)
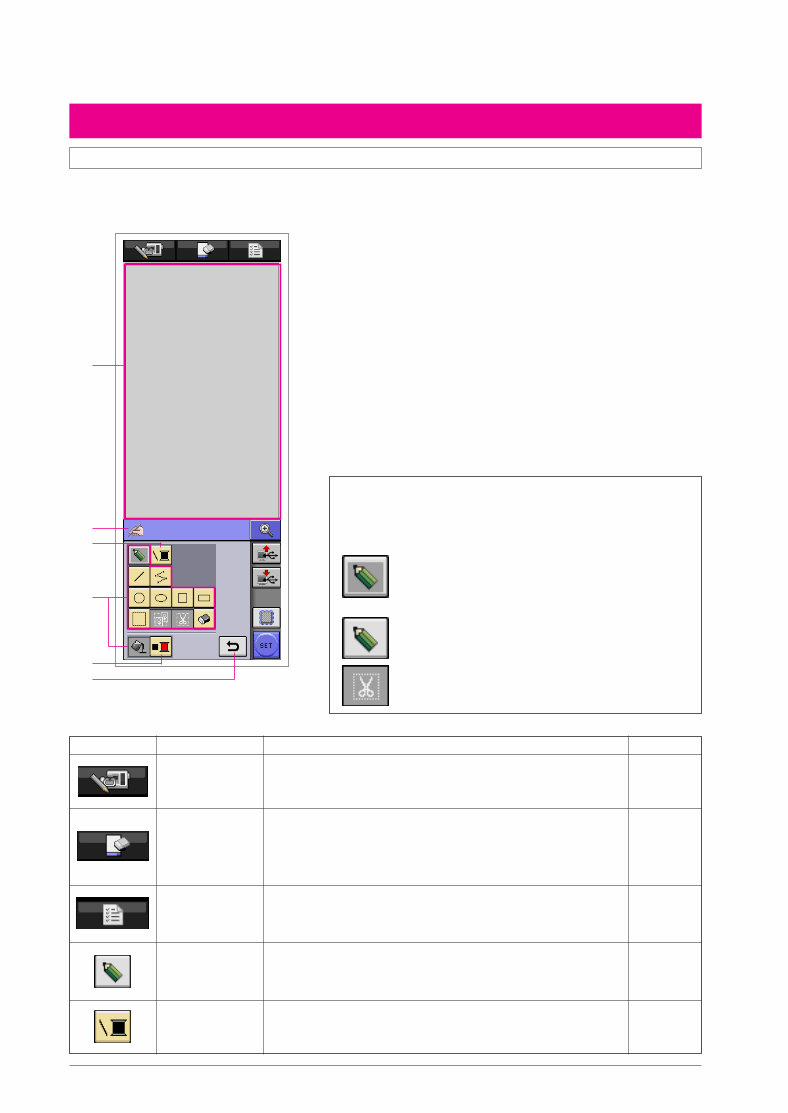
9 Description Reference Key Name Pattern Drawing Screen When My Custom Design is started up, the following pattern drawing screen appears. The pattern can be drawn in this screen. ■ Key functions Press this key to close My Custom Design and use the sewing machine. When this key is pressed, all data that had been drawn is erased. Press this key when you want to begin creating a new pattern. When this key is pressed, the currently displayed data is deleted and the first screen displayed when My Custom Design is started up appears. Press this key to adjust the screen density and turn on/off the buzzer. Press this key to draw lines freehand. Press this key to select the color of the lines. Key Machine function key New pattern key Settings key Freehand line key Line thread color key 43 42 7 12 24 2 3 APPLICATION SCREENS 2 5 4 1 1 Pattern drawing area Draw the pattern within this area. The actual dimension of the pattern area is the size of the extra large embroidery frame (30 cm (height) × 18 cm (width)). 2 Use to select the thread colors. 3 Pattern drawing keys Use to draw the pattern. 4 You can use the touch pen to enter data when this icon is displayed. 5 Touch this key to undo previous operation. Key displays The appearances of the keys have the following meanings. This key is selected (being used). (When the application is started up, the freehand line key is selected.) This key is not but can be selected. This key cannot be selected.
The Brother My Custom Design 1.0 Embroidery Data Creation Software Instruction Manual is a comprehensive guide for users of the My Custom Design 1.0 software by Brother. It provides detailed instructions for creating personalized embroidery designs, covering basic navigation, advanced design techniques, and optimizing designs for different fabrics and threads. The manual also includes troubleshooting tips and best practices for software maintenance.
This manual is essential for both novice and experienced embroiderers, enabling them to fully utilize the capabilities of the My Custom Design 1.0 software for unique embroidery projects.
Printable: Yes
Language: English
Compatibility: Compatible with various electronic devices including PC, Mac, Android, and Apple smartphones and tablets.
Requirements: Adobe Reader (free)
Recently Viewed
5,521,897Happy Clients
2,594,462eManuals
1,120,453Trusted Sellers
15Years in Business
Price:
Actual Price:
Brother My Custom Design 1.0 Embroidery Data Creation Software Instructrion Manual