Daewoo Doosan 430 Series, 440 Plus, 450 Series, 460 Series Skid Steer Loaders Complete Workshop Service Repair Manual
What's Included?
Lifetime Access
Fast Download Speeds
Online & Offline Access
Access PDF Contents & Bookmarks
Full Search Facility
Print one or all pages of your manual
For use in service manual form SB4031E01 SB4032E01 Nov. 2004 SERVICE MANUAL CONTENTS NOTICE This form lists the contents of the complete Service Manual for this product. The items listed with form numbers are available and included in the manual. If form numbers listed with mark(*) are, they are not available for the initial release of the manual. When items are updated, or supplements added, they will be announced in preview and should be ordered as they become available. TITLE FORM NUMBER Service Manual Contents SB4032E01 FOREWORD Safety & Foreword SB4033E00 ENGINE A2000 Diesel Engine (430 Series), A2300 Diesel Engine (440 Plus) SB4102E00 B3.3 Diesel Engine (450 Series & 460 Series) SB4135E00 VEHICLE Vehicle Systems SB4036E00 Skid Steer Loader SB4015E00 HYDRAULIC & HYDROSTATIC Hydraulic & Hydrostatic Systems SB4149E00 ELECTRIC Electric Systems SB4038E00 Electric System (440 Plus) SB4103E00 OPERATION & MAINTENANCE 430 Series & 450 Series SB2333E01 440 Plus & 460 Series SB2334E02 Models ; 430 Series, 440 Plus, 450 Series, 460 Series chodina@live.co.uk chodina@live.co.uk
Important Safety Information Most accidents involving product operation, maintenance and repair are caused by failure to observe basic safety rules or precautions. An accident can often be avoided by recognizing potentially hazardous situations before an accident occurs. A person must be alert to potential hazards. This person should also have the necessary training, skills and tools to perform these functions properly. Read and understand all safety precautions and warnings before operating or performing lubrication, maintenance and repair on this product. Basic safety precautions are listed in the “Safety” section of the Service or Technical Manual. Additional safety precautions are listed in the “Safety” section of the owner/operation/maintenance publication. Specific safety warnings for all these publications are provided in the description of operations where hazards exist. WARNING labels have also been put on the product to provide instructions and to identify specific hazards. If these hazard warnings are not heeded, bodily injury or death could occur to you or other persons. Warnings in this publication and on the product labels are identified by the following symbol. Improper operation, lubrication, maintenance or repair of this product can be dangerous and could result in injury or death. Do not operate or perform any lubrication, maintenance or repair on this product, until you have read and understood the operation, lubrication, maintenance and repair information. Operations that may cause product damage are identified by NOTICE labels on the product and in this publication. DAEWOO cannot anticipate every possible circumstance that might involve a potential hazard. The warnings in this publication and on the product are therefore not all inclusive. If a tool, procedure, work method or operating technique not specifically recommended by DAEWOO is used, you must satisfy yourself that it is safe for you and others. You should also ensure that the product will not be damaged or made unsafe by the operation, lubrication, maintenance or repair procedures you choose. The information, specifications, and illustrations in this publication are on the basis of information available at the time it was written. The specifications, torques, pressures, measurements, adjustments, illustrations, and other items can change at any time. These changes can affect the service given to the product. Obtain the complete and most current information before starting any job. DAEWOO dealers have the most current information available. WARNING chodina@live.co.uk chodina@live.co.uk
The proper and safe lubrication and malntenance for this machine, recommended by DAEWOO, are outilined in the OPERATION & MAINTENANCE GUIDE of this machine. Improper performance of lubrication or maintenance procedures is dangerous and could result in injury or death. Read and understand the OPERATION & MAINTENANCE GUIDE before performing any lubrication or maintenance. The serviceman or mechanic may be unfamitiar with many of the systems on this machine. This makes it important to use caution when performing service work A knowledge of the system an/ or components is important before the removal or disassembly of any component. Because of the size of some of the machine components, the serviceman or mechanic should check the weights noted in this Manual, Use proper lifting procedures when removing any components. Following is a list of basic precautions that should always be observed. 1. Read and understand all Waming plates and decals on the machine before operating, lubricating or repairing the product. 2. Always wear protective glasses and protective shoes when working around machines. In particular, wear protective glasses when pounding on any part of the machine or its attachments with a hmmer or sledge. Use welders gloves, hood/goggles, apron and other protective clothing appropriate to the welding job being performed. Do not wear loose-fitting or tom clothing. Remove all rings from fingers when working on machinery. 3. Do not work on any machine that is supported only by lift jacks or a hoist. Always use blocks or jack stands to support the machine before performing any disassembly. 4. Lower the bucket or other implements to the ground before performing any work on the machine. If this cannot be done, make sure the forks or other im plements are blocked correctly to prevent them from dropping unexpectedly. 5. Use steps and grab handles (if applicable)when mounting or dismounting a machine. Clean any mud or debris from steps, walkways or work plaftorms before using. Always face machine when using steps, ladders and walkways. When it is not possible to use the designed access system, provide ladders, scaffolds, or work platforms to perfom safe repair operations. 6. To avoid back injury, use a hoist when lifting components which weigh 23 kg (50 lb.) or more. Make sure all chains, hooks, slings, etc., are in good condition and are of the correct capacity. Be sure hooks are positioned correctly. Lifting eyes are not to be side loaded during a lifting operation. 7. To avoid bums, be alert for hot parts on machines which have just been stopped and hot fluids in lines, tubes and compartments. 8. Be careful when removing cover plates. Gradually back off the last two bolts or nuts located at opposite ends of the cover or device and pry cover loose to relieve any spring or other pressure, before removing the last two bolts or nuts completely. 9. Be careful when removing filler caps, breathers and plugs on the machine. Hold a rage over the cap or plug to prevent being sprayed or splashed by liquids under pressure. The danger is even greater if the machine has just been stopped because fluids can be hot. 10. Always use tools that are in good condition and be sure you understand how to use them before performing any service work. 11. Reinstall all fasteners with same part number. Do not use a lesser quality fastener if replacements are necessary. Do not mix metric fasteners with standard nuts and bolts. 12. If possible, make all repairs with the machine parked on a level, hard surface. Block machine so it does not roll while working on or under machine. WARNING WARNING SAFETY SB2003E00 Apr. 1999 chodina@live.co.uk chodina@live.co.uk
13. Disconnect battery before starting to work on machine. Hang “Do Not Operate” tag in the Operator’s Compartment. 14. Repairs, which require welding, should be performed only with the benefit of the appropriate reference information and by personnel adequately trained and knowledgeable in welding procedures. Determine type of metal being welded and select correct welding procedure and electrodes, rods or wire to provide a weld metal strength equivalent at least to that of parent metal. 15. Do not damage wiring during removal operations. Reinstall the wiring so it is not damaged nor will it be damaged in operation by contacting sharp corners, or by rubbing against some object or hot surface. Do not connect wiring to a line containing fluid. 16. Be sure all protective devices including guards and shields are properly installed and functioning correctly before starting a repair. If a guard or shield must be removed to perform the repair work, use extra caution. 17. Loose or damaged fuel, lubricant and hydraulic lines, tubes and hoses can cause fires. Do not bend or strike high pressure lines or install ones which have been bent or damaged. Inspect lines, tubes and hoses carefully. Do not check for leaks with your hands. Pin hole (very small) leaks can result in a high velocity oil stream that will be invisible close to the hose. This oil can penetrate the skin and cause personal injury. Use cardboard or paper to locate pin hole leaks. 18. Tighten connections to the correct torque. Make sure that all heat shields, clamps and guards are installed correctly to avoid excessive heat, vibration or rubbing against other parts during operation. Shields that protect against oil spray onto hot exhaust components in event of a line, tube or seal failure must be installed correctly. 19. Relieve all pressure in air, oil or water systems before any lines, fittings or related items are disconnected or removed. Always make sure all raised components are blocked correctly and be alert for possible pressure when disconnecting any device from a system that utilizes pressure. 20. Do not operate a machine if any rotating part is damaged or contacts any other part during operation. Any high speed rotating component that has been damaged or altered should be checked for balance before reusing. WARNING chodina@live.co.uk chodina@live.co.uk
Foreword How to Use This Manual Foreword How to Use This Manual This manual provides information for servicing the 1760XL(DSL802) skid steer loader. All service procedures are broken down into detailed steps, listed in their recommended sequence. The manual uses both photographs and drawings to help locate and itemize components. The table of Contents on the preceding pages is your best tool for finding the service procedure you need. Be certain to observe all Safety information included in these pages. General Precautions For Disassembly Preparations before disassembly 1) Wash the machine before moving it to into the repair shop. Prior to moving the machine into the repair shop remove dust and dirt thoroughly by washing the machine. Dirt brought into the shop will degrade the cleanliness of the parts handled in the shop, will produce scratches, and can contaminate the inside of reassembled units. 2) Checking and inspection before disassembly. Before attempting to disassemble, check thoroughly to determine the cause of the problem, and record it. This will not only prevent needless disassembly and losses from needless replacement parts and manhour costs, but will also prevent repetition of the same problem. It is important to keep records of problems and replacements in order to advise serviceman how to prevent trouble. Items to be checked and recorded are as follows: •Model, machine serial number and service meter readings. •Reason for disassembly. •Components replaced. Check for symptom, location and cause of problem. If necessary, try repeating the same problem. •Amount of dirt in air cleaner elements and air leakage. •Oil levels in the engine oil pan and status of oil (viscosity, color and mixed impurities). •Water mixed in the oil and oil leakage. •Clogging of the oil filter element. •Deviations from designated adjusting points. •Damaged parts and loosening of tightening fittings. •Maintenance conditions of the machine in service, if possible. 3) Preparation for disassembly To save unnecessary work, reserve the necessary facilities, tools, and parts racks as well as adequate floor space considering the extent of disassembly. Keep the area and facilities clean. Precautions For Disassembly 1) Removal of parts •Proceed with the disassembly by confirming the fitting conditions of the relative parts, their positions fore-and aft, left-and-right, upper-and-lower, and the sequence of their removal. •Confirm match marks for mating joints before separating parts and where necessary, punch match marks to clearly identify their relative position to prevent confusion during reassembly. •For disassembly of certain designated parts, use specified special tools. •When a part, after removal of fastening nuts and bolts, is still found to be unremovable, never force the part. Carefully check for the cause of the tightness and remove the cause. •Keep the disassembled parts in an orderly condition. Take special care to identify similar parts by attaching tags or markings. •See that standard parts such as bolts and nuts are stored in good order with reference to quantity and where they are to be used. 2) Checking and inspecting during disassembly. •The cause of the actual trouble is often discovered in the course of disassembly. Thus careful checking of sliding surfaces for any signs of seizing or interference, and their mating conditions, is important. •Measure and record during disassembly the various end clearances, backflashes and protrusions that are necessary to determine the trouble. 5 chodina@live.co.uk chodina@live.co.uk
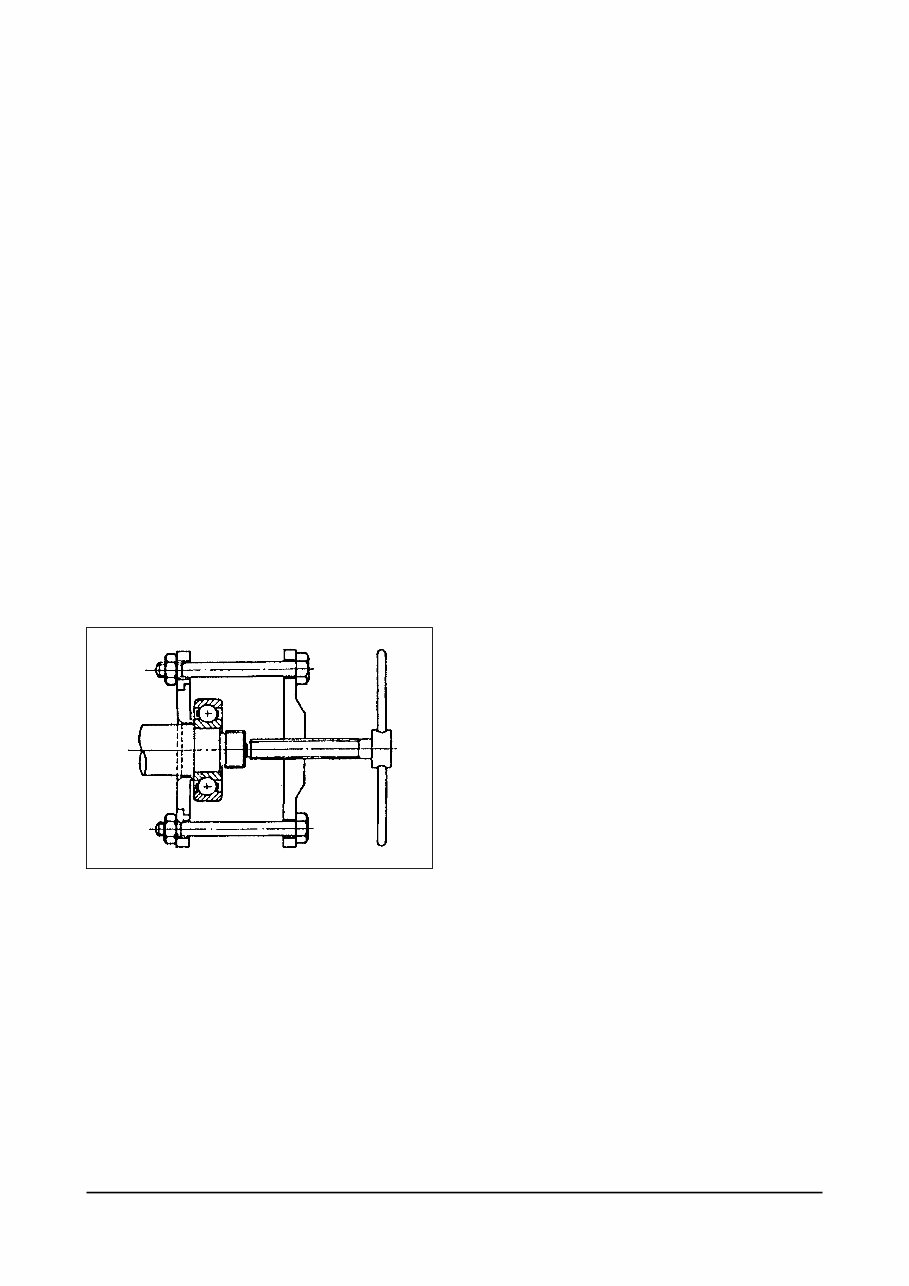
Foreword General Precautions For Disassembly 3) Maintaining clearance adjustmnets Keep each set of shims or washers stored in an orderly manner so that its original arrangement with the same clearances can be obtained at reassembly. 4) Maintaining linkage adjustments Be careful to maintain the original adjustment of the rods unless some readjustment is necessary. When it is necessary to remove the rod end for disassembly, measure and record the length of the rod before disassembly. 5) disassembly of taper-fitted or force-fitted parts •Remove any scars or dents, clean well and reassemble. •When looseness of fit exists in taper-fitted or force- fitted parts, carefully check for the cause of the faulty fit, remove the cause and reassemble. 6) Disassembly of bearings •Do not attempt to remove a bearing by force, but remove it with a suitable puller such as shown in the figure below. 7) Safety •Keep the area where the machine is to be disassembled clean and orderly. •When loosening a bolt or nut, use a correct size wrench and always pull the wrench toward you. Use of a mis-matched wrench because of confusion between the inch and metric system, or pushing the wrench away from your body may cause accidents through slipping of the wrench or the hand. •For jobs involving two or more persons, keep close contact by mutual checking and exchange of necessary signals. Procesures after disassembly 1) Cleaning •Wash disassembled parts clean, neatly arrange the parts according to each assembly, and keep in storage, free from dust and dirt. Special care should be taken to remove sludge and dust thoroughly from oil holes in the parts and from the interior of the tubes. •More effective cleaning can be achieved by use of two vessels filled with detergent, one for washing dirty parts and the other for rinsing. When washing special parts, increase the number of vessels and keep the dirty detergent away from these parts. •Kerosene or neutral-anhydride light oil is a suitable detergent for cleaning viscous bearing oils. •When washing a large casting, immerse it in a vessel filled with detergent (alkalinity pH10 to 12, temperature 50 to 70 ßC) (122ß to 158 ßF) for up 10 minutes. Then, rinse it thoroughly with water. •If harmful chemical agents are used as the detergent, take care to protect the skin and eyes. Do not attempt to drain waste fluid into the sewage system. 2) Dust-proofing •Cover washed parts in storage to keep them free from dust and dirt. Cap all pipes. •Apply suitable rust-preventive treatment to the parts if they are to be kept an extended period of time in storage before reassembly. 6 chodina@live.co.uk chodina@live.co.uk
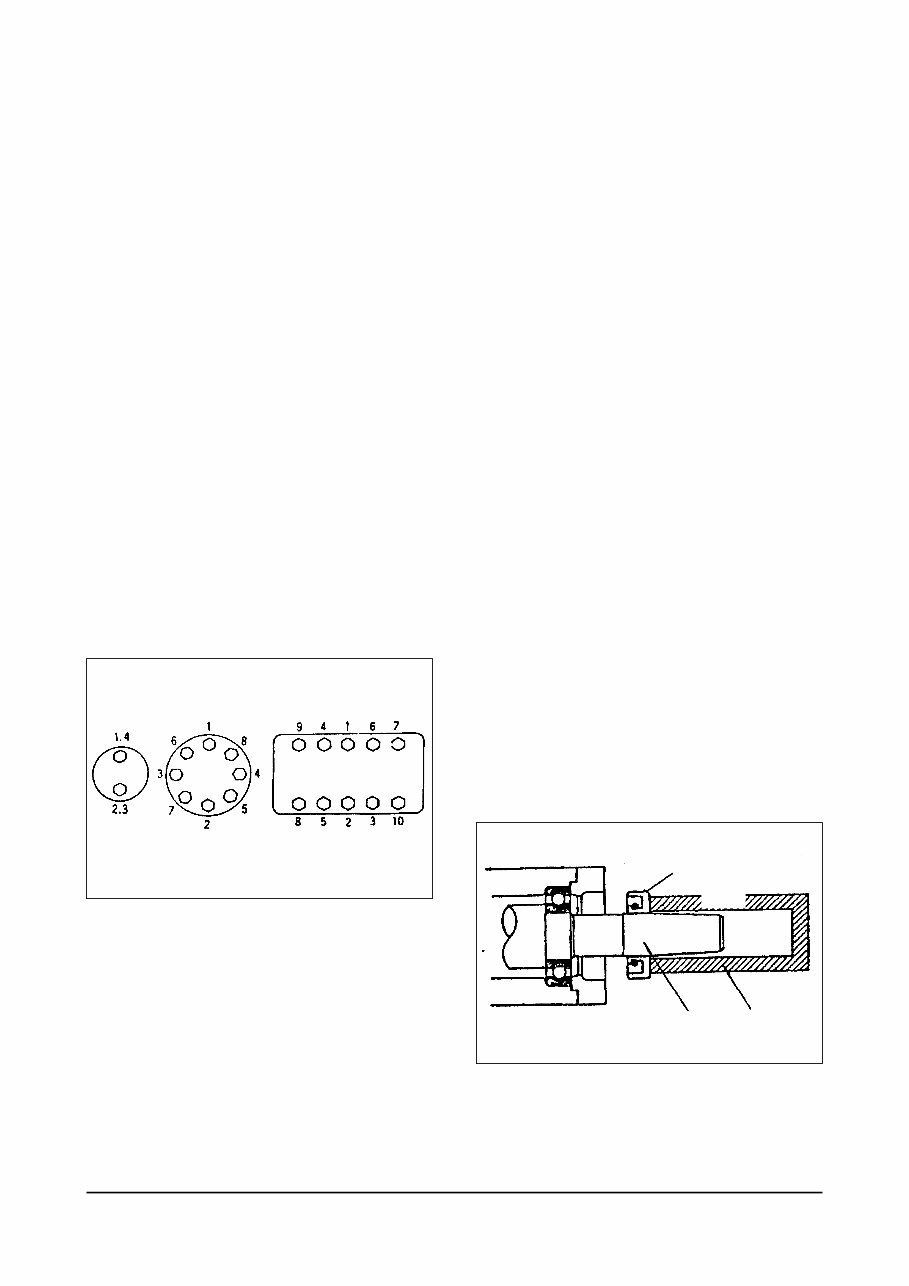
Foreword General Precautions For Assembly General Precautions for Assembly Preparations before disassembly 1) Installation of parts •Thoroughly clean all parts before assembly. Check for scratches and nicks on the surfaces of the parts, and repair if necessary. Special care should be paid to the sliding surfaces of parts which, if left soiled, will cause reduced machine life. •Use detergent to remove any rust preventive before assembly. •Make sure to align match marks of those parts that are marked before attempting to assemble. •Use the correct or a press-fitting tool or driver when assembling bearings, bushings and oil seals. Also, use the prescribed “special tool” for assembly of certain designated parts. •Coat the surface parts to be press-fitted with moly bdenum disulfide grease. (2) Tightening bolts and nuts •Tighten the bolts and nuts fastening parts together by alternately (left-and-right and upper-and-lower) turning symmetrically opposite nuts and bolts, to apply even tightening force. •When tightening bolts on certain designated parts, tighten them in the prescribed sequence as shown in the figure, in order to exert even torque on every bolt. In this method called the “template methods”. the bolts are tightened stepwise and sometimes loosened, so that the bolts and nuts are well seated or the bearing comes into close and even contact. •Apply engine oil to the screw threads of certain designated bolts so that smooth and even tightening of the bolts may be obtained. •With wires, cotter pins or lock washers, securely lock those bolts and nuts which cannot be checked from the outside or are used for important parts that require locking. •Remove remnants of loctite or any thread bonding agent from the removed bolts with appropriate solvent. Apply 2 or 3 drops of fresh loctite before retightening bolts. (3) Check in the course of assembly During assembly, check and record end clearances, end plays, protrusions, steps and backflashes at each stage of assembly. (4) Reinsertion of shims •Insert stored sets of shims or washers in their positions in the same order as disassembly. •After inserting, check for correct values of clearances. (5) Assembly of control linkage Assemble each control link to the same length as disassembly, unless adjustments are necessary. Reassemble and properly adjust. (6) Assembly of taper-fitted or force-fitted parts •Repair scratches and nicks, and thoroughly clean the parts before fitting. •If proper fit cannot be obtained between the taper- fitted parts, carefully check for the cause. •Check and see that there is no dust, rust or scratches found on the surface of the shaft on which an oil seal is to be fitted and coat the shaft with grease or lubricating oil so that the oil seal can be installed smoothly. •When installing an oil seal, use a suitable guide and jig as shown in the figure below to prevent oil seal damages. •After press-fitting an oil seal, check for alignment. Allowable limit of misalignment : 0.2 mm per 100 mm dia. (1/64” per 3 15/16” dia.). •When applying bonding agent on the circumference 7 Jig Guide Seal Seal chodina@live.co.uk chodina@live.co.uk
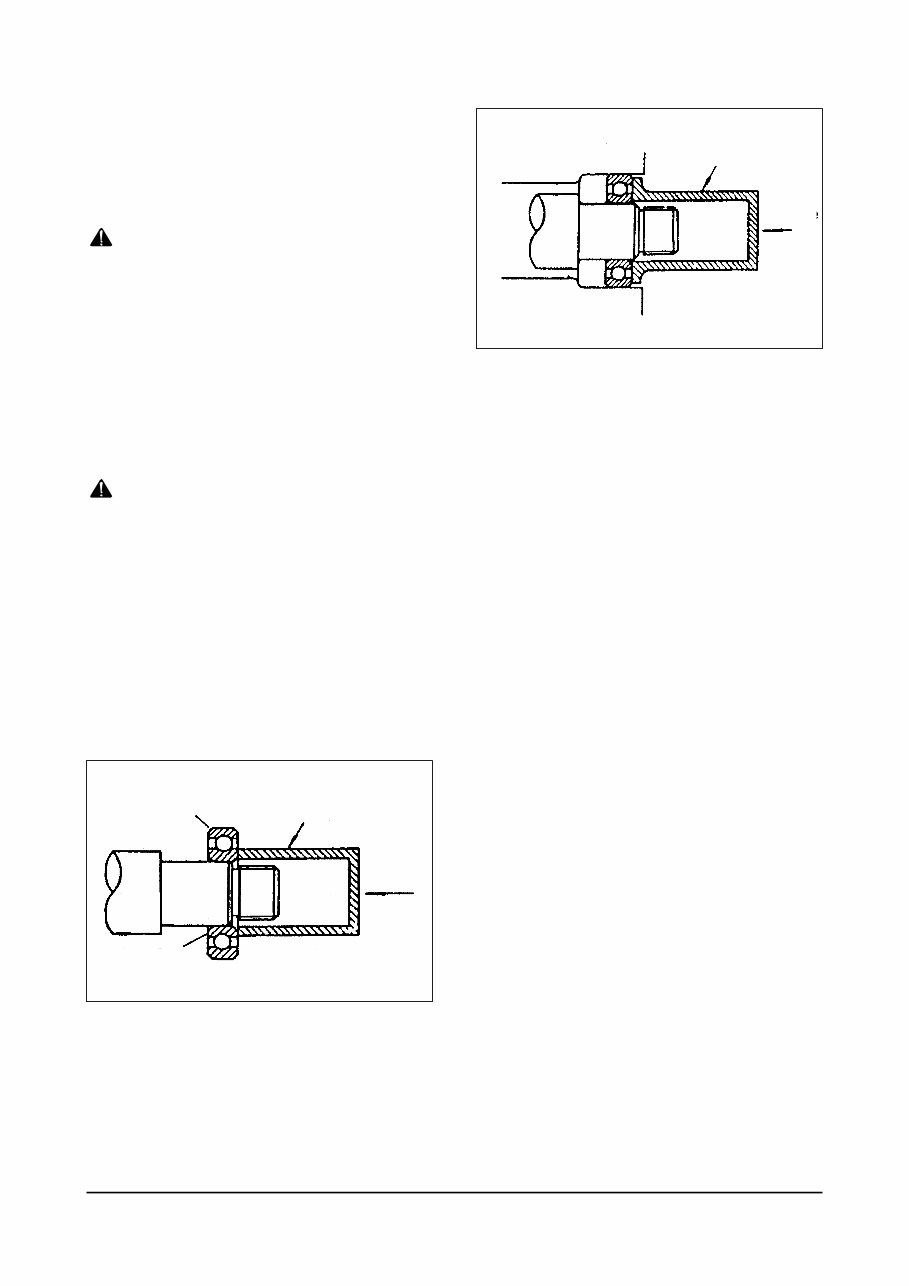
Foreword General Precautions For Assembly of an oil seal, avoid contact of the lip surface with the onding agent. Remove excess bonding agent on the guide and jig before using them to install another oil seal. (7) Handling of bearings Pay special attention to the following instructions so as not to damage bearing assemblies : a. Leave the bearings in their original package until just before installation. Keep bearings free from dust and dirt. Dust affects bearing life significantly. b. Avoid impact loads and do not apply shocks to the bearings. Absolutely avoid such unreasonable handling like rotating a bearing excessively by blowing compressed air to remove detergent from the bearing. Observe the following precautions when installing the bearings : a. Do not attempt to hammer the bearing assembly or damage may occur. b. When installing a bearing assembly, use a suitable jig as shown in the figure below to apply pressure to the inner race. Apply the shrink fit method to the bearings requiring large interference. Do not heat any bearings requiring large interference. Do not heat any bearing assemblies to over 120ßC(248ßF). Excessively high temperature will deteorate the hardness of the heat treated bearing surface. c. When installing a non-split type bearing with necesary interferences of the inner and outer races, use a suitable jig as shown in the figure below to apply the necessary pressure to both the inner and outer races. (8) Handling of snap rings •When removing or installing snap rings, use a suitable ring plier, taking care not to over expand the snap ring. •Make sure the snap ring is properly seated in its groove. (9) Assembly of keys and keyways Check for looseness of the key in its keyway and for the contact of the keyhead. If the keyhead contacts with keyway, remove the excess keyhead. (10) Safety •Keep the working area, tools, worker’s hands, etc. clean and orderly during assembly work. •Use the correct size wrench when tightening a bolt or nut to reduce the risk of injury and equipment damage. •For jobs involving two or more persons, keep close contact by mutual checking and the exchange of necessary signs. Handling of Common Parts (1) Handling of packings and O-ring •Replace all packings, gaskets O-rings, and copper packings. •Coat certain gaskets designated in this manual with recommended sealant. (2) Handling of O-rings •Use only the O-rings prescribed in the Service Parts Manual. Special care should be paid to the O-rings subjected to engine lubrication oil, since they are made of thermal resistant, aging-free special materials such as silicon rubber and cannot be 8 Outer Race Jig Pressure Jig Pressure Inner Race chodina@live.co.uk chodina@live.co.uk
The Daewoo Doosan 430 Series, 440 Plus, 450 Series, 460 Series Skid Steer Loaders Complete Workshop Service Repair Manual is a comprehensive resource for all your service and repair needs.
Whether you are a professional mechanic or a DIY enthusiast, this manual provides detailed instructions and illustrations for every service and repair procedure, enabling you to save money by performing the work yourself.
Once downloaded, this manual is yours to keep forever. You have the flexibility to print specific pages or chapters, or to store it on your tablet or smartphone for easy access.
All models, engines, trim, and transmission types are covered in this manual, ensuring that it caters to a wide range of needs.
From basic maintenance to complex repairs, this high-quality manual encompasses all repair procedures from A to Z, making it an indispensable tool for anyone working on these skid steer loaders.
Compatible with all PC and MAC computers, tablets, and mobile phones, this downloadable manual requires only Adobe Reader, which is readily available for free in most cases.
Upon payment confirmation, the manual will be instantly emailed to the address provided during checkout, ensuring a prompt delivery process.
With a focus on customer satisfaction, this manual guarantees to meet your service and repair requirements effectively.
Recently Viewed
5,521,897Happy Clients
2,594,462eManuals
1,120,453Trusted Sellers
15Years in Business
Price:
Actual Price:
Daewoo Doosan 430 Series, 440 Plus, 450 Series, 460 Series Skid Steer Loaders Complete Workshop Service Repair Manual