2011 VOLVO XC90 L.H.D. B6324S5 SERVICE & REPAIR MANUAL
874: Air conditioning, B6324S5 XC90, 2011, B6324S5, L.H.D, YV4952CZ6B1580458, 580458 10/4/2017 PRINT 874: Air conditioning, B6324S5 Operation number: 87404-2 AC compressor, replacement Note! Some variation in the illustrations may occur, but the essential information is always correct. Removal Note! Removal steps in this procedure may contain installation details. Warning! Follow the safety instructions for work on the air conditioning system. Refer to: Refrigerant, safety regulations . Note! First read the instructions covering slow and fast leaks. Refer to: Oil air conditioning (A/C) system, filling . Drain the refrigerant from the AC system. Page 1 of 3 874: Air conditioning, B6324S5
Refer to: Refrigerant, draining Remove the following items: ◾ Air cleaner housing Refer to: Air cleaner housing ◾ The auxiliaries belt. Refer to: Accessory Drive Belt . Note! Plug the terminals of the compressor using the transport plugs from the new compressor. Torque: M8, 24 Nm Installation To install, reverse the removal procedure. Vacuum pump the air conditioning system. Refer to: Vacuum pumping . Fill the air conditioning system with refrigerant. Refer to: Refrigerant, filling . Page 2 of 3 874: Air conditioning, B6324S5
Leak-trace the air conditioning system. Refer to: Leak tracing, fluorescent tracing agent / UV lamp . Carry out a performance test on the climate control system. Refer to: Climate system, performance test . 10/4/2017 PRINT Page 3 of 3 874: Air conditioning, B6324S5
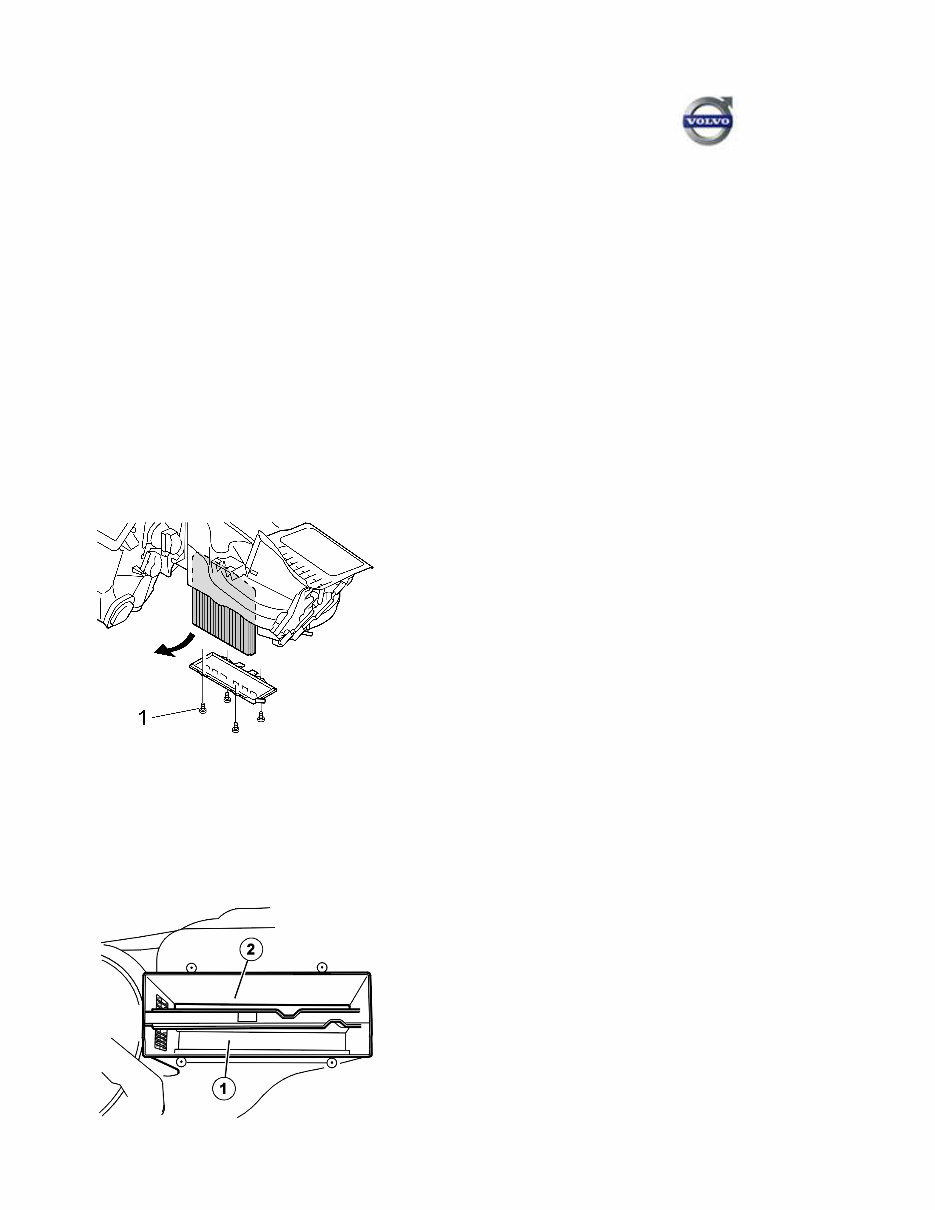
87: Air distribution XC90, 2011, B6324S5, L.H.D, YV4952CZ6B1580458, 580458 10/4/2017 PRINT 87: Air distribution Air cleaner passenger compartment, replacing Removing the passenger compartment air cleaner (ACL) Remove: ◾ the soundproofing panel. See Soundproofing panel, replacing . ◾ the screws for the cover ◾ the cover. Pull the air cleaner (ACL) downwards / away. Installing the passenger compartment air cleaner (ACL) Install the air cleaner (ACL). There are 2 alternative positions for the air cleaner (ACL). See the illustration. The pollen filter (standard) must be installed in the smaller compartment (1). The multi filter (cars with an air quality sensor) must be installed in the wider compartment (2). Page 1 of 2 87: Air distribution
Note! Install either the pollen filter or the multi filter. Both filters must not be together. Install: ◾ the screws. The front left screw must not be tightened to more than 0.8 Nm ◾ the soundproofing panel. See Soundproofing panel, replacing . 10/4/2017 PRINT Page 2 of 2 87: Air distribution
87: Air distribution XC90, 2011, B6324S5, L.H.D, YV4952CZ6B1580458, 580458 10/4/2017 PRINT 87: Air distribution Air ducts passenger compartment, replacing As the illustrations in this service information are used for different model years and / or models, some variation may occur. However, the essential information in the illustrations is always correct. Air ducts panel B-post, replacing Removing the air ducts from the B-post panel The air ducts are integrated in the B-post panel. Remove: ◾ the B-post panel. See Panel B-post, replacing ◾ the air ducts. Installing the air ducts in the B-post panel Install: ◾ the air ducts ◾ the B-post panel. See Panel B-post, replacing . Air ducts for the vents dashboard, replacing Page 1 of 7 87: Air distribution
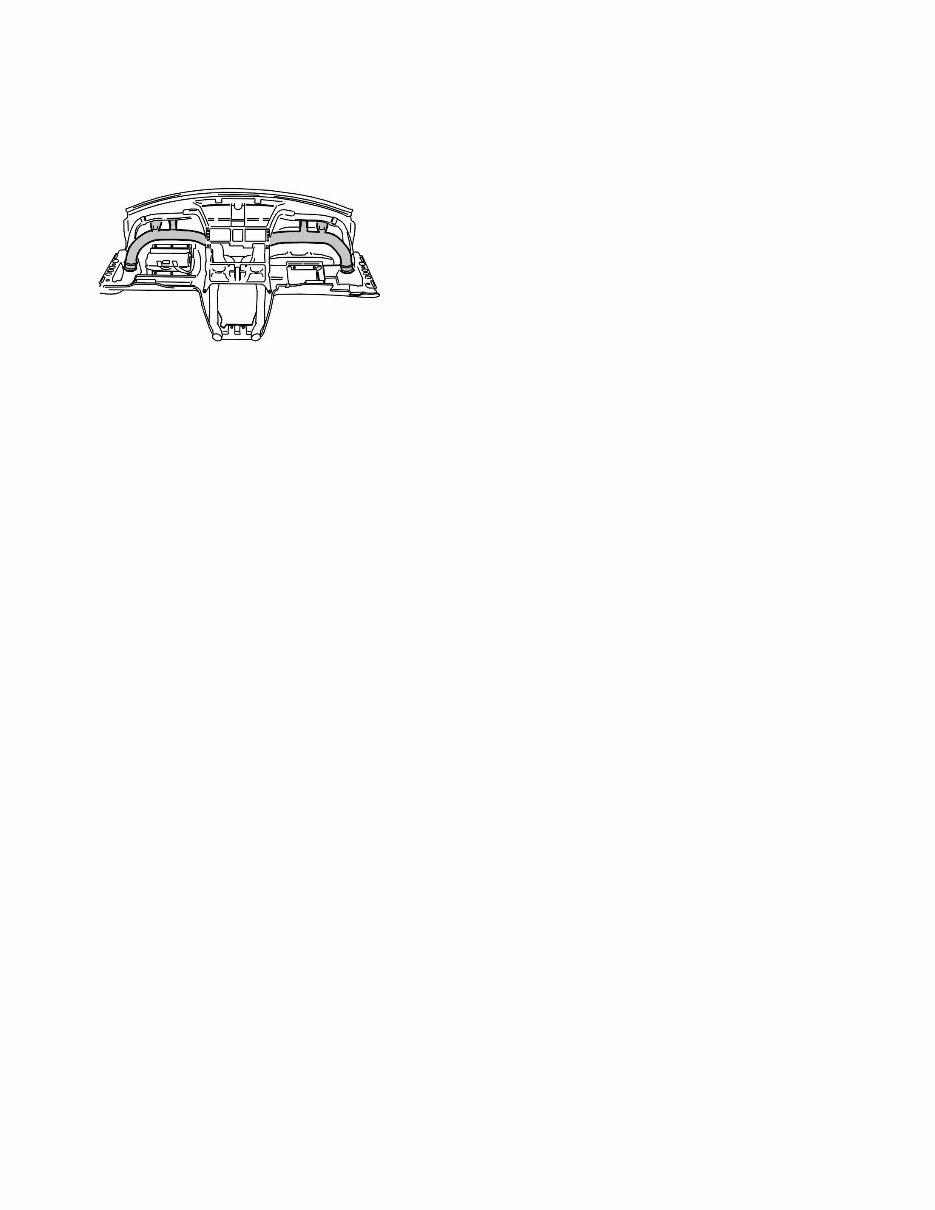
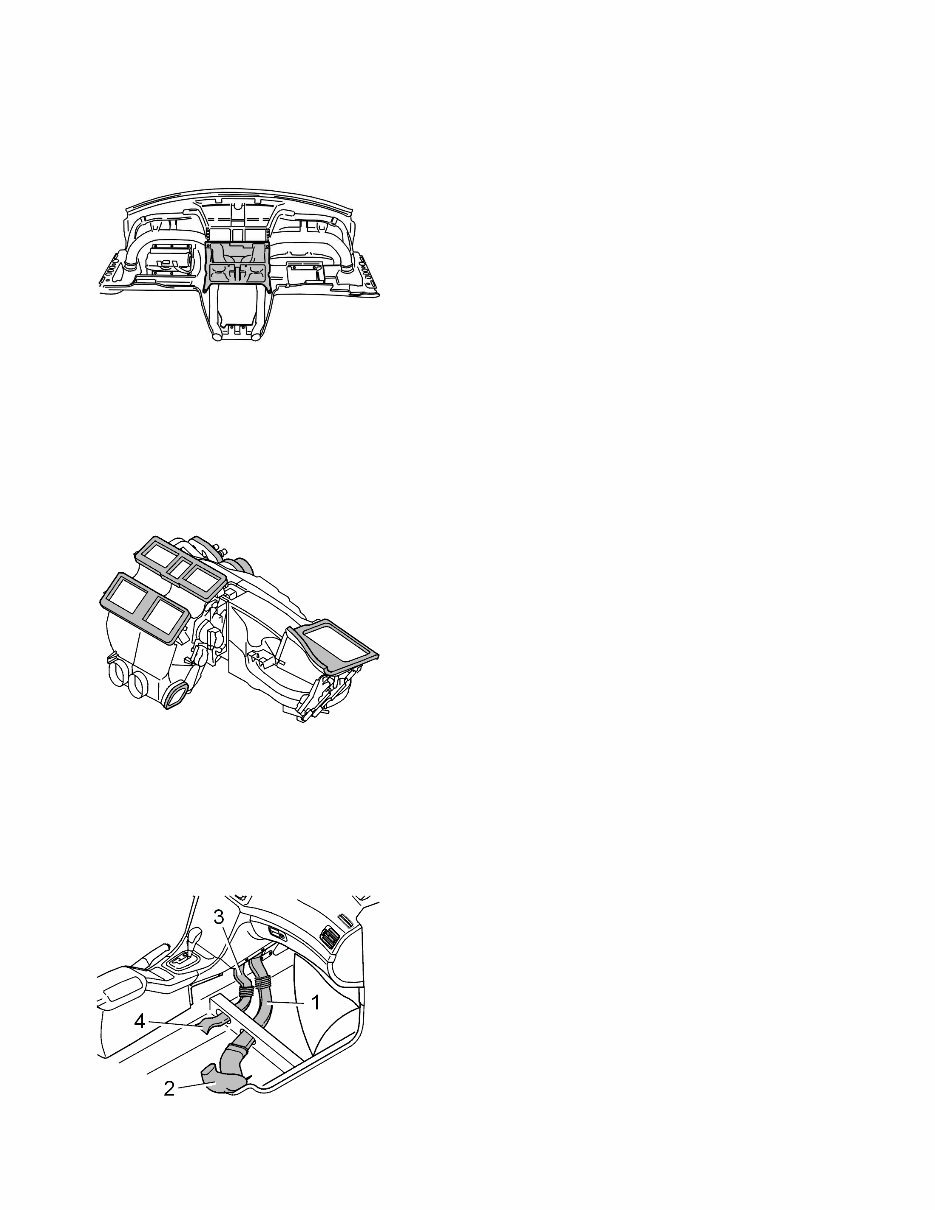
Removing the air ducts for the vents in the dashboard The air ducts for the vents are accessed from the reverse of the dashboard. Remove the dashboard. See Dashboard, replacing . Unscrew the ducts. Installing the air ducts for the vents in the dashboard Thread each duct on to the air vents and/or air distribution unit. Screw the ducts into place. Install the dashboard. See Dashboard, replacing . Air distribution unit dashboard loudspeaker, replacing Removing the air distribution unit from the dashboard Remove: ◾ the dashboard. See Dashboard, replacing ◾ the screws. Remove: ◾ the duct from the connections ◾ the air duct from the air distribution unit. Twist off the air duct from the lower mounting. Remove the 4 screws. Page 2 of 7 87: Air distribution
Installing the air distribution unit in the dashboard Position the air distribution unit so that the connections to the adjacent ducts are correctly positioned. Install: ◾ the 4 screws ◾ the connections ◾ the screws for the air ducts. Ensure that all components are secure and that there is no risk of air leakage. Install the dashboard. See Dashboard, replacing . Seal between the air distribution unit and central electrical unit, replacing Remove the dashboard. See Dashboard, replacing . Replace the seal. Install the dashboard. See Dashboard, replacing . Air duct front and rear on vent B-post vent, replacing Removing the front and rear air ducts on the vent on the B-post Remove: ◾ the front seat from the car. See Upholstery back rest, replacing:Removing the front seat (-2004) or Front seat, replacing (2005-) ◾ the side panel on the center console ◾ the front sill trim panel. See Sill trim panel, replacing ◾ the front floor carpet. Page 3 of 7 87: Air distribution
Pull / bend the duct (1) at the center console. Detach the duct at the upper mounting. Remove the duct (1) from the member. Remove: ◾ the rear sill trim panel. See Sill trim panel, replacing ◾ the B-post panel. See Panel B-post, replacing . Push the rear carpet to one side. Remove the lower floor section. Pull off the air duct. Installing the front and rear air ducts on the vent on the B-post Install: ◾ the air duct ◾ the lower floor section ◾ the rear carpet ◾ the B-post panel. See Panel B-post, replacing ◾ the rear sill trim panel. See Sill trim panel, replacing ◾ the duct (1) ◾ the front floor carpet ◾ the front sill trim panel. See Sill trim panel, replacing ◾ the side panel on the center console ◾ the front seat. See Upholstery back rest, replacing:Installing the front seat (-2004) or Front seat, replacing (2005-). Air ducts front to vent rear, replacing Removing the front air ducts for the rear vent Remove: Page 4 of 7 87: Air distribution
Introducing the comprehensive 2011 VOLVO XC90 Service and Repair Manual! This manual is your ultimate guide to maintaining and fixing your 2011 VOLVO XC90, ensuring optimal performance and longevity.
Featuring detailed instructions and diagrams, this manual is designed to assist both DIY enthusiasts and professional mechanics in carrying out a wide range of service and repair tasks. From routine maintenance procedures to complex repairs, this manual has got you covered.
Here are some of the key features of the 2011 VOLVO XC90 Service and Repair Manual:
Step-by-step instructions: Easy-to-follow instructions for every repair and maintenance task.
Detailed diagrams: Clear and concise diagrams to aid in understanding and executing the procedures.
Comprehensive coverage: Covers all aspects of servicing and repairing the 2011 VOLVO XC90, including engine, transmission, electrical systems, brakes, suspension, and more.
Troubleshooting guide: Diagnostic procedures to help identify and resolve common issues.
Specifications and technical data: Complete specifications and technical information for the 2011 VOLVO XC90.
Safety precautions: Important safety precautions to ensure personal safety while working on the vehicle.
No matter your level of experience, the 2011 VOLVO XC90 Service and Repair Manual provides the detailed instructions and information needed to tackle any service or repair task with confidence. Don't let mechanical issues hold you back, get your copy of the manual today and keep your 2011 VOLVO XC90 running smoothly!









 Lifetime Access




