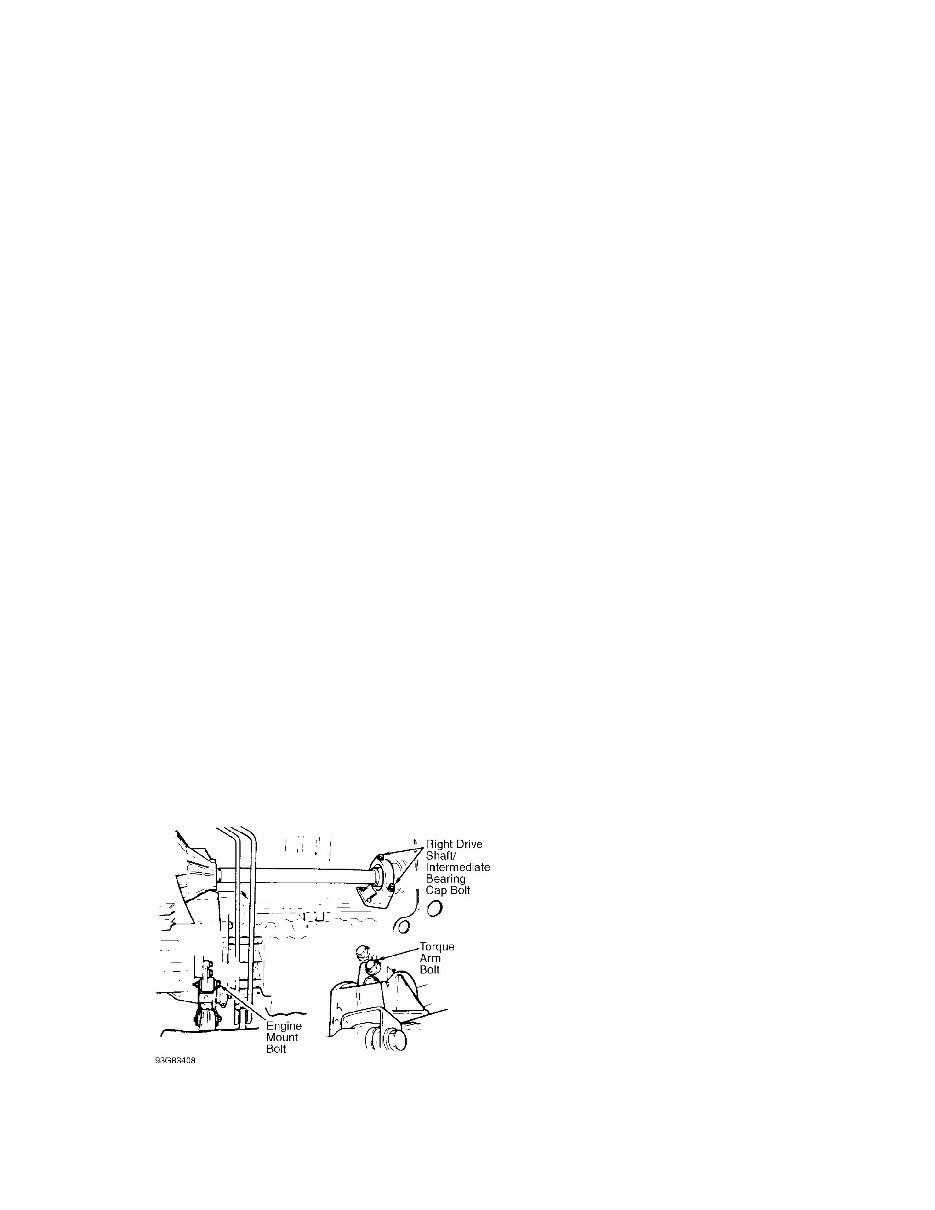
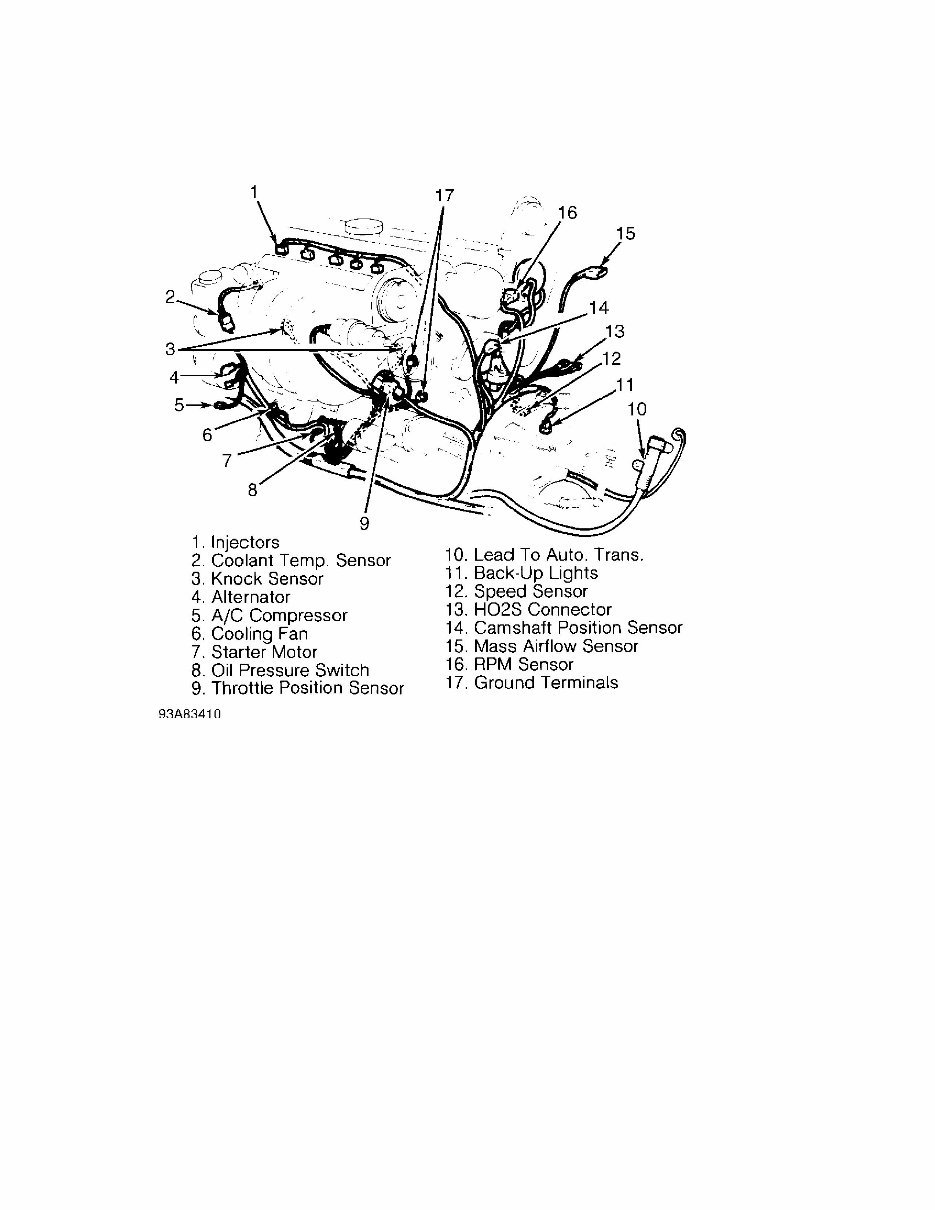
2.3L & 2.4L 5-CYL & 2.9L 6-CYL Article Tex exhaust pipe bolts. Disconnect speedometer. Remove engine mounting shield bolt. Lower vehicle. 5) Remove battery, battery self, and fresh air hose between air intake and air cleaner housing. Disconnect MAF sensor connector and primary lead between distributor and coil. Remove throttle pulley cover. If equipped with cruise control, disconnect all necessary electrical wiring and vacuum hose. 6) Disconnect intake hose at throttle body and idle air control valve hose. Disconnect vacuum hose and crankcase ventilation hose from intake hose. Disconnect vacuum hoses and connector from solenoid valve. Disconnect heater hose. Remove air cleaner housing. Disconnect throttle cable from throttle pulley. Remove torque arm. 7) Disconnect 2 heater hoses at firewall, brake servo hose, and 2 HO2S connectors. Remove upper nut on rear engine mount. Disconnect gear selector cables from mounting bracket on transmission. Disconnect rubber-mounted section of cable bracket. On automatic transmission equipped vehicles, disconnect 2 oil cooler hoses. On manual transmission equipped vehicles, remove clutch slave cylinder retaining ring. Remove slave cylinder from transmission. 8) On all vehicles, disconnect negative battery cable. Disconnect lower radiator hose at radiator. Loosen and move air cleaner mounting bracket aside. Remove rubber mount from air cleaner bracket. On manual transmission equipped vehicles, remove clutch slave cylinder through front hole in air cleaner bracket and place aside. On all vehicles, place air cleaner bracket aside. 9) Remove electric cooling fan relays from fan shroud. Disconnect connectors and place wiring aside. Remove 2 control module box cooling air ducts. Remove 4 fan shroud screws from radiator. Use a piece of plywood to protect radiator and slide fan housing back slightly and remove air intakes. Remove fan. 10) Remove 2 long mounting bolts in A/C compressor. Leave compressor in position until removing engine. Remove front engine mounting pad nut and cable duct bracket mounting bolts. Remove intake manifold and starter support brackets. 11) Disconnect upper radiator hose from thermostat housing. Remove coolant hose between expansion tank and thermostat housing. Remove expansion tank lower hose from fitting on engine. Remove drive belt. Disconnect temperature sensor wiring from bracket on servo pump. Remove 6 servo pump bolts. Leave servo pump in position at this time. 12) Remove protective cover over fuel distribution manifold. Remove upper and lower fuel pipe clips. Remove fuel distribution manifold bolts. Disconnect braided ground lead from engine. Secure injectors with 5 Holders (5465). Lift and place fuel distribution manifold (including injectors) aside. Remove engine wiring harness. See Fig. 2.
The VOLVO V70 V-70 1997-2000 Workshop Service Repair Manual is an essential tool for anyone who owns or works on a VOLVO V70 V-70 from the years 1997 to 2000. This comprehensive manual provides detailed instructions and diagrams to help you maintain, repair, and troubleshoot your vehicle.
Whether you are a professional mechanic or a DIY enthusiast, this workshop service manual is designed to assist you in performing various tasks on your VOLVO V70 V-70. From routine maintenance tasks such as oil changes and brake pad replacements to more complex repairs like engine overhauls and transmission rebuilds, this manual has got you covered.
Key features of the VOLVO V70 V-70 1997-2000 Workshop Service Repair Manual include:
Step-by-step procedures for disassembly and reassembly of various components
Detailed explanations of electrical systems, including wiring diagrams
Troubleshooting guides to help you diagnose and fix common problems
Specifications and torque values for all parts and components
Regular maintenance schedules and procedures
With this workshop service manual, you can save time and money by performing repairs and maintenance tasks on your VOLVO V70 V-70 yourself. No more expensive trips to the dealership or mechanic – simply follow the detailed instructions in this manual and get your vehicle back on the road in no time.
Invest in the VOLVO V70 V-70 1997-2000 Workshop Service Repair Manual today and have the confidence to tackle any repair or maintenance job on your VOLVO V70 V-70.






 Lifetime Access




