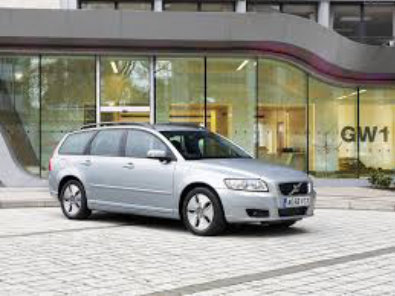
EXTERIOR/INTERIOR TRIM Power transmission EXTERIOR/INTERIOR TRIM A-PILLAR MOLDING REMOVAL AND INSTALLATION Fig. 1: Removing/Installing A - Pillar Molding Courtesy of VOLVO CARS CORPORATION B-PILLAR TRIM PANEL REMOVAL REMOVING THE B-POST PANEL Remove: the front and rear sill trim panel. See: SILL EDGE the weatherstrips around the doors. NOTE: The illustrations in this service information are used for different model years and/or models. Some variation may occur. However, the essential information in the illustrations is always correct. 2008 Volvo V50 T-5 EXTERIOR/INTERIOR TRIM Power transmission
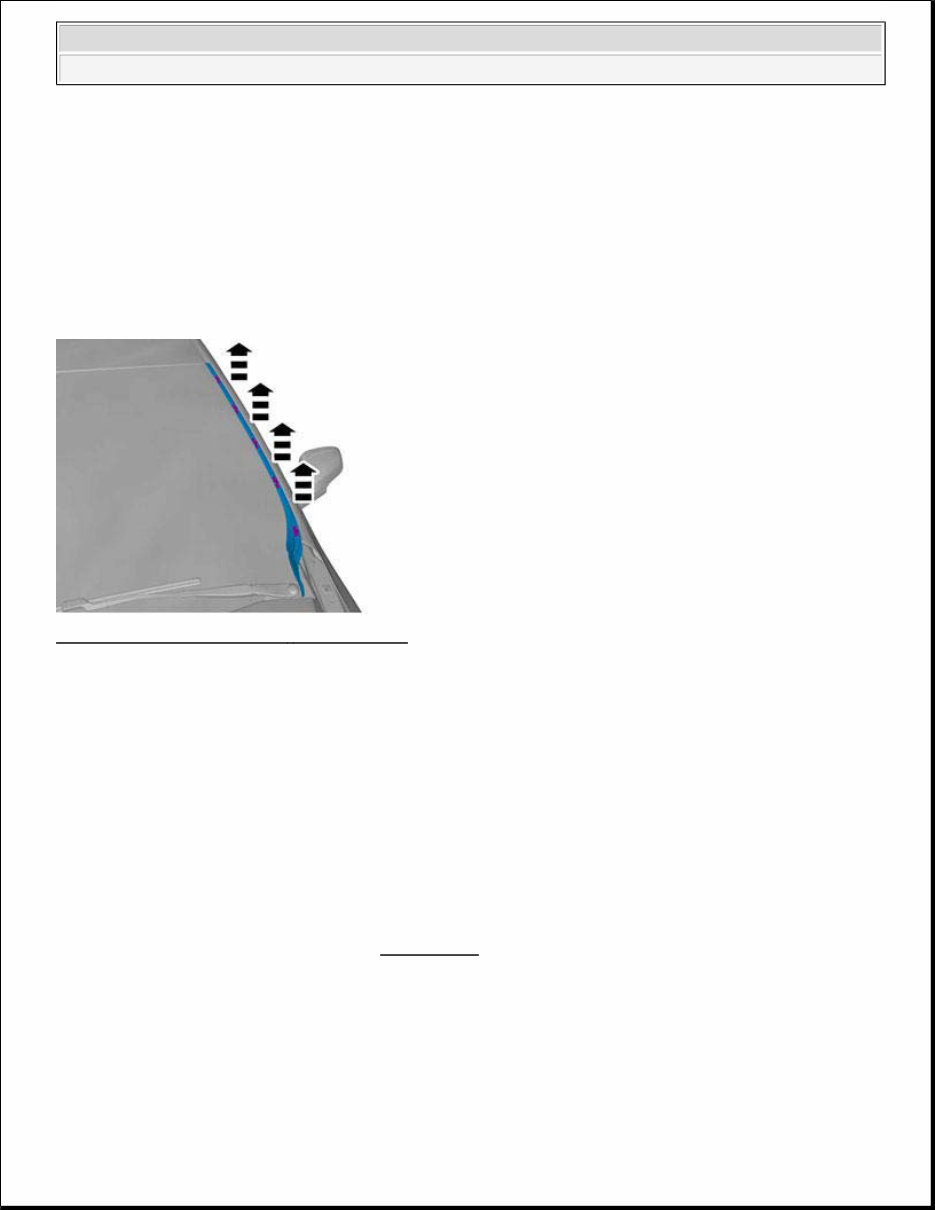
Fig. 2: Removing B - Post Panel Courtesy of VOLVO CARS CORPORATION HINT: The panel can be divided. The seat belt end mounting and the upper screw do not need to be removed when working behind or when replacing the lower section. Detach the center and lower panel sections when removing the lower section. Press in the mounting hook on the reverse of the panel. Pull out the lower section When removing the entire panel, remove the seat belt end mounting. Remove: the center section of the panel. Pull out the bottom edge of the center section the bottom edge of the lower panel. Pull the panel straight out. Remove the panel. Detach the seat belt cover and thread it through the seat belt. INSTALLATION INSTALLING THE B-POST PANEL Pull the seat belt through the panel. Install the seat belt cover. Press the panel into place against the post. Install: NOTE: Remove the cover at the top edge of the B-pillar to access the upper screw. 2008 Volvo V50 T-5 EXTERIOR/INTERIOR TRIM Power transmission
the 1 screw in the top edge of the panel the cover the seat belt end mounting the weatherstrips around the doors the front and rear sill trim panel. See: SILL EDGE . 2008 Volvo V50 T-5 EXTERIOR/INTERIOR TRIM Power transmission
HVAC Power transmission HVAC AC-SYSTEM, OIL, REFILLING OIL LEAKS The oil must be topped up when repairing a leak or when replacing a component. The quantity required for the component in question will depend on whether leakage has taken place slowly or quickly. Slow leakage (longer than 24 hours) With a slow leak, there is normally minimal risk of oil loss. Rapid leakage (e. g. hose rupture) Rapid leakage often means that lubricating oil escapes with the refrigerant. Frequent inspections or compressor oil changes do not normally have to be carried out if the above leak has not occurred or if the vehicle is used in professional circumstances. The compressor oil absorbs moisture for as long as it is in contact with air. Therefore, always use the necessary amount of oil and discard the remainder or close the oil reservoir tightly after use. DRAINING/REFILLING OIL When draining oil from the compressor, inspect for the following: the oil changes color to red the oil contains metal residues WARNING: Never mix different types of oils. Always use the correct type of compressor oil. CAUTION: When installing a completely new air conditioning system: Check that there is oil in the compressor. The other components should contain no oil. NOTE: Too much lubricating oil will impair refrigeration. Too little lubricating oil will damage the compressor. 2008 Volvo V50 T-5 HVAC Power transmission
the clarity/translucency of the oil Draining the oil on the air conditioning compressor without drain plug occurs via the pressure and intake side openings after the pulley and the clutch plate have been rotated 4-5 turns and with the openings facing downwards. Filling oil in air conditioning compressors without drain plugs occurs via the pressure side's opening. REPLACING OIL Change the oil in the compressor (reusing the compressor) or replace with the same amount that was in the old one (new compressor) according to the tables below. Carry out a performance test of the air conditioning system. See CLIMATE CONTROL SYSTEM, CHECK . When replacing components, the following oil volumes must be found in the new components or must be injected in the system through the service valve, except for the compressor (see the "Compressor" service information in the next table): Preparatory work for transferring the oil in the compressor: Measure the volume of the oil drained from the compressor Replace the volume of drained oil according to the tables below: Receiver drier (integrated with condenser) 0 cm 3 Evaporator 50 cm 3 Condenser 30 cm 3 Tube 10 cm 3 Hose 20 cm 3 Reusing the compressor Drained oil Filling of oil > or =70 cm 3 Replace the volume of drained oil with the corresponding quantity <70 cm 3 oil fill with 70 cm 3 of oil. New compressor Drained oil Filling of oil > or =70 cm 3 replace the drained oil volume with the same amount that was drained from the old compressor. <70 cm 3 oil fill with 70 cm 3 of oil. NOTE: Filling/draining/vacuum pumping stations have a reservoir for injecting oil. This can be used before filling with refrigerant and after vacuum pumping. 2008 Volvo V50 T-5 HVAC Power transmission
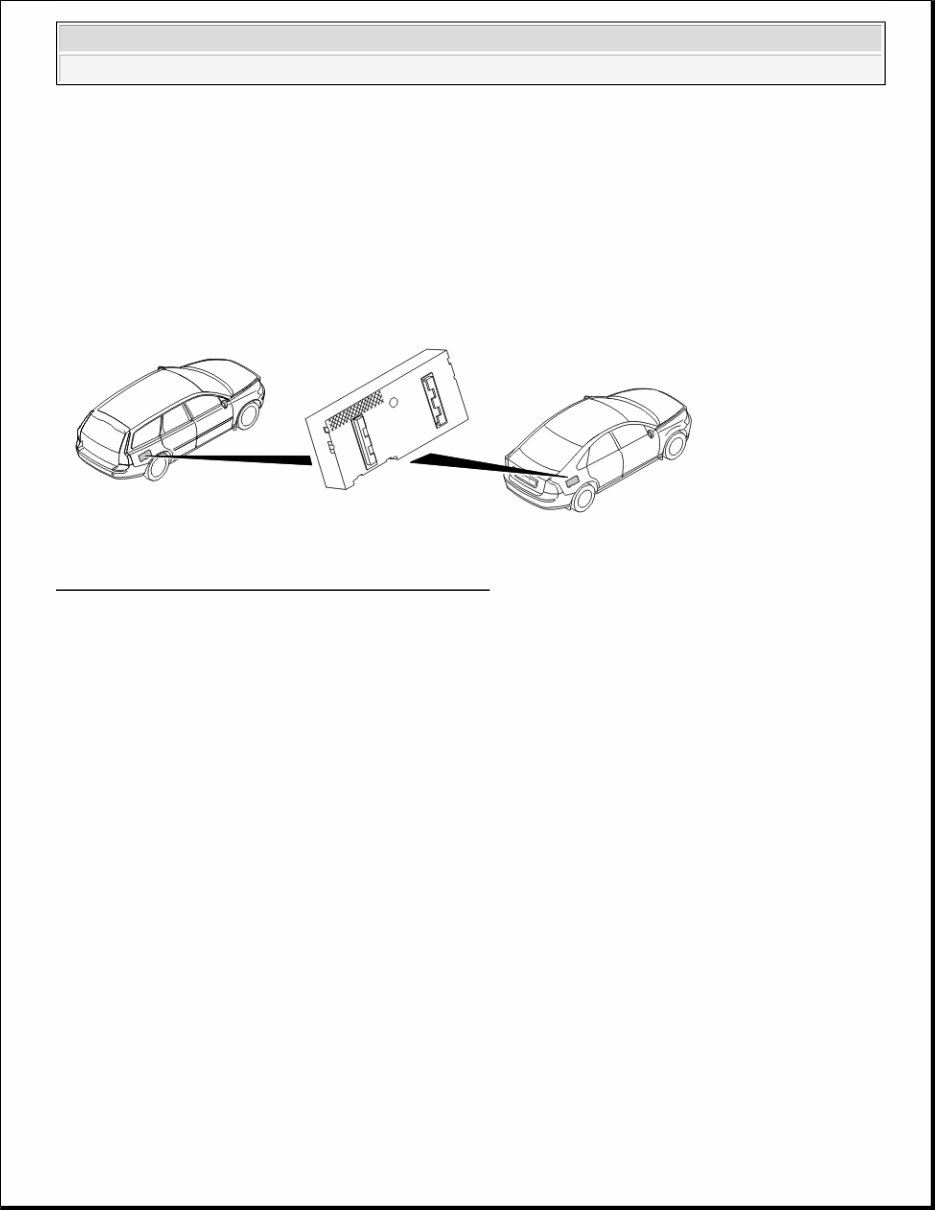
ELECTRICAL Cables & Fuses - Component Location COMPONENT LOCATION, ACCESSORY ELECTRONIC MODULE (AEM) (2005-11) LOCATION OF COMPONENTS Fig. 1: Identifying Accessory Electronic Module (AEM) Courtesy of VOLVO CARS OF NORTH AMERICA. Accessory electronic module (AEM). COMPONENT LOCATION, ACCESSORY USB UNIT (AUU) (2008-11) COMPONENT LOCATION 2008 Volvo V50 T-5 ELECTRICAL Cables & Fuses - Component Location
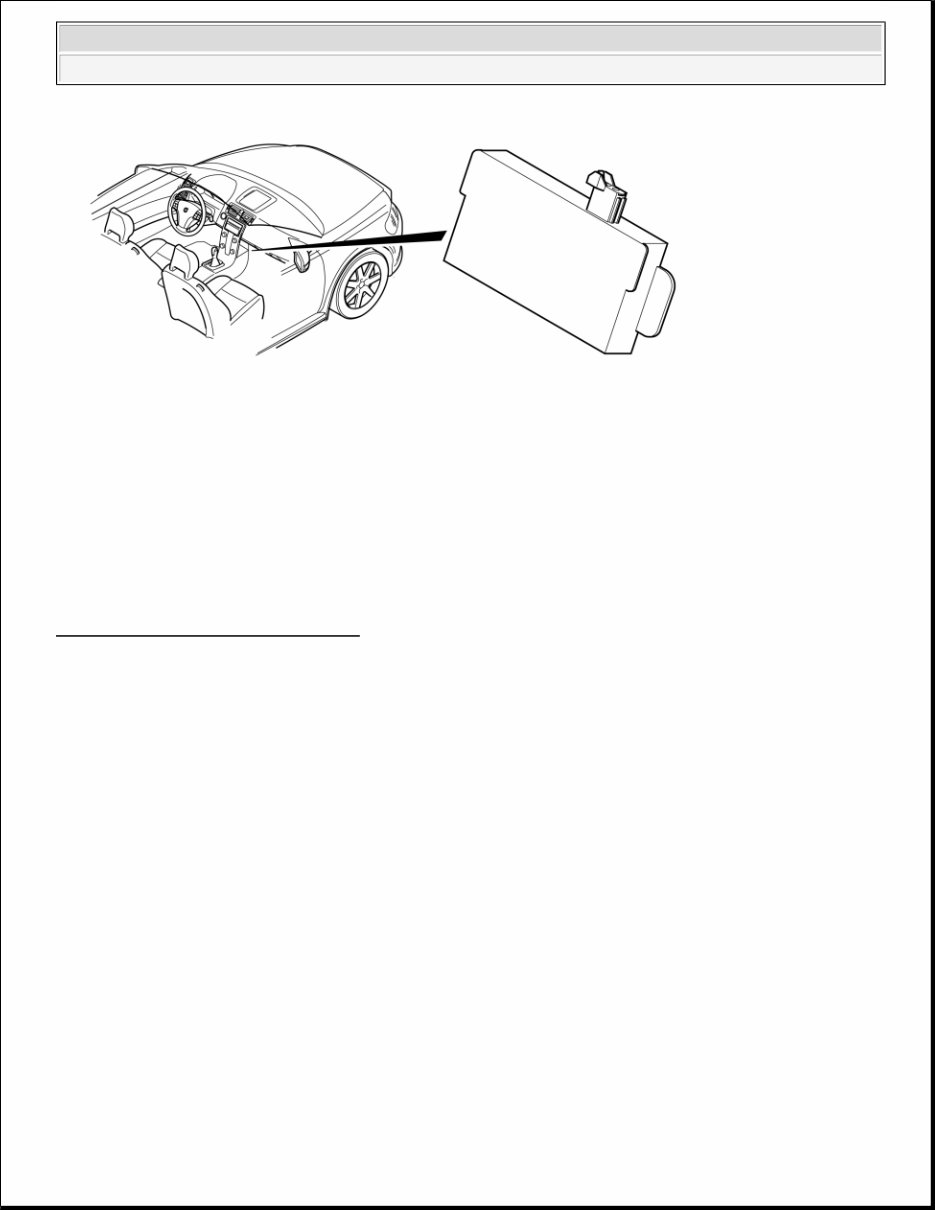
Fig. 2: Identifying Accessory USB Unit Courtesy of VOLVO CARS OF NORTH AMERICA. Overview 1. Accessory USB unit (AUU) COMPONENT LOCATION, CENTRAL ELECTRONIC MODULE (CEM) (2010- 11) LOCATION OF COMPONENTS 2008 Volvo V50 T-5 ELECTRICAL Cables & Fuses - Component Location
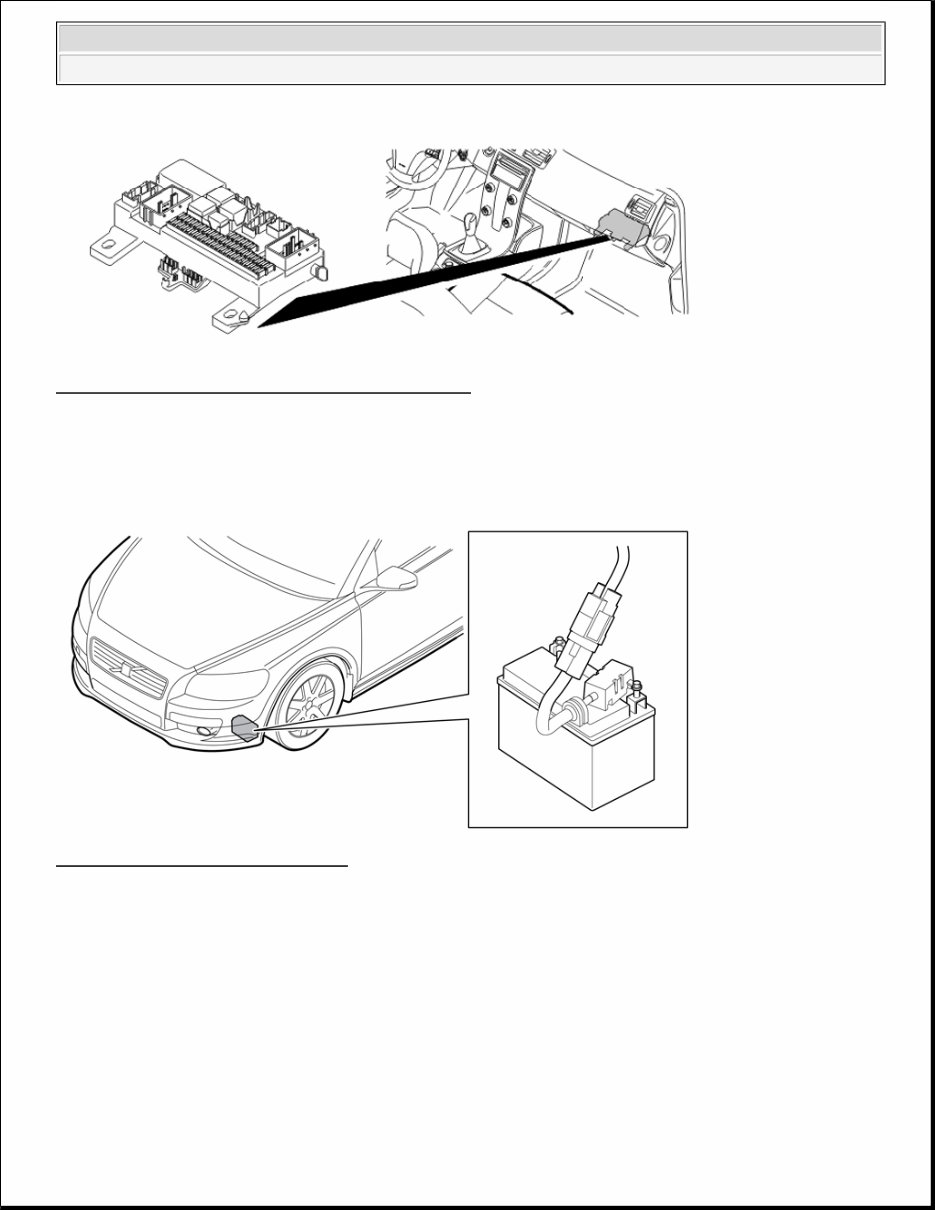
Fig. 3: Identifying Central Electronic Module (CEM) Courtesy of VOLVO CARS OF NORTH AMERICA. central electronic module (CEM) 1. central electronic module (CEM) Fig. 4: Identifying Secondary Battery Courtesy of VOLVO CARS OF NORTH AMERICA. Secondary Battery Secondary battery (only on vehicles with the function Automatic start/stop of engine). 2008 Volvo V50 T-5 ELECTRICAL Cables & Fuses - Component Location
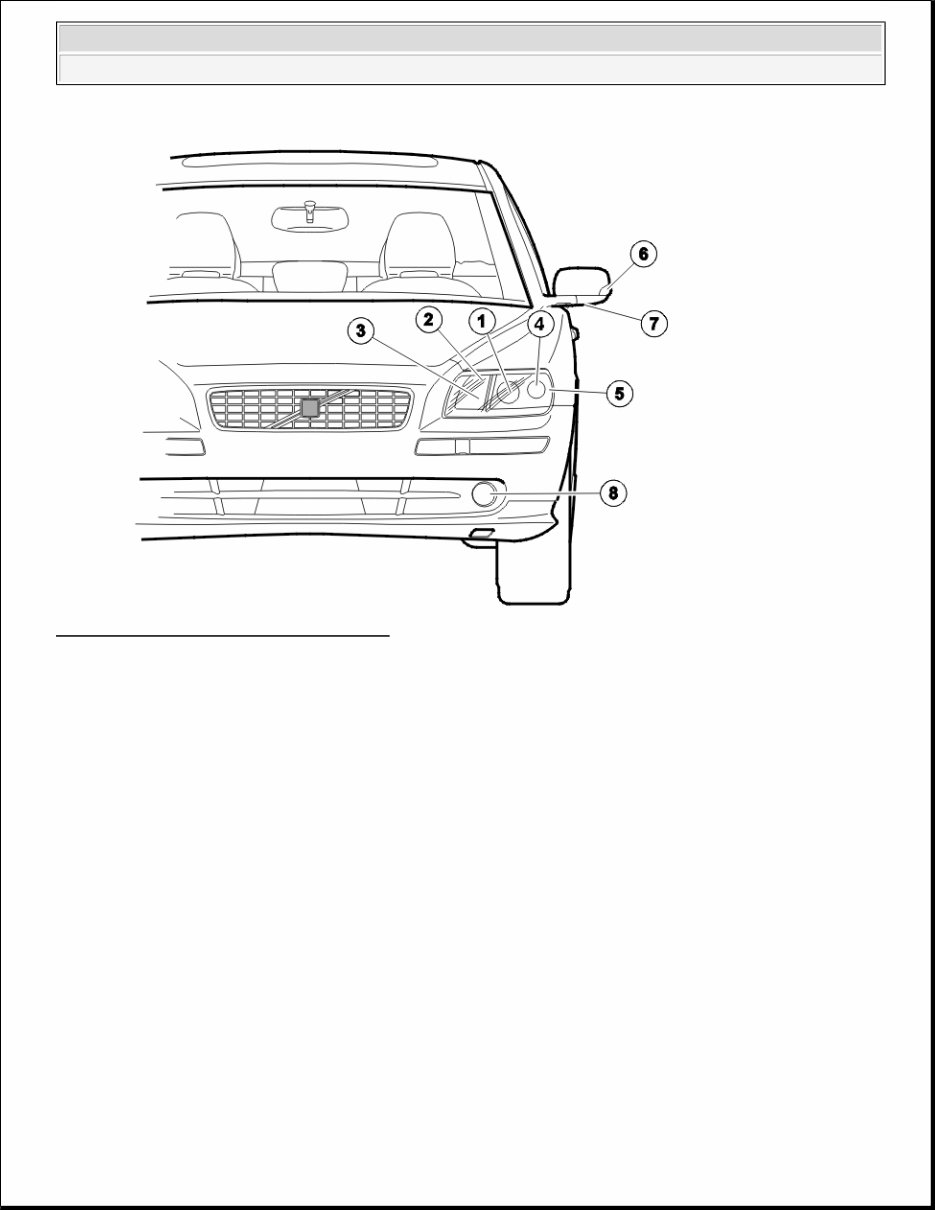
Fig. 5: Identifying Front Exterior Lighting Courtesy of VOLVO CARS OF NORTH AMERICA. Lighting exterior, front 1. Low beam 2. High beam 3. Parking lamps 4. Turn signal lamps 5. Side marking 6. Turn signal lamp door mirror 7. Local lighting 8. Fog lamps 2008 Volvo V50 T-5 ELECTRICAL Cables & Fuses - Component Location
If you are in need of a repair manual for your 2006 Volvo V50, look no further. This accessible repair manual is available in a convenient digital format, making it an ideal resource for both professional mechanics and DIY enthusiasts.
Gone are the days of purchasing traditional service manuals in book format at a higher cost. This digital manual provides the same valuable information at a more affordable price and with greater convenience.
Whether you require guidance for brake repairs, suspension component replacements, engine troubleshooting, standard maintenance, or any other vehicle-related task, this repair manual for the Volvo V50 has you covered.
With comprehensive service information, you will be equipped to address various aspects of your vehicle, including brakes, engine, suspension, steering, drivetrain, electrical systems, heating, air conditioning, and more.
By taking on the repairs yourself, you can significantly reduce expenses typically incurred when seeking professional assistance. This 2006 Volvo V50 repair manual is designed to be user-friendly and is compatible with Windows, Mac computers, smartphones, and tablets.