

Maintenance
',·-2·
''"''>
;···s
.
-./-
/' , .. __
Engine
Engine Management,
Exhaust, and
Engine Electrical
Clutch,
Transmission, arid
Final Drive
Suspension,
Brakes, and
Steering
Body-
Assembly
Body-
Components and
Accessories
Body-
Interior Trim
Heating and
Air Conditioning
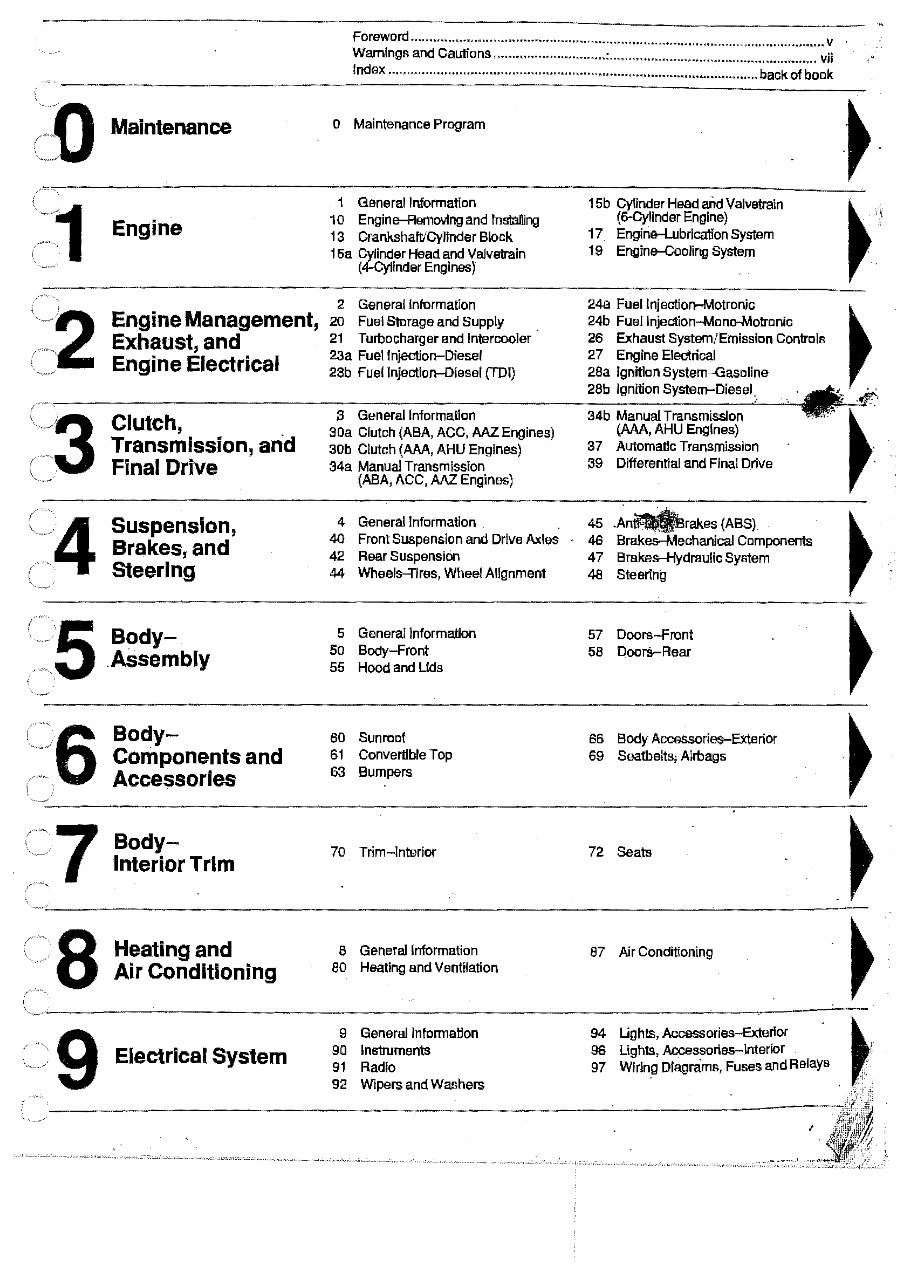
Foreword .............................................................................. "' .............................. v
Warnings and Cautions ......••.•.................... :........................................................ vii
Index ................................... ·............................................................... back of book
o Maintenance Program
1 Generalln!ormation
10 Engine-Removing and lnslalling
13 Crankshaft/Cylinder Block
15a Cylinder Head and Valvetrain
(4-Cylinder Engines)
2 Generallnformation
20 Fuel Storage and Supply
21 Turbocharger and Intercooler ·
23a Fuel Injection-Diesel
23b Fuel Injection-Diesel (TDI)
3 General Information
SOa Clutch (ABA, ACC, AAZ Engines)
30b Clutch (AAA, AHU Engines)
34a Manual Transmission
(ABA, ACC, AAZ Engines)
4 Generallnformation
40 Front Suspension and Drive Axles
42 Rear Suspension
44 Wheels-'fires, Wheel Alignment
5 Generallnformatlon
50 Body-Front
55 Hood and Uds
60 Sunroof
61 Convertible Top
63 Bumpers
70 Trim-interior
8 Generallnformation
80 Heating and Ventilation
15b Cylinder Head aitd Valvetrain
(6-Cylinder Engine)
17 Engine-Lubrication System
19 Engin&-Cooling System
24a Fuel lnjectioo-Motronic
24b Fuel lnjection-Mono-Motronic
26 Exhaust System/Emission Controls
27 Engine Electrical
28a Ignition System-Gasoline
28b Ignition System-Diesel,
34b Manual Transmission
(AAA, AHU Engines)
37 Automatic Transmission
39 Differential and Final Drive
45 (ABS)
48 Brakes-Mechanical Components
47 Brake&-Hydrautic System
48 Steering
57 Doors-Front
58 DoorS-Rear
66 Body Accessories-Exterior
69 Seatbeits; Airbags
72 Seats
87 Air Conditioning
•..
9 Electrical System
9 General Information
90 lnstrumants
91 Radio
92 Wipers and Washars
94 Ughts, Accessories-Extar!or
98 Lights, Accessorias-Jnterlor
97 Wiring Diagl'lims, Fuses and Relays
t
Foreword
Service to Volkswagen owners is a top priority of the Volkswagen organization and has always
included the continuing development and introduction of new and expanded services. In line with
this purpose, Robert Bentley, Inc., in cooperation with Volkswagen of America, Inc., has
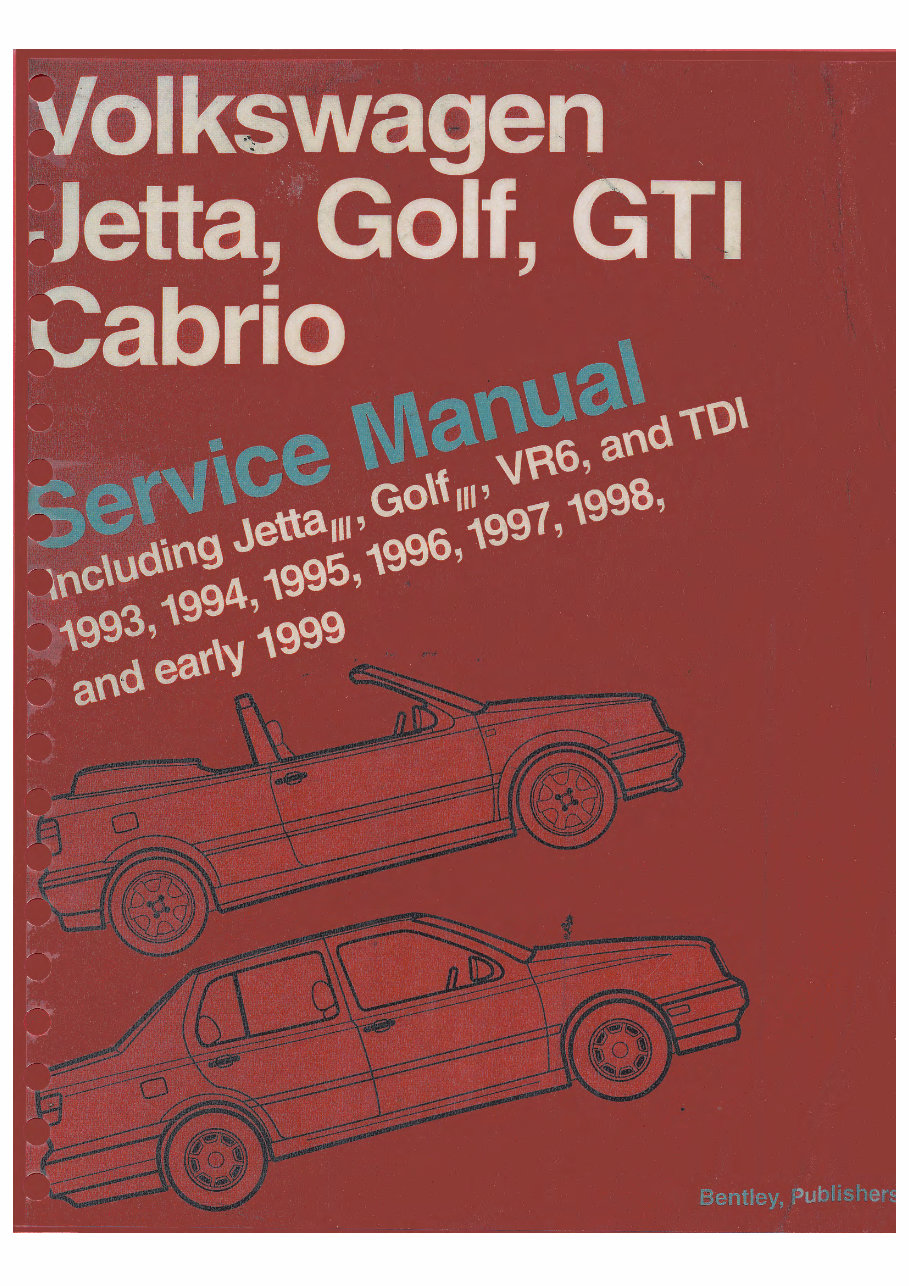
introduced this Volkswagen Jetta, Golf, GTI, Cabrio Service Manual.
This manual covers Volkswagen Jetta, Golf, GTI, GLX, Cabrio, TDI and special editions for the
model years 1993 through early 1999. This manual was created specifically to cover only those
models built for sale in the United States and Canada.
Volkswagen and most aftermarket parts suppliers specializing in Volkswagens refer to the Jet-
las, Golfs, GTis and Cabrios covered by this manual as the A3 models. The code "A3" is Volk-
swagen's internal code for the basic platform shared by all of the cars covered by this manual.
When ordering parts, especially body parts, knowing the A3 code may be helpful.
For the Volkswagen owner with basic mechanical skills and tor independent auto·service
professionals, this manual includes the specifications and procedures that were available in an
authorized Volkswagen dealer service department as this manual went to press. The Volkswagen
owner with no intention of working on his or her car will find that owning and referring to this manual
will make it possible to be better informed and to more knowledgeably discuss repairs with a
professional automotive technician. The aim throughout has been clarity and completeness, with
step-by-step procedures and accurate specifications.
The Volkswagen owner intending to do maintenance and repair should have screwdrivers, a
set of metric wrenches and sockets, and metric hex wrenches, since these basic hand tools are
needed tor most of the work described in this manual. Most procedures will also require a torque
wrench to ensure that fasteners are tightened properly and in accordance with specifications. In
some cases, the text refers to special tools that are recommended or required to accomplish
adjustments or repairs. These tools are identified by their Volkswagen special tool number and
illustrated. A thorough pre-reading of each procedure is recommended to determine in advance
the need for particular tools and for essential replacement parts such as gaskets.
v
vi
Some of the information in this manual applies only to cars of a particular model year or range
of years. For example, "1993 m.y." refers to the 1993 model year. The model year does not
necessarily match the calendar year in which the car was manufactured or sold. To be sure of the
model year of a particular car, check the vehicle identification number (VIN) on the car. Technical
changes made in production within a model year are identified in this manual by listing the VIN for
the first car produced with this change.
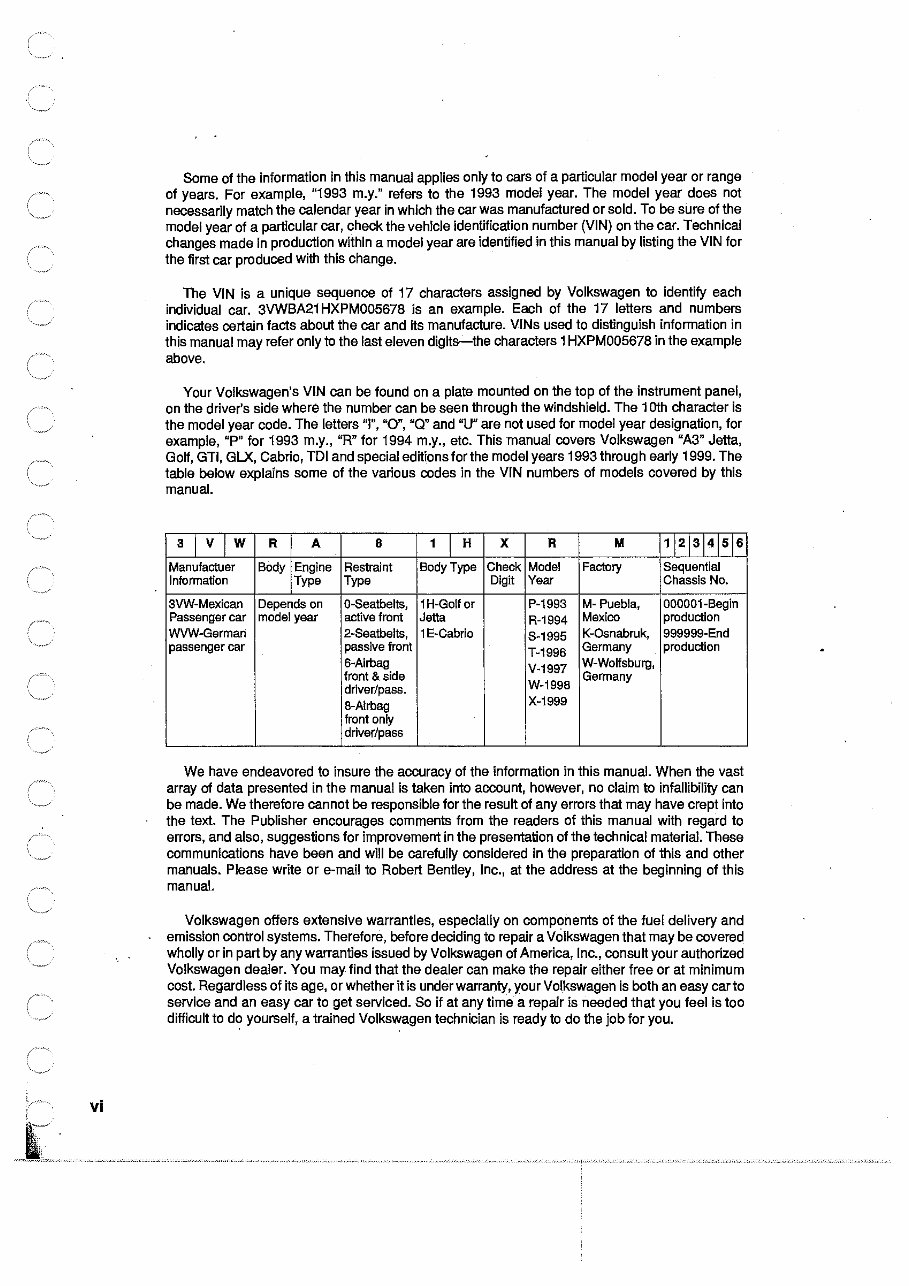
The VIN is a unique sequence of 17 characters assigned by Volkswagen to identify each
individual car. 3VWBA21 HXPM005678 is an example. Each of the 17 letters and numbers
indicates certain facts about the car and its manufacture. VINs used to distinguish information in
this manual may refer only to the last eleven digits-the characters 1HXPM005678 in the example
above.
Your Volkswagen's VIN can be found on a plate mounted on the top of the instrument panel,
on the driver's side where the number can be seen through the windshield. The 1Oth character is
the model year code. The letters "1", "0", "Q" and "U" are not used for model year designation, for
example, "P" for 1993 m.y., "R" for 1994 m.y., etc. This manual covers Volkswagen "A3" Jetta,
Golf, GTI, Gl.X, Cabrio, TDI and special editions for the model years 1993 through early 1999. The
table below explains some of the various codes in the VIN numbers of models covered by this
manual.
a 1 v 1 w
R A 8
1 I H
X R M
11213141516
Manufactuer Body Engine Restraint Body Type Check Model Factory Sequential
Information Type Type Digit Year Chassis No.
3VW-Mexican Depends on 0-Seatbelts, 1H-Golf or P-1993 M- Puebla, 000001-Begin
Passenger car model year active front Jetta
R-1994
Mexico production
WVW-German 2-Seatbelts, 1E-Cabrio
S-1995
K-Osnabruk, 999999-End
passenger car passive front
T-1996
Germany production
6-Airbag
V-1997
W-Wolfsburg,
front & side
W-1998
Germany
driver/pass.
B-Airbag
X-1999
front only
driver/pass
We have endeavored to insure the accuracy of the information in this manual. When the vast
array of data presented in the manual is taken into account, however, no claim to infallibility can
be made. We therefore cannot be responsible for the result of any errors that may have crept into
the text. The Publisher encourages comments from the readers of this manual with regard to
errors, and also, suggestions for improvement in the presentation of the technical material. These
communications have been and will be carefully considered in the preparation of this and other
manuals. Please write or e-mail to Robert Bentley, Inc., at the address at the beginning of this
manual.
Volkswagen offers extensive warranties, especially on components of the fuel delivery and
emission control systems. Therefore, before deciding to repair a Volkswagen that may be covered
wholly or in part by any warranties issued by Volkswagen of America, Inc., consult your authorized
Volkswagen dealer. You may find that the dealer can make the repair either free or at minimum
cost. Regardless of its age, or whether it is under warranty, your Volkswagen is both an easy carlo
service and an easy car to get serviced. So if at any time a repair is needed that you feel is too
difficult to do yourself, a trained Volkswagen technician is ready to do the job for you.
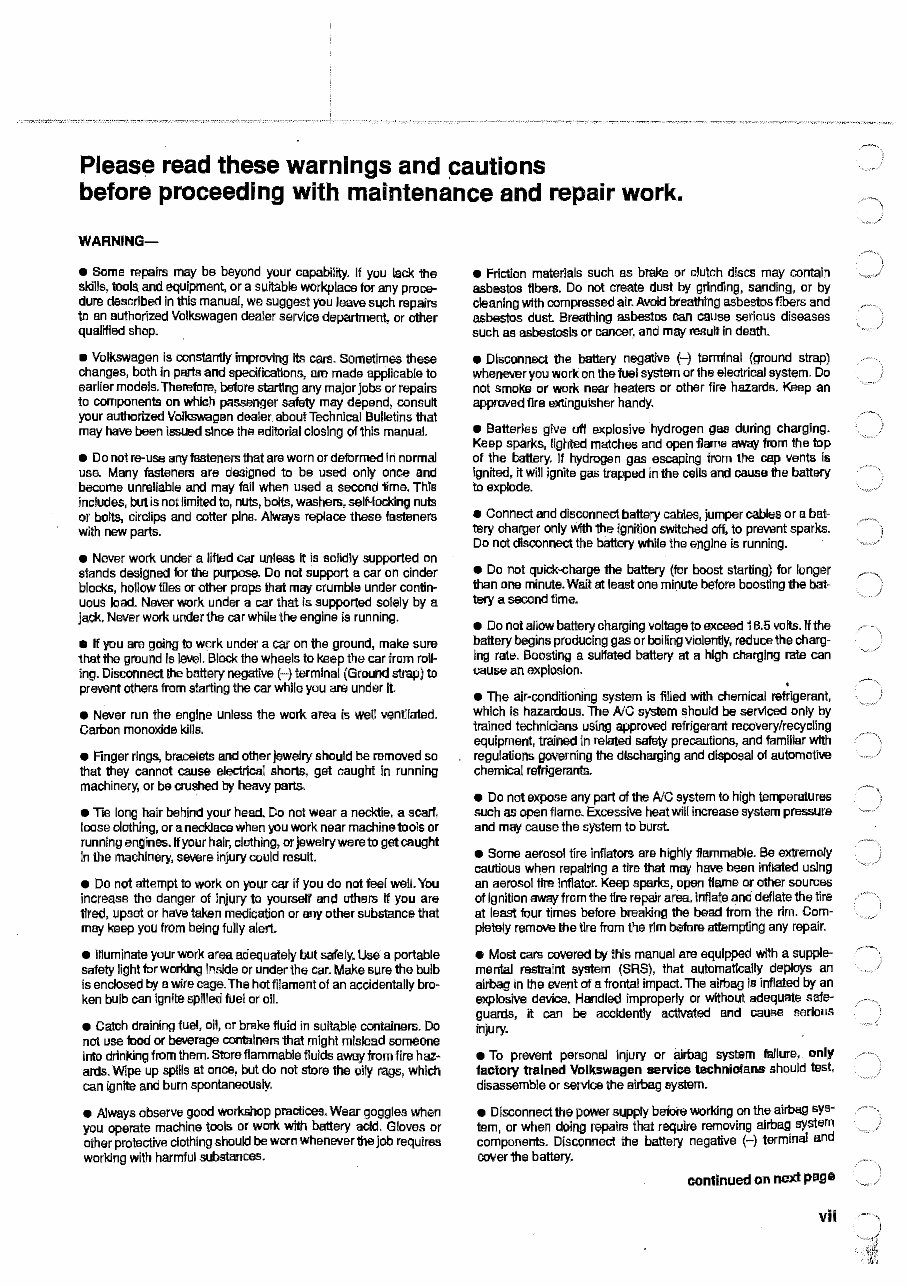
Please read these warnings and
before proceeding with maintenance and repair work.
WARNING-
• Some repairs may be beyond your capability. If you lack ihe
skills, fool!\ and equipment, or a suitable workplace for any proce-
dure described in this manual, we suggest you leave Sl!Ch repairs
to an authorized Volkswagen dealer service department, or oiher
qualmed shop.
• Volkswagen is constantly improving ita cars. Sometimes these
changes, both in parts and specilica!lons, are mad& applicable to
earlier models. Therefore, before starting any major jobs or repairs
to components on which passenger safety may dep&nd,
your auihorlzed Volkswagen dealer about Technical Bulletins that
may have been Issued since the editorial closing of this manual.
• Do not re-use any fasteners !hal are worn or deformed In normal
use. Many fasteners are designed to be used only once and
become unreliable and may fail whan used a second 1ime. This
includes, but is not limited to, nuts, boils, washers, sett-locklng nuts
or bolts, clrclips and cotter pins. Always replace these lasteners
with new parts.
• Never work under a lifted car unless it is solidly supported on
stands designed lor the purpose. Do not support a car on cinder
blocks, hollow tiles or other props that may crumble under contin-
uous load. Never work under a car that is supported solely by a
jack. Never work under the car while the engine is running.
• tt you are going to work under a car on the ground, make sure
that the ground is level. Block the wheels to keep the car from
ing. Disconnect !he battery negative (-)terminal (Ground sttap) to
prevent others from starting the car while you are under it.
• Never run the engine unless the work area is well ventilated.
Carbon monoxide kills.
• Finger rings, bracelets and other jewelry should be removed so
that they cannot cause electrical shorts, gel caught In running
machinery, or be crushed hy heavy parts.
• TIS long hair behind your head. Do not wear a necktie, a scarf,
loose clothing, or a necklace when you work near machine tools or
running engines. H your hair, clothing, or jewelry were to get caught
In ihe machinery, severe injury could result.
• Do not attempt to work on your car if you do not lael well. You
Increase the danger of injury to yoursan and oihers ff you are
tirad, upset or have taken medication or any other substance that
may keep you from being fully alert.
• Illuminate your work area adequately but sstely. Usli a portable
safety light for working Inside or under the car. Make sure the bulb
is enclosed hy a wire cage. The hot filament of an accidentally bro-
ken bulb can ignite spilled fuel or oil.
• Catch draining fuel, oil, or brake fluid in suitable containers. Do
not use food or beverage containers that might mislead someone
into drinking from them. Store flammable fluids away from !Ire haz-
ards. Wipe up spills at once, but do not store !he oily rags, which
can ignite and burn spontaneously.
• /Oways observe good workshop practices. Wear goggles when
you operate machine tools or work with battery acid. Gloves or
other protective clothing should be worn whenever !he job requires
working with harmful substances.
• Friction materials such as brake or clutch discs may contain
asbestos fibers. Do not create dust bY grinding, sanding, or by
cleaning with compressed air. Avoid breathing asbestos fibers and
asbestos dust Breathing asbestos can cause serious diseases
such as asbestosis or cancer, and may resuU in death.
• Disconnect the battery nega1ive (-) tenminal (ground strap)
whenever you work on the fuel system or the eleatrlcal system. Do
not smoke or work near heaters or other fire hazards. Keep an
approved fire extinguisher handy.
• Batteries give off explosive hydrogen gas during charging.
Keep sparks, lighted matches and open flame away from ihe top
of the battery. If hydrogen gas escaping from the cap vents Is
ignited, it will Ignite gas trapped In the cells and cause the battery
to explode.
• Connect and disconnect battery cables, jumpar cables or a bat-
tery charger only with the ignition switched off, to prevent sparks.
Do not disconnect the battery while the engine is running.
• Do not quick-charge the battery (for boost starting) for longer
!hen one minute. Wait at least one minute before boosting the bat·
tery a second time.
• Do not allow battery charging voltage to exceed 16.5 voits. If the
battery begins producing gas or boiling vlolentiy, reduce the charg-
Ing rate. Boosting a suWated battery at a high charging rate can
cause an explosion.
•
• The air-conditioning system Is filled with chemical refrigerant,
which is hazardous. The AJC system should be serviced only by
trained technicians using approved refrigerant recovery/recycling
equipment, trained in related safety precautions, and familiar with
regulations governing ihe discharging and disposal of automotive
chemical relrigeranta.
• Do not expose any part of the AJC system to high temperaiures
such as open flame. Excessive heat will increase system pressure
and may cause the system to burst.
• Some aerosol tire inflators are highly Be extremely
cautious when repairing a tire that may have been inflated using
an aerosol tire inflator. Keep sparks, opan ftarne or other sources
of Ignition away from the tire repair area. Inflate and deflate the tire
at leaal four times before breaking the baed from the rim. Com-
pletely remove the tire from the rim before attempting any repair.
• Most cars covered by !his manual are equipped with a supple-
mental restraint system (SRS), that automatically deploys an
alrbag in the event of a frontal impact. The alrbag Is inflated by an
explosive device. Handled improperly or without adequate sale-
guards, it can be accidently activated and cause serious
injury.
• To prevent personal Injury or iilrbag system failure, only
1aotory trained Volkswagen service technicians should test,
disassemble or service the airbag system.
• Disconnect the power supply be!ote working on the airbag sys-
tem, or when doing repairs that require removing alrbag system
components. Disccnneat the battery negative (-) terminal and
cover the battery.
continued on next page
vii
'
/
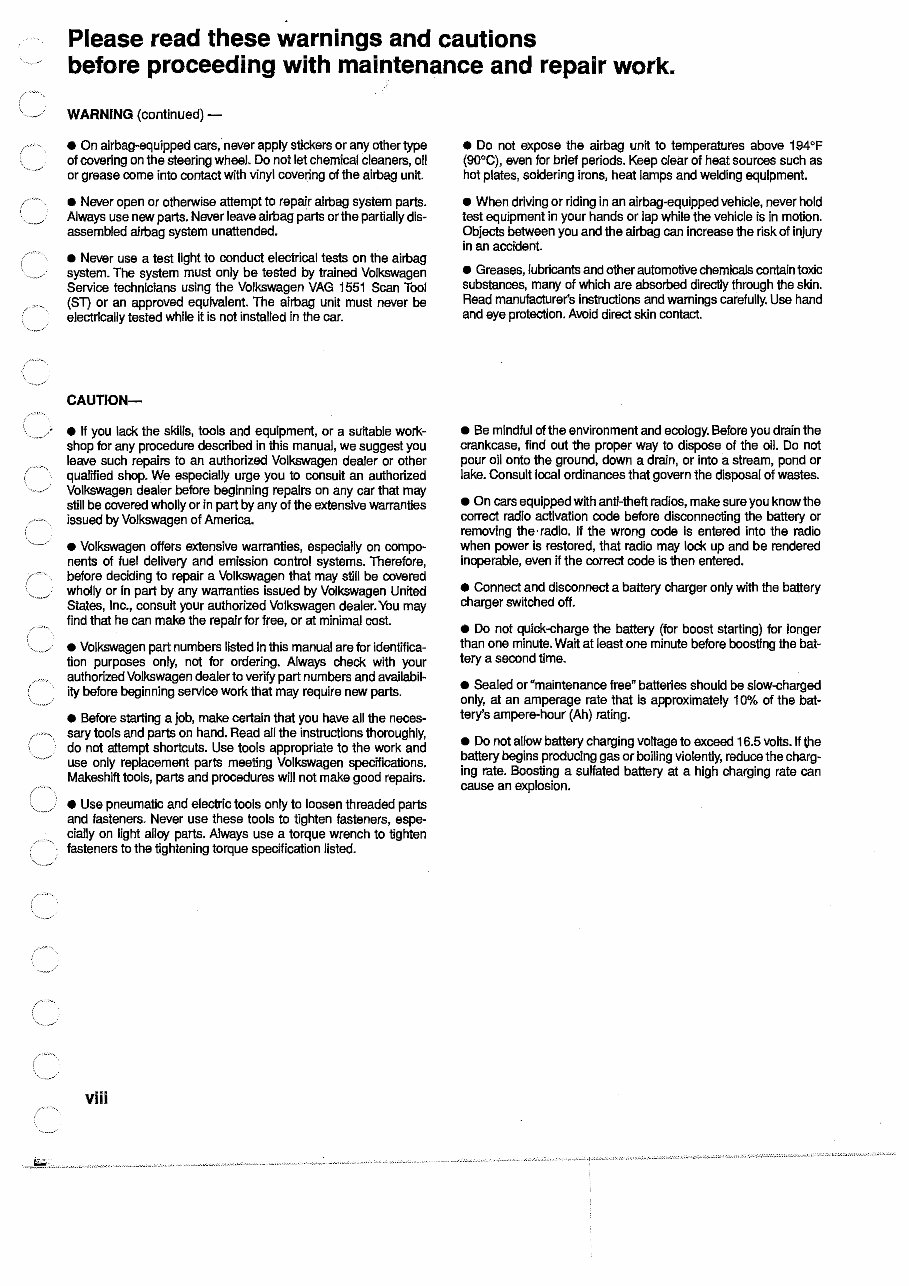
Please read these warnings and cautions
before proceeding with maintenance and repair work.
WARNING (continued}-
e On airbag-equipped cars, never apply stickers or any other type
of covering on the steering wheel. Do not let chemical cleaners, oil
or grease come into contact with vinyl covering of the airbag unit.
• Never open or otherwise attempt to repair airbag system parts.
Always use new parts. Never leave airbag parts or the partially dis-
assembled airbag system unattended.
e Never use a test light to conduct electrical tests on the airbag
system. The system must only be tested by trained Volkswagen
Service technicians using the Volkswagen VAG 1551 Scan Tool
(ST} or an approved equivalent. The airbag unit must never be
electrically tested while it is not installed in the car.
CAUTION-
e If you lack the skills, tools and equipment, or a work-
shop for any procedure described in this manual, we suggest you
leave such repairs to an authorized Volkswagen dealer or other
qualnied shop. We especially urge you to consult an authorized
Volkswagen dealer before beginning repairs on any car that may
still be covered wholly or in part by any of the extensive warranties
issued by Volkswagen of America.
• Volkswagen offers extensive warranties, especially on compo-
nents of fuel delivery and emission control systems. Therefore,
before deciding to repair a Volkswagen that may still be covered
wholly or in part by any warranties issued by Volkswagen Unfted
States, Inc., consult your authorized Volkswagen dealer. You may
find that he can make the repair for free, or at minimal cost.
• Volkswagen part numbers listed in this manual are for identifica-
tion purposes only, not for ordering. Always check with your
authorized Volkswagen dealer to verify part numbers and availabil-
ity before beginning service work that may require new parts.
e Before starting a job, make certain that you have all the neces-
sary tools and parts on hand. Read all the instructions thoroughly,
do not attempt shortcuts. Use tools appropriate to the work and
use only replacement parts meeting Volkswagen specffications.
Makeshift tools, parts and procedures will not make good repairs.
• Use pneumatic and electric tools only to loosen threaded parts
and fasteners. Never use these tools to tighten fasteners, espe-
cially on light alloy parts. Always use a torque wrench to tighten
fasteners to the tightening torque specification listed.
viii
• Do not expose the airbag unft to temperatures above 194"F
(90"C), even for brief periods. Keep clear of heat sources such as
hot plates, soldering irons, heat lamps and welding equipment.
• When driving or riding in an airbag-equipped vehicle, never hold
test equipment in your hands or lap while the vehicle is in motion.
Objects between you and the airbag can increase the risk of injury
in an accident.
• Greases, lubricants and other automotive chemicals contain toxic
substances, many of which are absorbed direclly through the skin.
Read manufacturer's instructions and warnings carefully. Use hand
and eye protection. Avoid direct skin contact.
• Be mindful of the environment and ecology. Before you drain the
crankcase, find out the proper way to dispose of the oil. Do not
pour oil onto the ground, down a drain, or into a stream, pond or
lake. Consult local ordinances that govern the disposal of wastes.
• On cars equipped with anti-theft radios, make sure you know the
correct radio activation code before disconnecting the battery or
removing the· radio. II the wrong code is entered into the radio
when power is restored, that radio may lock up and be rendered
inoperable, even if the correct code is then entered.
• Connect and disconnect a battery charger only with the battery
charger switched off.
• Do not quick-charge the battery (for boost starting) for longer
than one minute. Waft at least one minute before boosting the bat-
tery a second time.
• Sealed or "maintenance free" batteries should be slow-charged
only, at an amperage rate that is approximately 1 0% of the bat-
tery's ampere-hour (Ah} rating.
• Do not allow battery charging voftage to exceed 16.5 volts. If the
battery begins producing gas or boiling violently, reduce the charg-
ing rate. Boosting a sulfated battery at a high charging rate can
cause an explosion.
MAINTENANCE PROGRAM 0-1
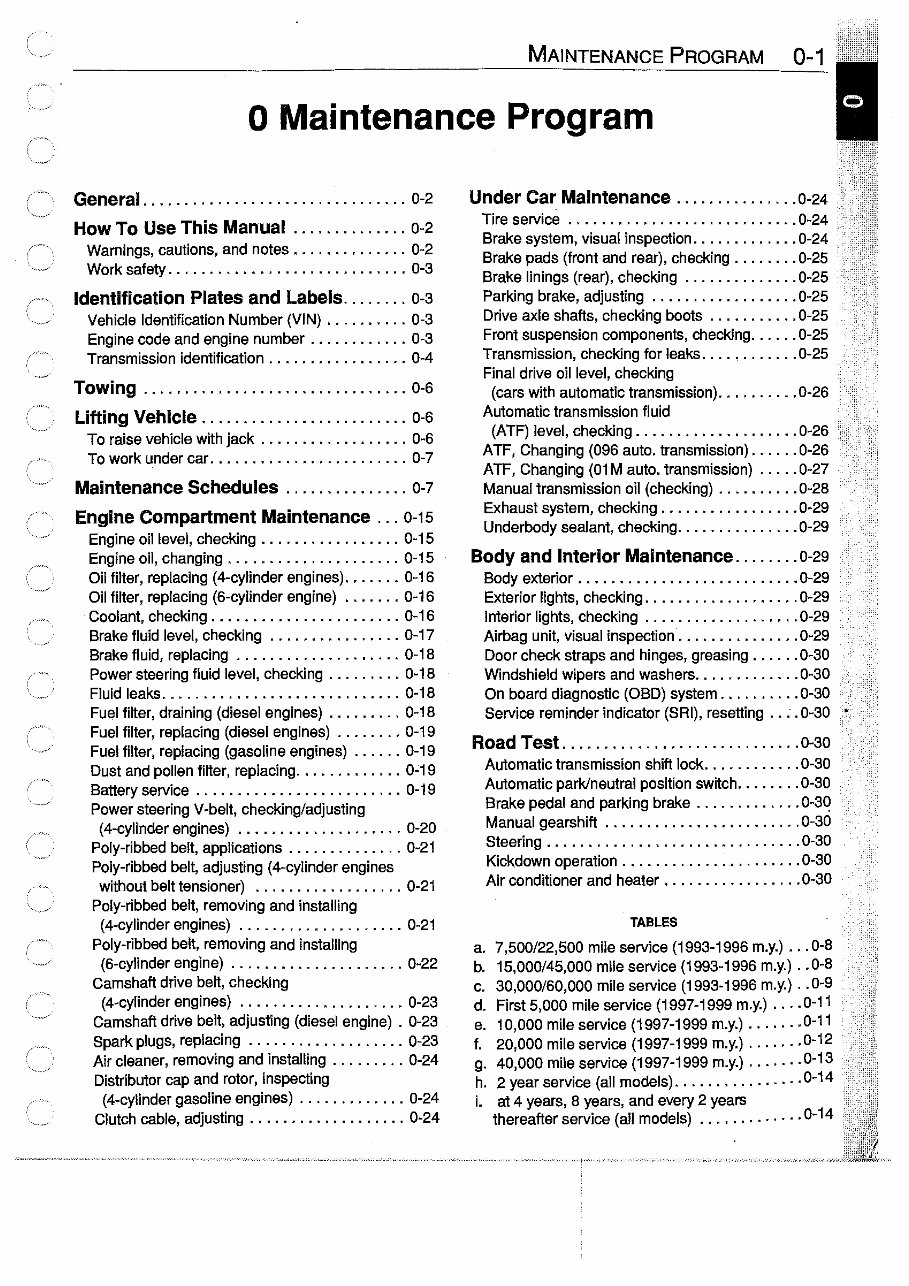
0 Maintenance Program
General ................................ o-2
How To Use This Manual .............. o-2
Warnings, cautions, and notes .............. 0-2
Work safety ............................. 0-3
Identification Plates and Labels . ....... o-3
Vehicle Identification Number (VIN) .......... 0-3
Engine code and engine number ............ 0-3
Transmission identification ................. 0-4
Towing ................................ 0-6
Lifting Vehicle ......................... o-6
To raise vehicle with jack . . . . . . . . . . . . . . . . . . 0-6
To work under car ........................ 0-7
Maintenance Schedules ............... o-7
Engine Compartment Maintenance ... 0-15
Engine oil level, checking ................. 0-15
Engine oil, changing ..................... 0-15
Oil filter, replacing (4-cylinder engines) ....... 0-16
Oil filter, replacing (6-cylinder engine) ....... 0-16
Coolant, checking ....................... 0-16
Brake fluid level, checking ................ 0-17
Brake fluid, replacing .................... 0-18
Power steering fluid level, checking ......... 0-18
Fluid leaks ............................. 0-18
Fuel filter, draining (diesel engines) ......... 0-18
Fuel filter, replacing (diesel engines) ........ 0-19
Fuel filter, replacing (gasoline engines) ...... 0-19
Dust and pollen filter, replacing ............. 0-19
Battery service . . . . . . . . . . . . . . . . . . . . . . . . . 0-19
Power steering V-belt, checking/adjusting
(4-cylinder engines) .................... 0-20
Poly-ribbed belt, applications .............. 0-21
Poly-ribbed belt, adjusting (4-cylinder engines
without belt tensioner) .................. 0-21
Poly-ribbed belt, removing and installing
(4-cylinder engines) .................... 0-21
Poly-ribbed belt, removing and installing
(6-cylinder engine) ..................... 0-22
Camshaft drive belt, checking
(4-cylinder engines) .................... 0-23
Camshaft drive belt, adjusting (diesel engine) . 0-23
Spark plugs, replacing ................... 0-23
Air cleaner, removing and installing ......... 0-24
Distributor cap and rotor, inspecting
(4-cylinder gasoline engines) ............. 0-24
Clutch cable, adjusting ................... 0-24
Under Car Maintenance .............. . 0-24
Tire service ............................ 0-24
Brake system, visual inspection ............. 0-24
Brake pads (front and rear), checking ........ 0-25
Brake linings (rear), checking .............. 0-25
Parking brake, adjusting .................. 0-25
Drive axle shafts, checking boots ........... 0-25
Front suspension components, checking ...... 0-25
Transmission, checking for leaks ............ 0-25
Final drive oil level, checking
(cars with automatic transmission) .......... 0-26
Automatic transmission fluid
(ATF) level, checking .................... 0-26
ATF, Changing (096 auto. transmission) ...... 0-26
ATF, Changing (01 M auto. transmission) ..... 0-27
Manual transmission oil (checking) .......... 0-28
Exhaust system, checking ................. 0-29
Underbody sealant, checking ............... 0-29
Body and Interior Maintenance . ....... 0-29
Body exterior ........................... 0-29
Exterior lights, checking ................... 0-29
Interior lights, checking ................... 0-29
Airbag unit, visual inspection ............... 0-29
Door check straps and hinges, greasing ...... 0-30
Windshield wipers and washers ............. 0-30
On board diagnostic (OBD) system .......... 0-30
Service reminder indicator (SRI), resetting .... 0-30
Road Test ............................. o-30
Automatic transmission shift lock ............ 0-30
Automatic park/neutral position switch ........ 0-30
Brake pedal and parking brake ............. 0-30
Manual gearshift ........................ 0-30
Steering ............................... 0-30
Kickdown operation ...................... 0-30
Air conditioner and heater ................. 0-30
TABLES
a. 7,500/22,500 mile service (1993-1996 m.y.) ... 0-8
b. 15,000/45,000 mile service (1993-1996 m.y.) .. 0-8
c. 30,000/60,000 mile service (1993-1996 m.y.) .. 0-9
d. First 5,000 mile service (1997-1999 m.y.) .... 0-11
e. 10,000 mile service (1997-1999 m.y.) ....... 0-11
f. 20,000 mile service (1997-1999 m.y.) ....... 0-12
g. 40,000 mile service (1997-1999 m.y.) ....... 0-13
h. 2 year service (all models) ................ 0-14
i. at 4 years, 8 years, and every 2 years
thereafter service (all models) .......... · · · 0-14
0-2 MAINTENANCE PROGRAM
GENERAL
All of the maintenance work described in this repair group is
important and should be carried out at the specified time or
mileage interval. The Owner's Manual, the Maintenance
Record, and the Warranty Booklet originally supplied with the
car contain the maintenance schedules that apply to your
Volkswagen. Following these schedules will ensure safe and
dependable operation. In addition, many of the maintenance
procedures are necessary to maintain warranty protection.
NOTE-
Volkswagen is constantly updating their recommended
maintenance procedures and requirements. The inforR
mat/on contained here may not include updates or reR
visions made by Volkswagen since publication of the
Owner's Manual, the Maintenance Record, and the
Warranty Booklet supplied with the car. If there is any
doubt about what procedures apply to a specific model
or model year, or what Intervals should be followed,
member that an authorized Volkswagen dealer has the
latest maintenance information.
HOW TO USE THIS MANUAL
The manual is divided into 1 0 main sections, or partitions:
0 Maintenance
1 Engine
2 Fuel, Ignition, and Exhaust Systems
3 Clutch, Transmission, and Final Drive
4 Suspension, Brakes, and Steering
5 Body-Assembly
6 Body-Components and Accessories
7 Body-Interior Trim
8 Heating and Air Conditioning
9 Electrical System
0 Maintenance Program covers the recommended sched-
ules and service procedures needed to do the Volkswagen-
specified scheduled maintenance work.
The remaining nine partitions (1 through 9) are repair ori-
ented and are broken down into individual repair groups.
Each main partition begins with a general information group,
e.g. 1 General Information. These general groups are
mostly descriptive in nature, covering topics such as theory
of operation and troubleshooting. The remainder of the re-
pair groups contain the more involved and more detailed
system repair information.
GENERAL
A master listing of the 1 0 partitions and the corresponding in-
dividual repair groups can be found on the inside book cover.
Thumb tabs are used on the first page of each repair group
page to help locate the groups quickly. Page numbers
throughout the manual are organized according to the repair
group system. For example, you can expect to find informa-
tion on engine removal and installation (Repair Group 1 0) be-
ginning on page 10-1. A comprehensive index can be found
on the last pages of the manual.
Warnings, Cautions and Notes
Throughout this manual are many passages with the head-
ings WARNING, CAUTION, or NOTE. These very important
headings have different meanings.
WARNING-
The text under this heading warns of unsafe practio-
es that are very likely to cause injury, either by direct
threat to the person(s} doing the work or by in·
creased risk of accident or mechanical failure while
driving. Warnings are always contained In a box.
CAUTION-
A caution calfs attention to important precautions
to be observed during the repair work that will help
prevent accidentally damaging the car or its parts.
Cautions are always contained in a box.
NOTE-
A note contains helpful information, tips that will help In
doing a better job and completing it more easily.
Please read every WARNING, CAUTION, and NOTE at the
front of the manual and as they appear in repair procedures.
They are very important. Read them before you begin any
maintenance or repair job.
Some WARNINGs and CAUTIONs are repeated wherever
they apply. Read them all. Do not skip any. These messages
are important, even to the owner who never intends to work on
the car.
Work Safety
Although an automobile presents many hazards, common
sense and good equipment can help ensure safety. Many ac-
cidents happen because of carelessness. Pay attention and
stick to these few important safety rules.
WARNING-
• Never run the engine in the work area unless it
is we/1-venfflated. The exhaust should be vented
to the outside. Galban Monoxide (CO) in the ex-
haust kills.
• Remove all neckties, scarfs, loose clothing, or
jewelry when working near running engines or
power tools. Tuck in shirts. Tie long hair and se-
cure it under a cap. Severe injury can result from
these things being caught in rotating parts.
• Remove rings, watches, and bracelets. Aside
from the dangers of moving parts, metallic jew-
. elry conducts electricity and may cause shorts,
sparks, burns, or damage to the electrical sys-
tem when accidentally contacting the battery or
other electrical terminals.
• Disconnect the battery negative (-) cable when-
ever working on or near the fuel system, airbag
system or anything that is electrically powered.
Accidental electrical contact may damage the
electrical system, cause fire, or result in serious
personal injury.
• Never work under a lifted car unless it is solidly
supported on jack stands that are intended for
that purpose. Do not support a car on cinder
blocks, bricks, or other objects that may shift or
crumble under continuous load. Never work un-
der a car that Is supported only by a jack.
• The fuel system retains pressure even when the
ignition is off. Loosen the fuel lines very slowly to
allow the residual pressure to dissipate gradually.
Avoid spraying fuel.
• Fuel is highly flammable. When working around
fuel, do not smoke or work near fire hazards.
Keep an approved fire extinguisher handy.
• Illuminate the work area adequately and safely.
Use a portable safety light for working inside or un-
der the car. A fluorescent type light is best because
ft gives off less heat. If using a light with a normal
incandescent bulb, use rough service bulbs to
avoid breakage. The hot filament of an accidental-
ly broken bulb can ignfte spilled fuel or oil.
• Keep sparks, lighted matches, and open flame
away from the top of the battery. Hydrogen gas
emitted by the battery is highly flammable. Any
nearby source of ignition may cause the battery
to explode.
• Never Jay tools or parts in the engine
ment or on top of the battery. They may tall and
be difficult to retrieve, become caught in belts or
other rotating parts, or cause electrical shorts
and damage to the electrical system.
MAINTENANCE PROGRAM
0-3
IDENTIFICATION PLATES AND LABELS
Vehicle Identification Number (VIN)
The vehicle year and model can be determined from the
VIN or the identification plate. Because stickers can fall off, be
painted over, or be moved, it is best to rely on numbers
stamped into the chassis.
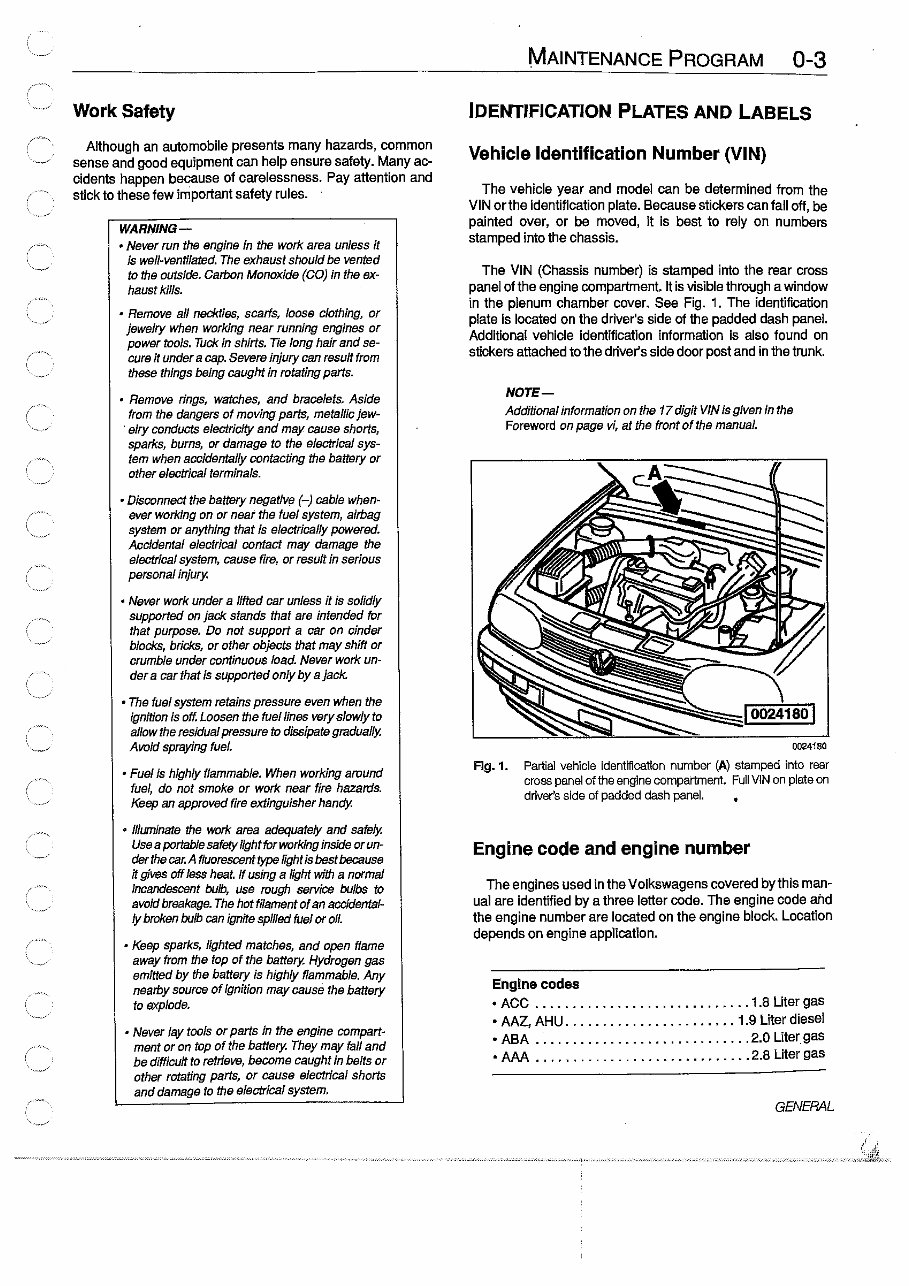
The VIN (Chassis number) is stamped into the rear cross
panel of the engine compartment. It is visible through a window
in the plenum chamber cover. See Fig. 1. The identification
plate is located on the driver's side of the padded dash panel.
Additional vehicle identification information is also found on
stickers attached to the driver's side door post and in the trunk.
NOTE-
Additional information on the 17 digit V/N is given in the
Foreword on page vi, at the front of the manual .
0024180
Fig. 1. Partial vehicle identification number (A) stamped into rear
cross panel of the engine compartment. Full VIN on plate on
driver's side of padded dash panel.
Engine code and engine number
The engines used in the Volkswagens covered by this man-
ual are identified by a three letter code. The engine code and
the engine number are located on the engine block. Location
depends on engine application.
Engine codes
• ACC ............................. 1 .8 Liter gas
• AAZ, AHU ....................... 1.9 Liter diesel
• ABA ............................. 2.0 Liter gas
• AAA ............................. 2.8 Liter gas
GENERAL
0-4 MAINTENANCE PROGRAM
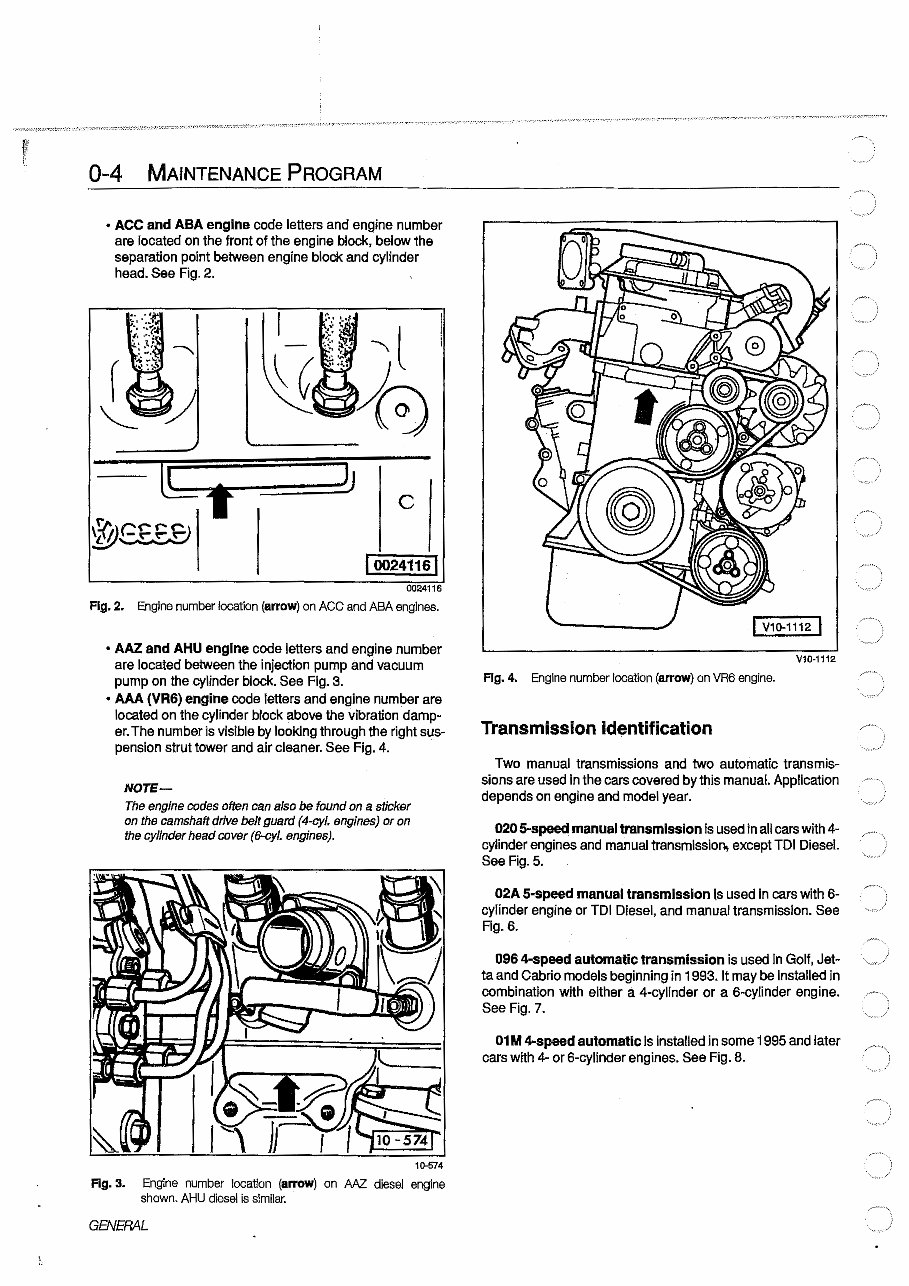
• ACC and ABA engine code letters and engine number
are located on the front of the engine block, below the
separation point between engine block and cylinder
head. See Fig. 2.
c
I 0o2411sl
0024116
Fig. 2. Engine number location (arrow) on ACC and ABA engines.
• AAZ and AHU engine code letters and engine number
are located between the injection pump and vacuum
pump on the cylinder block. See Fig. 3.
• AAA (VR6) engine code letters and engine number are
located on the cylinder block above the vibration damp-
er. The number is visible by looking through the right sus-
pension strut tower and air cleaner. See Fig. 4.
NOTE-
The engine codes often can also be found on a sticker
on the camshaft drive belt guard (4-cy/. engines) or on
the cylinder head cover {6-cy/. engines).
10-574
Fig. 3. Engine number location {arrow) on AAZ diesel engine
shown. AHU diesel is similar.
GENERAL
I V10-1112 I
V10-1112
Fig. 4. Engine number location (arrow) on VR6 engine.
Transmission identification
Two manual transmissions and two automatic transmis-
sions are used in the cars covered by this manual. Application
depends on engine and model year.
020 5-speed manual transmission is used in all cars with 4-
cylinder engines and manual transmission, except TDI Diesel.
See Fig.5.
02A 5-speed manual transmission i.s used in cars with 6-
cylinder engine or TDI Diesel, and manual transmission. See
Fig.6.
096 4-speed automatic transmission is used in Golf, Jet-
ta and Cabrio models beginning in 1993. It may be installed in
combination with either a 4-cylinder or a 6-cylinder engine.
See Fig. 7.
01 M 4-speed automatic is installed in some 1995 and later
cars with 4- or 6-cylinder engines. See Fig. 8.
You're Reading a Preview
What's Included?
 Lifetime Access
Fast Download Speeds
Online & Offline Access
Access PDF Contents & Bookmarks
Full Search Facility
Print one or all pages of your manual
$41.99
1993-1999 Volkswagen Jetta Golf GTI Cabrio A3 Platform Service & Repair Manual
Viewed 39 Times Today

What's Included?
Lifetime Access
Fast Download Speeds
Online & Offline Access
Access PDF Contents & Bookmarks
Full Search Facility
Print one or all pages of your manual
$41.99

Secure transaction
What's Included?
Lifetime Access
Fast Download Speeds
Online & Offline Access
Access PDF Contents & Bookmarks
Full Search Facility
Print one or all pages of your manual
Description
The Volkswagen Jetta, Golf, GTI, Cabrio (A3 Platform) Complete Workshop Service Repair Manual provides comprehensive and detailed information for owners and mechanics. With this manual, you can confidently perform maintenance, repairs, and troubleshooting on your Volkswagen vehicle.
Models covered in this manual:
- Volkswagen Jetta 1993
- Volkswagen Jetta 1994
- Volkswagen Jetta 1995
- Volkswagen Jetta 1996
- Volkswagen Jetta 1997
- Volkswagen Jetta 1998
- Volkswagen Jetta 1999
- Volkswagen Golf 1993
- Volkswagen Golf 1994
- Volkswagen Golf 1995
- Volkswagen Golf 1996
- Volkswagen Golf 1997
- Volkswagen Golf 1998
- Volkswagen Golf 1999
- Volkswagen GTI 1993
- Volkswagen GTI 1994
- Volkswagen GTI 1995
- Volkswagen GTI 1996
- Volkswagen GTI 1997
- Volkswagen GTI 1998
- Volkswagen GTI 1999
- Volkswagen Cabrio 1993
- Volkswagen Cabrio 1994
- Volkswagen Cabrio 1995
- Volkswagen Cabrio 1996
- Volkswagen Cabrio 1997
- Volkswagen Cabrio 1998
- Volkswagen Cabrio 1999
Whether you are a Volkswagen owner or a professional mechanic, this workshop service repair manual is an invaluable resource.


