

1997-2002 Toyota Corolla Service & Repair Manual
What's Included?
Fast Download Speeds
Online & Offline Access
Access PDF Contents & Bookmarks
Full Search Facility
Print one or all pages of your manual

Toyota Corolla
Owners Workshop Manual
Martynn Randall
Models covered
Saloon, Hatchback, Liftback & Estate, including special/limited editions
1.3 litre (1332cc), 1.4 litre (1398cc) & 1.6 litre (1587cc & 1598cc) petrol
Does NOT cover models with 1.8 litre (1762cc) petrol engine, diesel engines, or 4-wheel-drive
Does NOT cover new Corolla range introduced January 2002
© Haynes Publishing 2006
A book in the Haynes Service and Repair Manual Series
All rights reserved. No part of this book may be reproduced or
transmitted in any form or by any means, electronic or mechanical,
including photocopying, recording or by any information storage or
retrieval system, without permission in writing from the copyright
holder.
ISBN 1 84425 286 8
Printed in the USA
Haynes Publishing
Sparkford, Yeovil, Somerset BA22 7JJ, England
Haynes North America, Inc
861 Lawrence Drive, Newbury Park, California 91320, USA
Editions Haynes
4, Rue de I'Abreuvoir
92415 COURBEVOIE CEDEX, France
British Library Cataloguing in Publication Data Haynes Publishing Nordiska AB
A catalogue record for this book is available from the British Library. Box 1504, 751 45 UPPSALA, Sverige

Contents
LIVING WITH YOUR TOYOTA COROLLA
Safety first!
Introduction
Roadside repairs
Introduction
If your car won't start
Jump starting
Wheel changing
Identifying leaks
Towing
Weekly checks
Introduction
Underbonnet check points
Engine oil level
Coolant level
Brake and clutch fluid level
Washer fluid level
Tyre condition and pressure
Power steering fluid level
Wiper blades
Battery
Bulbs and fuses
Lubricants and fluids
Tyre pressures
Page 0•5
Page 0•6
Page 0•7
Page 0•7
Page 0•8
Page 0•9
Page 0•10
Page 0•10
Page 0•11
Page 0•11
Page 0•12
Page 0•12
Page 0•13
Page 0•13
Page 0•14
Page 0•15
Page 0•15
Page 0•16
Page 0•16
Page 0•17
Page 0•17
MAINTENANCE
Routine maintenance and servicing
Servicing specifications
Maintenance schedule
Maintenance procedures
Page 1•2
Page 1•4
Page 1•8

Contents
Engine in-car repair procedures
Engine removal and overhaul procedures
Cooling, heating and air conditioning systems
Fuel and exhaust systems
Emission control systems
Starting and charging systems
Ignition systems
Transmission
Clutch
Manual transmission
Automatic transmission
Driveshafts
Brakes and suspension
Braking system
Suspension and steering
Body equipment
Bodywork and fittings
Body electrical system
Wiring diagrams
REFERENCE
Dimensions and weights
Conversion factors
Buying spare parts
Vehicle identification
General repair procedures
Jacking and vehicle support
Tools and working facilities
MOT test checks
Fault finding
Glossary of technical terms
Page 2A•1
Page 2B•1
Page 3•1
Page 4A•1
Page 4B•1
Page 5A•1
Page 5B•1
Page 6•1
Page 7A•1
Page 7B•1
Page 8•1
Page 9•1
Page 10•1
Page 11•1
Page 12•1
Page 12•20
Page REF•1
Page REF•2
Page REF•3
Page REF•3
Page REF•4
Page REF•5
Page REF•6
Page REF•8
Page REF•12
Page REF•22
Index Page REF•27
REPAIRS & OVERHAUL
Engine and associated systems

0•4 Advanced Driving
Advanced driving
Many people see the words 'advanced
driving' and believe that it won't interest them
or that it is a style of driving beyond their own
abilities. Nothing could be further from the
truth. Advanced driving is straightforward
safe, sensible driving - the sort of driving we
should all do every time we get behind the
wheel.
An average of 10 people are killed every day
on UK roads and 870 more are injured, some
seriously. Lives are ruined daily, usually
because somebody did something stupid.
Something like 95% of all accidents are due
to human error, mostly driver failure.
Sometimes we make genuine mistakes -
everyone does. Sometimes we have lapses of
concentration. Sometimes we deliberately
take risks.
For many people, the process of 'learning to
drive' doesn't go much further than learning
how to pass the driving test because of a
common belief that good drivers are made by
'experience'.
Learning to drive by 'experience' teaches
three driving skills:
• Quick reactions. (Whoops, that was
close!)
• Good handling skills. (Horn, swerve,
brake, horn).
• Reliance on vehicle technology. (Great
stuff this ABS, stop in no distance even in
the wet...)
Drivers whose skills are 'experience based'
generally have a lot of near misses and the
odd accident. The results can be seen every
day in our courts and our hospital casualty
departments.
Advanced drivers have learnt to control the
risks by controlling the position and speed of
their vehicle. They avoid accidents and near
misses, even if the drivers around them make
mistakes.
The key skills of advanced driving are
concentration, effective all-round
observation, anticipation and planning.
When good vehicle handling is added to
these skills, all driving situations can be
approached and negotiated in a safe,
methodical way, leaving nothing to chance.
Concentration means applying your mind to
safe driving, completely excluding anything
that's not relevant. Driving is usually the most
dangerous activity that most of us undertake
in our daily routines. It deserves our full
attention.
Observation means not just looking, but
seeing and seeking out the information found
in the driving environment.
Anticipation means asking yourself what is
happening, what you can reasonably expect
to happen and what could happen
unexpectedly. (One of the commonest words
used in compiling accident reports is
'suddenly'.)
Planning is the link between seeing
something and taking the appropriate
action. For many drivers, planning is the
missing link.
If you want to become a safer and more skilful
driver and you want to enjoy your driving more,
contact the Institute of Advanced Motorists at
www.iam.org.uk, phone 0208 996 9600, or
write to IAM House, 510 Chiswick High Road,
London W4 5RG for an information pack.

Safety First! 0•5
Working on your car can be dangerous.
This page shows just some of the potential
risks and hazards, with the aim of creating a
safety-conscious attitude.
General hazards
Scalding
• Don't remove the radiator or expansion
tank cap while the engine is hot.
• Engine oil, automatic transmission fluid or
power steering fluid may also be dangerously
hot if the engine has recently been running.
Burning
• Beware of burns from the exhaust system
and from any part of the engine. Brake discs
and drums can also be extremely hot
immediately after use.
Crushing
• When working under or near
a raised vehicle
always
supplement the
jack with axle
stands, or use
drive-on
ramps.
Never
venture
under a car which
is only supported by a jack.
• Take care if loosening or tightening high-
torque nuts when the vehicle is on stands.
Initial loosening and final tightening should be
done with the wheels on the ground.
Fire
• Fuel is highly flammable; fuel vapour is
explosive.
• Don't let fuel spill onto a hot engine.
• Do not smoke or allow naked lights
(including pilot lights) anywhere near a
vehicle being worked on. Also beware of
creating sparks
(electrically or by use of tools).
• Fuel vapour is heavier than air, so don't
work on the fuel system with the vehicle over
an inspection pit.
• Another cause of fire is an electrical
overload or short-circuit. Take care when
repairing or modifying the vehicle wiring.
• Keep a fire extinguisher handy, of a type
suitable for use on fuel and electrical fires.
Electric shock
• Ignition HT
voltage can be
dangerous,
especially to
people with heart
problems or a
pacemaker. Don't
work on or near the
ignition system with
the engine running or
the ignition switched on
• Mains voltage is also dangerous. Make
sure that any mains-operated equipment is
correctly earthed. Mains power points should
be protected by a residual current device
(RCD) circuit breaker.
Fume or gas intoxication
• Exhaust fumes are
poisonous; they often
contain carbon
monoxide, which is
rapidly fatal if inhaled.
Never run the
engine in a
confined space
such as a garage
with the doors shut.
• Fuel vapour is also
poisonous, as are the vapours from some
cleaning solvents and paint thinners.
Poisonous or irritant substances
• Avoid skin contact with battery acid and
with any fuel, fluid or lubricant, especially
antifreeze, brake hydraulic fluid and Diesel
fuel. Don't syphon them by mouth. If such a
substance is swallowed or gets into the eyes,
seek medical advice.
• Prolonged contact with used engine oil can
cause skin cancer. Wear gloves or use a
barrier cream if necessary. Change out of oil-
soaked clothes and do not keep oily rags in
your pocket.
• Air conditioning refrigerant forms a
poisonous gas if exposed to a naked flame
(including a cigarette). It can also cause skin
burns on contact.
Asbestos
• Asbestos dust can cause cancer if inhaled
or swallowed. Asbestos may be found in
gaskets and in brake and clutch linings.
When dealing with such components it is
safest to assume that they contain asbestos.
Special hazards
Hydrofluoric acid
• This extremely corrosive acid is formed
when certain types of synthetic rubber, found
in some O-rings, oil seals, fuel hoses etc, are
exposed to temperatures above 400°C. The
rubber changes into a charred or sticky
substance containing the acid. Once formed,
the acid remains dangerous for years. If it
gets onto the skin, it may be necessary to
amputate the limb concerned.
• When dealing with a vehicle which has
suffered a fire, or with components salvaged
from such a vehicle, wear protective gloves
and discard them after use.
The battery
• Batteries contain sulphuric acid, which
attacks clothing, eyes and skin. Take care
when topping-up or carrying the battery.
• The hydrogen gas given off by the battery
is highly explosive. Never cause a spark or
allow a naked light nearby. Be careful when
connecting and disconnecting battery
chargers or jump leads.
Air bags
• Air bags can cause injury if they go off
accidentally. Take care when removing the
steering wheel and/or facia. Special storage
instructions may apply.
Diesel injection equipment
• Diesel injection pumps supply fuel at very
high pressure. Take care when working on
the fuel injectors and fuel pipes.
Warning: Never expose the hands,
face or any other part of the body
to injector spray; the fuel can
penetrate the skin with potentially fatal
results.
Remember...
DO
• Do use eye protection when using power
tools, and when working under the vehicle.
• Do wear gloves or use barrier cream to
protect your hands when necessary.
• Do get someone to check periodically
that all is well when working alone on the
vehicle.
• Do keep loose clothing and long hair well
out of the way of moving mechanical parts.
• Do remove rings, wristwatch etc, before
working on the vehicle - especially the
electrical system.
• Do ensure that any lifting or jacking
equipment has a safe working load rating
adequate for the job.
DON'T
• Don't attempt to lift a heavy component
which may be beyond your capability - get
assistance.
• Don't rush to finish a job, or take
unverified short cuts.
• Don't use ill-fitting tools which may slip
and cause injury.
• Don't leave tools or parts lying around
where someone can trip over them. Mop
up oil and fuel spills at once.
• Don't allow children or pets to play in or
near a vehicle being worked on.
0•6 Introduction
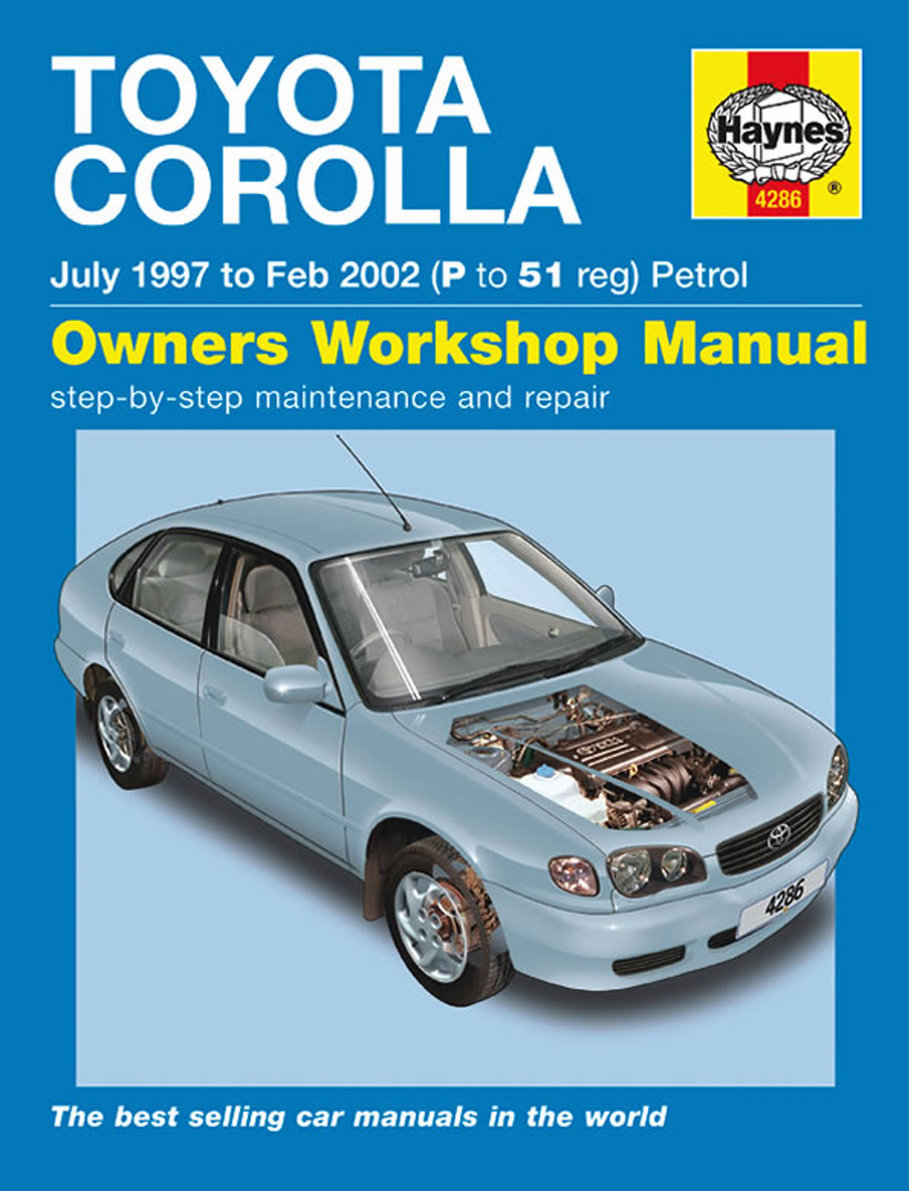
Toyota Corolla 3
Continuing the tradition of the 'World's
best-selling car', the range of Corolla models
covered by this manual offers a wide range of
body styles and engines, with the emphasis on
proven, solid engineering, further reinforcing
Toyota's deserved reputation for outstanding
reliability. Introduced in June 1997, the Corolla
was available as a 3-door Hatchback, 5-door
Liftback, 4-door Saloon and a 5-door Estate,
with a 5-door Hatchback version introduced
in October 1998. In October 1999, the range
underwent a facelift, with cosmetic revisions
to the front bumper, headlights, bonnet and
front grille. To coincide with the facelift, a new
range of petrol engines, with variable intake
camshaft timing, was introduced, replacing
the existing units.
The petrol engines are all fuel injected, in-line,
four-cylinder units of 1332 cc, 1398 cc, 1587 cc
door Hatchback
or 1598 cc displacement with double overhead
camshaft and 16 valves. All engines are normally
aspirated, with the 1.4 litre and 1.6 litre VVT-i
engines (October 1999-on), incorporating
an hydraulically controlled mechanism on
the intake camshaft which varies the valve
timing. This facility improves the driveability,
efficiency and emissions of the engines. All
engines feature a comprehensive engine
management system with extensive emission
control equipment. Although two diesel
engines were available, neither are covered
in this manual.
5- or 6-speed manual transmissions were
available, along with 3- or 4-speed automatic
options. Although a four-wheel-drive model
was available in some markets, only the front-
wheel-drive versions are covered by this
manual.
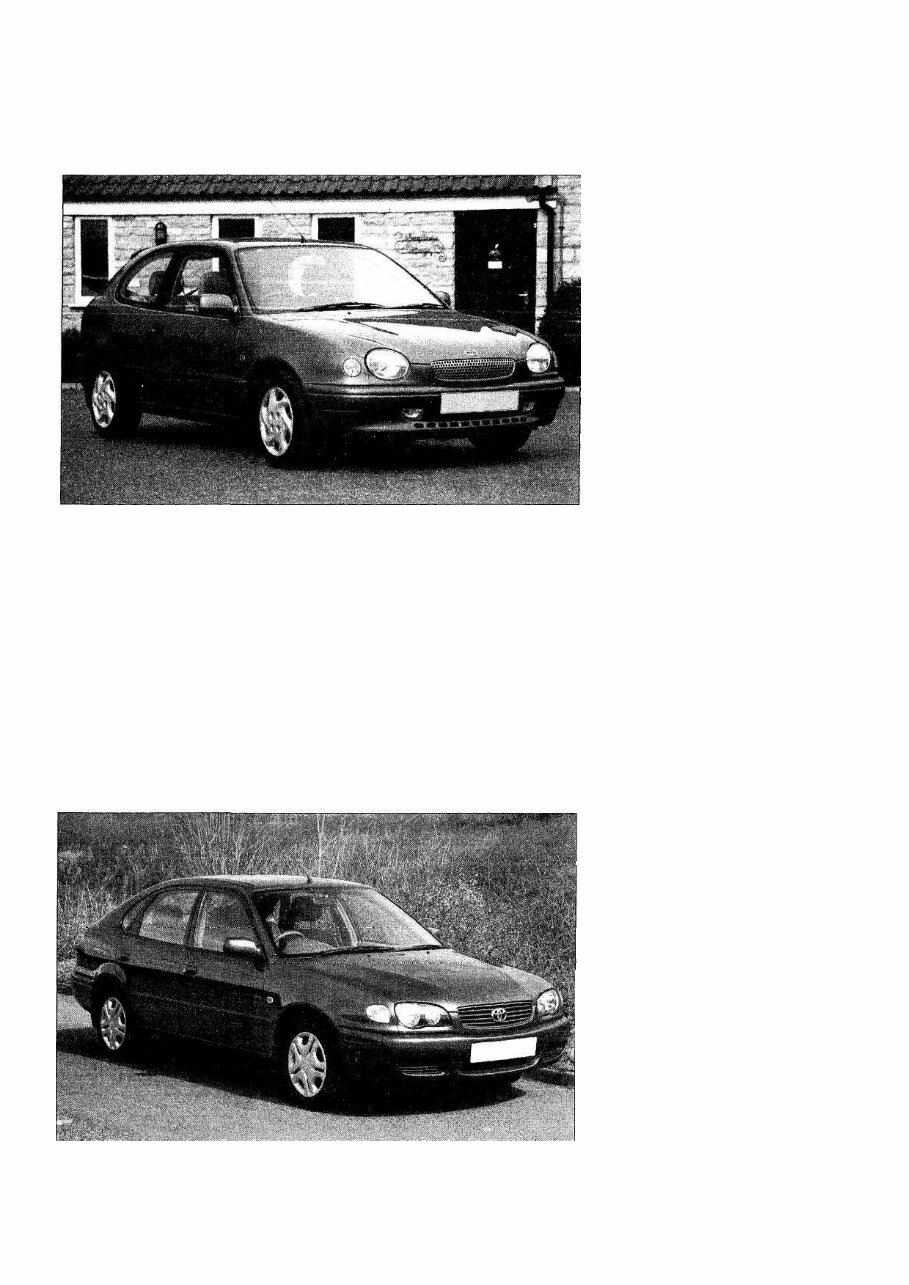
Toyota Corolla 5-door Liftback
Braking is by discs at the front, and by
drums or discs at the rear. Hydraulically
operated power-assisted steering is standard
on all models, with ABS available as an
option.
A wide range of standard and optional
equipment is available within the range to
suit virtually all tastes. Both a driver's and
passenger's airbag were fitted as standard,
with side airbags, incorporated into the front
seats, and front seat belt pretensioners,
available as an option on some models after
the October 1999 facelift.
Provided that regular servicing is carried
out in accordance with the manufacturer's
recommendations, the Toyota Corolla will
provide the enviable reliability for which this
marque is famous. The engine compartment
is relatively spacious, and most of the
items requiring frequent attention are easily
accessible.
Your Toyota manual
The aim of this manual is to help you get
the best value from your vehicle. It can do
so in several ways. It can help you decide
what work must be done (even should you
choose to get it done by a garage). It will also
provide information on routine maintenance
and servicing, and give a logical course of
action and diagnosis when random faults
occur. However, it is hoped that you will use
the manual by tackling the work yourself.
On simpler jobs it may even be quicker than
booking the car into a garage and going there
twice, to leave and collect it. Perhaps most
important, a lot of money can be saved by
avoiding the costs a garage must charge to
cover its labour and overheads.
The manual has drawings and
descriptions to show the function of the
various components so that their layout
can be understood. Tasks are described
and photographed in a clear step-by-step
sequence. The illustrations are numbered by
the Section number and paragraph number to
which they relate - if there is more than one
illustration per paragraph, the sequence is
denoted alphabetically.
References to the 'left' or 'right' of the
vehicle are in the sense of a person in the
driver's seat, facing forwards.
Acknowledgements
Thanks are due to Draper Tools Limited,
who provided some of the workshop tools,
and to all those people at Sparkford who
helped in the production of this manual.
We take great pride in the accuracy
of information given in this manual, but
vehicle manufacturers make alterations
and design changes during the production
run of a particular vehicle of which they do
not inform us. No liability can be accepted
by the authors or publishers for loss,
damage or injury caused by any errors in,
or omissions from the information given.

Roadside repairs 0•7
The following pages are intended to help in dealing with common roadside emergencies and breakdowns. You will find more
detailed fault finding information at the back of the manual, and repair information in the main chapters.
If your car won't start and
the starter motor doesn't
turn
• If it's a model with automatic transmission, make sure the selector
is in P or N.
• Open the bonnet and make sure that the battery terminals are
clean and tight.
• Switch on the headlights and try to start the engine. If the
headlights go very dim when you're trying to start, the battery is
probably flat. Get out of trouble by jump starting (see next page)
using a friend's car.
If your car won't start even
though the starter motor
turns as normal
• Is there fuel in the tank?
• Is there moisture on electrical components under the bonnet?
Switch off the ignition, then wipe off any obvious dampness with
a dry cloth. Spray a water-repellent aerosol product (WD-40 or
equivalent) on ignition and fuel system electrical connectors like
those shown in the photos.
Check the security of the ignition coil(s)
electrical connectors. B
Check the security of the airflow meter
wiring plug. C
Check that all fuses are still in good
condition and none have blown.
D
Check the security and condition of the
battery connections.
Check that electrical connections are secure (with the ignition switched off) and spray them with Check the security of the HT leads (non-
a water-dispersant spray like WD-40 if you suspect a problem due to damp E VVT-i engines).
A

0•8 Roadside repairs
Jump starting
When jump-starting a car using a booster
battery, observe the following precautions:
• Before connecting the booster battery,
make sure that the ignition is switched
off.
• Ensure that all electrical equipment
(lights, heater, wipers, etc) is switched off.
• Take note of any special precautions
printed on the battery case.
• Make sure that the booster battery is the
same voltage as the discharged one in
the vehicle.
• if the battery is being jump-started from
the battery in another vehicle, the two
vehicles MUST NOT TOUCH each other.
• Make sure that the transmission is in
neutral (or PARK, in the case of automatic
transmission).
Jump starting will get you out
of trouble, but you must correct
whatever made the battery go
flat in the first place. There are
three possibilities:
1
The battery has been drained by
repeated attempts to start, or by
leaving the lights on.
2
The charging system is not working
properly (alternator drivebelt slack
or broken, alternator wiring fault or
alternator itself faulty).
3
The battery itself is at fault
(electrolyte low, or battery worn out).
Connect one end of the red jump lead to
the positive (+) terminal of the flat
battery
Connect the other end of the red lead to
the positive (+) terminal of the booster
battery.
Connect one end of the black jump lead
to the negative (-) terminal of the booster
battery
Connect the other end of the black jump
lead to a bolt or bracket on the engine
on the vehicle to be started.
Make sure that the jump leads will not
come into contact with the cooling fan,
drivebelts or other moving parts of the
engine.
Start the engine using the booster
battery and run it at idle speed. Switch
on the lights, rear window demister and
heater blower motor, then disconnect
the jump leads in the reverse order of
connection. Turn off the lights etc.

Roadside repairs 0•9
Warning: Do not change a wheel in a situation where you risk being hit by other traffic. On busy roads, try to stop in a lay-by or
a gateway. Be wary of passing traffic while changing the wheel - it is easy to become distracted by the job in hand.
Wheel changing
Preparation
• When a puncture occurs, stop as soon as
it is safe to do so.
• Park on firm level ground, if possible, and
well out of the way of other traffic.
• Use hazard warning lights if necessary.
Changing the wheel
• If you have one, use a warning triangle to
alert other drivers of your presence.
• Apply the handbrake and engage first
or reverse gear (or Park on models with
automatic transmission).
• Chock the wheel diagonally opposite the
one being removed - a couple of large
stones will do for this.
• If the ground is soft, use a flat piece of
wood to spread the load under the jack.
1
From inside the luggage compartment,
remove the trim panel and remove the
jack.. .
4
Prise off the wheel trim (where fitted),
then slacken each wheel nut by a half
turn, using the wheelbrace. If the nuts are
too tight, DON'T stand on the brace to undo
them - call for assistance. On models with
alloy wheels, a Toyota socket may be needed
to remove the security nut - the socket should
be in the glovebox or toolkit.
2
. . . or lift the panel in the luggage
compartment floor. On some models the
tools are stored with the spare wheel.
5
Engage the jack head with the reinforced
bracket located at the end of the sill (don't
jack the vehicle at any other point of the
sill).
7
Fit the spare wheel, then fit and screw on
the nuts. Lightly tighten the nuts with the
wheelbrace, then lower the vehicle to the
ground. Securely tighten the wheel nuts in the
sequence shown, then refit the wheel trim or
hub cap, as applicable. The wheel nuts should
be slackened and retightened to the specified
torque (103 Nm) at the earliest possible
opportunity.
3
Lift the carpet then unscrew the spare
wheel retainer from the centre of the
wheel and lift out the wheel.
6
Turn the handle clockwise until the wheel
is raised clear of the ground, then unscrew
the wheel bolts and remove the wheel.
Finally...
• Remove the wheel chocks.
• Stow the jack and tools back in the car.
• Check the tyre pressure on the wheel just
fitted. If it is low, or if you don't have a
pressure gauge with you, drive slowly to
the nearest garage and inflate the tyre to
the correct pressure.
Note: Some models are supplied with a special
lightweight 'space-saver' spare wheel, the tyre
being narrower than standard, and marked
TEMPORARY USE ONLY. The space-saver
spare wheel is intended only for temporary use,
and must be replaced with a standard wheel as
soon as possible. Drive with particular care with
this wheel fitted, especially through corners and
when braking - Toyota recommend a maximum
speed of 50 mph (80 km/h) when the special
spare wheel is in use.
You're Reading a Preview
What's Included?
Fast Download Speeds
Online & Offline Access
Access PDF Contents & Bookmarks
Full Search Facility
Print one or all pages of your manual
$36.99
Viewed 73 Times Today


Secure transaction
What's Included?
Fast Download Speeds
Online & Offline Access
Access PDF Contents & Bookmarks
Full Search Facility
Print one or all pages of your manual
$36.99
This service and repair manual for the 1997-2002 Toyota Corolla is an essential resource for maintaining and fixing your vehicle. Whether you're a professional mechanic or a DIY enthusiast, this manual offers detailed instructions and step-by-step procedures.
- Covers all Toyota Corolla models from 1997 to 2002
- Inclusive of Sedan, Coupe, and Hatchback models
- Comprehensive information on engine, transmission, electrical systems, brakes, suspension, and more
- Includes troubleshooting guides and diagnostic procedures
- Features detailed illustrations and diagrams
- Offers valuable tips and advice for proper maintenance and care
- Authored by experienced automotive technicians
- Formatted in an easy-to-follow, user-friendly design
This manual enables you to save time and money by performing various repairs and maintenance tasks on your Toyota Corolla. Whether it's replacing a worn-out part or conducting a complete engine overhaul, this manual provides comprehensive coverage. Invest in this manual to keep your Toyota Corolla in top condition for years to come.


