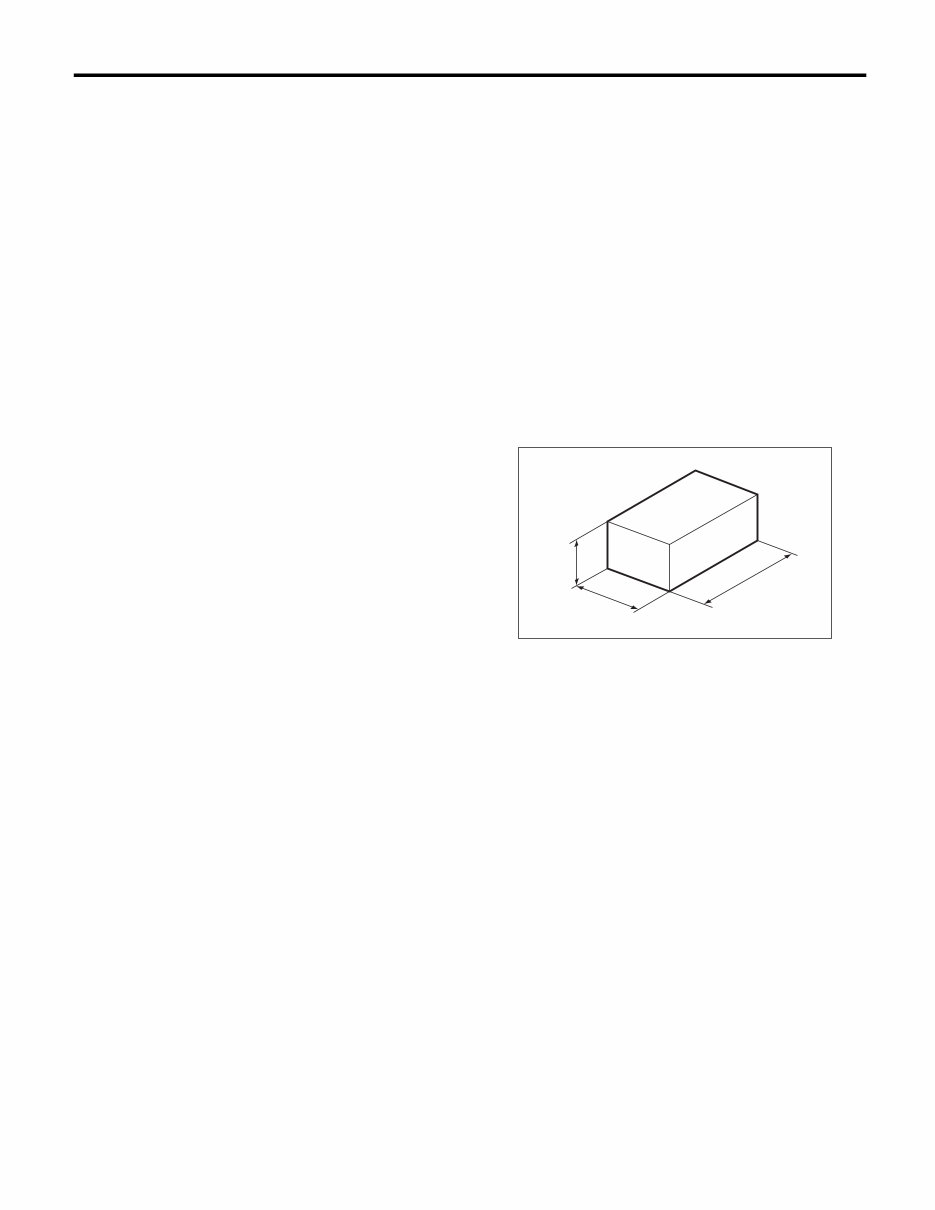
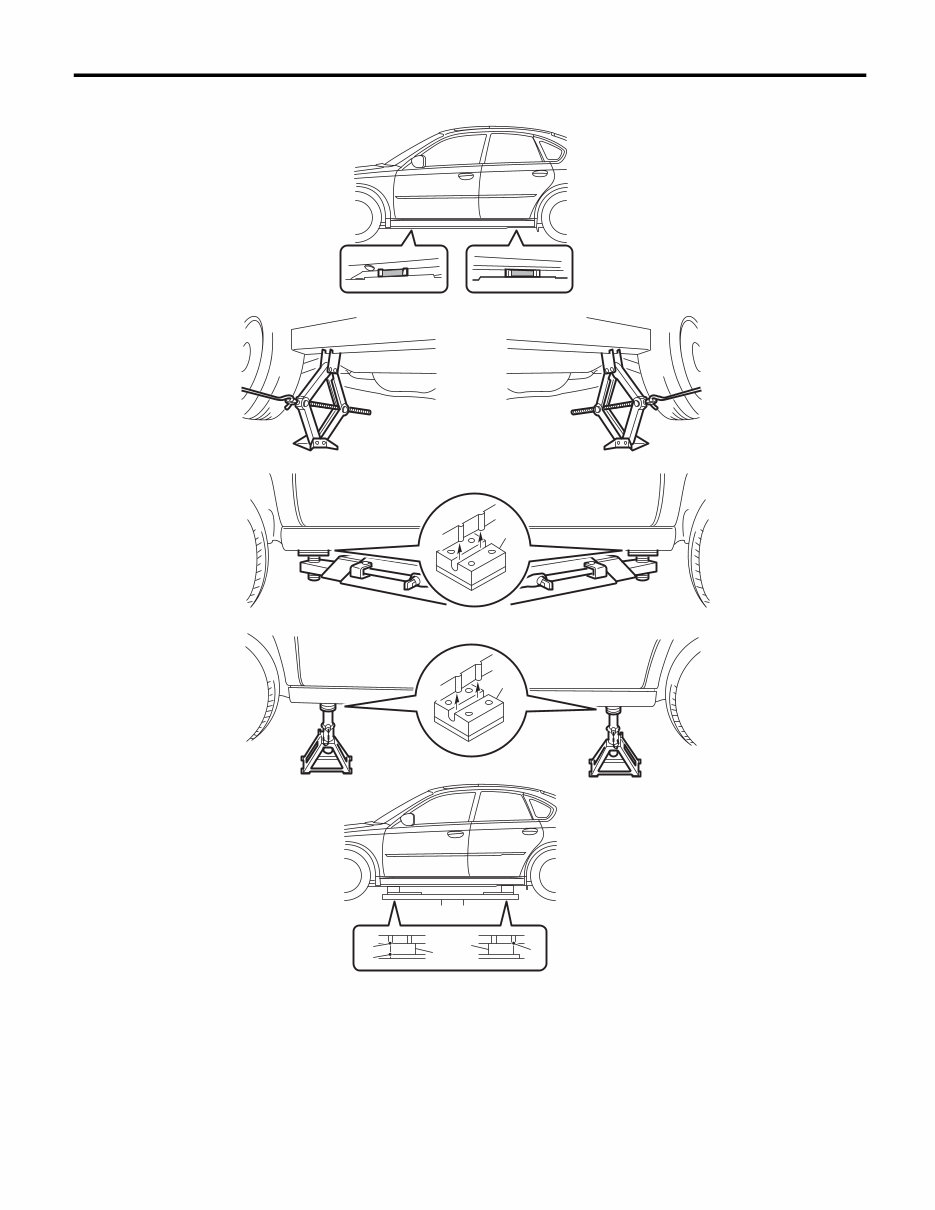
NT-2 Note NOTE 1. Note A: NOTE This is the information that can improve the effi- ciency of maintenance and assure the sound work. 1. FASTENERS NOTICE Fasteners are used to prevent the parts from dam- age, dislocation and play due to looseness. Fasten- ers must be tightened to the specified torque. Do not apply paint, lubricant, rust retardant or other substance to the surface around bolts, nuts, etc. Doing so will make it difficult to obtain the correct torque and result in looseness and other problem. 2. STATIC ELECTRICITY DAMAGE Do not touch the control modules, connectors, logic boards and other such parts when there is a possi- bility of static electricity. Always use a static elec- tricity prevention cord or touch grounded metal for the elimination of static electricity before conduct- ing work. 3. BATTERY When removing the battery terminal, always be sure to turn the ignition switch to OFF to prevent electrical damage of the control module from over- current. Be sure to remove the battery ground ca- ble first. 4. SERVICE PARTS Use genuine parts for maximum performance and maintenance when conducting repairs. Subaru/FHI will not be responsible for poor performance result- ing from the use of parts except for genuine parts. 5. PROTECTING VEHICLE UNDER MAIN- TENANCE Make sure to attach the fender cover, seat covers, etc. before work. 6. ENSURING SECURITY DURING WORK When working in a group of two or more, perform the work with calling each other to ensure mutual safety. 7. LIFT AND JACK When using a lift or shop jack raise a vehicle or us- ing rigid rack to support a vehicle, always follow in- structions concerning jack-up points and weight limits to prevent the vehicle from falling, which could result in injury. Be especially careful that the vehicle is balanced before raising it. Be sure to set the wheel stoppers when jacking-up only the front or rear side of the vehicle. NOTE: • When using a lift, follow its operation manual be- fore work. • Do not work or leave unattended while the vehi- cle is supported with jack, support it with rigid racks. • Be sure to use the rigid racks with rubber at- tached to cradle to support the vehicle. • When using a plate lift, use a rubber attachment. • Align the cushion rubber end of plate lift with the end of rubber attachment. (Portion b) Also, align the protrusion portion of the supporting locations with the end of attachment. (Portion a) (A) 80 mm (3.1 in) or more (B) 100 — 150 mm (3.94 — 5.91 in) (C) 120 — 190 mm (4.72 — 7.48 in) NT-00070 (A) (B) (C)
NT-3 Note NOTE • Do not use the plate lift whose attachment does not reach the supporting locations. (1) Supporting locations (3) Swing arm lift (5) Plate lift (2) Pantograph jack (4) Rigid rack (6) Attachment NT-00086 a a b (1) (2) (3) (4) (5) (6) (6) (6) (6)
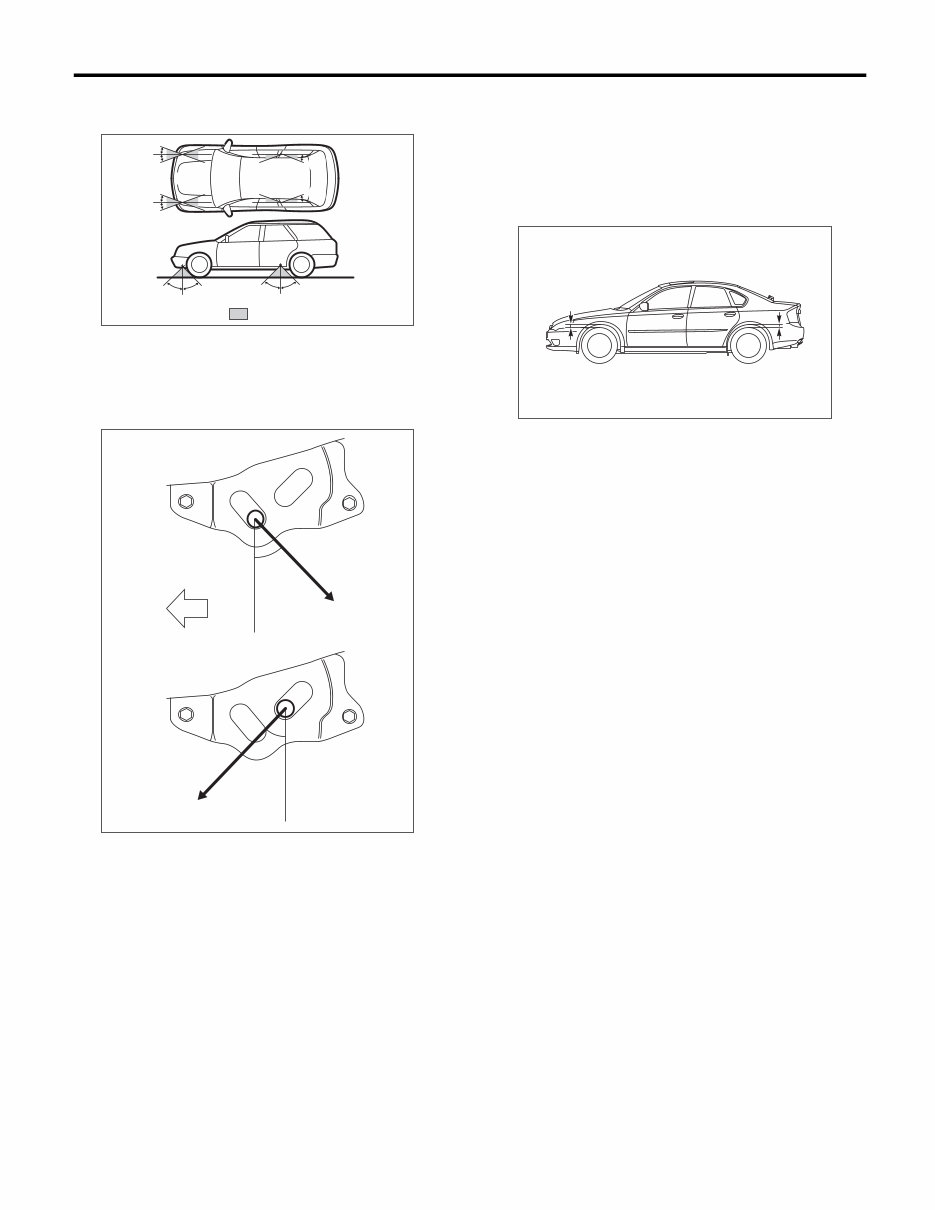
NT-4 Note NOTE (A) Front (B) Rear (1) Front crossmember (2) Rear differential NT-00072 (1) (2) (A) (B)
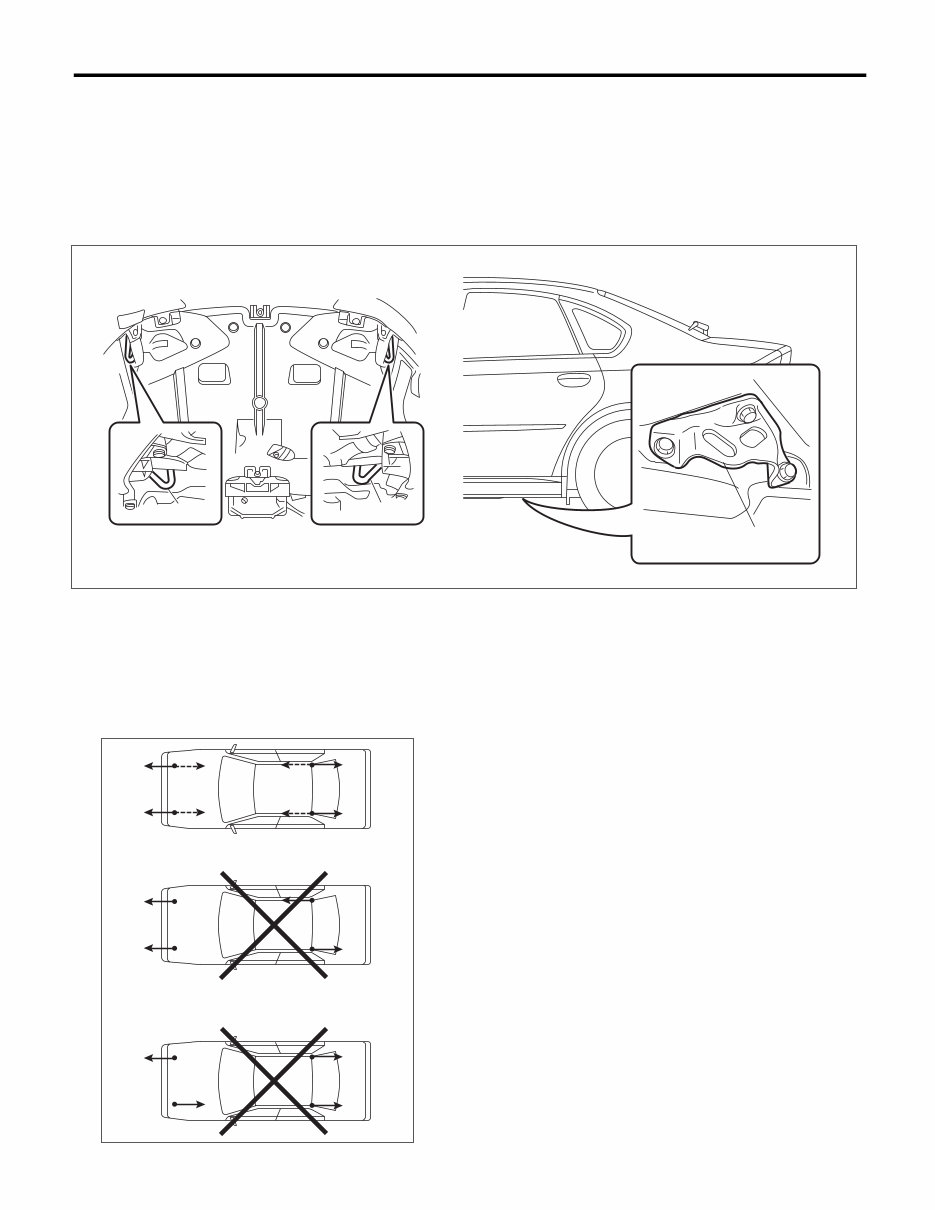
NT-5 Note NOTE 8. TIE-DOWNS Tie-downs are used when transporting vehicles and when using the chassis dynamo. Attach tie-down only to the specified locations on the vehicle. • Tie-down location CAUTION: Use the T-hook for rear tie-down. Do not use the hook other than T-hook, otherwise it can be removed when transporting vehicles • CHAIN DIRECTION AT TIE-DOWN CONDITION NOTE: Pull the chains LH and RH in the same direction, but front and rear side in the counter direction. Pull all the chains in a same moment. (1) (1) (1) NT-00149 (1) Hook for tie-down NT-00117
NT-6 Note NOTE • CHAIN PULLING RANGE AT TIE-DOWN CON- DITION • VEHICLE SINKING VOLUME AT TIE-DOWN CONDITION Measure the distance between the highest tire point and highest arch point before and after tie- down. Difference of measured values (sinking vol- ume) should be within 50 mm (1.97 in) and make sure to fix the vehicle securely. (1) Chain pulling range at tie-down condition (2) 20° (3) 45° (F) Front side (1) Tightening direction of chain (2) 45° NT-00122 (2) (2) (2) (2) (3) (3) (3) (3) : (1) (2) (2) NT-00151 (1) (1) (2) (2) F NT-00076 L L
You're Reading a Preview
What's Included?
Lifetime Access
Fast Download Speeds
Offline Viewing
Access Contents & Bookmarks
Full Search Facility
Print one or all pages of your manual
$37.99
2006 SUBARU LEGACY BL BP Service and Repair Manual
Get your hands on the 2006 SUBARU LEGACY BL BP Service and Repair Manual. Whether you're a professional mechanic or a DIY enthusiast, these Auto Repair Manuals provide comprehensive instructions and procedures to help you fix your vehicle. The manual contains technical data, diagrams, a complete list of car parts, and pictures, making it easy for even novice car mechanics to follow along. It covers all models and repairs A-Z, providing step-by-step instructions, wiring schematics, and specifications to facilitate easy vehicle repair. The manual is compatible with Windows and Mac, and it includes maintenance, engine, control system, mechanical, fuel service specifications, and much more. With printable pages, you can take the manual with you to the garage or workshop, ensuring that it stays clean and intact. This comprehensive manual is a valuable resource that can save you time and money, allowing you to stay up-to-date and knowledgeable about your vehicle's repair needs.
Complete instructions and procedures for vehicle repair
Useful for professional mechanics and DIY enthusiasts
Contains technical data, diagrams, and a complete list of car parts
Compatible with Windows and Mac
Printable pages for easy reference in the garage or workshop
Reviews
Q&A
Recently Viewed
5,521,897Happy Clients
2,594,462eManuals
1,120,453Trusted Sellers
15Years in Business
Price:
Actual Price:
2006 SUBARU LEGACY BL BP Service and Repair Manual