
")
2003-2007 Saab 9-3 Service & Repair Manual
What's Included?
Fast Download Speeds
Offline Viewing
Access Contents & Bookmarks
Full Search Facility
Print one or all pages of your manual
2006-07 ENGINE
Basic Engine 4-Cylinder Petrol - 9-3 (9440)
REPAIR INSTRUCTIONS
POWER TRAIN REMOVAL
To Remove
1. Place the car on a lift and apply wing covers.
2. Open the cap on the expansion tank.
3. Raise the car slightly and remove the front wheels.
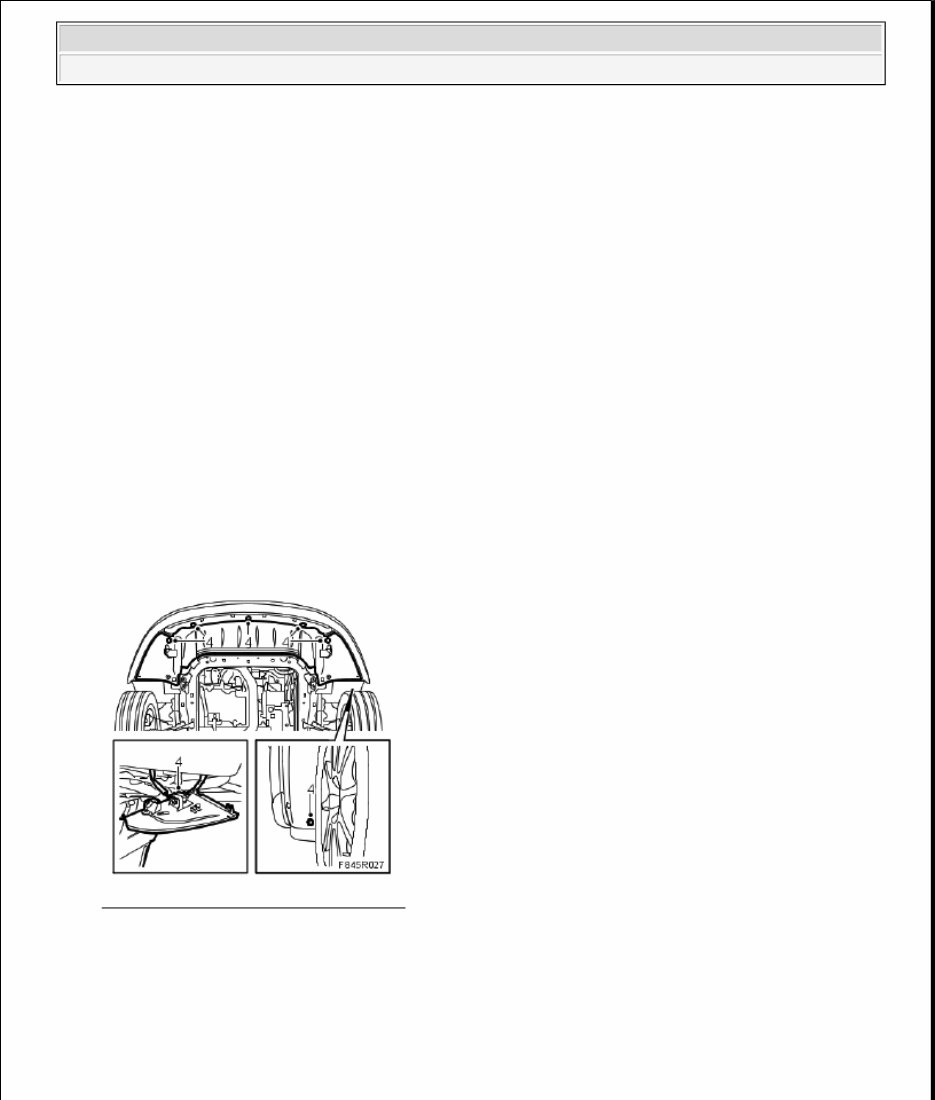
4. Remove the lower spoiler shield. Unplug and remove the connector.
Fig. 1: Removing Lower Spoiler Shield
Courtesy of SAAB-SCANIA OF AMERICA, INC.
5. Place a receptacle under the car, connect a hose to the radiator and drain the coolant.
WARNING: There is a large number of cables, hoses, wires, etc., that are secured with
hard plastic cable ties. After tightening, the loose ends of these cable ties
are cut off and may leave more or less sharp edges at fixing points.
Pay attention to the risk of cuts caused by these sharp ends!
2006 Saab 9-3 Aero
2006-07 ENGINE Basic Engine 4-Cylinder Petrol - 9-3 (9440)
2006 Saab 9-3 Aero
2006-07 ENGINE Basic Engine 4-Cylinder Petrol - 9-3 (9440)
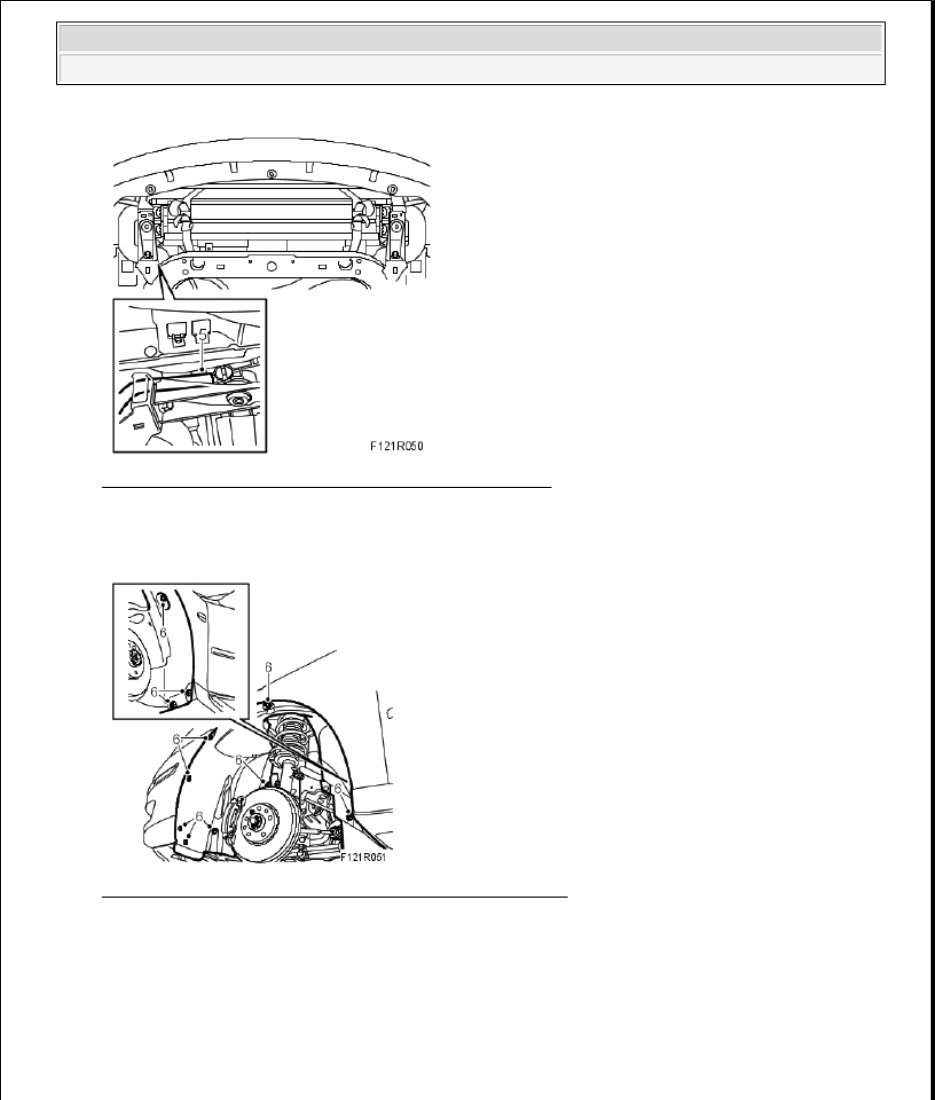
Fig. 2: Connecting Hose To Radiator & Draining Coolant
Courtesy of SAAB-SCANIA OF AMERICA, INC.
6. Remove the wing liners from both front wheel housings and the cover by the gearbox.
Fig. 3: Removing Wing Liners From Front Wheel Housings
Courtesy of SAAB-SCANIA OF AMERICA, INC.
7. Detach the hose for the headlamp washers and drain the washer fluid reservoir.
2006 Saab 9-3 Aero
2006-07 ENGINE Basic Engine 4-Cylinder Petrol - 9-3 (9440)

This manual is sold and compiled by
Fixyourcar2008@aol.com. Duplication and resell is not
permitted.
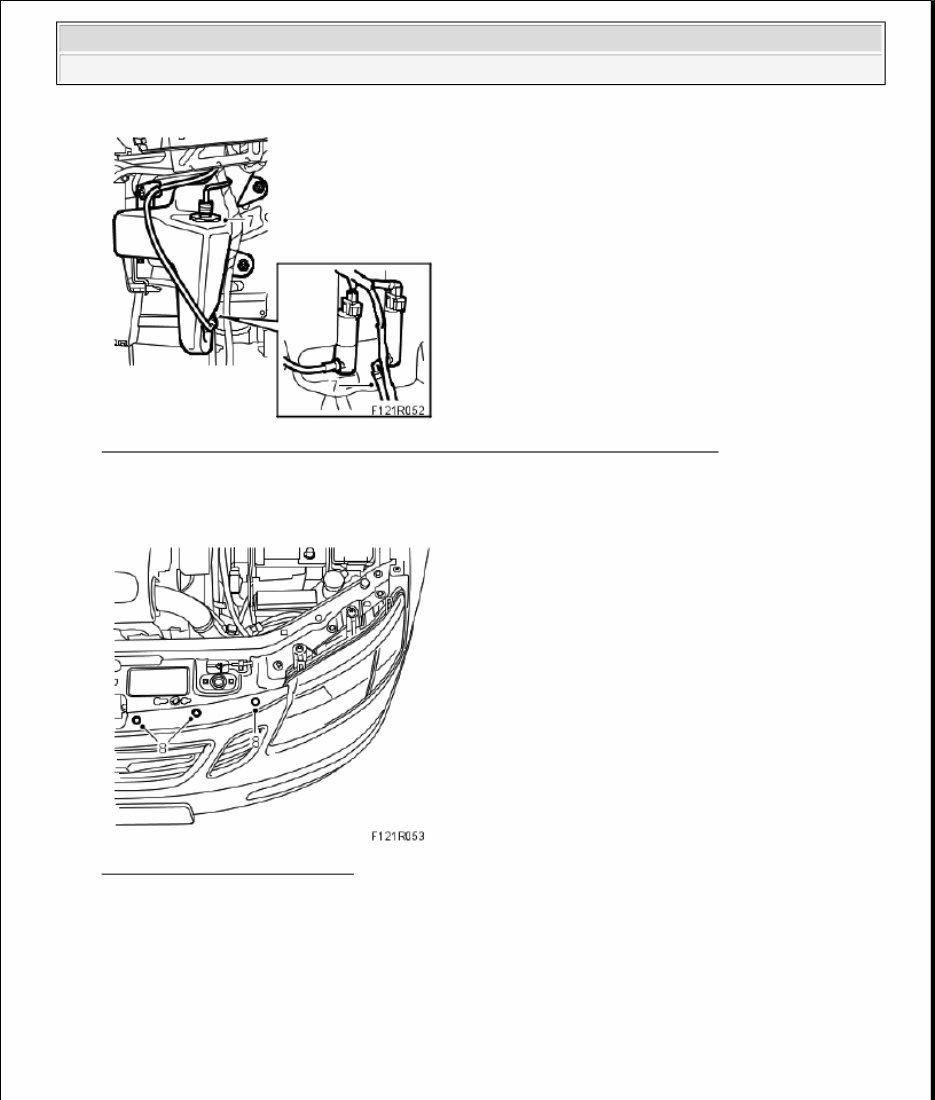
Fig. 4: Removing Headlamp Washer Hose & Draining Washer Fluid Reservoir
Courtesy of SAAB-SCANIA OF AMERICA, INC.
8. Lower the car slightly and remove the bumper.
Fig. 5: Removing Front Bumper
Courtesy of SAAB-SCANIA OF AMERICA, INC.
9. Remove the cover on the left-hand side and the charge air hose between the charge air pipe and the charge
air cooler.
2006 Saab 9-3 Aero
2006-07 ENGINE Basic Engine 4-Cylinder Petrol - 9-3 (9440)
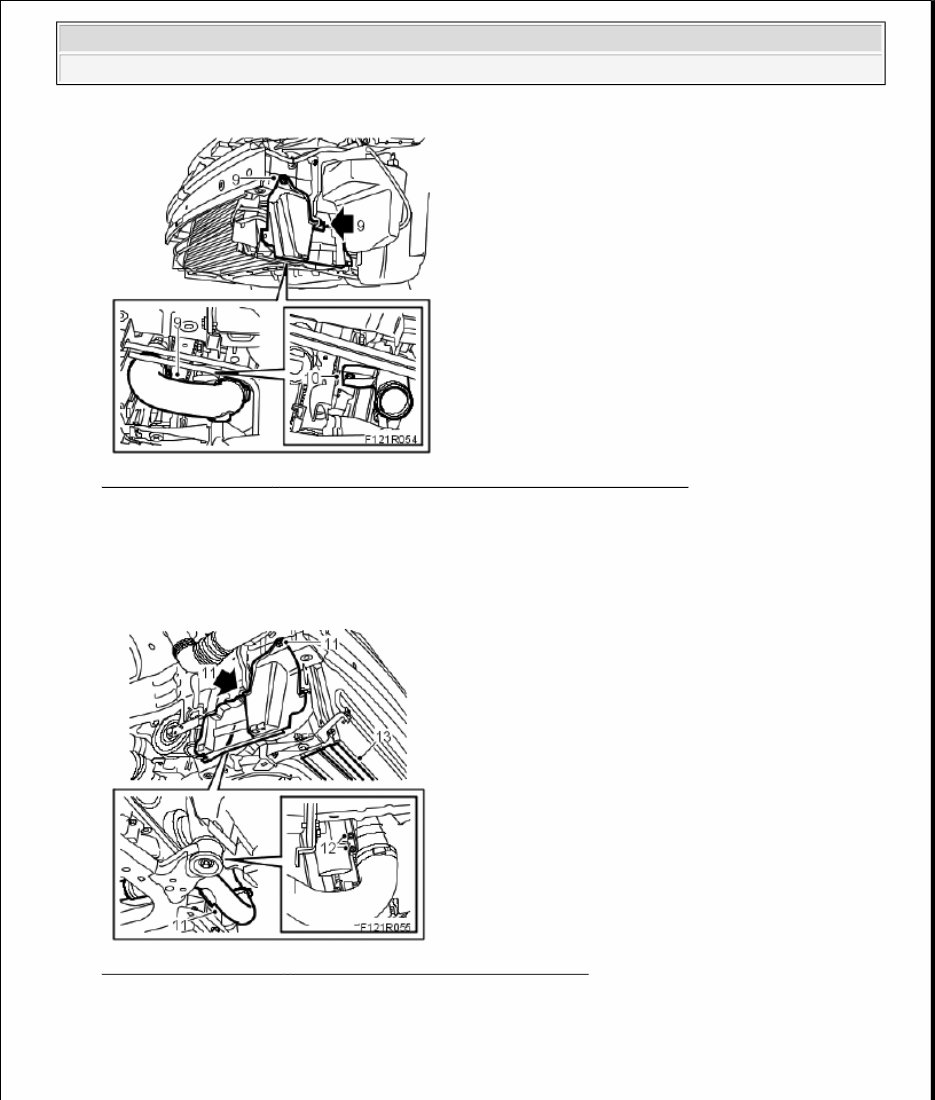
Fig. 6: Removing Left - Hand Side Cover & Lower Charge Air Pipe Bracket
Courtesy of SAAB-SCANIA OF AMERICA, INC.
10. Remove the lower charge air pipe bracket from the fan cowling.
11. Remove the cover on the right-hand side and the hose between the charge air cooler and the charge air
pipe.
Fig. 7: Removing Right - Hand Side Cover & Dryer Filter Bolts
Courtesy of SAAB-SCANIA OF AMERICA, INC.
12. Remove the dryer filter bolts from the radiator.
13. Remove the lower seal between the charge air cooler and the radiator.
14. Lower the car and remove the upper engine cover.
2006 Saab 9-3 Aero
2006-07 ENGINE Basic Engine 4-Cylinder Petrol - 9-3 (9440)
You're Reading a Preview
What's Included?
Fast Download Speeds
Offline Viewing
Access Contents & Bookmarks
Full Search Facility
Print one or all pages of your manual
$24.99
$32.99
Viewed 41 Times Today


Secure transaction
What's Included?
Fast Download Speeds
Offline Viewing
Access Contents & Bookmarks
Full Search Facility
Print one or all pages of your manual
$24.99
$32.99
- The 2003-2007 Saab 9-3 Service & Repair Manual is a comprehensive resource for fixing vehicle issues through a Do-It-Yourself approach.
- It includes troubleshooting and replacement procedures recommended by the manufacturer, featuring step-by-step instructions, clear images, and exploded-view illustrations.
- Regular maintenance is essential for the durability of your vehicle, and this manual provides the manufacturer's recommended troubleshooting charts and replacement procedures.
- By utilizing this manual, you can save on repairs, enhance your vehicle's reliability, and reduce visits to the repair shop.
- Conveniently access specific information without flipping through numerous pages, and easily carry, search, screenshot, and bookmark the content.
- It is available in English and compatible with various electronic devices such as PC, Mac computers, Android and Apple smartphones, and tablets.
- The manual is in PDF format and requires Adobe Reader for access.
- It is also printable if a physical copy is preferred.


