General information Contents Page 01 02 03 05 07 SPECIFICATIONS Engine - Clutch - Gearbox 01-1 Vehicle identification 01-3 LIFTING Trolley jack - Strapping 02-1 Axle stands 02-2 TOWING All types 03-1 OIL CHANGE Engine 05-1 Gearbox 05-3 Power assisted steering 05-4 Brake circuit 05-5 Particle filters 05-6 VALUES AND SETTINGS Dimensions 07-1 Capacities - Grades 07-2 Accessories belt tension 07-3 Tightening the cylinder head 07-4 Dimensions of the main braking components 07-5 Front axle geometry checking values 07-6 Rear axle geometry checking values 07-7 Underbody height 07-8 Tyres 07-9
SPECIFICATIONS Engine- Clutch - Gearbox 01 101 SPECIFICATIONS Engine- Clutch - Gearbox VEHICLE IDENTIFICATION Example: D : Type of bodywork (coupe) E : Project code 0T : Engine suffix Vehicle type Engine Clutch type Gearbox type Type Capacity DE0 T L7X 2963 LUK PK6 01-1
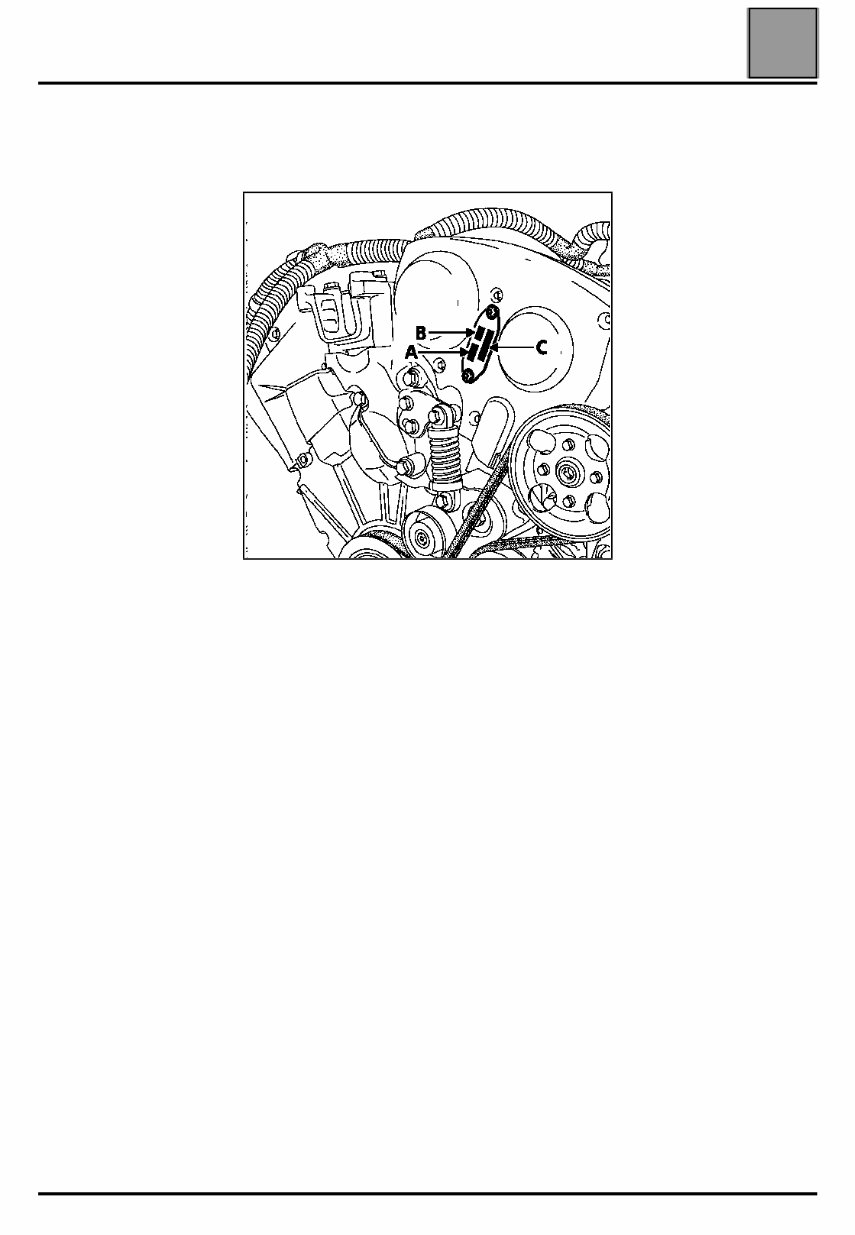
SPECIFICATIONS Engine- Clutch - Gearbox 01 01-2 ENGINE IDENTIFICATION Visual reminder. A: Engine type and approval B: Renault identification and engine suffix C: Engine fabrication number
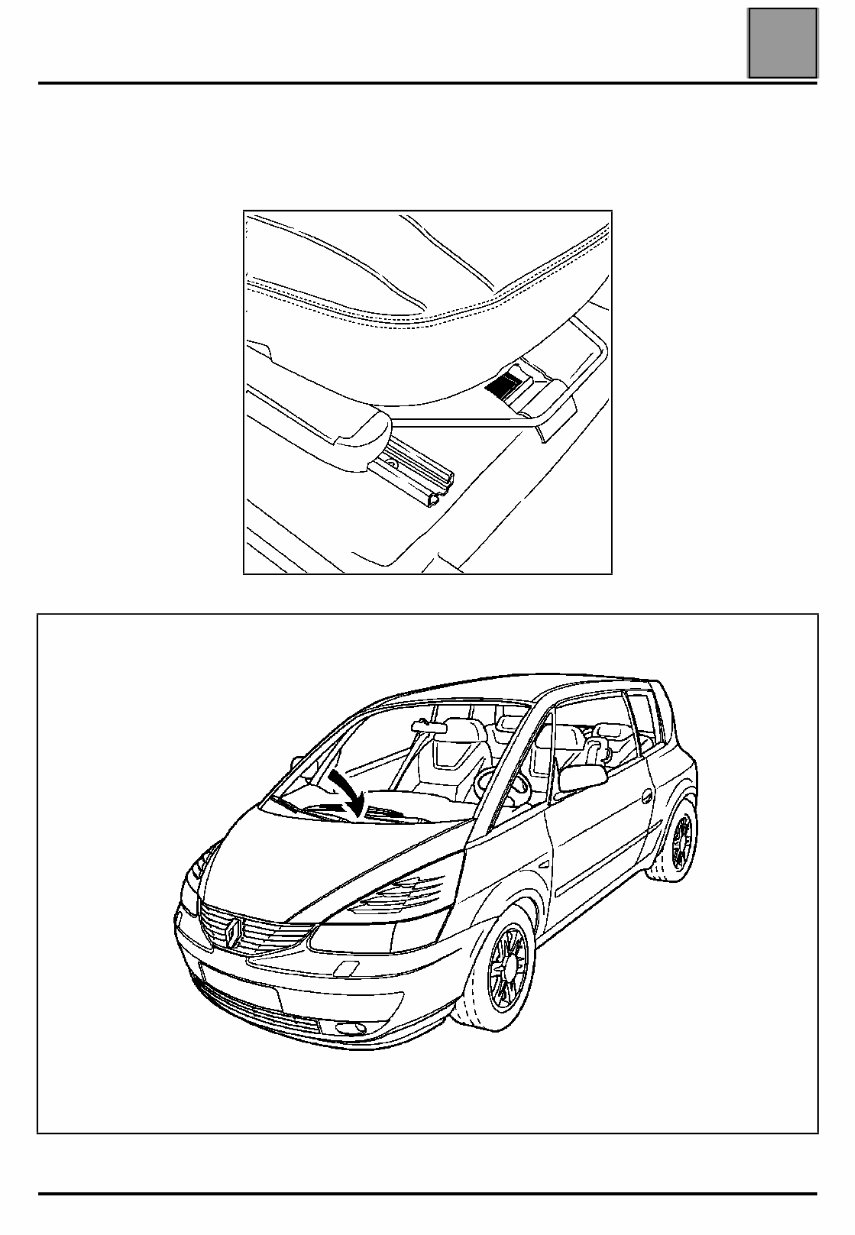
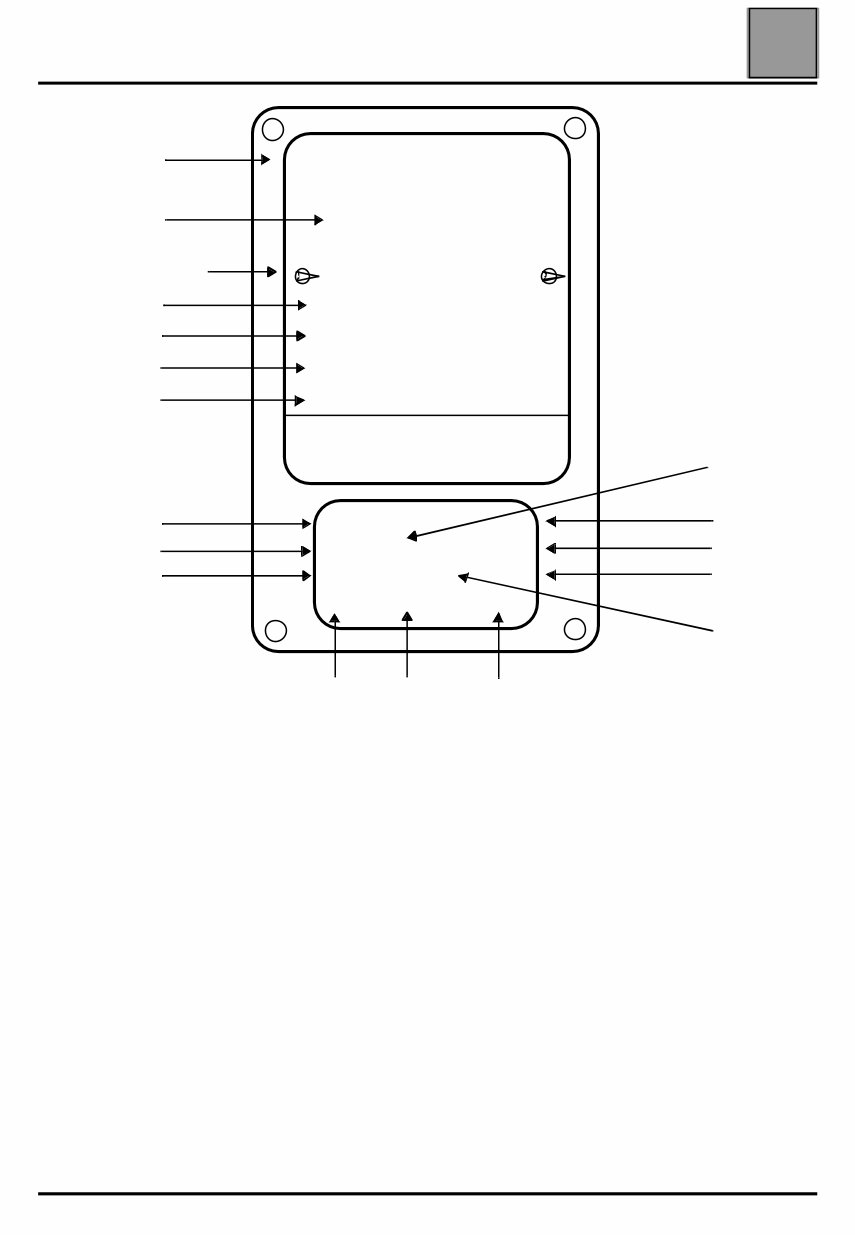
SPECIFICATIONS Vehicle identification 01 01-3 Vehicle identification LOCATION OF VEHICLE IDENTIFICATION PLATE On the floor crossmember at the foot of the front right-hand seat, by lifting up the flap built into the carpet. The chassis number is also under the windscreen.
SPECIFICATIONS Vehicle identification 01 01-4 It includes: A : Manufacturer's name B : EEC approval number C : Vehicle type preceded by the manufacturer's world identification code (VF8 corresponds to MATRA AUTOMOBILE) D : Chassis number E: Maximum permissible all-up weight (P.T.M.A.) F: Maximum permitted total train weight (P.T.R. - vehicle loaded with trailer) G: Maximum gross front axle load (P.T.M.A. front axle) H : Maximum gross rear axle load (P.T.M.A. rear axle) 1: Vehicle type 2: Equipment level 3: Grade of paintwork and body paint part number 4: Special or limited series 5: Letter identifying the factory of manufacture, followed by the fabrication number 6: Additional factory option equipment 7: Interior matching code 8: Seat trim material 9 - 10: The Parts Catalogue pictogram identification 11: Special technical features NOTE: depending on the export country, some indications may not be included on the plate. The plate shown above is the most complete. A MATRA AUTOMOBILE S.A. B 00 00/00 * 0000 * 00* C D 00000000000000000 E 0000 Kg F 0000 Kg G 1 0000 Kg H 2 0000 Kg 000 *0000 0 *000000 4 1 5 0000 0 000000 2 00 000000 0000 6 00000 0000 00000 7 3 00 0000 0000 8 11 10 9
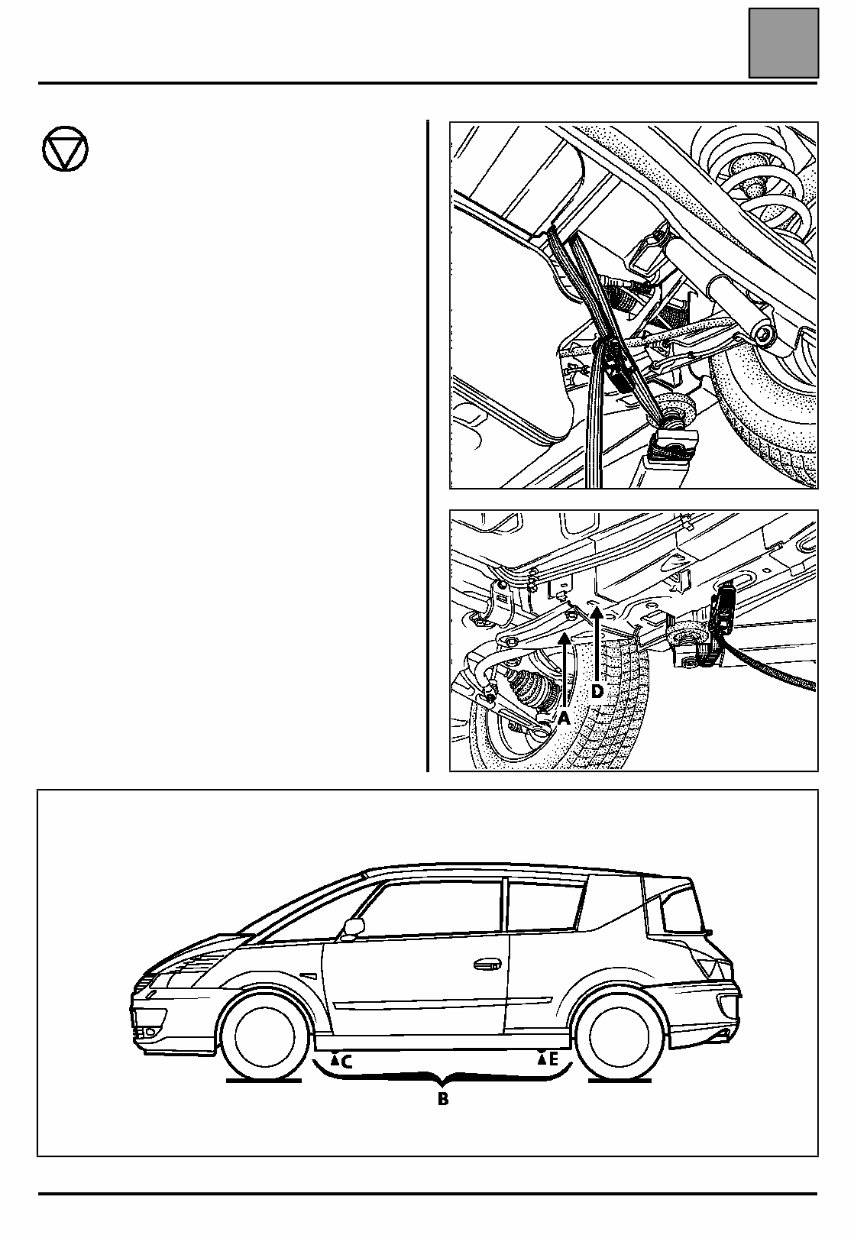
LIFTING Trolley jack - Strapping 02 02-1 102 LIFTING Trolley jack - Strapping If a trolley jack is used, appropriate axle stands must always be used. TROLLEY JACK It is forbidden to lift the vehicle with support from under the front suspension arm, under the front wheel arch reinforcement triangles (A ), under the rear axle crossmember and on the full length of the sill panel ( B). LIFTING THE VEHICLE To lift the front: – place the trolley jack on the jack support (C ) or the front side member extension ( D). To lift the rear: – use the tool kit jack supports ( E). VEHICLE STRAPPING Strapping is done beneath the floor because the doors no longer allow returning through the passenger compartment.
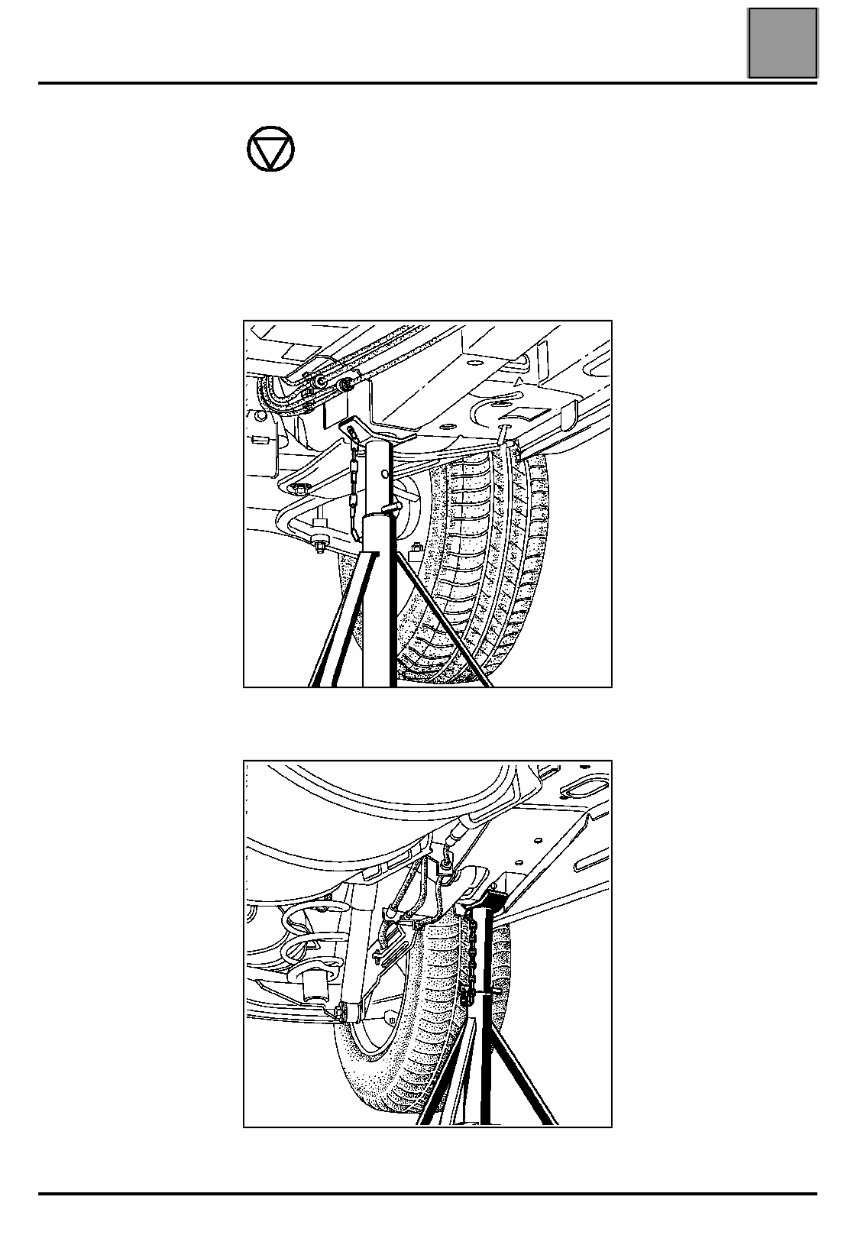
LIFTING Axle stands 02 02-2 Axle stands Warning: If a trolley jack is used, appropriate axle stands must always be used. AXLE STANDS When the vehicle is to be placed on axle stands, these must be positioned: – at the front under the side members behind the triangular reinforcements, – at the rear under the arm anchorage members.
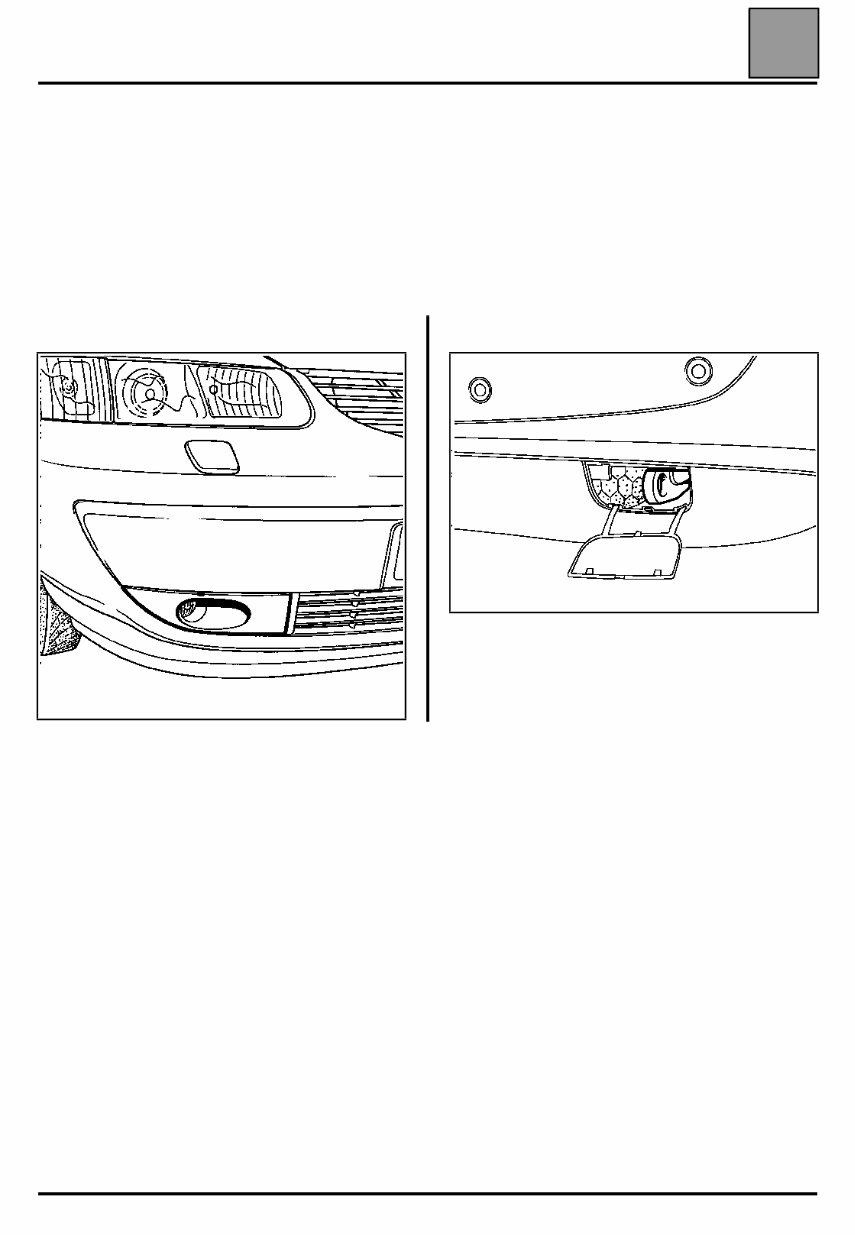
TOWING All types 03 03-1 103 TOWING All types OBSERVE THE TOWING REQUIREMENTS OF THE COUNTRY YOU ARE IN. NEVER USE THE DRIVESHAFTS AS ATTACHMENT POINTS. The towing points may only be used for towing the vehicle on the road. They should never be used for removing the vehicle from a ditch or for any other similar breakdown operation or to lift the vehicle, either directly or indirectly. They can be used for winching by placing a shackle between the towing ring and the winch hook. FRONT REAR Remove the ring cover which also serves as a guard for the additional front right headlight or the rear right blanking cover for the bumper and place the shackle in the ring. FOR LASHING ON TRANSPORT Use the wire ring of the front left side member and the two rings located behind the rear bumper.
Get your hands on the Renault Avantime (En-Fr-De-Ru) Multi-Language Complete Workshop Service Repair Manual for the years 2001, 2002, and 2003.
This comprehensive manual is a valuable resource for both professional mechanics and DIY enthusiasts, covering every service and repair procedure you may need.
Save a significant amount of money by performing your own repairs with the help of easy-to-follow step-by-step instructions and detailed pictures encompassing all areas of servicing and repairs.
Once downloaded, this manual is yours to keep forever. You have the flexibility to print out specific pages, chapters, or the entire manual. Additionally, you can conveniently access it on your tablet or smartphone.
All models, engines, trim, and transmission types are included in this manual, ensuring it caters to a wide range of needs.
From A to Z, this high-quality Service Repair Workshop Manual covers every repair procedure, leaving no aspect untouched.
Compatible with all PC and MAC computers, tablets, and mobile phones, this downloadable manual requires only Adobe Reader, which is typically pre-installed on most devices or can be easily obtained for free.
Upon payment via Visa, MasterCard, or PayPal, the manual will be instantly emailed to the address provided during checkout, ensuring a prompt delivery.
Rest assured, customer satisfaction is guaranteed with this comprehensive workshop service repair manual.
Reviews
Q&A
Recently Viewed
5,521,897Happy Clients
2,594,462eManuals
1,120,453Trusted Sellers
15Years in Business
Price:
Actual Price:
2001-2003 Renault Avantime (En-Fr-De-Ru) Multi-Language Service & Repair Manual




 Lifetime Access




