Back To Article 201315 ACCESSORIES AND BODY, CAB 50 Body Front (981) Boxster/Cayman WM 501055 REPLACING FRONT CLOSING PANEL (ALL MODELS) TOOLS Designation Type Number Description  twist drill Commercially available tool Nr.201  Countersink Commercially available tool Nr.202  TECHNICAL VALUES Location Description Type Basic value Tolerance 1 Tolerance 2 twist drill,  diameter 6.5 mm   Twist drill,  diameter 6.6 mm   PRELIMINARY WORK Preliminary Work For Body Repairs (Without Straightening System) 1. Remove accessories in the repair area. 1.1. Remove accessories in the repair area according to the extent of damage on the vehicle. 2. Cover accessories adjacent to the repair area on the vehicle. 2.1. Cover all accessories remaining on the vehicle and adjacent areas with fireproof protective covers. 3. Reshape connection area of the sheetmetal parts to be replaced. See Information on aluminum repairs → WM 5X00IN INFORMATION ON ALUMINUM REPAIRS (EXCEPT BOXSTER GTS, BOXSTER SPYDER) 4. Expose joint areas. 4.1. Remove underbody protection, paint, etc. from the joint areas of the body using a hotair gun or rotary brush. SAFETY INSTRUCTIONS AND INFORMATION ON QUALITY CAUTION: Nonobservance of safety instructions for body repairs Risk of damage to the vehicle Danger of injury → Read the relevant safety instructions as well as general information and quality instructions → 5X00IN01 SAFETY INSTRUCTIONS . Protection of electrical components during body repairs → 5X00IN02 PROTECTION OF ELECTRICAL COMPONENTS DURING BODY REPAIRS Corrosion protection measures during repairs → 5X00IN03 CORROSION PROTECTION MEASURES DURING REPAIRS 2 of 3206
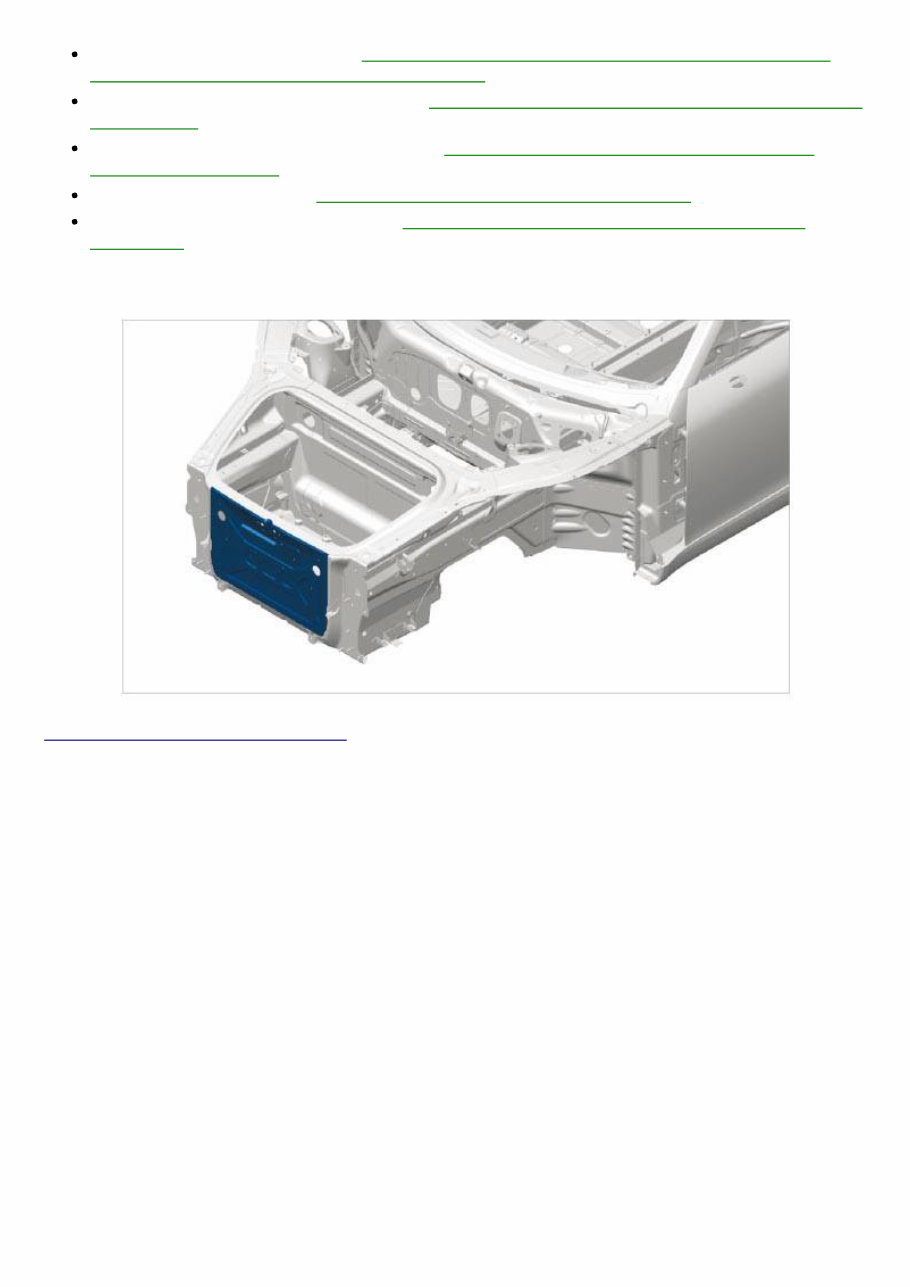
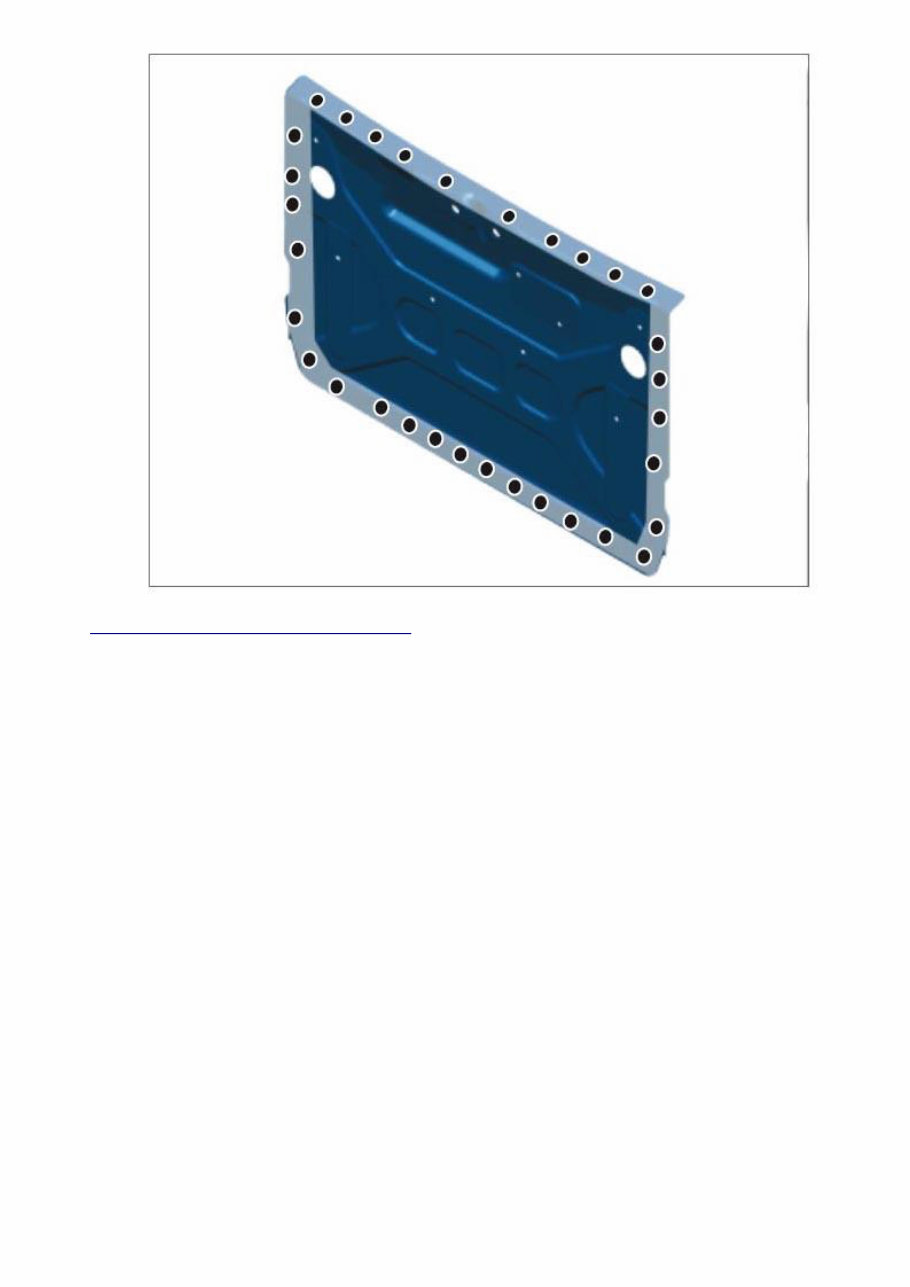
Information on aluminum repairs → WM 5X00IN INFORMATION ON ALUMINUM REPAIRS (EXCEPT BOXSTER GTS, BOXSTER SPYDER) Body parts of various sheetsteel strengths → 5X00IN04 BODY PARTS OF VARIOUS SHEETSTEEL STRENGTHS Replacing punch rivets and penetrated joints → 5X00IN23 REPLACING PUNCH RIVETS AND PENETRATED JOINTS Setting selftapping screws → 5X00IN24 SETTING SELFTAPPING SCREWS Working with body structural adhesive → 5X00IN21 WORKING WITH BODY STRUCTURAL ADHESIVE REMOVING FRONT CLOSING PANEL Fig. 1: Identifying Front Closing Panel Courtesy of PORSCHE CARS NORTH AMERICA, INC. 1. Drill through clinch points using a → diameter: 6.5 mm . 3 of 3206
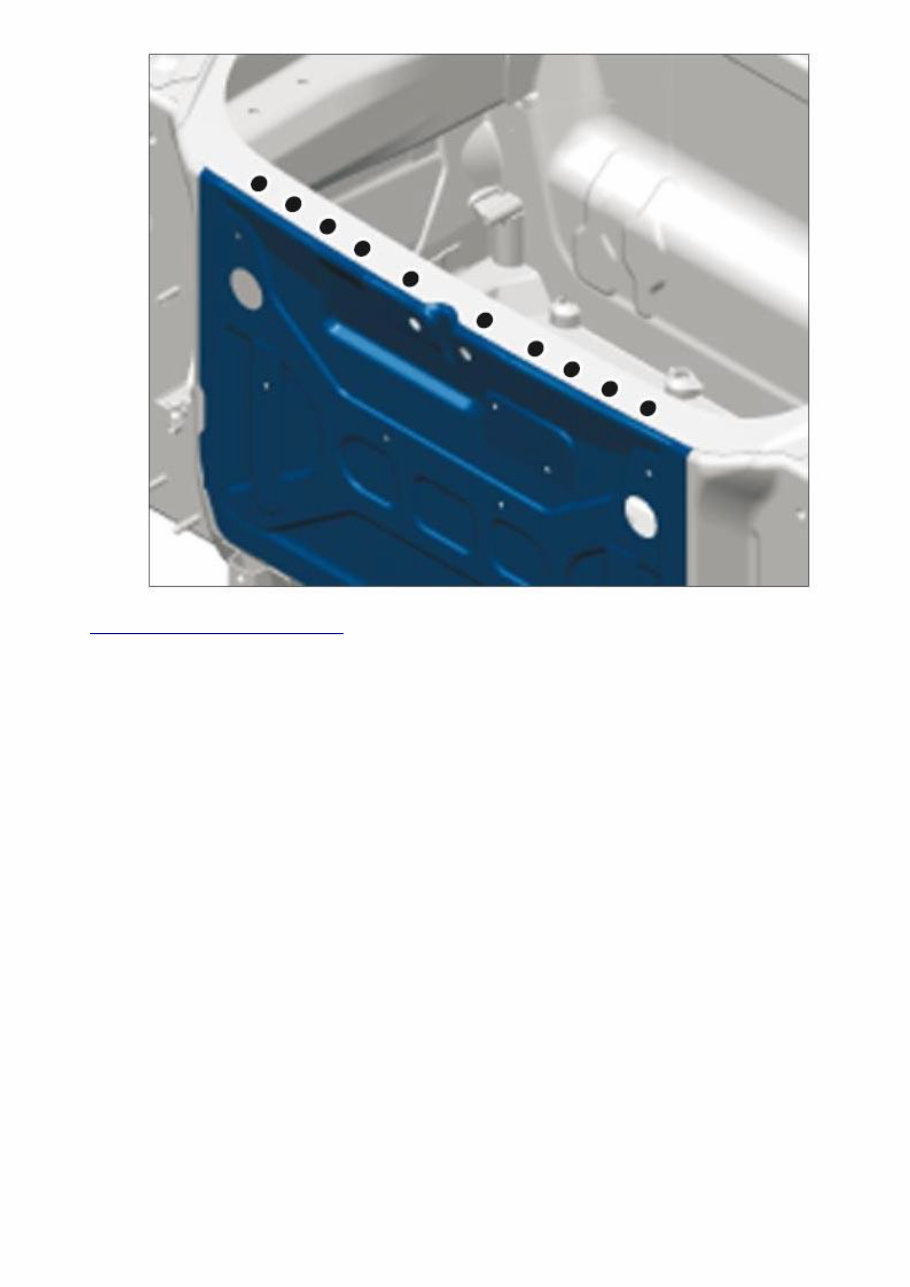
Fig. 2: Identifying Closing Panel Courtesy of PORSCHE CARS NORTH AMERICA, INC. 2. Drill through punch rivets using a twist drill Nr.201 . 4 of 3206
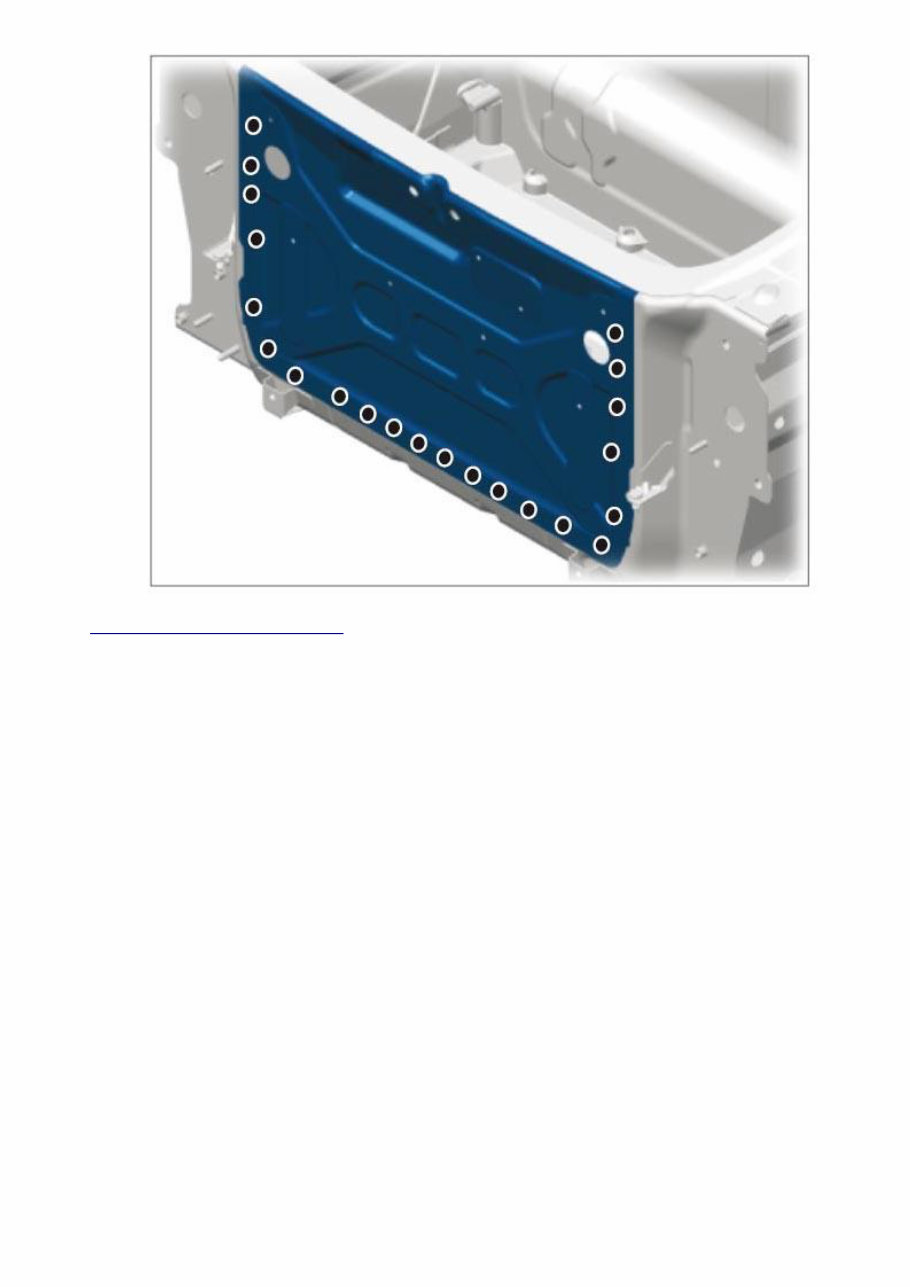
Fig. 3: Identifying Closing Panel Courtesy of PORSCHE CARS NORTH AMERICA, INC. 3. Remove closing panel. PREPARING FRONT CLOSING PANEL FOR INSTALLATION 1. Fit closing panel and secure it to the body. 1.1. Drill bores for the rivets through the existing holes. → diameter: 6.6 mm 2. Remove closing panel. 3. Countersink bores for installing countersunk rivets. Countersink Nr.202 4. Prepare connection areas for bonding. 5 of 3206
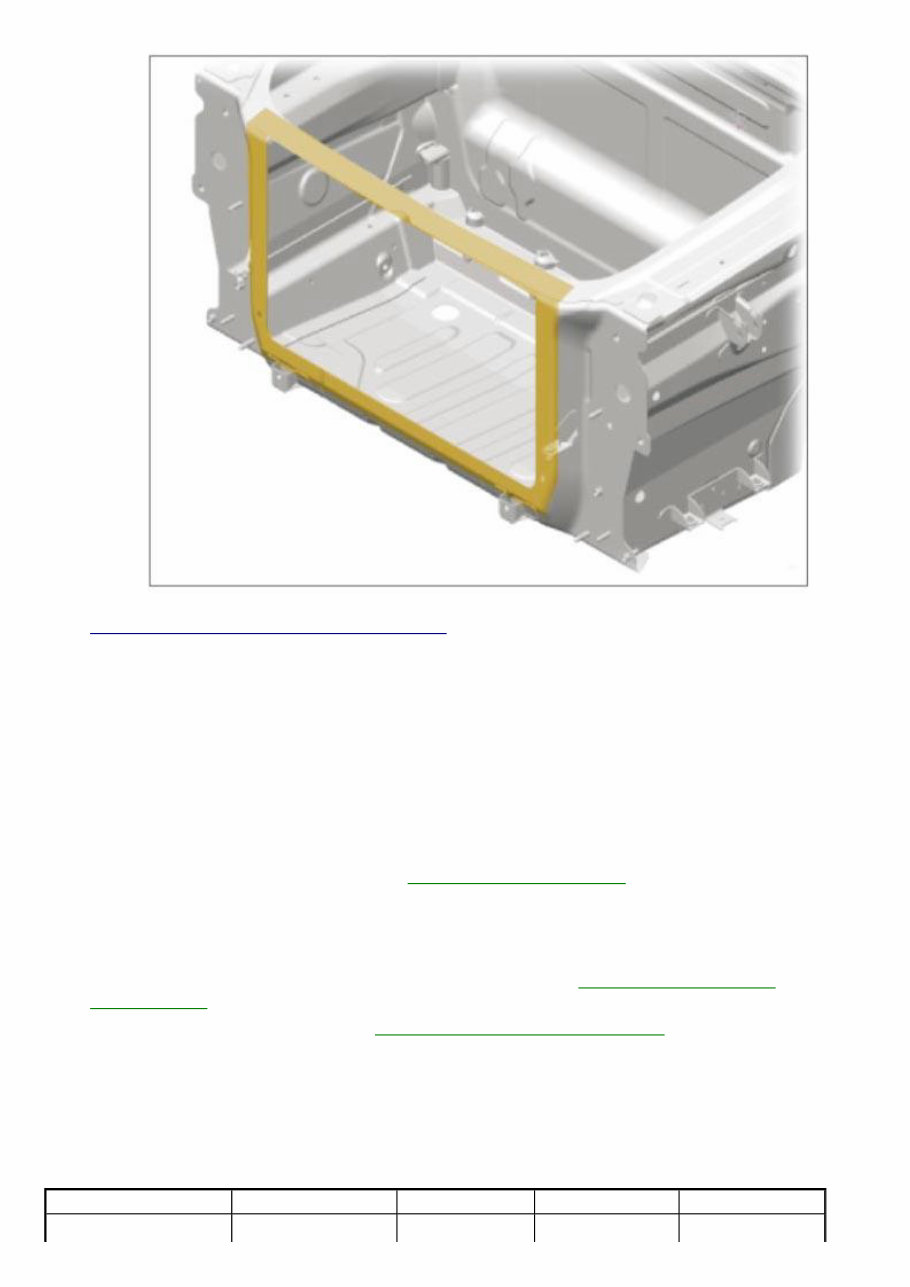
Fig. 4: Identifying Closing Panel Position Courtesy of PORSCHE CARS NORTH AMERICA, INC. PREPARING CONNECTION AREAS OF BODY FOR INSTALLING CLOSING PANEL 1. Prepare connection areas for bonding. 6 of 3206
Fig. 5: Identifying Bonding Connection Areas Courtesy of PORSCHE CARS NORTH AMERICA, INC. INSTALLING FRONT CLOSING PANEL 1. Apply adhesive. 7 of 3206
Fig. 6: Identifying Bonding Connection Areas Courtesy of PORSCHE CARS NORTH AMERICA, INC. 2. Fit closing panel. 3. Rivet in closing panel. → BLIND RIVET 000.043.207.59 SUBSEQUENT WORK Subsequent Work For Body Repairs (Without Straightening System) 1. Clean joint areas and sheetmetal flanges with a wire brush. 2. Prime joint areas and sheetmetal flanges with 2K primer. 3. Restore standard seal with body sealant → 5X00IN42 SEAM SEALING . Also seal the repair area carefully. 4. Paint repair area and adjacent surfaces, if necessary. 5. Restore standard underbody protection with underbody sealant → 5X00IN43 UNDERBODY PROTECTION . 6. Apply standard cavity preservation → 5X00IN44 CAVITY PRESERVATION . Also apply cavity preservation to the repair area. 7. Install removed accessories in the repair area. WM 501455 REPLACING FRONT PANEL (EXCEPT BOXSTER GTS) TOOLS Designation Type Number Description  Hotair blower, Leister Workshop equipment WE 1119  8 of 3206
Electron/V.A.G. 1416 twist drill Commercially available tool Nr.201  Countersink Commercially available tool Nr.202  TECHNICAL VALUES Location Description Type Basic value Tolerance 1 Tolerance 2 Drill bit  Diameter 6.5 mm   Drill bit  Diameter 6.5 mm   Applying adhesive Spread out evenly Application depth 0.5 mm   Bead of adhesive  Application depth 5 mm   Drill bit  Diameter 8.2 mm   Threaded joint for ground connection  Tightening torque 15 Nm (11 ftlb.)   PRELIMINARY WORK Preliminary Work For Body Repairs (With Straightening System) 1. Remove accessories in the repair area. 1.1. Remove accessories in the repair area according to the extent of damage to the vehicle. 2. Set vehicle on the straightening system. 3. Cover the accessories adjacent to the repair area on the vehicle. 3.1. Cover all accessories remaining on the vehicle and the adjacent areas with fireproof protective covers. 4. Reshape connection area of the sheetmetal parts to be replaced. See Information on aluminum repairs → 5X00IN04 INFORMATION ON ALUMINUM REPAIRS 5. Expose joint areas. 5.1. Remove undersealing, paint, etc. from the joint areas of the body with a hotair gun or rotary brush. SAFETY INSTRUCTIONS AND INFORMATION ON QUALITY CAUTION: Nonobservance of safety instructions for body repairs Risk of damage to the vehicle Danger of injury → Read the relevant safety instructions as well as general information and quality instructions → 5X00IN01 SAFETY INSTRUCTIONS . 9 of 3206
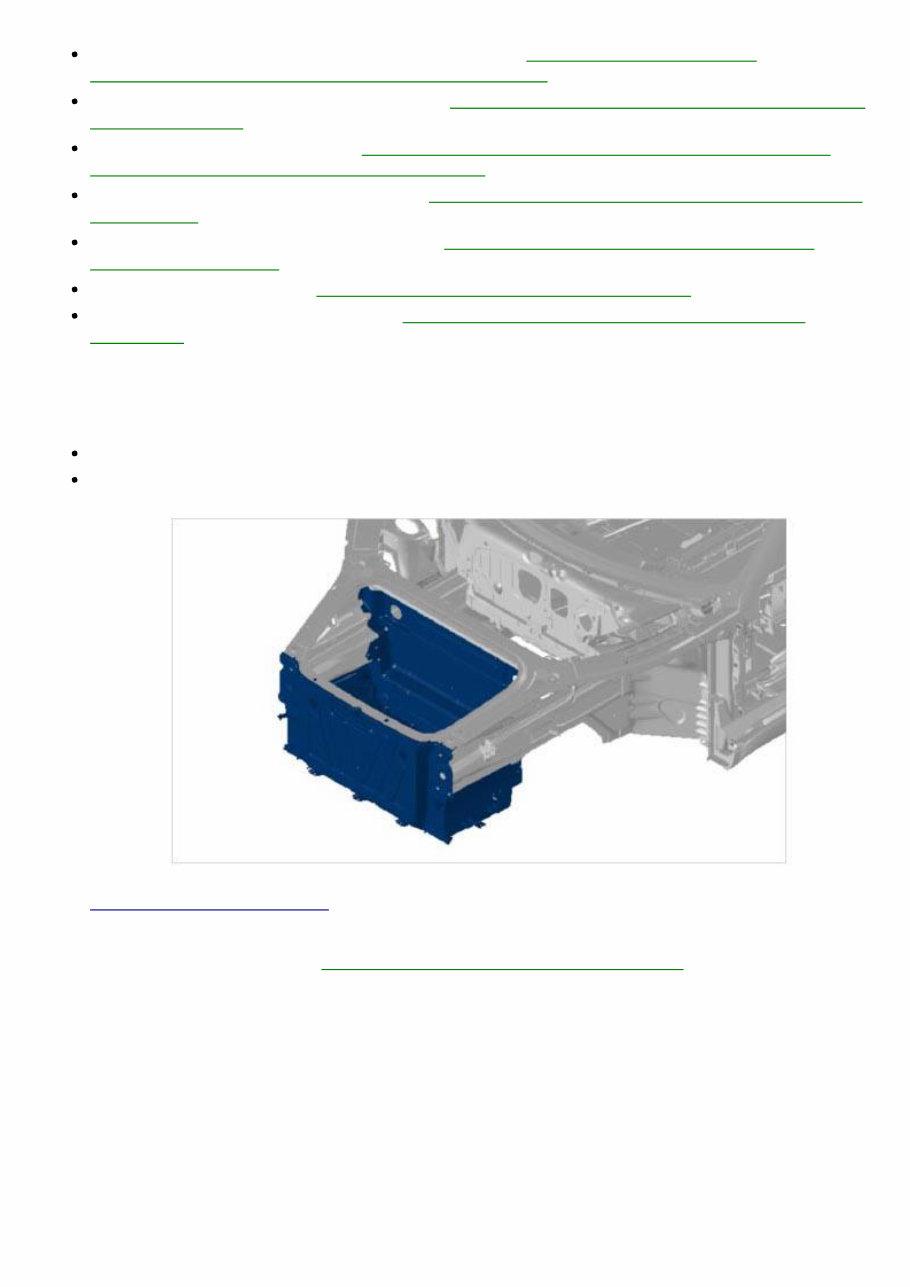
Protection of electrical components during body repairs → 5X00IN02 PROTECTION OF ELECTRICAL COMPONENTS DURING BODY REPAIRS Corrosion protection measures during repairs → 5X00IN03 CORROSION PROTECTION MEASURES DURING REPAIRS Information on aluminum repairs → WM 5X00IN INFORMATION ON ALUMINUM REPAIRS (EXCEPT BOXSTER GTS, BOXSTER SPYDER) Body parts of various sheetsteel strengths → 5X00IN04 BODY PARTS OF VARIOUS SHEETSTEEL STRENGTHS Replacing punch rivets and penetrated joints → 5X00IN23 REPLACING PUNCH RIVETS AND PENETRATED JOINTS Setting selftapping screws → 5X00IN24 SETTING SELFTAPPING SCREWS Working with body structural adhesive → 5X00IN21 WORKING WITH BODY STRUCTURAL ADHESIVE REMOVING FRONT PANEL Information Some of the repair illustrations show only one side of the vehicle . Naturally, some steps also have to be performed on the opposite side of the vehicle as well . Fig. 7: Identifying Front Panel Courtesy of PORSCHE CARS NORTH AMERICA, INC. 1. Remove wing joining plate. → 505355 REPLACING WING JOINING PLATE 2. Drill through punch rivets using a twist drill Nr.201 . Grind down welded seams. 10 of 3206
2012-2015 Porsche Cayman (981) Service & Repair Manual
This service and repair manual for the 2012-2015 Porsche Cayman (981) provides comprehensive technical documentation for maintaining and repairing all key systems of this high-performance sports car. It offers detailed step-by-step instructions, troubleshooting methods, and factory-recommended maintenance schedules to ensure precise servicing.
The manual covers vital components, including the flat-six engine, transmission, suspension, brakes, and electrical systems. In addition, it features factory-approved wiring diagrams, torque specifications, and diagnostic procedures, making it a valuable resource for addressing both routine maintenance and more complex mechanical tasks.
Formatted for digital access, this manual can be viewed on computers or mobile devices, providing convenience for both workshop use and on-the-go repairs. Whether you're a professional technician or an experienced Porsche owner, this service and repair manual is essential for ensuring the optimal performance and longevity of your Porsche Cayman.
Printable: Yes Language: English Compatibility: Pretty much any electronic device, incl. PC & Mac computers, Android and Apple smartphones & tablet, etc. Requirements: Adobe Reader (free)
Recently Viewed
5,521,897Happy Clients
2,594,462eManuals
1,120,453Trusted Sellers
15Years in Business
Price:
Actual Price:
2012-2015 Porsche Cayman (981) Service & Repair Manual