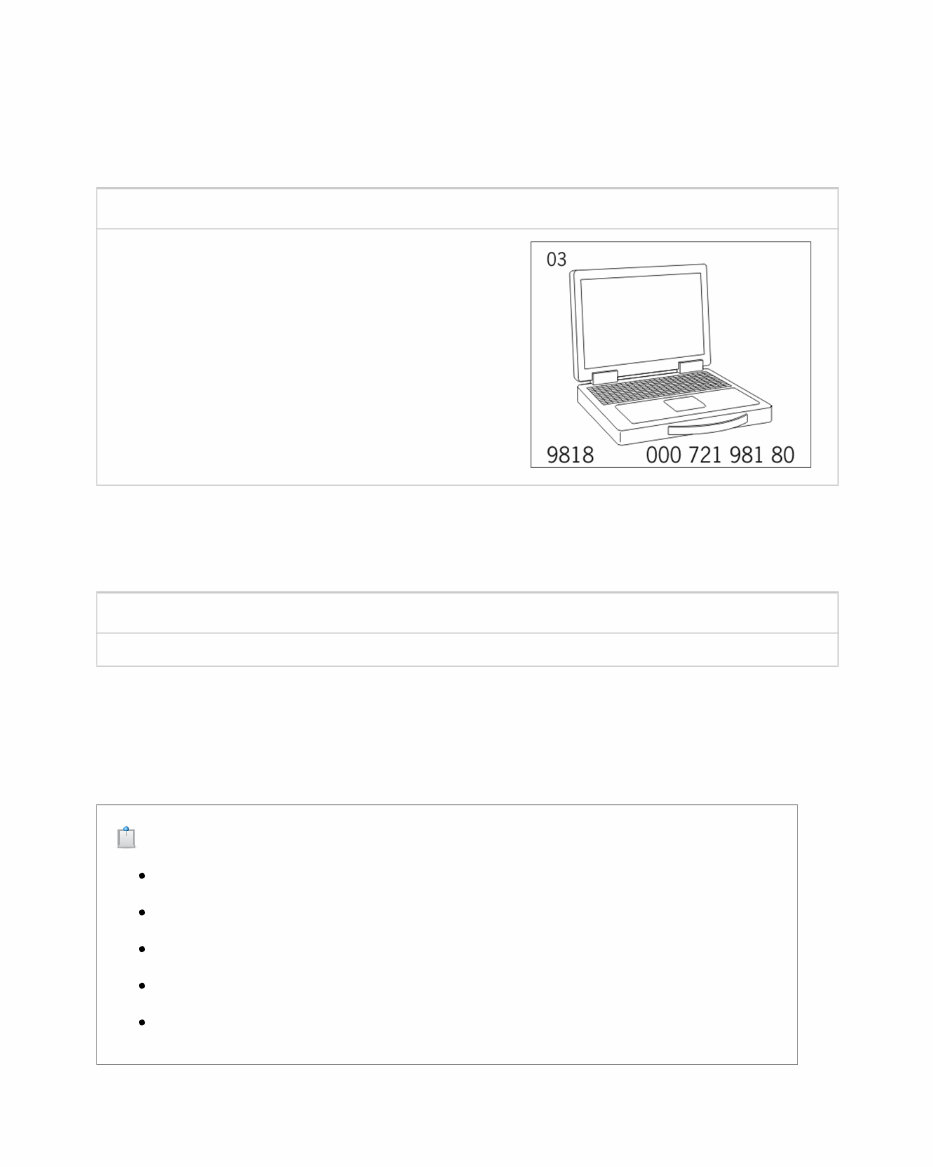
WM 0101IN DIAGNOSTIC SYSTEM: PERFORMING VEHICLE HANDOVER (CAYENNE, CAYENNE (3.0), CAYENNE GTS, CAYENNE S, CAYENNE S E-HYBRID, CAYENNE TURBO & CAYENNE TURBO S > TOOLS Designation Type Number Description PIWIS Tester II Special tool 9818 WM 0101IN DIAGNOSTIC SYSTEM: PERFORMING VEHICLE HANDOVER (CAYENNE, CAYENNE (3.0), CAYENNE GTS, CAYENNE S, CAYENNE S E-HYBRID, CAYENNE TURBO & CAYENNE TURBO S > TECHNICAL VALUES Location Description Type Basic value Tolerance 1 Tolerance 2 Current rating Nominal value 40 A WM 0101IN DIAGNOSTIC SYSTEM: PERFORMING VEHICLE HANDOVER (CAYENNE, CAYENNE (3.0), CAYENNE GTS, CAYENNE S, CAYENNE S E-HYBRID, CAYENNE TURBO & CAYENNE TURBO S > INFORMATION > PERFORMING VEHICLE HANDOVER NOTE: Voltage drop Risk of irreparable damage to control unit Risk of damage to control unit Fault entries in the control unit Coding in the control unit is aborted Malfunctions in control unit, even during programming → Prior to disconnecting the control unit, switch off ignition and remove ignition key. Service Manual: 01 - SALES CHECK -- 92A CAYENNE Porsche Cayenne
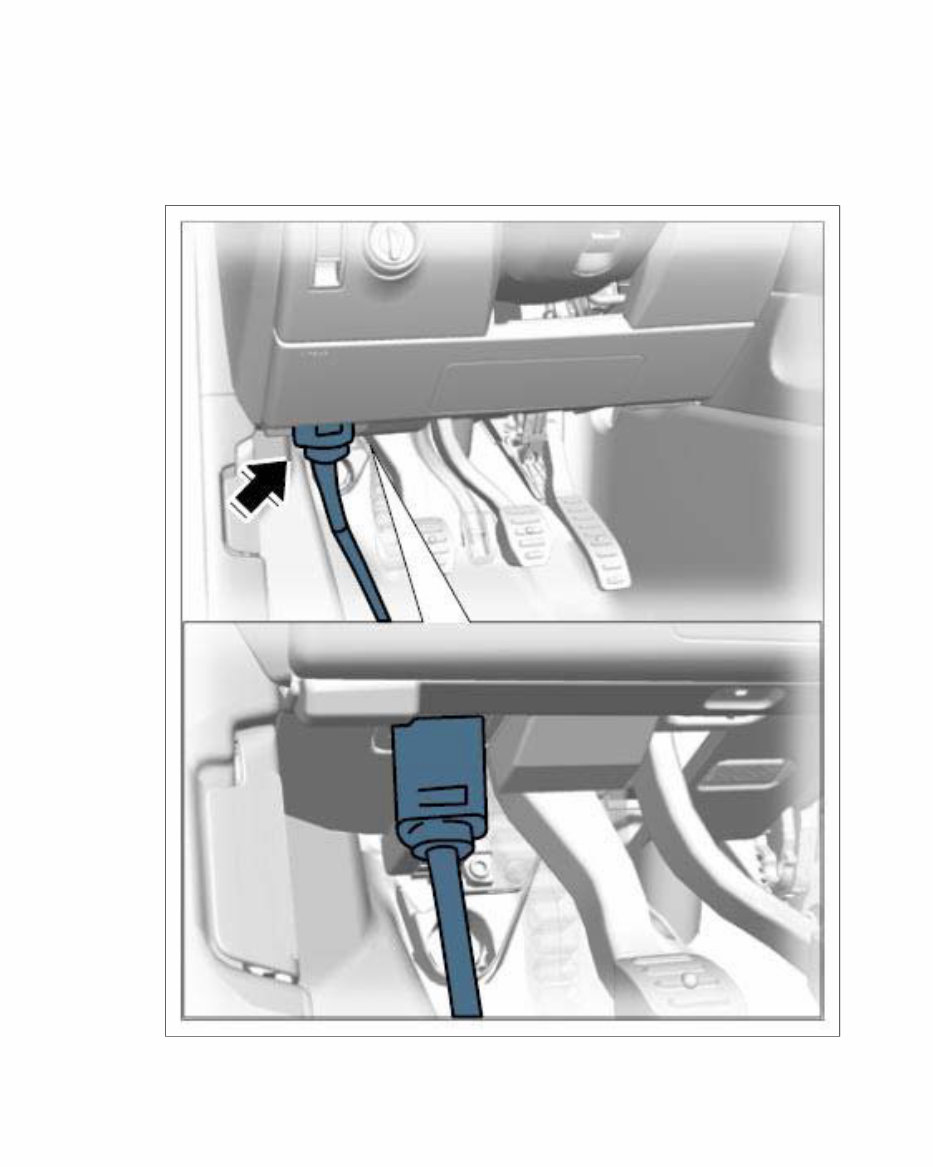
→ Ensure that the power supply is not interrupted during programming. → Connect a battery charger with a current rating of at least → Nominal value: 40 A to the vehicle battery. PIWIS Tester II 9818 must be connected to the vehicle. Then start the System Tester. Switch on ignition . Fig 1: Identifying Vehicle Diagnostic Socket Courtesy of PORSCHE CARS NORTH AMERICA, INC. 1. Select the vehicle. 2.
In the Control unit overview , press [F7] to continue. 3. Select the Vehicle handover function, then press [F12]. 4. When Remove transport protection is displayed, press [F12] to continue. 5. Create vehicle handover log , then press [F12]. 6. Write service interval, then press [F8] (Yes). 7. Select the individual maintenance intervals for the maintenance interval allocation for each specific country and engine. [F12]. 8. Write maintenance interval , then press [F12]. 9. The control units are activated and the status is displayed. Compare the chassis number displayed on the Tester with the vehicle identification number of the vehicle. Press [F12] to continue. 10. Conclude vehicle handover and press [F12]. The log you created is saved under the vehicle identification number. 11. Test-drive the vehicle and read out the fault memory. Check faults after diagnosis if necessary and erase the fault memory before delivering the vehicle. 12. WM 010100 SALES CHECK (CAYENNE TIP, CAYENNE TIP (3.0), CAYENNE S, CAYENNE TURBO & CAYENNE S HYBRID) > SALES CHECK WARNING: High voltage at the high-voltage system on hybrid vehicles Danger of electric shock from live parts Risk of serious burns or death Health risks for persons with medical devices/life-support systems. → Before working on the high-voltage electrical system and carrying out any repair work to the body, a high-voltage technician must switch off the power to the system. → All work on vehicles with a high-voltage electrical system may only be carried out by electrically instructed persons. The work must be done under the instruction of a high-voltage technician. → Observe general warning notes for working on the high-voltage electrical system. → 2X00IN GENERAL WARNING NOTES FOR WORKING ON THE HIGH-VOLTAGE ELECTRICAL SYSTEM Information The term "checking" includes all necessary subsequent work such as adjusting, readjusting, correcting and topping up, but does not include repairing, replacing and reconditioning parts or assemblies. Work instruction for order no. Dealer No.
Vehicle Ident. No. OK Not OK Check PIWIS information system for open workshop campaigns and recall campaigns for the vehicle Check consistency of Vehicle Ident. No. on vehicle, data bank, vehicle registration documents and on-board documentation → 0X01IN CHECKING VEHICLE IDENT . No. Remove transport locks, transport protection → 0X01IN REMOVING TRANSPORT PROTECTION→ 966015 SWITCHING ON MAIN POWER SUPPLY SWITCH Diagnostic system: Perform vehicle handover, read out and erase fault memory→ 0101IN DIAGNOSTIC SYSTEM: PERFORMING VEHICLE HANDOVER AND CODING REAR-END ELECTRONICS Windscreen washer/headlight cleaning system: Check function, fluid level and nozzle settings; check window cleaner and antifreeze, depending on the season; check wiper blades → 0X03IN ELECTRICS MAINTENANCE: CHECKING WINDSCREEN WIPER AND WASHER SYSTEM Vehicle lights: Check function. All headlights: Check adjustment. Horn and clock: Check function → 0X03IN ELECTRICS MAINTENANCE: CHECKING THE FUNCTION OF THE VEHICLE'S LIGHTS Electrical equipment, warning and indicator lights: Check operation Mobile roofs: Check operation → 0X01IN MOBILE ROOFS: CHECKING OPERATION Check engine-oil level → 170117 CHANGING ENGINE OIL AND OIL FILTER Check comfort tire pressure → 0X03IN RUNNING GEAR MAINTENANCE: TIRES AND SPARE WHEEL: CHECKING CONDITION AND TIRE PRESSURE Wheels, tires: Visual inspection for damage → 0X03IN RUNNING GEAR MAINTENANCE: TIRES AND SPARE WHEEL: CHECKING CONDITION AND TIRE PRESSURE Check wheel mounting → 440519 REMOVING AND INSTALLING WHEEL Brake hoses and lines: Visual inspection for damage in wheel area→ 0X03IN RUNNING GEAR MAINTENANCE: VISUAL INSPECTION - BRAKE LINES/BRAKE PADS/BRAKE DISCSCheck brake fluid level → 470855 CHANGING BRAKE FLUID Visual inspection for leaks: oils, fluids Exterior equipment and paint finish: Visual inspection for damage Glazing: Visual inspection for damage Interior equipment: Visual inspection for damage and soiling Door and lid locks: Check operation → 0X01IN CHECKING LIDS AND DOORS Alarm system: Check operation of monitoring devices (1) (2)
Complete vehicle and check that all equipment is present → 0X01IN CHECKING VEHICLE EQUIPMENT FOR COMPLETENESS OK = functioning correctly Not OK = not functioning correctly Test drive OK Not OK Electric parking brake and foot brake, clutch, steering, cruise control, ParkAssist, heating, sports exhaust system, air conditioning and instruments: Check function → WM 0X00IN TEST DRIVE - SALES CHECK Transmission: Check operation Check vehicle for unusual handling behaviour, vibrations and noise Diagnostic system: Read out and erase fault memory OK = functioning correctly Not OK = not functioning correctly Stamp of Official Porsche Centre (1) (2) (1) (2) (1) (2)
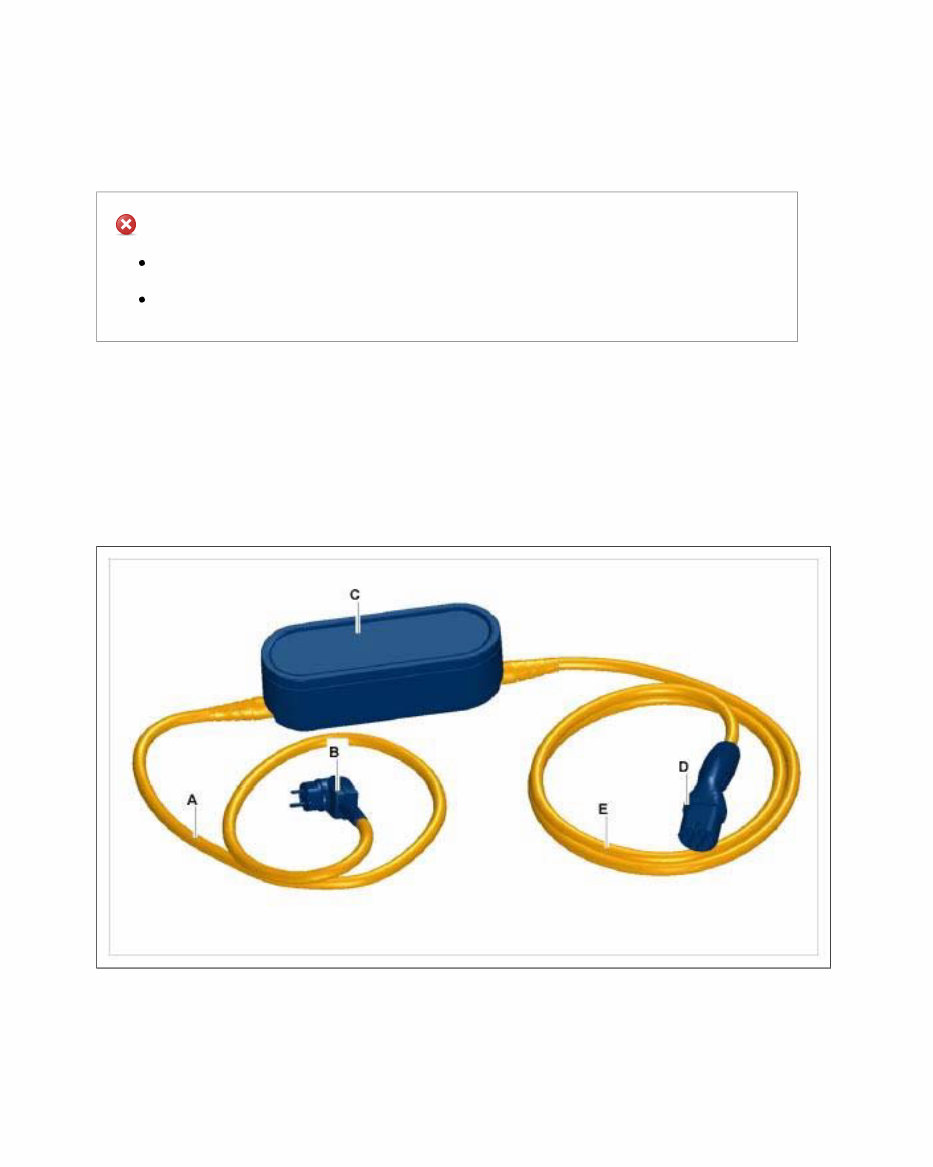
WM 0940IN PORSCHE UNIVERSAL CHARGER (AC) (HIGH-VOLTAGE CHARGING CABLE) DIAGNOSTICS (FAULT CODES) (CAYENNE S E-HYBRID) > INFORMATION > GENERAL INFORMATION WARNING: Working on electric components Risk of burns Risk of short circuit or fire. → Before replacing the power cable or vehicle cable, always disconnect the power cable from the electrical socket. → Only replace cables in a dry environment. → Porsche universal charger (AC) may only be used as a unit comprising power cable, control unit and vehicle cable. Fig 1: Identifying Porsche Universal Charger (AC) Components Courtesy of PORSCHE CARS NORTH AMERICA, INC. Power cable A. Power plug (connector for connecting to main power supply) B. Control unit C. Service Manual: 09 - PORSCHE SYSTEM COMPONENTS -- 92A CAYENNE
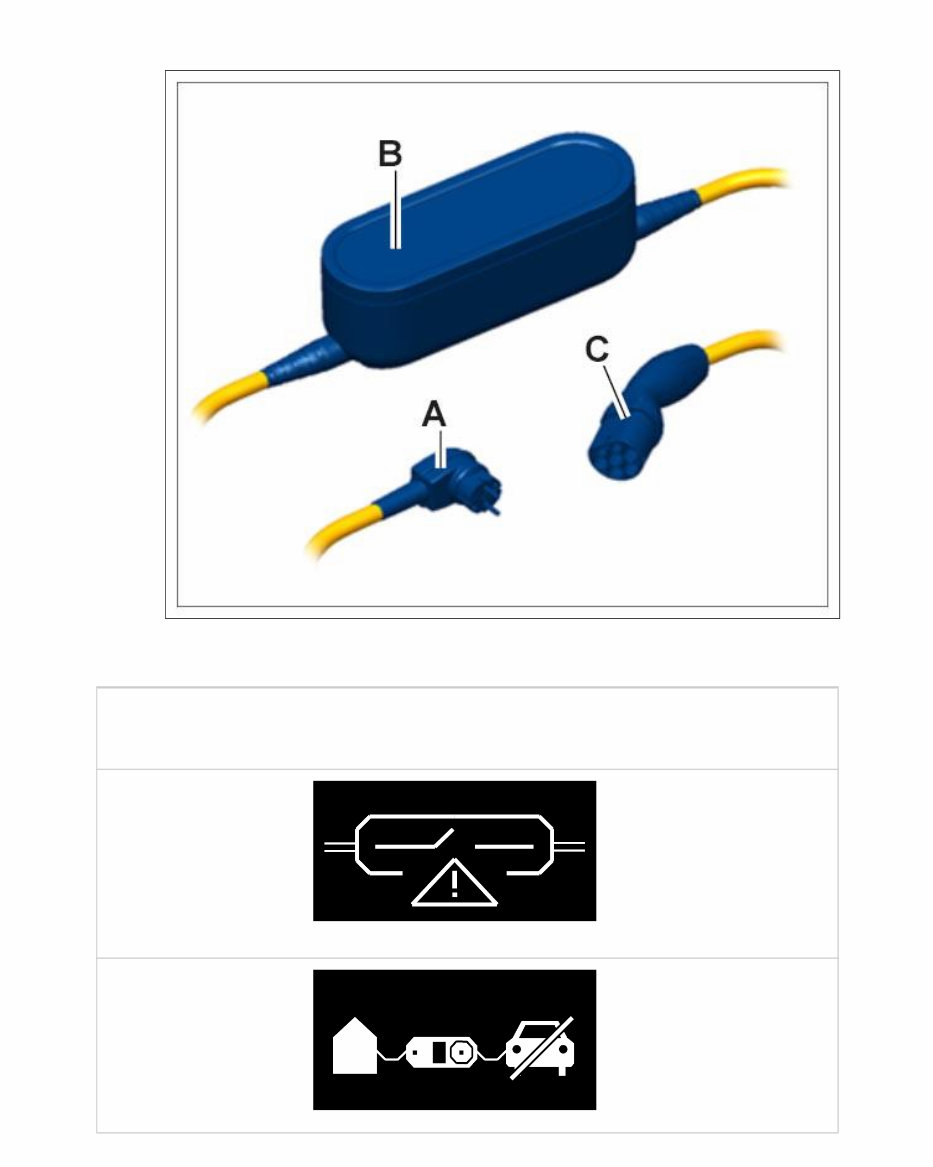
Vehicle plug (plug connection for the vehicle) D. Vehicle cable E. Information Risk of damage to charging equipment. Charging equipment can be operated in a temperature range from -25 °C to +35 °C. Control unit must not be submerged in water or covered with snow or ice. Information Do not expose Porsche universal charger (AC) to direct sunlight over long periods to prevent it from overheating during operation. If the temperature in the control unit exceeds 80 °C, the charging process will be interrupted automatically until the temperature has dropped to the normal range. WM 0940IN PORSCHE UNIVERSAL CHARGER (AC) (HIGH-VOLTAGE CHARGING CABLE) DIAGNOSTICS (FAULT CODES) (CAYENNE S E-HYBRID) > FAULT DESCRIPTION FOR UNIVERSAL CHARGER CONTROL UNIT Information Power plug (connector for connecting to main power supply) A. Control unit display B. Vehicle plug (plug connection for the vehicle) C.
Fig 1: Identifying Porsche Universal Charger Components (AC) Courtesy of PORSCHE CARS NORTH AMERICA, INC. Fault code State Symbol in control unit display LED on control unit Action required 110 Final switch-off due to triggering of the surge protector in the control unit Control unit display Flashes red Dry the vehicle plug. Then reset the control unit by pressing "OK". 130 Switch-off due to overload Continuous red light Check cable
Control unit display 140 CP signal not valid Control unit display Continuous red light Replace control unit and/or vehicle cable 170 Charging current downgraded due to internal overtemperature Control unit display Flashes green Place control unit in the shade or charge in a cooler environment 180 Switch-off due to internal overtemperature Control unit display Continuous red light Place control unit in the shade or charge in a cooler environment 200 FI self-test failed Control unit display Continuous red light Replace control unit 210 Protection permanently conductive Control unit display Continuous red light Replace control unit
If you are in need of a repair manual for your 2011 Porsche Cayenne, look no further. Our accessible repair manual provides comprehensive coverage and is suitable for both professional mechanics and DIY enthusiasts.
Gone are the days of purchasing traditional service manuals in book format at a higher cost. Our repair manual offers the same valuable information in a more affordable and convenient digital format.
Whether you require guidance for brake repairs, suspension component replacements, engine troubleshooting, or standard maintenance tasks, this repair manual for the Porsche Cayenne has you covered.
With this , you will have access to a wealth of service information, including brakes, engine, suspension, steering, drivetrain, electrical systems, heating, air conditioning, and more. It provides comprehensive assistance for any repair or maintenance needs.
By utilizing this 2011 Porsche Cayenne repair manual , you can save a significant amount of money on vehicle maintenance. Avoid high mechanic fees and take control of your own repairs with the help of this user-friendly manual, compatible with Windows, Mac, smartphones, and tablets.