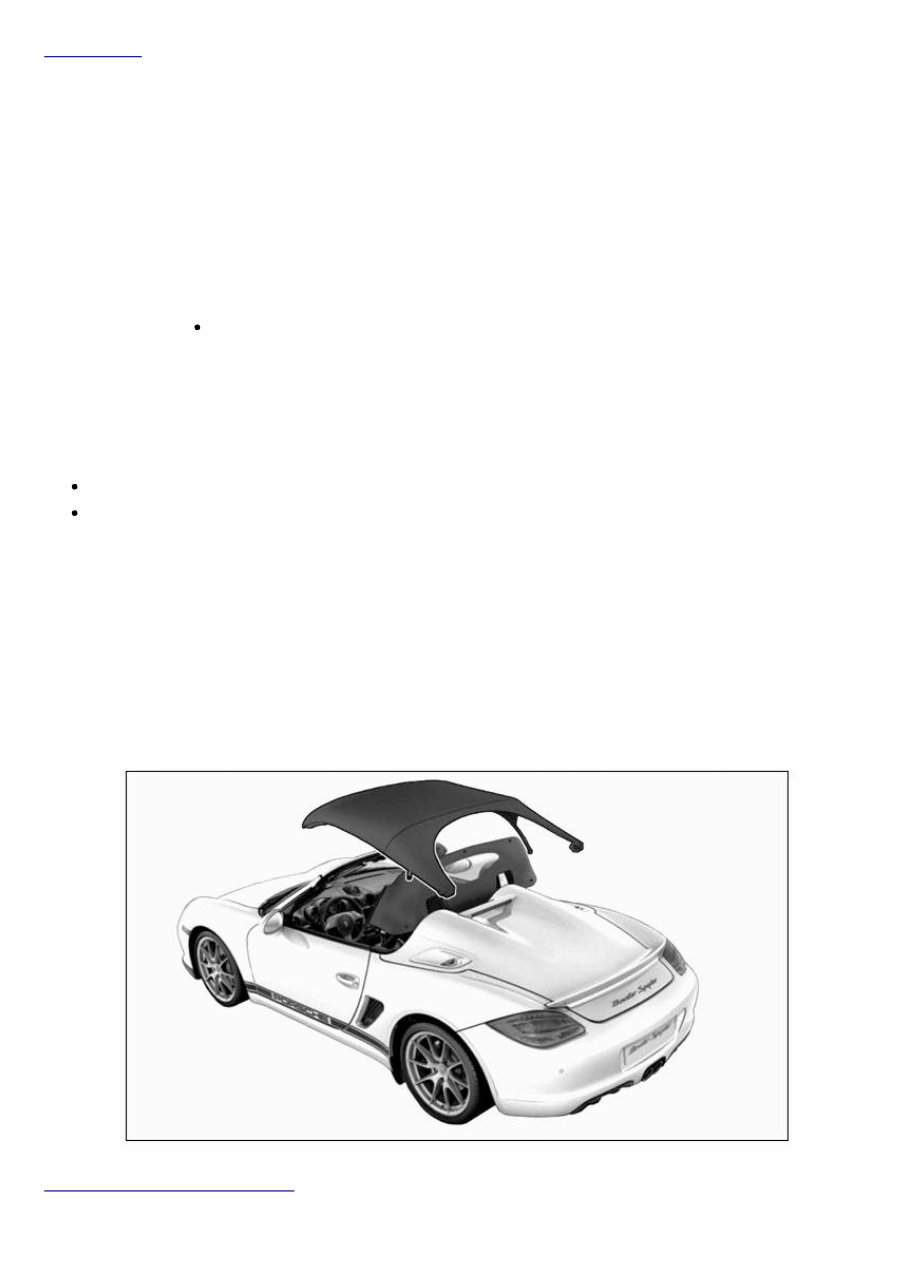
Back To Article 2010 GENERAL INFORMATION 6X BodyEquipment Outside General 987BoxsterCayman WM 6X00IN INFORMATION ON WATER MANAGEMENT AND BALLOONING EFFECT (BOXSTER SPYDER) INFORMATION General Information On The Boxster Spyder NOTE: Not suitable for washing in a car wash Risk of water leaking into passenger compartment → Cannot be washed in a car wash In the illustrations of the Boxster Spyder convertible top (order type 987720, 987721) shown below, the following permitted driving conditions are defined and stateoftheart. Ballooning effect Water management effect An important feature of a classic roadster is a closely cut, lightweight fabric top. The current Boxster models (2nd generation 987/987) maintain this tradition with a technically perfected roof system. The design of the manual top used on the Boxster Spyder was intended not only to perfect the silhouette, but also to meet the basic needs of the passengers in bad weather. The twopiece top, consisting of a sun shield and weather protector with a plastic rear window , closes off the passenger compartment to the rear and at the rear sides and together with the raised door windows, provides protection against difficult weather conditions and rain. Fig. 1: Overview Of Spyder Top Courtesy of PORSCHE CARS NORTH AMERICA, INC.
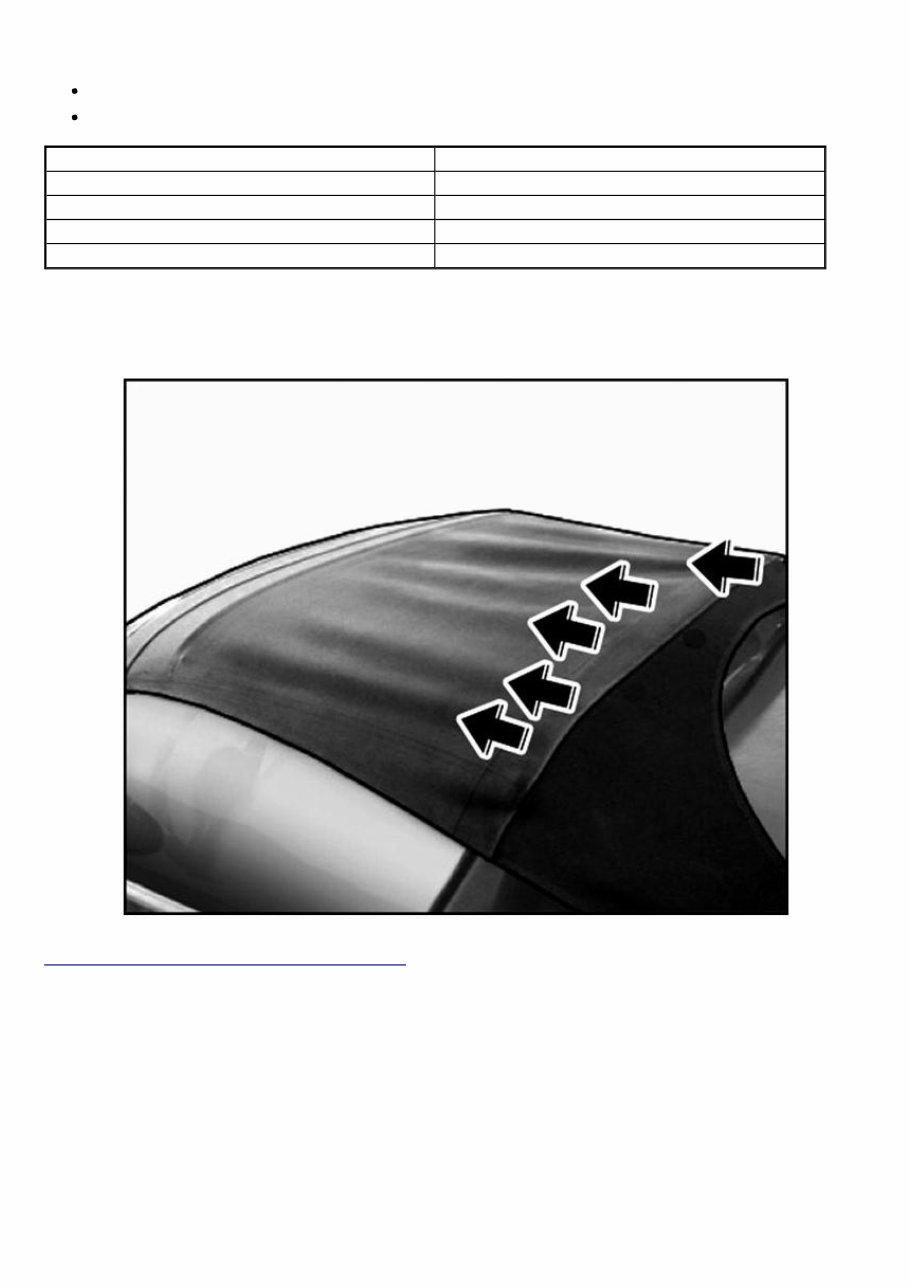
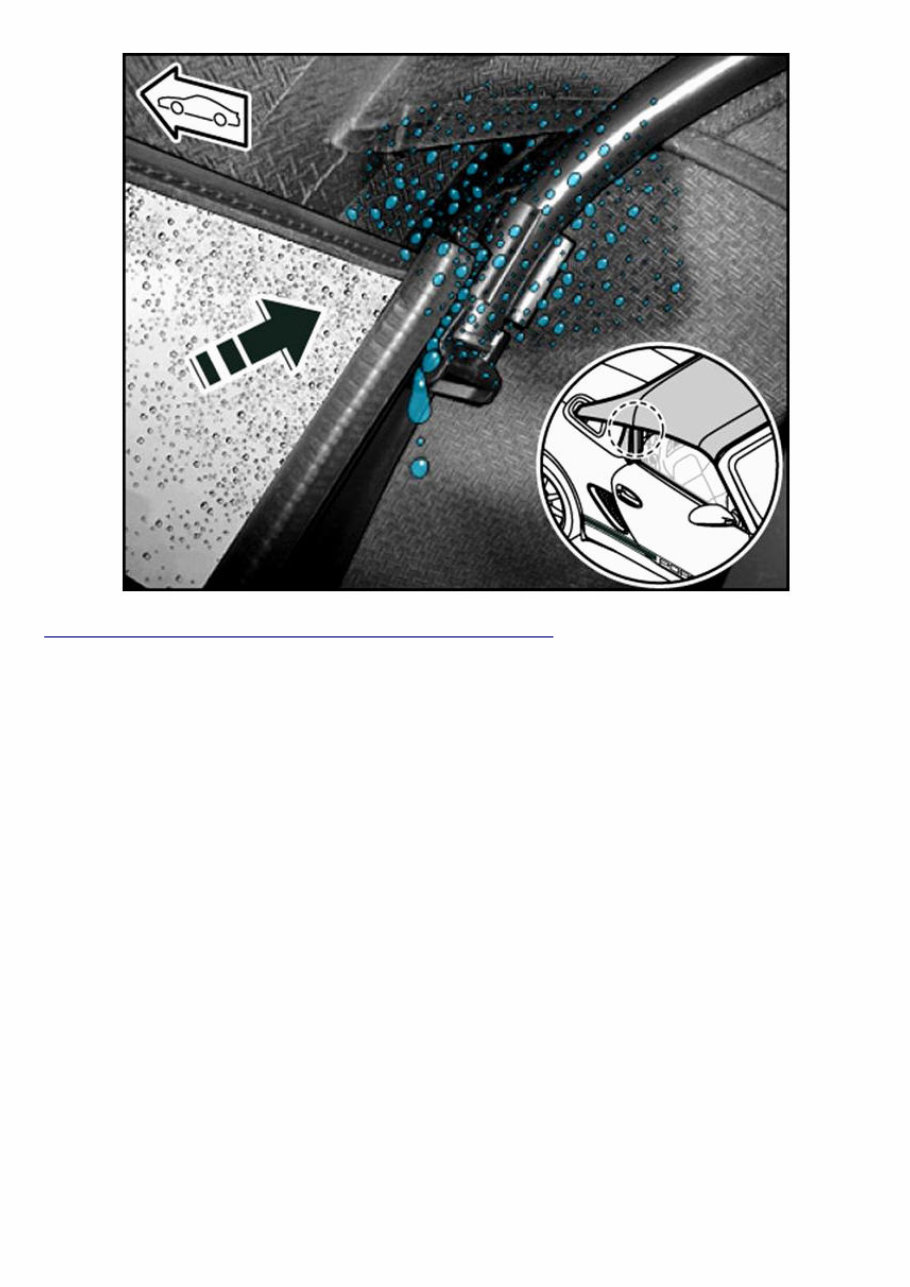
Ballooning Effect Of Convertible Top While Driving This effect is caused by a difference in air pressure between the inside and outside. When driving at 80 km/h (50 mph) or faster, the convertibletop seal along the side window lifts off. 80 km/h (50 mph) approx. 0.5 mm 100 km/h (60 mph) approx. 1 mm 125 km/h (80 mph) approx. 2 3 mm 150 km/h (90 mph) approx. 5 mm 180 200 km/h (112 125 mph) approx. 10 20 mm If you drive at high speed for a long time, the fabric top will balloon out (Ballooning effect). This will cause folds or creases → see figure in direction of travel in the fabric top, which will disappear again after about 30 60 minutes. Hood tension is considerably reduced during this time. Fig. 2: Locating Boxster Spyder Hood Tension Courtesy of PORSCHE CARS NORTH AMERICA, INC. If you drive at high speed with the windows down and/or without the weather deflector, the resultant differences in pressure will press the fabric top in. The fabric top can touch against the head of tall drivers. Hood tension is also reduced temporarily in this situation. Water Management While Driving When driving at a speed of 80 km/h (50 mph) or faster (depending on how heavy it is raining), drips can form along the side window. At higher speeds and when it is raining very heavily, more drips will accumulate until in extreme cases a flowing jet of water can form.
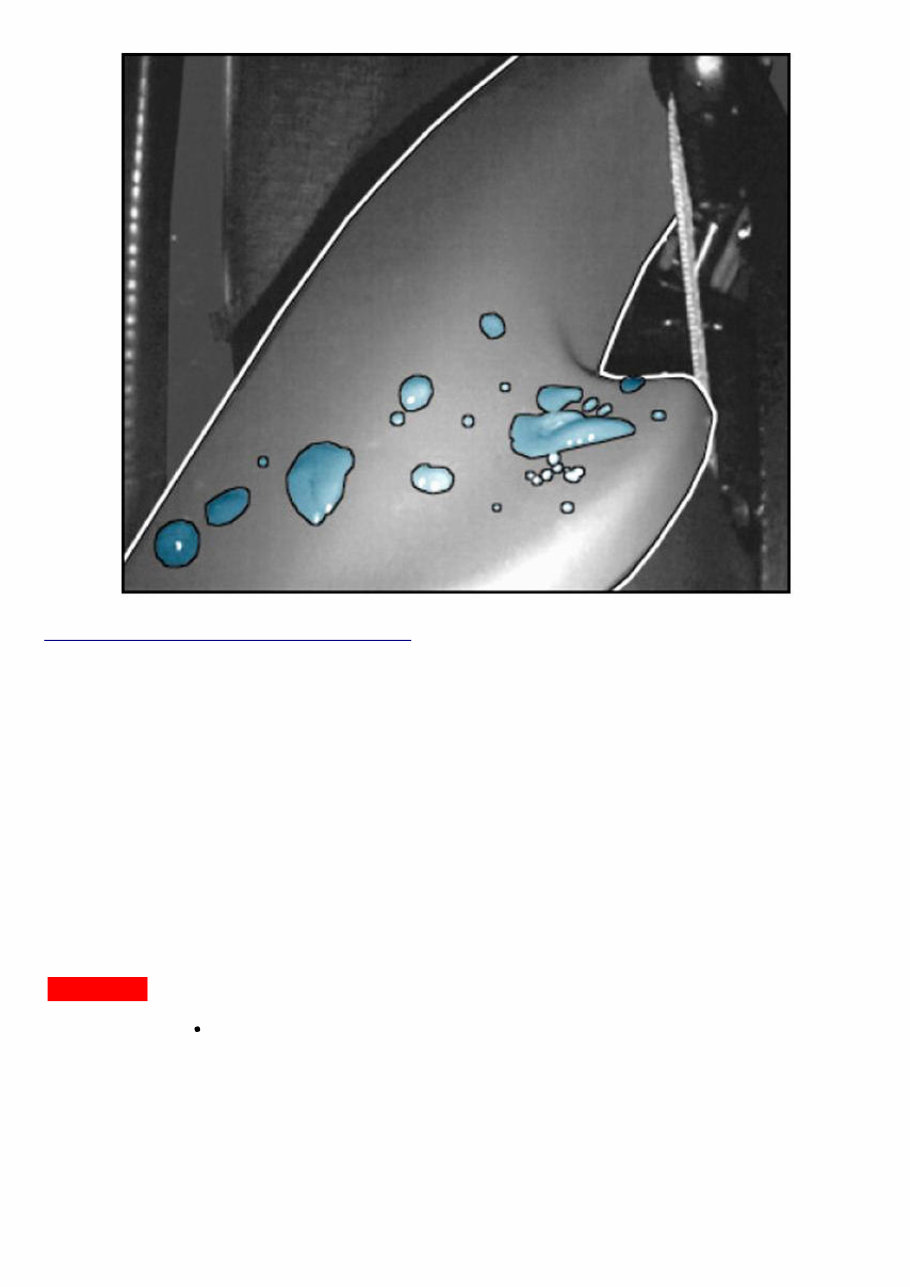
Fig. 3: Identifying Water Management Driving (Speed 80 KM/H) Courtesy of PORSCHE CARS NORTH AMERICA, INC. The water flowing back onto the side windows can leak into the passenger compartment at the point where the convertible top and top of the side window meet. Water management is designed so that the water on the inside of the hood cover and Bpillar seal flows down onto the Bpillar trim and runs off between the seat belt and B pillar trim into the water drip tray.
Fig. 4: Identifying Water Management Driving Courtesy of PORSCHE CARS NORTH AMERICA, INC. Water Management On Stationary Or Parked Vehicles Do not park the vehicle on upward or downward slopes greater than 12° (longitudinal position) or with lateral inclination greater than 9°. WM 6X00IN SAFETY INSTRUCTIONS (EXCEPT CAYMAN BLACK EDITION, CAYMAN S SPORT, CAYMAN S BLACK EDITION, BOXSTER BLACK EDITION, BOXSTER SPYDER, BOXSTER S "PORSCHE DESIGN EDITION 2", BOXSTER S BLACK EDITION, CAYMAN R) SAFETY INSTRUCTIONS FOR WORK ON CAR WINDOWS Danger Of Injury When Working On Car Windows WARNING: Danger of cut injuries when removing and installing car windows! Cutting out glued car windows may lead to cut injuries to the skin and eyes due to flying glass splinters and may result in cut injuries from the knife of the cutter. → Always wear protective gloves when working on car windows. → Wear protective goggles when cutting out car windows. → Only replace the cutting knife with the power supply disconnected so that the cutter is not switched on accidentally.
Material Damage When Removing The Glass From Car Windows CAUTION: Danger of damage to the label with the vehicle identification number! Danger of paint damage and damage to the label with the vehicle identification number if windscreen is removed incorrectly! → When cutting out the windscreen, ensure that the label with the vehicle identification number is not damaged! Material Damage When Inserting The Glass Into Car Windows CAUTION: Danger of material damage if specified curing time of adhesive is not observed! There will not be a proper adhesive bond if the prescribed curing time of the adhesive is not observed! → The vehicle must not be used until the curing time has elapsed. → Curing time: 3 hours → Temperature: at least 10°C → Fixing time: approx. 1 hour SAFETY INSTRUCTIONS FOR INSTALLATION WORK Safety Instructions For Airbag System CAUTION: Danger of injury due to unintentional activation of airbag units! Serious injury due to unintentional activation of airbag units! → The ground strap of the battery must be disconnected during work on the airbag system and alignment bench jobs when the body is being repaired! → After the battery is disconnected, assembly work or work on the vehicle with a hammer or similar tools must not be started until after a waiting period of 1 minute! Safety Instructions For The Heat Shield CAUTION: Assembly of deformed heat shields. Damage will be caused through heat build up if deformed heat shields are installed. → Check heat shields for deformation, fixing of the aluminum braided cord, tears and missing or damaged fixing tabs. → Damaged or distorted heat shields must be straightened or replaced. WM 6X00IN HANDLING AND REPLACING AIRBAG AND SEATBELT PRETENSIONER UNITS (EXCEPT CAYMAN, CAYMAN S, CAYMAN BLACK EDITION, CAYMAN S "PORSCHE DESIGN EDITION 1", CAYMAN S SPORT, CAYMAN S BLACK EDITION, BOXSTER SPYDER, CAYMAN R)
TOOLS Designation Type Number Description  PIWIS Tester Special tool 9718  PIWIS Tester II Special tool 9818  TOOLS AND MATERIALS Materials Use Porsche work clothing. GENERAL WARNING NOTES General Warnings For Handling Airbag And SeatBelt Pretensioner Units CAUTION: Danger of injury and material damage if the airbag unit is not handled correctly! Triggering of the airbag unit! → The airbag units are pyrotechnical items in hazard class T 1! → Handling, transport and storage of these units must conform to hazardous goods regulation and explosives legislation! → The listed statutory requirements refer to Germany. The relevant valid regulations must be observed in all other countries. Consult the importer for the country concerned! → The commencement of work with pyrotechnical items must be reported to the Trade Supervisory Office (responsible authority) 14 days in advance! → The airbag units may only be shipped in transport packaging officially approved for this purpose! → Internally and otherwise, they must always be transported in the luggage compartment or loadspace of a vehicle using the abovementioned transport packaging! → They must never be transported in the passenger compartment! → Airbag units must be stored in accordance with the explosives legislation SprengLR 240 Storage of airbag and seatbelt pretensioner units! → This ordinance stipulates that small quantities of materials and items may be stored at certain locations without special storage approval! → The airbag units must be kept in a locked place! → When storing airbag units, ensure that the blowout opening is facing upwards (risk of injury as a result of inflation of the airbag units in the event of accidental ignition)! → The airbag units must be stored in a dry place and must not be stored together with other hazardous goods (lacquers, etc.)!
→ Loose airbag units or airbag units in a removed steering wheel must never become the actual (physical) property of the customer! → The possession of loose airbag units not installed in the vehicle is not permitted in the private sector! → Airbag units may become the property of the customer only when installed in the vehicle! Warnings About Assembly And Straightening Work WARNING: Incorrect handling of airbag triggering unit Malfunction in airbag system → Never drive with an untaught or unlocked airbag triggering unit. → Teach and lock the airbag triggering unit using the PIWIS Tester 9718 . The warning light will flash continuously until such a time as you teach and lock the airbag triggering unit. → Inspection and assembly work may only be carried out by specialist staff. INFORMATION FOR AIRBAG AND SEATBELT PRETENSIONER UNITS Dangers For Persons And The Environment Information Dangers for persons and the environment Injury caused by incorrect triggering of the installed unit. Injury caused by spinning away, e.g. of the entire unit. Burns caused by touching the hot surfaces of a triggered unit. Damage to hearing due to the explosion when gas is released. Irritation caused by breathing in fuel particles. Irritation caused by skin and eye contact with fuel particles. Airbag/belt tensioner components must not be opened nor repaired; always use only new parts. Injury caused by incorrect triggering due to tampering with the short circuit bridges. Protective Measures And Rules Of Behavior Information Protective measures and rules of behavior Assembly work only by trained staff. Carry out tests only using the PIWIS Tester II 9818 diagnosis unit; do not use test lamps, voltmeters or ohmmeters. Avoid contact with grease, solvents, cleaning agents or liquids. Do not expose to temperatures above 90 °C.
Keep the deployment area of the blowout opening clear; e.g. do not hang test devices over the steering wheel. When carrying the airbag, hold it with the blowout opening facing away from the body. Set the airbag unit down with the blowout opening facing upwards. Electrostatic charge: In general, wear appropriate work clothing and footwear. Do not remove the shortcircuit spring of the plug contacts. An airbag unit must never be connected incorrectly to electrical power sources (danger of ignition). Only use testers prescribed by the manufacturer. During installation/removal or work on the vehicle involving vibrations: switch off ignition, disconnect and cover the negative terminal of the battery, wait 1 minute and only then should you disconnect the plug connection. Transport: In transport packaging. Never in the passenger compartment! Storage in the workshop: Max. 10 kg (=> 100 driver or 50 passenger airbags); protect against theft! The airbag/seatbelt pretensioner unit must be installed immediately after removal from the transport container. If work is interrupted, the airbag/seatbelt pretensioner unit must be stored in the transport container again. Never leave the airbag/seatbelt pretensioner unit unattended. Behavior In Cases Of Malfunction Or Danger Information Behavior in cases of malfunction or danger Protect from flames and heat. In case of fire, inform the fire brigade on arrival about the units present. Do not install mechanically damaged units or units that have fallen, even from a low height. Always replace units that are mechanically damaged (bulges, cracks). Because of the irritating combustion residues, only handle triggered airbags with protective gloves and goggles. In the case of contact with combustion residues, wash the affected skin with soap and water. In the case of eye contact, wash the eyes out with water. GENERAL INFORMATION Information Airbags general information A period of 10 seconds is required to enable the triggering unit to identify all faults in the system! In order to guarantee that every possible fault source is checked during the vehicle test, the ignition must be switched on for at least 10 seconds! The fault memory must be cleared following a fault in the airbag system and after it has been corrected! The replacement of a component must be noted in the Guarantee and Maintenance booklet! To do this, stick or enter the documentation number in a free panel intended for this purpose!
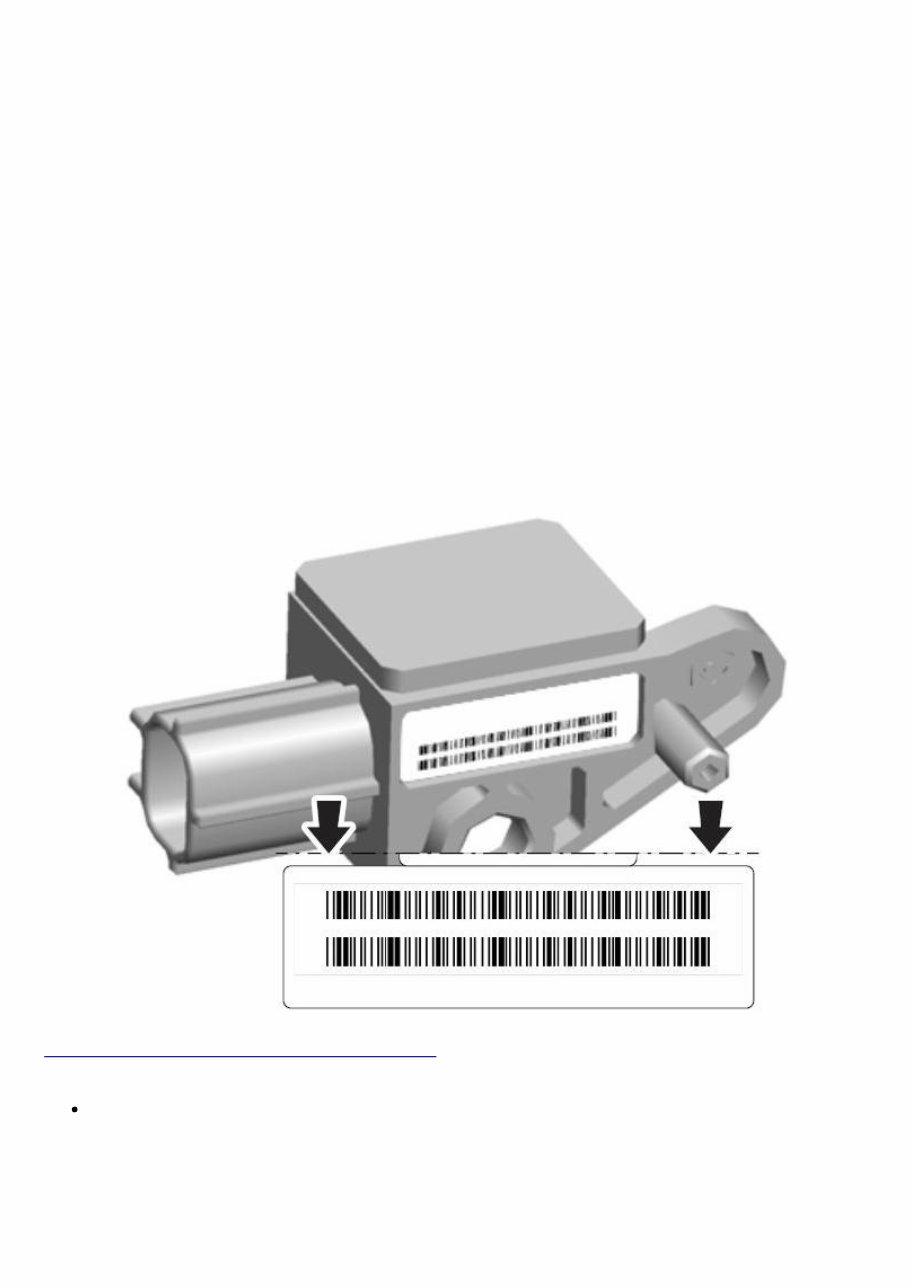
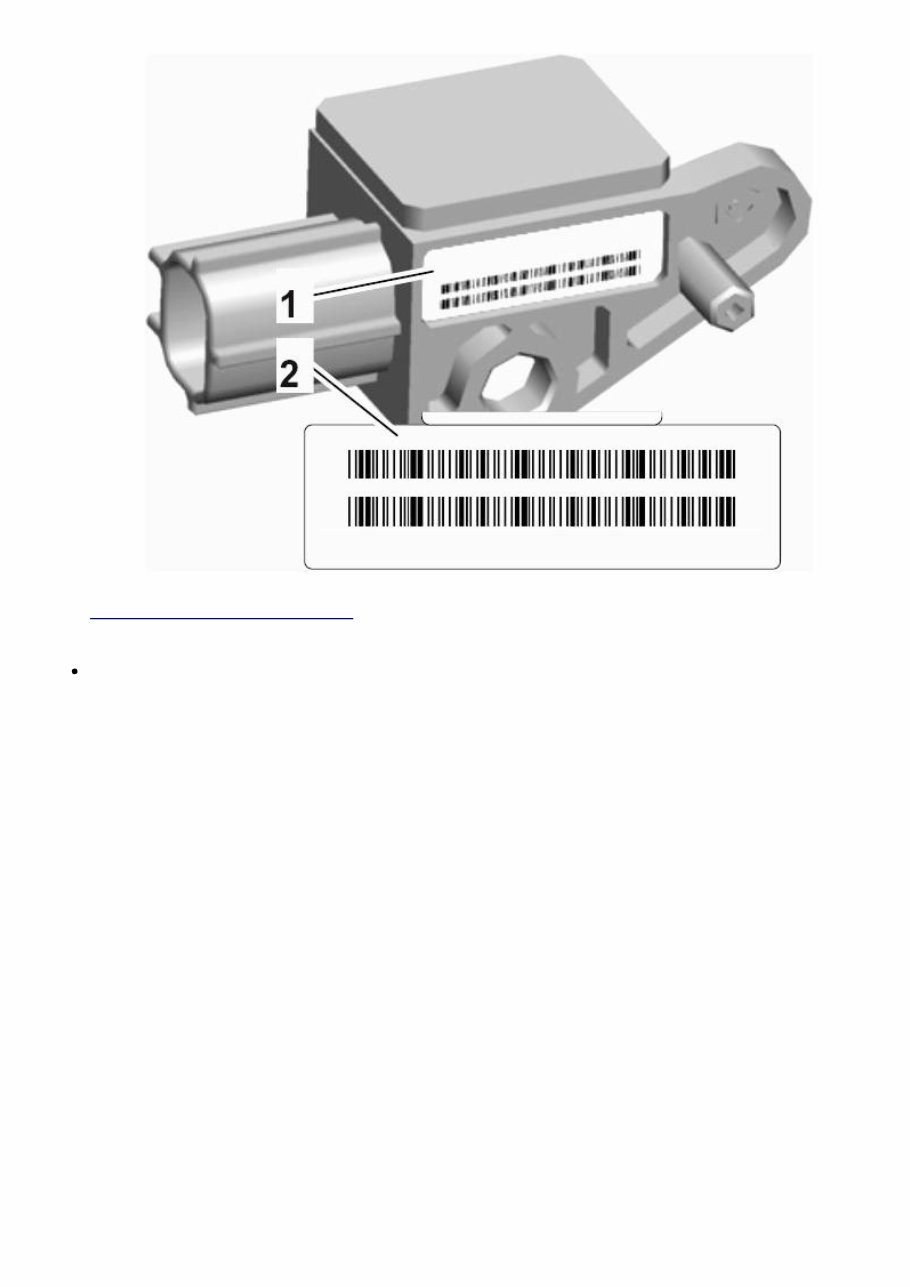
The documentation number is attached to the replacement part as a tearoff sticker or is stored in PIWIS Tester II 9818! Replaced airbag units or airbag modules must be retained by the Porsche Centre or authorised Porsche dealer and must not be handed over to the customer (customer has no right to keep them). They must be destroyed or disposed of in accordance with the explosives ordinance and the hazardous materials ordinance, or returned to the manufacturer! When the steering wheel is replaced, e.g. in order to install a steering wheel from the Equipment range, the airbag unit of the replaced steering wheel must be removed and destroyed, disposed of or returned to the manufacturer before the steering wheel that was replaced is handed over to the customer! The airbag system is constantly monitored by a diagnosis unit in the triggering unit. Any fault is signalled by a warning light. The warning light for the airbag system lights up in the event of a fault. The airbag warning light lights for approx. 3 seconds after the ignition is switched on and goes out if no fault has been entered in the fault memory. If it lights up again, this indicates a fault in the system. The fault can be read out with the PIWIS Tester 9718 . Information If a new component (e.g. sensor, airbag control unit, airbag unit) of the airbag system has to be installed, the new component will be supplied with a barcode sticker (tearoff label). Fig. 5: Locating TearOff Label On Airbag Sensor Courtesy of PORSCHE CARS NORTH AMERICA, INC. Tear off the tearoff label 2 on the new component 1 and stick it under the heading Proof of airbag system check/component replacement in the Guarantee and Maintenance booklet .
Fig. 6: Identifying TearOff Label Courtesy of PORSCHE CARS NORTH AMERICA, INC. The replacement date and current mileage must be documented and the booklet must be stamped with the dealer's stamp. Component Exchange After Airbag/SeatBelt Pretensioner Triggering The following components must be removed and replaced after the airbag system is triggered: Airbag unit, driver's side: 1. Contact unit. 2. Airbag unit, driver's side. 3. Triggering unit after the system is triggered for the third time. Airbag unit, passenger's side: 1. Airbag unit, passenger's side. 2. Triggering unit after the system is triggered for the third time. 3. Instrument panel. 4. Check instrument panel bracket for deformation and replace if necessary. Side airbag unit, seat: 1. Side airbag unit, seat. 2. Seat covering, deformed seat components. 3. Sensor for the side airbag unit after the side airbag is triggered for the third time. 4. Triggering unit after the system is triggered for the third time.
You're Reading a Preview
What's Included?
Lifetime Access
Fast Download Speeds
Online & Offline Access
Access PDF Contents & Bookmarks
Full Search Facility
Print one or all pages of your manual
$36.99
2009 Porsche Boxster Service & Repair Manual Software
If you are in need of a repair manual for your 2009 Porsche Boxster, look no further. Our accessible repair manual software is a cost-effective and convenient alternative to traditional paper manuals. Whether you are a professional mechanic or a DIY enthusiast, this manual provides comprehensive service information for various vehicle components such as brakes, engine, suspension, steering, drivetrain, electrical systems, and more.
In the past, obtaining a traditional service manual in book format was not only expensive but also less convenient. Our repair manual software offers the same valuable information at a lower cost and in a more accessible format. Whether you are tackling brake repairs, suspension replacements, engine troubleshooting, or standard maintenance, this software is an essential tool for your automotive needs.
By utilizing this repair manual software, you can save a significant amount of money on vehicle maintenance and repairs. Professional mechanics often charge high fees for their services, making a DIY approach a cost-effective alternative. This software is compatible with Windows, Mac computers, smartphones, and tablets, ensuring easy access to the manual for your Porsche Boxster.
Reviews
Q&A
Recently Viewed
5,521,897Happy Clients
2,594,462eManuals
1,120,453Trusted Sellers
15Years in Business
Price:
Actual Price:
2009 Porsche Boxster Service & Repair Manual Software