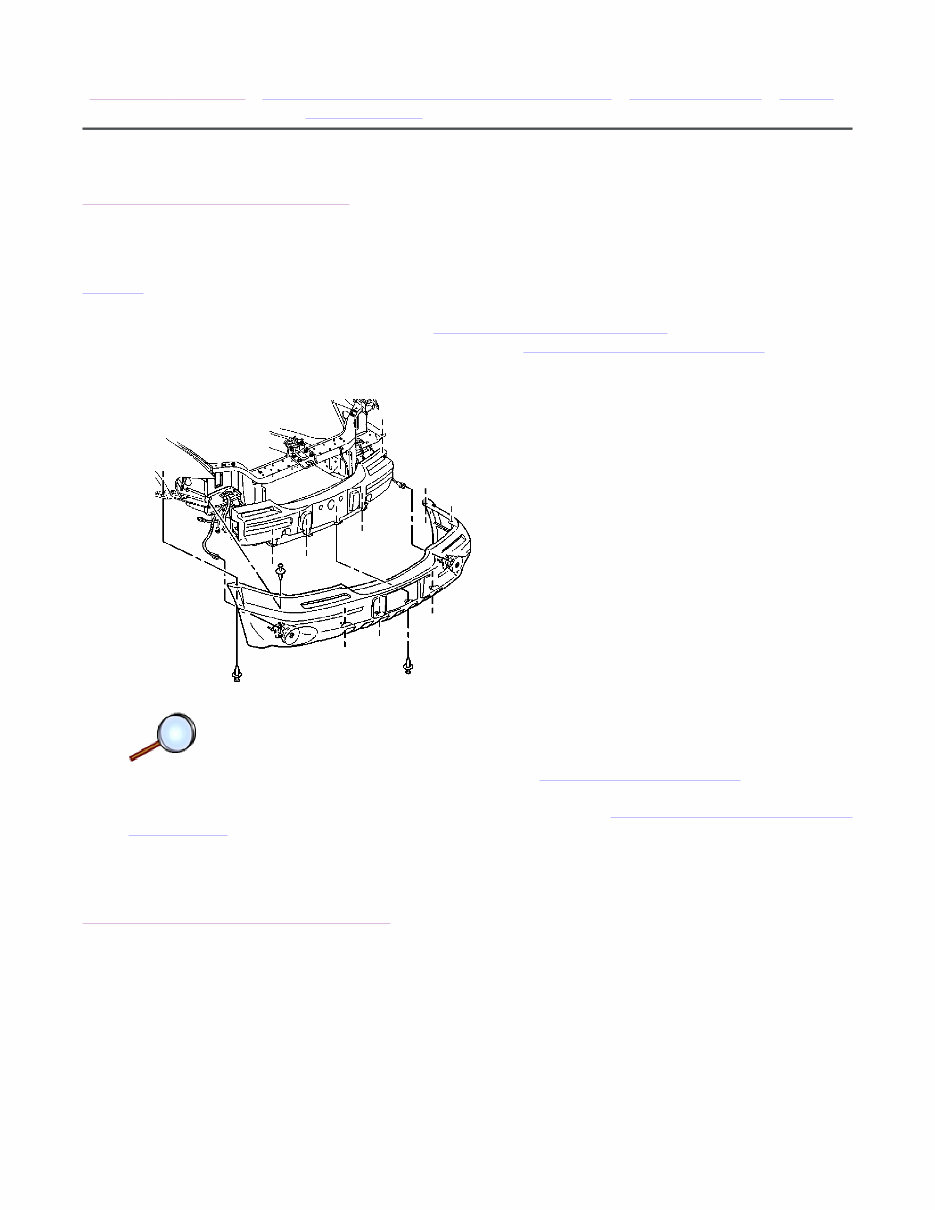
1. Align the front bumper to the front impact bar and to the body. 2. Install the push-in retainers to the upper and lower front bumper fascia. 3. Install the front park/turn signal/sidemarker lamp. Refer to Hazard and Turn Signal Flasher Replacement in Lighting Systems and Horns. 4. Install the right and left front fender liner. Refer to Fender Liner Replacement in Body Front End. 5. Install both of the front tire and wheels. Refer to Tire Mounting and Dismounting in Tires and Wheels. 6. Lower the vehicle. Page 2 of 2 Document ID: 476264 3/16/2011 http://localhost:9001/si/showDoc.do?docSyskey=476264&pubCellSyskey=9978&pubObj... tomsn048@gmail.com
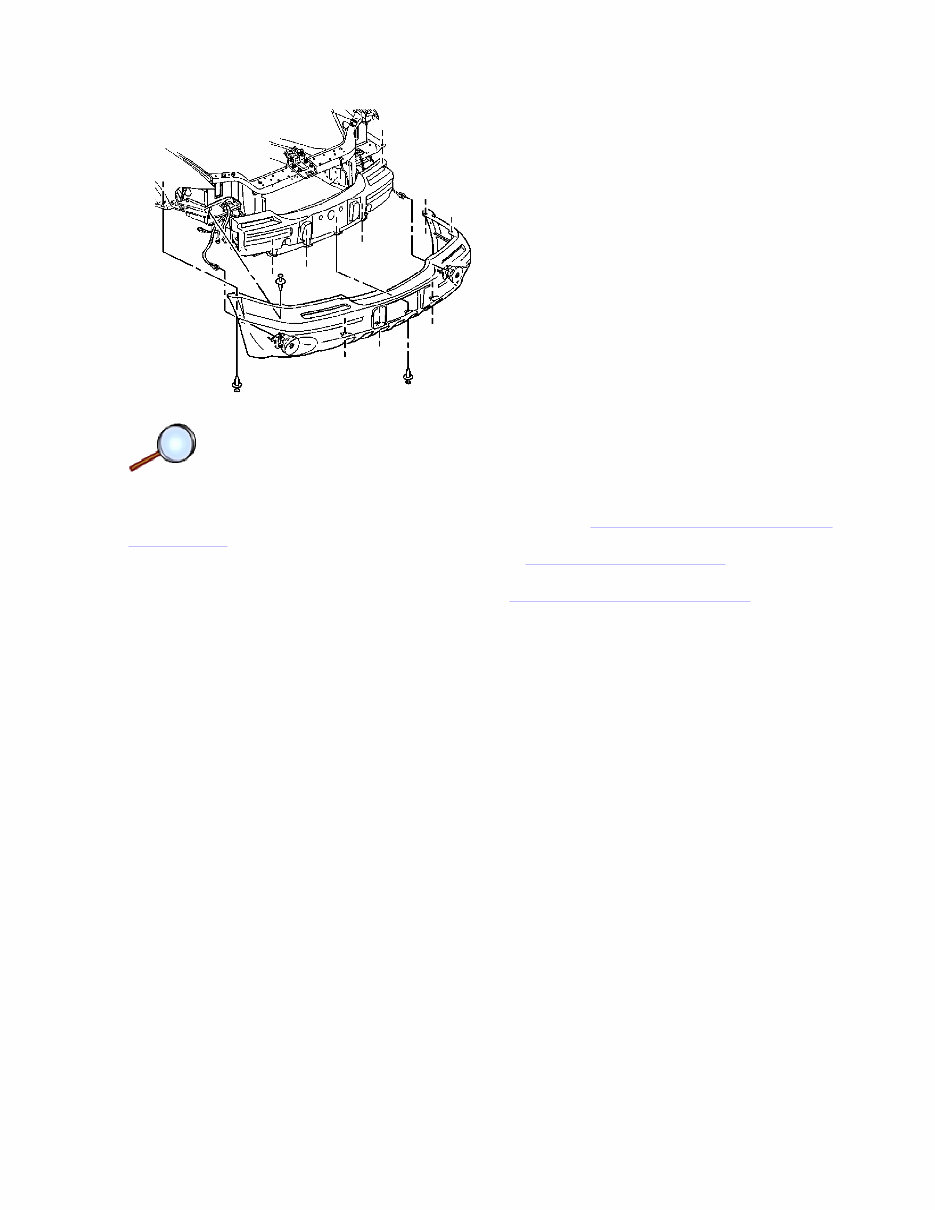
1. Install the front bumper fascia lower support to the front impact bar. 2. Install the push-in retainers to the front bumper fascia lower support. 3. Install the front bumper fascia. Refer to Front Bumper Fascia Replacement . Page 2 of 2 Document ID: 476272 3/16/2011 http://localhost:9001/si/showDoc.do?docSyskey=476272&pubCellSyskey=9982&pubObj... tomsn048@gmail.com
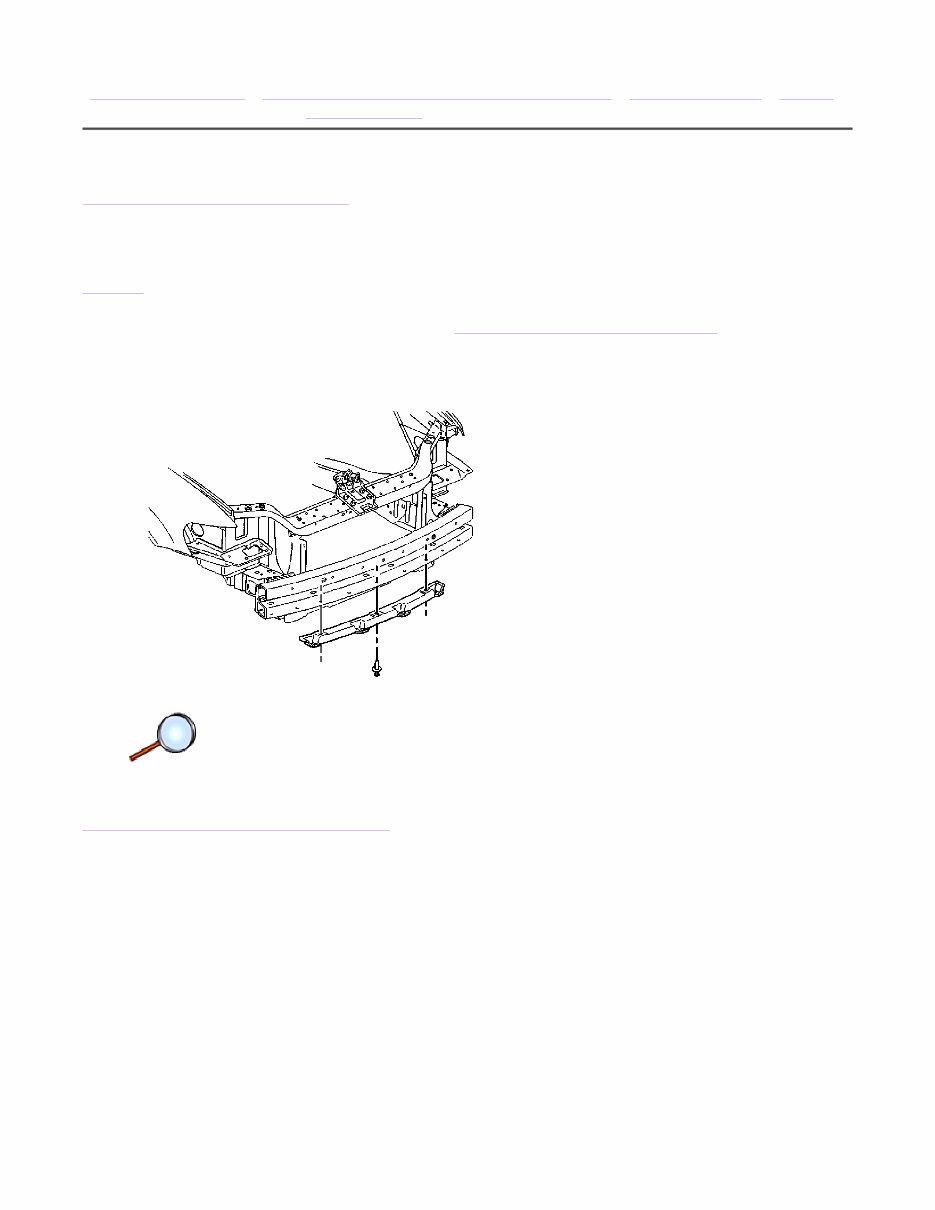
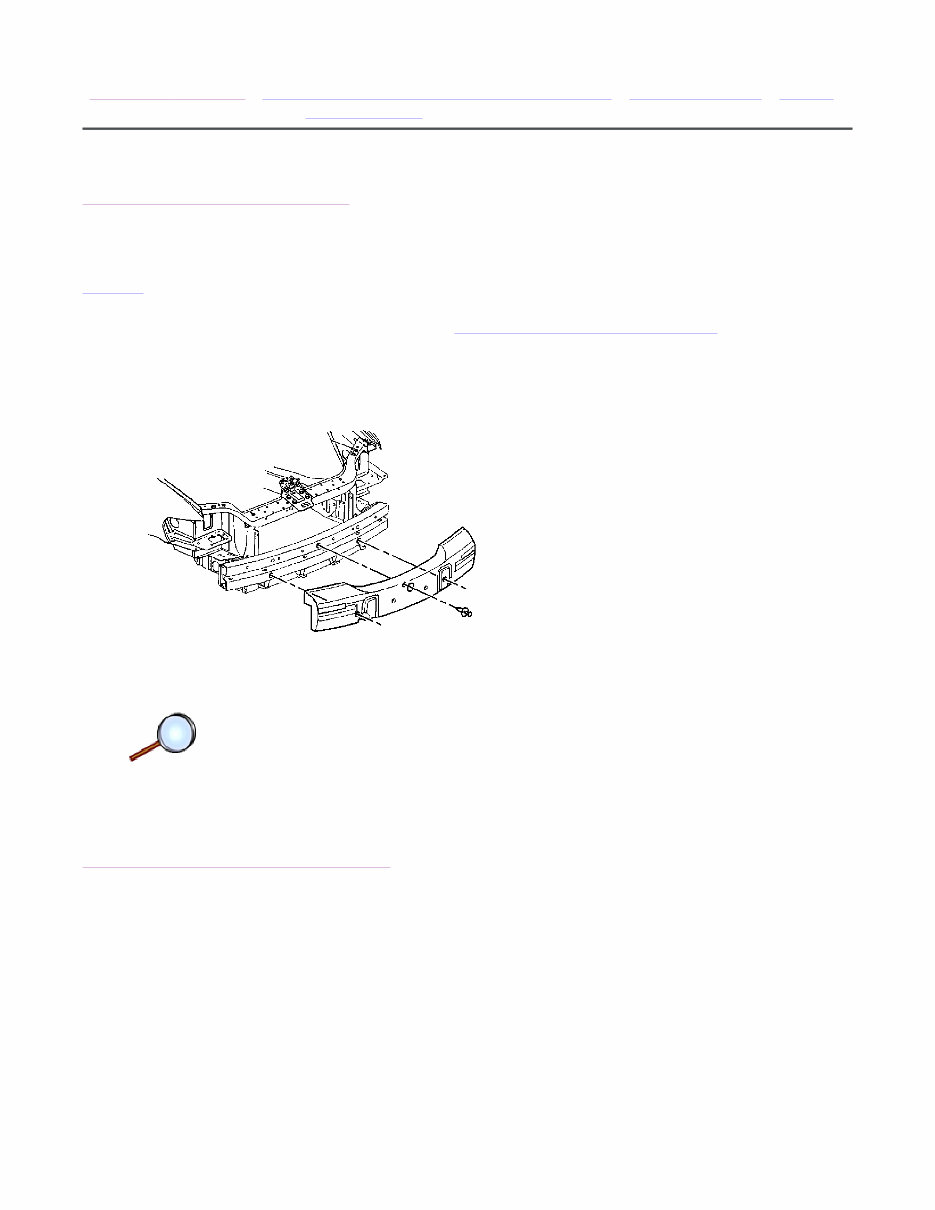
1. Align the front impact bar to the frame rail. Notice: Use the correct fastener in the correct location. Replacement fasteners must be the correct part number for that application. Fasteners requiring replacement or fasteners requiring the use of thread locking compound or sealant are identified in the service procedure. Do not use paints, lubricants, or corrosion inhibitors on fasteners or fastener joint surfaces unless specified. These coatings affect fastener torque and joint clamping force and may damage the fastener. Use the correct tightening sequence and specifications when installing fasteners in order to avoid damage to parts and systems. 2. Install the front impact bar bolts to the frame rail. Tighten Tighten the bolts to 25 N·m (18 lb ft). 3. Install the front bumper energy absorber to the front impact bar. 4. Install the push-in retainers to the front bumper energy absorber. 5. Install the front bumper fascia. Refer to Front Bumper Fascia Replacement . Page 2 of 2 Document ID: 476275 3/16/2011 http://localhost:9001/si/showDoc.do?docSyskey=476275&pubCellSyskey=9987&pubObj... tomsn048@gmail.com
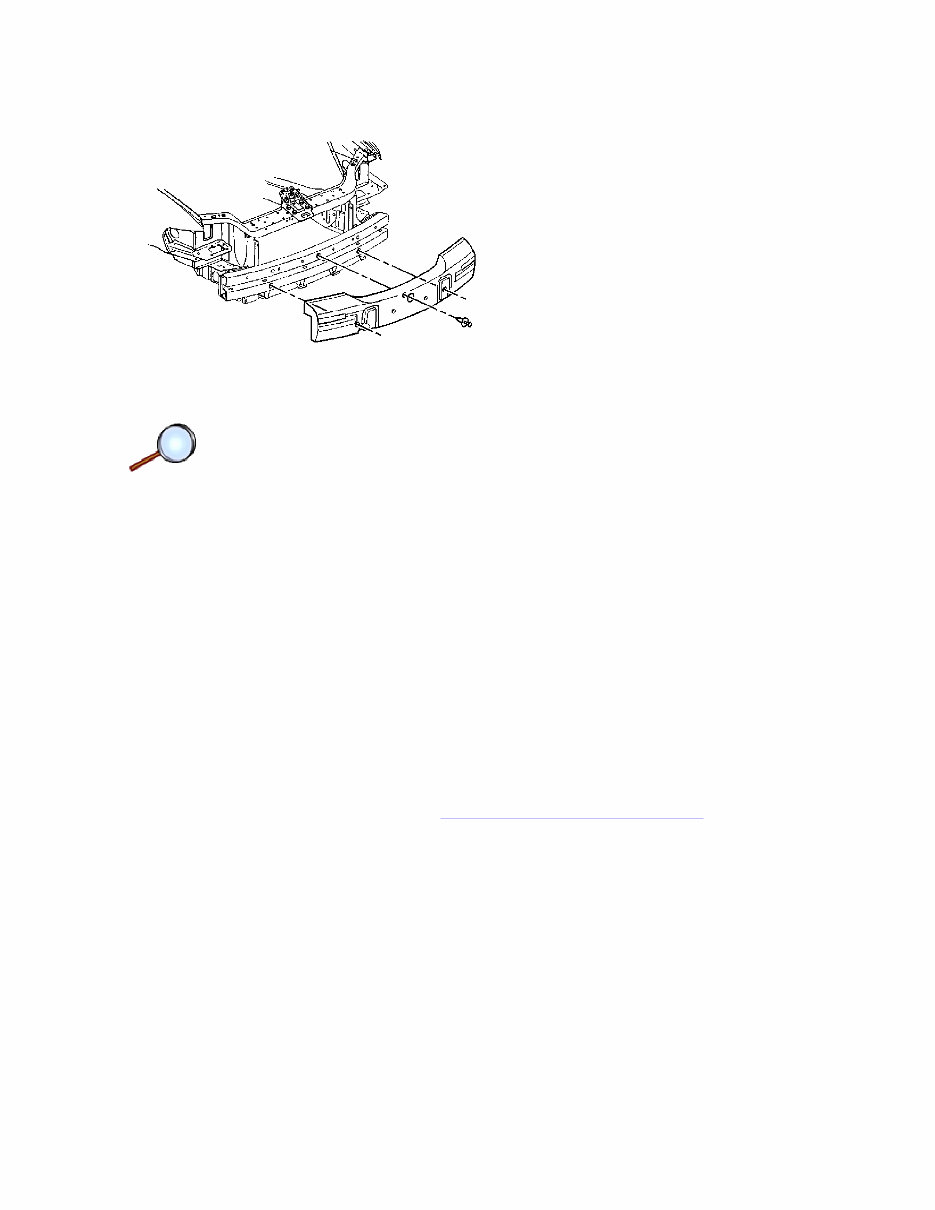
1. Align the front impact bar to the frame rail. Notice: Use the correct fastener in the correct location. Replacement fasteners must be the correct part number for that application. Fasteners requiring replacement or fasteners requiring the use of thread locking compound or sealant are identified in the service procedure. Do not use paints, lubricants, or corrosion inhibitors on fasteners or fastener joint surfaces unless specified. These coatings affect fastener torque and joint clamping force and may damage the fastener. Use the correct tightening sequence and specifications when installing fasteners in order to avoid damage to parts and systems. 2. Install the front impact bar bolts to the frame rail. Tighten Tighten the bolts to 25 N·m (18 lb ft). 3. Install the front bumper energy absorber to the front impact bar. 4. Install the push-in retainers to the front bumper energy absorber. 5. Install the front bumper fascia. Refer to Front Bumper Fascia Replacement . Page 2 of 2 Document ID: 476277 3/16/2011 http://localhost:9001/si/showDoc.do?docSyskey=476277&pubCellSyskey=9946&pubObj... tomsn048@gmail.com
If you are in need of a repair manual for your 2001 Pontiac Montana, look no further. Our accessible repair manual is perfect for both professional mechanics and DIY enthusiasts. In the past, traditional service manuals in book format were costly and inconvenient. Our repair manual provides the same information at a much lower cost and with greater convenience.
Whether you need to fix the brakes, replace suspension components, get the engine running, or perform standard maintenance, this manual has got you covered. It includes comprehensive service information for the brakes, engine, suspension, steering, drivetrain, electrical systems, heating, air conditioning, and more.
By utilizing this repair manual , you can save a significant amount of money on vehicle repairs. Mechanics often charge high fees for their services, but with this manual, you can tackle the repairs yourself. The is compatible with Windows, Mac computers, smartphones, and tablets, making it easy to access and use.