DRIVESHAFTS Front driveshaft 29 29-2 Front driveshaft REMOVAL - WHEEL SIDE Put the vehicle on a two-post lift. Remove: – the wheel hubcap, – the hub nut, – the front wheels, – the track rod end nut (B), – the shock absorber lower mounting bolts (C). Push the driveshaft back into the stub-axle carrier, whilst tilting the stub-axle carrier. SPECIAL TOOLING REQUIRED T. Av. 476 Ball joint extractor TIGHTENING TORQUES (in daNm) Shock absorber lower bolt 18 Track rod end nut 3.7 Hub nut 28 Wheel bolt 14.2 Mounting bolt on gearbox 4.4 Mounting bolt on intermediate bracket 4.4 Stud on gearbox 0.8
DRIVESHAFTS Front driveshaft 29 29-3 REMOVAL - GEARBOX SIDE Right-hand side Remove: – the two mounting bolts (A) of the intermediate support, – the driveshaft on the gearbox side. Left-hand side Drain the gearbox. Remove: – the three gaiter mounting bolts on the gearbox, – the driveshaft on the gearbox side.
DRIVESHAFTS Front driveshaft 29 29-4 REFITTING Left-hand side Remove the plastic protector from the bearing gaiter and insert the driveshaft as horizontally as possible. The driveshaft should enter freely until the thread protrudes allowing the stub axle nut to be fitted. Right-hand side Clean the bore of the bearing into which the bearing is inserted. Check the condition of the contact surface of the lip seal on the relay shaft. NOTE: the differential output lip seal must always be replaced. With the protector in place, coat the splines of the seal, gearbox end, with MOLYKOTE BR 2 grease. Position the driveshaft and insert it. The driveshaft should enter freely until the thread protrudes allowing the stub axle nut to be fitted. Proceed in the reverse order to removal.
REAR AXLE Bearing 33 33-7 Bearing REMOVAL Remove: – the brake disc (refer to the relevant procedure), – the brake disc circlip. – the bearing using tools A and C. NOTE: It is essential to fit a new bearing. REFITTING Refit: – the bearing using tools B and C, – the brake disc circlip, – the brake disc (refer to the relevant procedure). SPECIAL TOOLING REQUIRED T. Ar. 1623 Tool kit for replacing the rear bearings
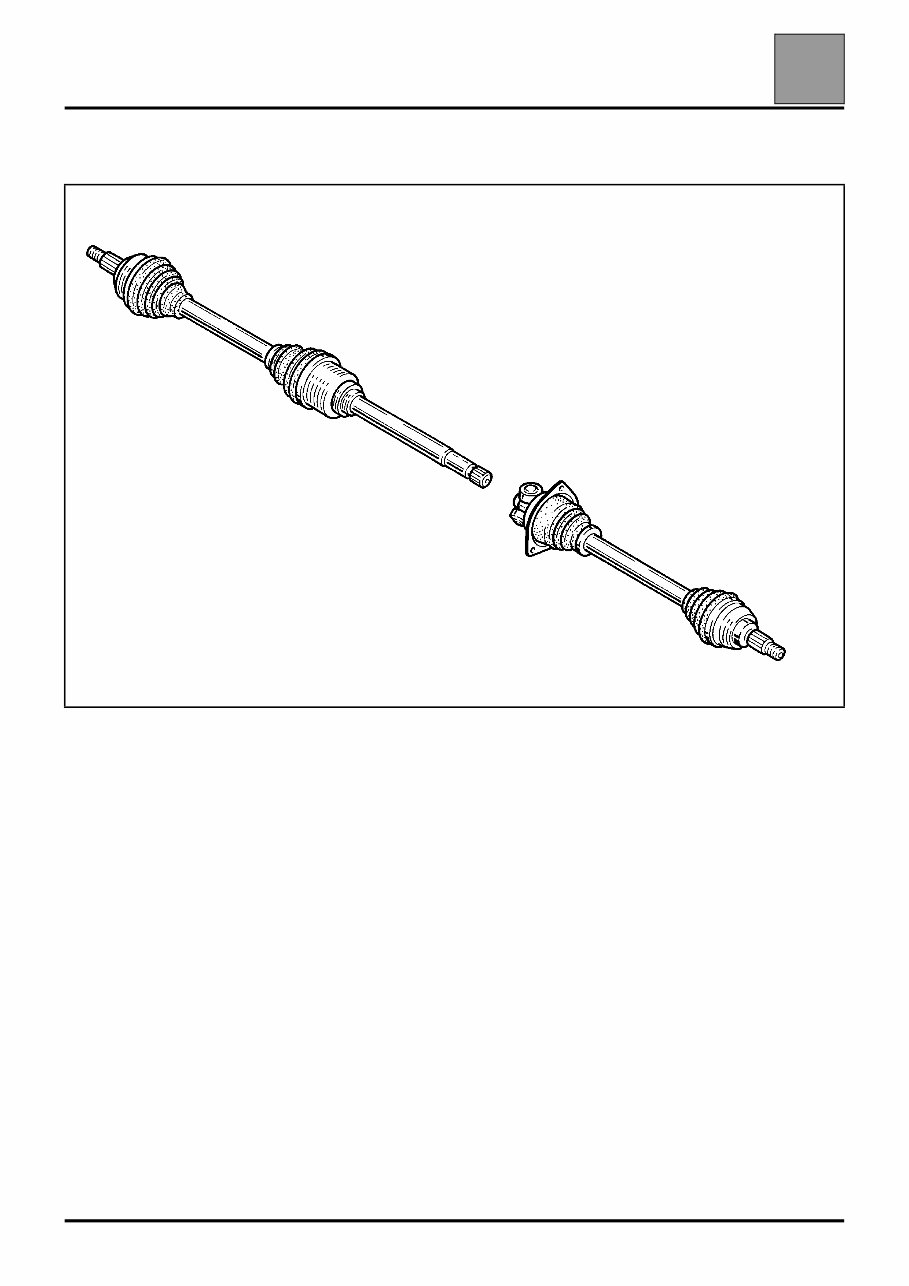
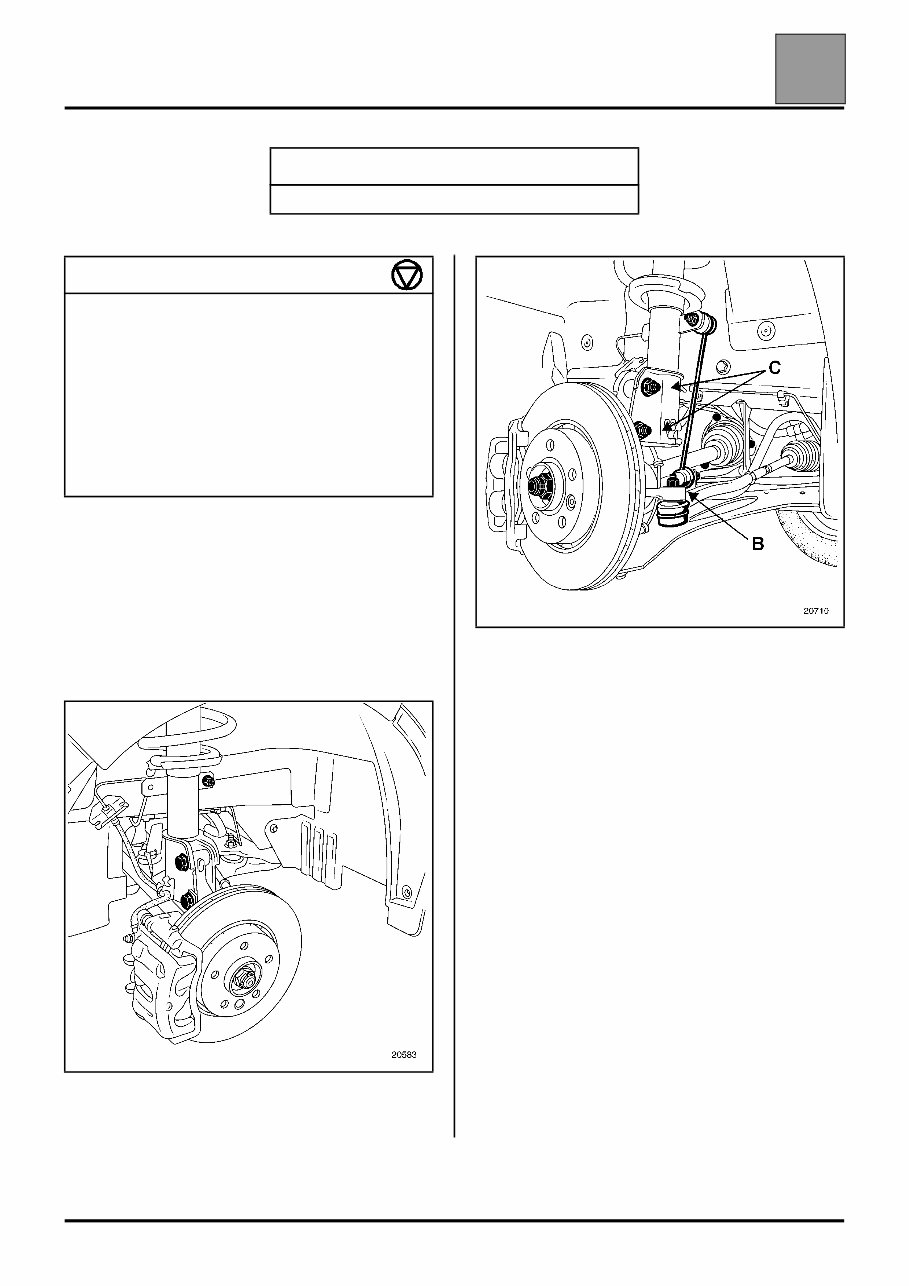
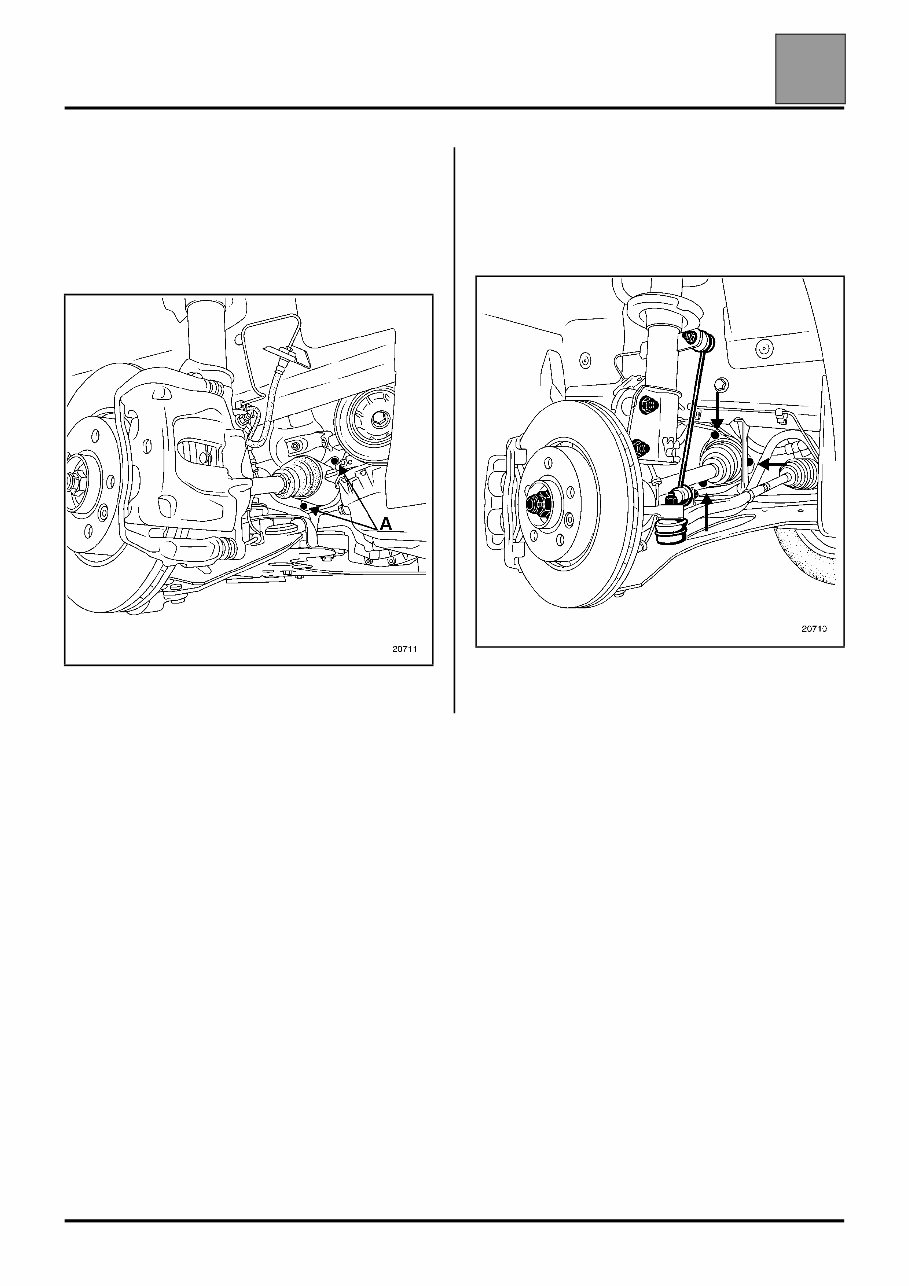
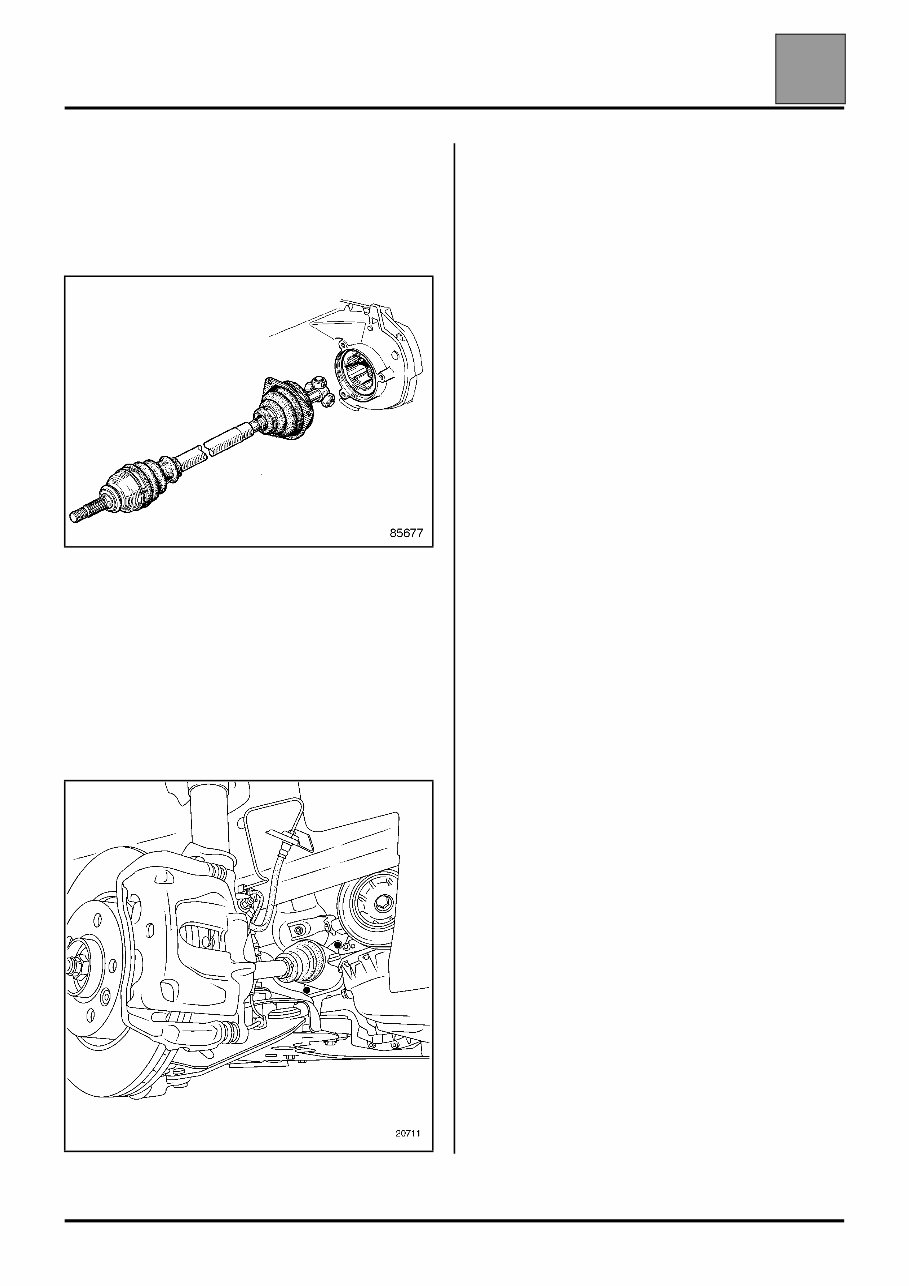
The 2002-2010 Opel Vivaro Service & Repair Manual is a comprehensive guide tailored to assist owners and technicians in maintaining, servicing, and repairing Opel Vivaro vehicles produced during the specified period. This manual provides detailed instructions, diagrams, and illustrations for various tasks, from routine maintenance to complex repairs, ensuring compatibility with a wide range of Opel Vivaro variants.
Whether you're a professional mechanic or a DIY enthusiast, this manual equips you with the necessary information to keep your Opel Vivaro in optimal condition. It includes comprehensive coverage of Opel Vivaro models from 2002 to 2010, detailed instructions for maintenance tasks, step-by-step procedures for troubleshooting common issues, electrical wiring diagrams, clear explanations of complex repair procedures, and tips for safe and efficient repairs.
Whether you're performing basic maintenance or tackling extensive repairs, the 2002-2010 Opel Vivaro Service & Repair Manual is an essential tool for ensuring the smooth operation of your Opel Vivaro for years to come.