

Nissan Kubistar Workshop Manual
What's Included?
Fast Download Speeds
Offline Viewing
Access Contents & Bookmarks
Full Search Facility
Print one or all pages of your manual
AUTOMATIC TRANSMISSION
Identification
23A
23A-1
123A
AUTOMATIC TRANSMISSION
Identification
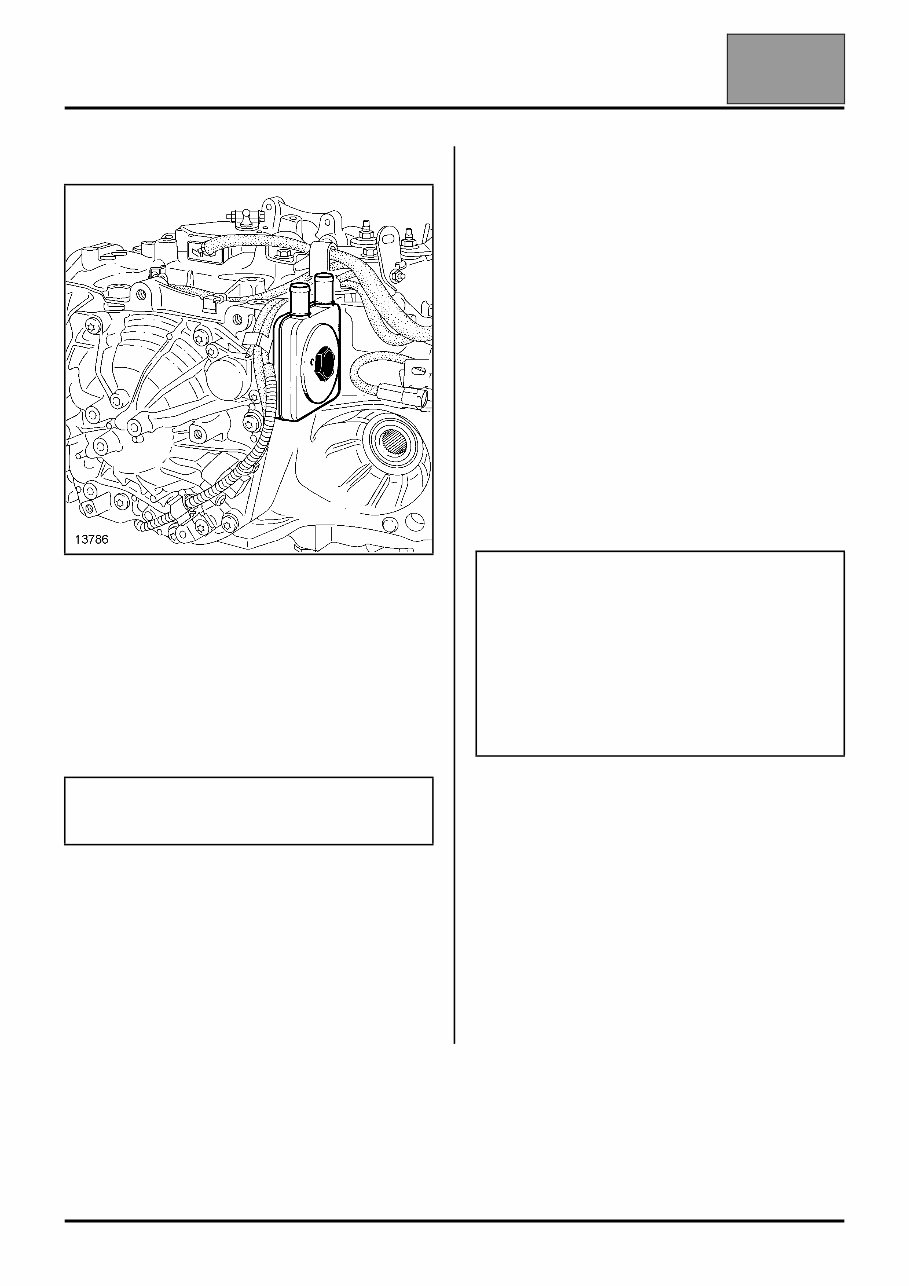
Identification stamped on the automatic transmission.
TECHNICAL SPECIFICATIONS
Weight: 70 kg
Vehicles fitted with DP0 automatic transmission use
systems called Shift Lock and Lock Up.
The aim of the Shift Lock is to prevent the gear lever
from being moved unless the brake pedal is being
depressed simultaneously.
The aim of Lock Up, or converter bridging, is to
connect the automatic transmission directly to the
engine. This function is performed by a "mini clutch"
located in the converter.
Lock Up is controlled by the automatic transmission
computer.
As the automatic transmission is lubricated under
pressure, lubrication is only provided when the engine
is running.
As a result of this fact, and to avoid serious damage, it
is essential to comply with the following instructions:
– never allow the vehicle to move with the ignition
switched off (e.g. when going down a hill); we cannot
stress too strongly the harm that this may cause,
– never push the vehicle (e.g. to reach a petrol station),
except taking the precautions contained in the
"Towing" section.
In addition, the vehicle can only be driven if the engine
is running. It is therefore impossible to start the engine
of an automatic transmission vehicle by pushing the
vehicle.
TOWING
The vehicle should always be towed on a back-plate or
with the front wheels raised. If this is not possible, the
vehicle may, in exceptional cases, be towed at up to
30 mph (50 kph) for a maximum distance of 30 miles
(50 km), with the gear lever in N position.
Note:
For repair operations when the battery is faulty, refer
to the vehicle user's handbook.
WARNING
Towing weight
(towing a caravan, boat, etc.).
The load to be towed must be no greater than
1,300 kg for a DP0 automatic transmission.
Failure to comply with this maximum load will, on a
class 7% slope, result in the maximum engine oil and
automatic transmission oil temperature being
exceeded, causing damage to the system.

AUTOMATIC TRANSMISSION
Ratios
23A
23A-2
Ratios
Vehicle Engine Automatic
transmission
Descent Final drive
FC0S / KC0S K4M 753 DP0 52/67 21/73

AUTOMATIC TRANSMISSION
Lubricants
23A
23A-3
Lubricants
The DP0 automatic transmission is lubricated for life,
and it requires no maintenance; it should only be
topped up if there is a small leak.
OIL SPECIFIED:
DEXRON III Standard automatic transmission oil
CAPACITY IN LITRES:
Total volume: 6 litres.

AUTOMATIC TRANSMISSION
Consumables
23A
23A-4
Consumables
DESCRIPTION
COMPONENT
CONCERNED
MOLYKOTE BR2
grease
Converter centring fitting
LOCTITE FRENBLOC Brake calliper mounting
bolt

AUTOMATIC TRANSMISSION
Parts always to be replaced
23A
23A-5
Parts always to be replaced
Parts to be replaced when they have been removed:
– self-locking nuts,
– seals,
– rubber seals,
– converter nuts.
AUTOMATIC TRANSMISSION
Oil changes
23A
23A-6
Oil changes
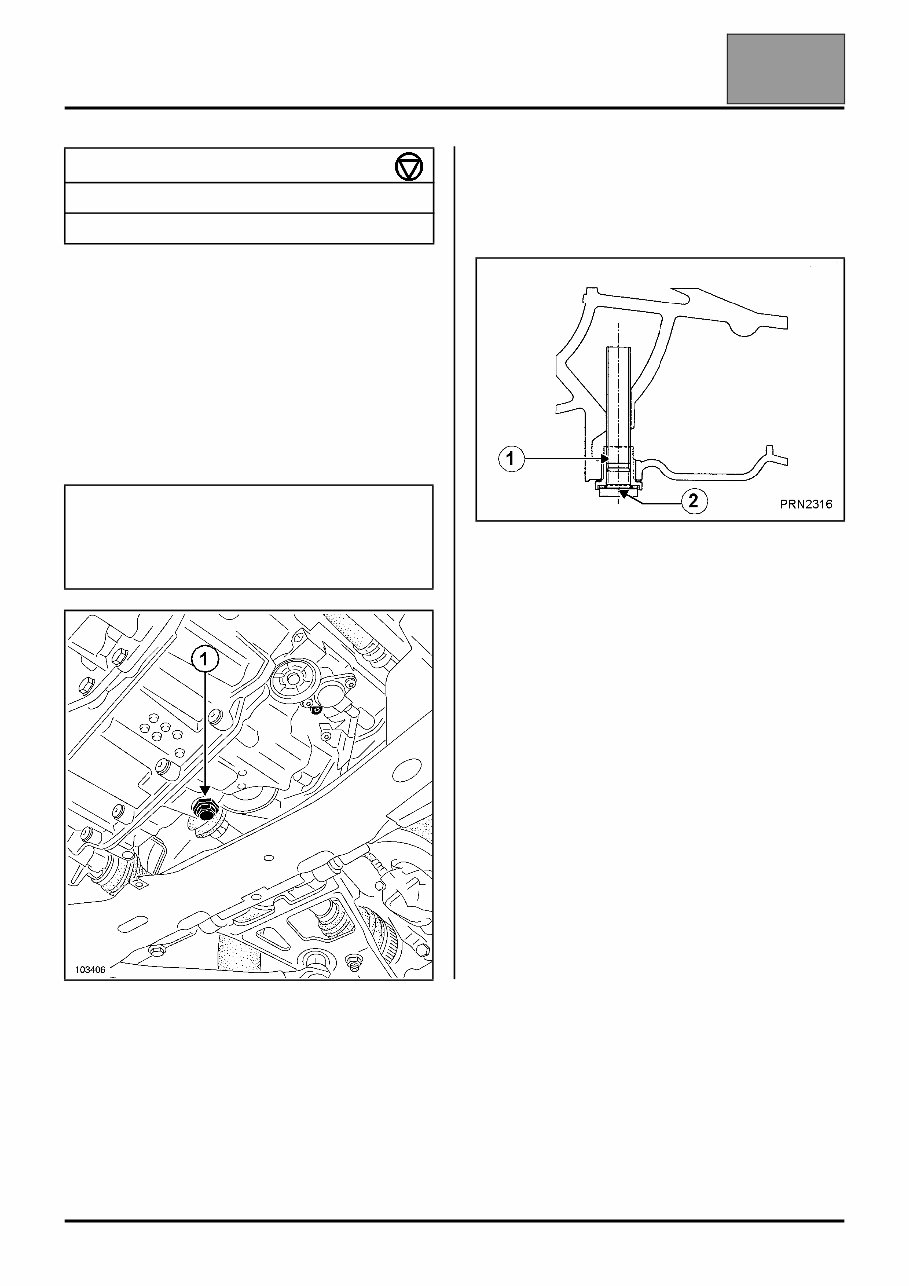
OIL CHANGES
Drain the automatic transmission oil when the oil
is warm (60 °C maximum), in order to remove as
many impurities as possible.
Put the vehicle on a lift.
Remove the engine undertray.
Drain the oil by removing the plug (1).
SPECIAL NOTES
The plug has two functions:
– draining the oil via the plug (1),
– topping up via the spout (2).
Tightening torques
drain plug 2.5 daNm
filler spout 3.5 daNm
Note:
As a precaution, measure the oil collected during the
oil change (total or partial) to find out the volume of
oil to be replaced and to prevent filling to the wrong
level.
AUTOMATIC TRANSMISSION
Filling and topping up
23A
23A-7
Filling and topping up
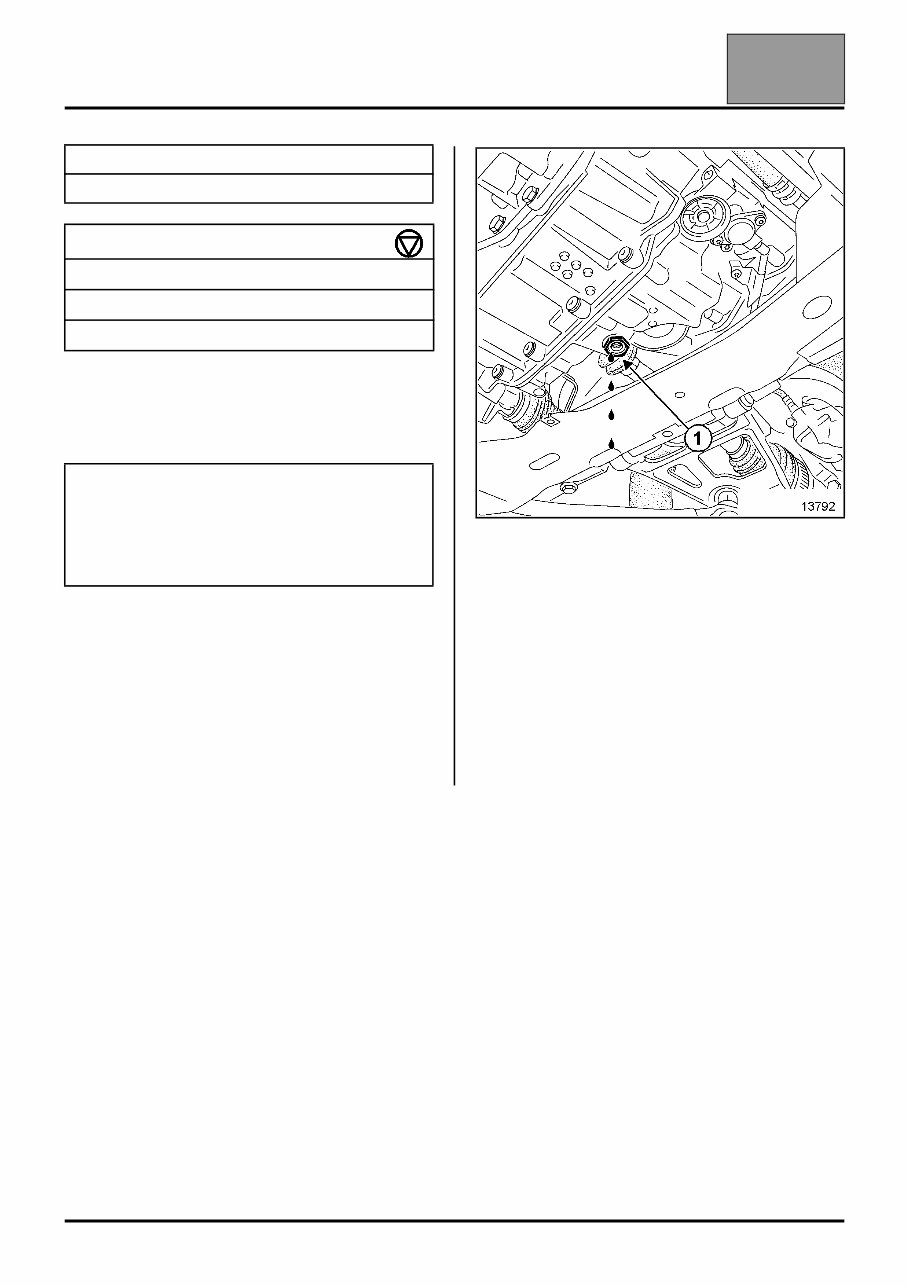
FILLING
Fill through the hole (1).
Use a funnel fitted with a 15/100
th
filter to prevent
impurities from entering the system.
FILLING PROCEDURE
1 - Park the vehicle on level ground.
2 - Fill the automatic transmission with 3.5 litres of
new oil.
3 - Run the engine at idle speed.
4 - Connect the diagnostic tool and establish
dialogue with the automatic transmission
computer.
5 - Monitor the transmission oil temperature
parameter.
6 - When a temperature of 60 °C ± 1 °C is reached,
open the top-up plug.
7 - Position a container to retrieve at least 0.1 litre of
excess oil and wait until the oil flows out one drop
at a time.
8 - Close the top-up plug.
PROCEDURE FOR CHECKING THE LEVEL OTHER
THAN DURING FILLING OPERATIONS
The level MUST be checked using the method
described below:
1 - Park the vehicle on level ground.
2 - Fill the automatic transmission with 0.5 litres of
new oil.
3 - Run the engine at idle speed.
Perform operations 4, 5 and 6 described previously.
If the oil does not flow out or the quantity collected is
less than 0.1 litres: stop the engine, add 0.5 litres, let
the automatic transmission cool down to 50 °C then
carry out operations 3, 4, 5 and 6.
When replacing the oil, the electronic oil ageing
counter must be reset (inside the computer).
Enter the oil change date using command CF074
"Record gearbox oil change date" on the diagnostic
tool.

AUTOMATIC TRANSMISSION
Checking the converter setting point
23A
23A-8
Checking the converter setting point
Place the vehicle on a two-post lift
Lift the vehicle until the wheels are raised off the
ground by a few centimetres.
Connect the diagnostic tool.
Establish dialogue with the automatic transmission
computer.
Monitor the automatic transmission oil temperature
parameter.
The check should be carried out when the oil
temperature is between 60 °C and 80 °C.
Start the engine and put the lever in (D).
Monitor the engine speed parameter.
Establish dialogue with the computer.
Accelerate fully keeping the brakes on.
The front wheels should not rotate.
The engine speed should stabilise at:
KUBISTAR → 2,500 ±150 rpm.
A setting point outside the tolerance requires that the
converter be replaced.
WARNING
– Maximum acceleration should not be maintained
for more than 5 seconds.
Beyond this, there is a high risk of damaging
the converter or the automatic transmission.
– Once the measurement has been taken, release
the accelerator and keep the brakes on until the
engine speed stabilises at idle speed (risk of
damaging the automatic transmission if this is not
done).
Note:
A setting point which is too low may be due to a lack
of engine power.
AUTOMATIC TRANSMISSION
Hydraulic distributor
23A
23A-9
Hydraulic distributor
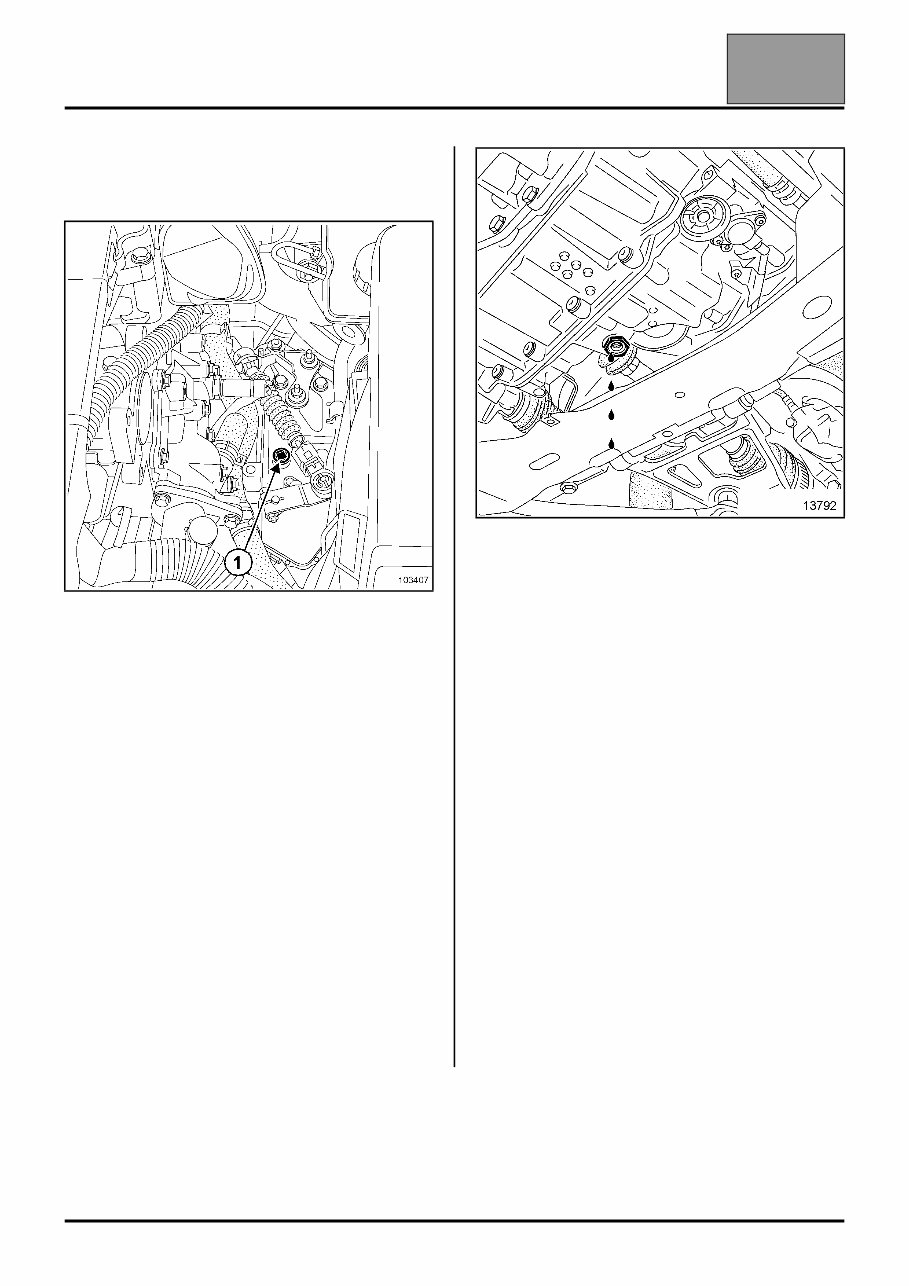
REMOVAL
Put the vehicle on a two-post lift.
Remove the engine covers.
Disconnect the battery.
Drain the refrigerant circuit using a filling station.
Remove the engine undertray.
Drain the cooling circuit through the radiator bottom
hose.
Drain the automatic transmission through the cap (1).
Special tooling required
B.Vi. 1462 Ball plate adjusting screw
Tightening torques
cover mounting bolt 1 daNm
distributor mounting bolt 0.75 daNm
rechargeable battery 4 daNm
Note:
During this operation, the vehicle must be secured to
the lift with a strap to prevent it from becoming
unbalanced.
For the strap attachment procedure, see the Lifting
section.
AUTOMATIC TRANSMISSION
Hydraulic distributor
23A
23A-10
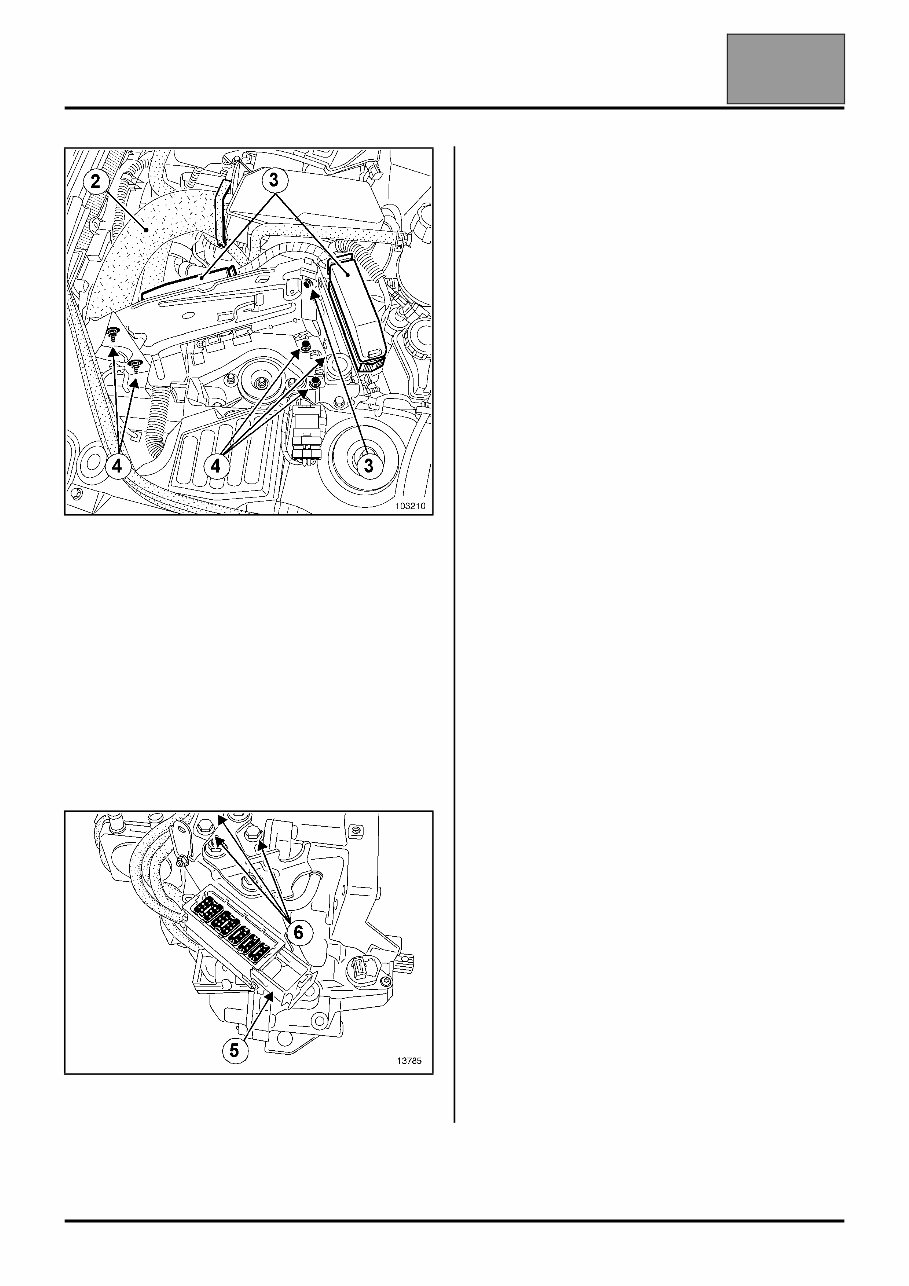
Remove:
– the resonator (2),
– the battery,
– the two connectors (3),
– the bolt (3).
Release the electric wiring harness from the battery
tray.
Remove:
– the four bolts and the nut (4) of the battery tray,
– the battery tray.
Remove the radiator (refer to the relevant section).
Remove the modular connector by releasing the
connector module (5).
Remove:
– the three mounting bolts (6) from the modular
connector support plate,
– the two mounting bolts from the modular connector
plate, then remove the connector,
– the connector,
– the connector tabs so that the harness can be
extracted from the gearbox,
– the hydraulic distributor harness clip attached to the
gearbox.
Undo the power assisted steering pipe mountings on
the gearbox.
You're Reading a Preview
What's Included?
Fast Download Speeds
Offline Viewing
Access Contents & Bookmarks
Full Search Facility
Print one or all pages of your manual
$24.99
Viewed 57 Times Today


Secure transaction
What's Included?
Fast Download Speeds
Offline Viewing
Access Contents & Bookmarks
Full Search Facility
Print one or all pages of your manual
$24.99
Nissan Kubistar Workshop Manual
Models / Engines:
- Models covered from 2003 to 2004:
- X76
- X78
Topics Included:
- General Information
- Maintenance
- Engine Mechanical
- Engine Lubrication & Cooling
- Engine Control System
- Accelerator Control
- Fuel & Exhaust System
- Clutch
- Manual & Auto Transmission
- Front & Rear Axles
- Front & Rear Suspension
- Brake System
- Restraint System
- Body & Trim
- Starting & Charging System
- Electrical System
- Plus More


