Title GENERAL INFORMATION BODY STRUCTURE REPLACING BODY PANELS BODY DIMENSIONS WATERPROOFING AND RUSTPROOFING BODY MODIFICATION TOOLS PLASTIC PARTS 00 11 21 31 41 51 61 Group This Body Shop Manual illustrates body structures and service procedures for the SPORTAGE. This manual illustrates the replacement of major body panels, plastic parts, body dimensions, sealing treatment etc., in a systematic manner which is necessary for effective and lasting body repairs. You are encouraged to become familiar with this manual and understand each section in order to perform proper repair procedures. Keep this manual in a convenient location so that it is readily available. All information in this manual including specifications, data and illustrations is made based on the vehicles built at the time the manual was printed. Information regarding the removal/replacement of components not specifically covered in this manual can be found in the SPORTAGE Service Manual. Information regarding electrical harness routing/ connections, etc. can be found in the SPORTAGE Electrical Troubleshooting Manual. The descriptions and specifications contained in this manual were in effect at the time this manual was approved for printing. Kia Motors Corporation reserves the right to discontinue models at any time, or change specifications or design without notice and without incurring obligation. Body shop Manual FOREWORD Kia Motors Corporation SEOUL, KOREA CONTENTS All rights reserved. No part of this publication may be reproduced, stored in any retrieval system or transmitted in any form or by any means without the prior written permission of Kia Motors Corporation. Copyright 2004, Kia Motors Corporation Printed in Korea, August 2004 Pub. No. : A1FB-EG48A (English) CAUTION : Severe engine and transaxle damage may result from the use of poor quality fuels and lubricants that do not meet Kia specifications. You must always use high quality fuels and lubricants that meet the specifications described on the specification section in the relevant group of the Workshop Manual.
21-18 Replacing body panels BMKM030 B A C D 5 Points 6 Points C D E E A B
IN THIS MANUAL IMPORTANT SAFETY NOTICE Proper service methods and repair procedures are essential for safe, reliable operation of all motor vehicles as well as personal safety of the operator. The service procedures and descriptions in this body shop manual provide general directions for a service and repair. Procedure, techniques, tools, and parts for service including the skill of the technician vary. It is impossible to provide advice or caution as to each case in this manual. Accordingly, anyone who intends to use a replacement part, service procedure, or tool, which is not recommended by the vehicle manufacturer, must first assure thoroughly that neither their personal safety nor the safe operation of the vehicle will be first jeopardized by the replacement part, service procedure, or tool they select. The following list contains some general WARNINGS that you should follow while working on a vehicle. Always wear safety glasses for eye protection. Use safety stands whenever a procedure requires you to be under the vehicle. Make sure that the ignition switch is always in the OFF position, unless otherwise required by the procedure. Set the parking brake when working on the vehicle. If you have an automatic transaxle, set in park unless instructed otherwise for a specific operation Place supporters against the front and rear surfaces of the tires to help prevent the vehicle from moving Operate the engine only in a well-ventilated area to avoid the danger of carbon monoxide poisoning. Keep yourself and your clothing away from moving parts when the engine is running, especially the drive belts. To prevent serious burns, avoid contact with hot metal parts such as the radiator, exhaust manifold, tail pipe, catalytic converter and muffler. Do not smoke while working on a vehicle. To avoid injury, always remove rings, watches, loose hanging jewelry, and loose clothing before beginning to work on a vehicle. When it is necessary to work under the hood, keep hands and other objects clear of the radiator fan blades! Your vehicle may be equipped with a cooling fan that may turn on, even though the ignition switch is in the OFF position. For this reason care should be taken to ensure that the radiator fan electric motor is completely disconnected when working under the hood and the engine is not running. Remind you to be especially careful in those areas where carelessness can cause personal injury. To prevent you from making errors that could damage the vehicle as well as personal injury. Gives you added information that will help you complete a particular procedure. WARNING : CAUTION : NOTE :
General information Fundamental procedures Vehicle protection ........................................................................................ 00- 1 A word about safety ..................................................................................... 00- 1 Welding procedures .................................................................................... 00- 1 Body frame straightener ............................................................................. 00- 2 Electrical procedures .................................................................................. 00- 2 For best results Disassembly .................................................................................................. 00- 3 Preparation of assembly ............................................................................ 00- 5 Assembly ........................................................................................................ 00- 6 Rustproof treatment after assembly .................. 00- 7 Vehicle lift (2-Support type) & safety stand positions 00- 8 Jack and safety stand positions ............................................................. 00- 8 Towing ..................................................................................................................00- 9 Body colors and major specifications Kia color codes ............................................................................................ 00- 10 Paint manufacture codes ............................................................................00- 10 General information 00
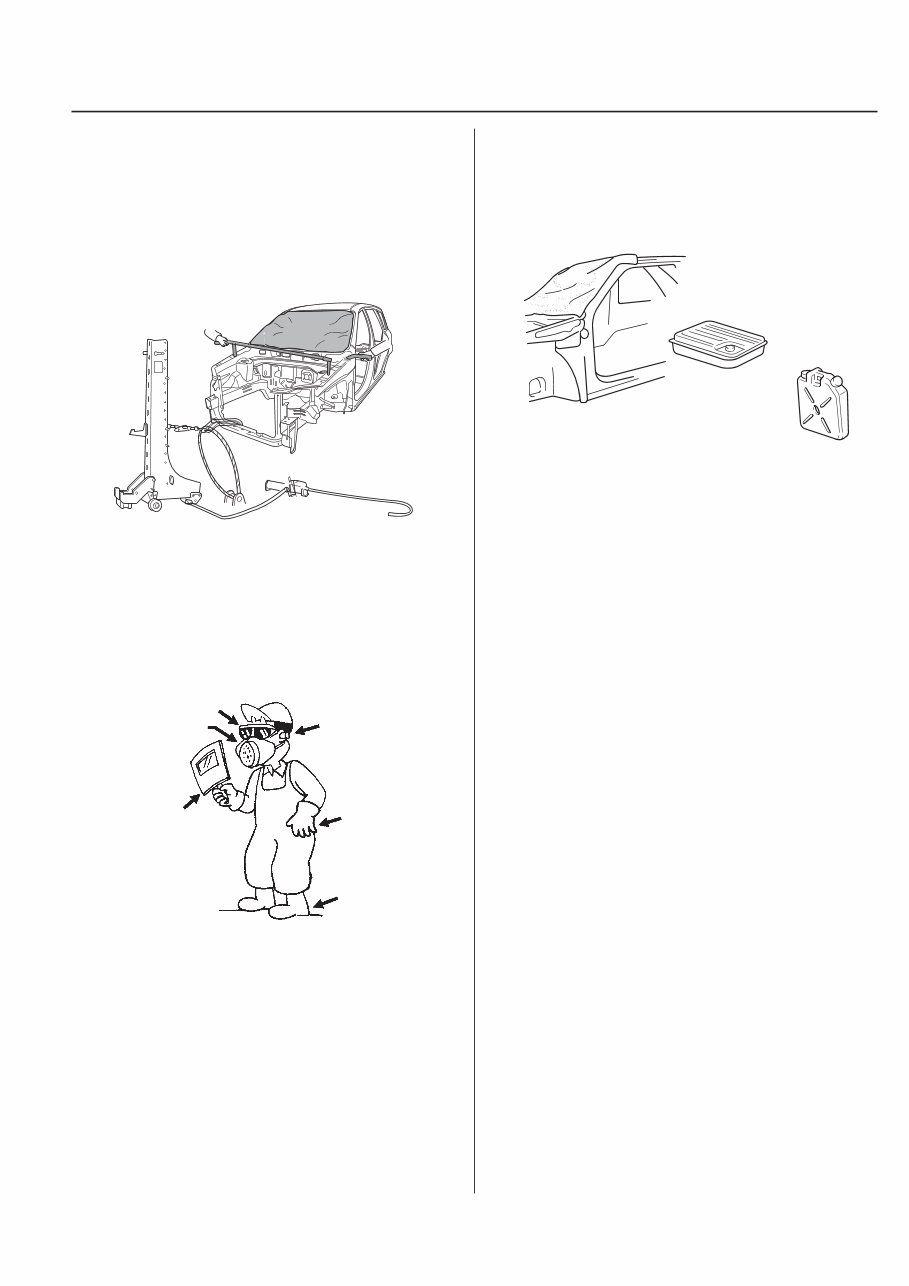
General information 00-1 Fundamental procedures Vehicle protection 1. Cover the seats before performing any procedure to keep them from getting dirty. 2. Cover all glasses, seats and mats with a heat resistant cover when welding. 3. Protect moldings, garnishes and ornaments. A word about safety 1. Wear the appropriate safety equipment that is necessary for the procedure being performed. 2. When welding or performing other procedures that require the use of an open flame near the fuel tank, disconnect and remove the tank and fuel pipe, and cap the pipe to prevent fuel leakage. Welding procedures Observe the following tips when welding. 1. Wear appropriate eye protection. 2. Carefully follow the manufacturers operating instructions for the welding machine you are using. 3. Do not weld, smoke or allow open flames around volatile chemicals, cleaners or solvents or in any area where they have just been used. AFJ3B3001 00003 ASD1BM003 Safety glasses Ear protectors Gloves Face shield Mask Safety shoes
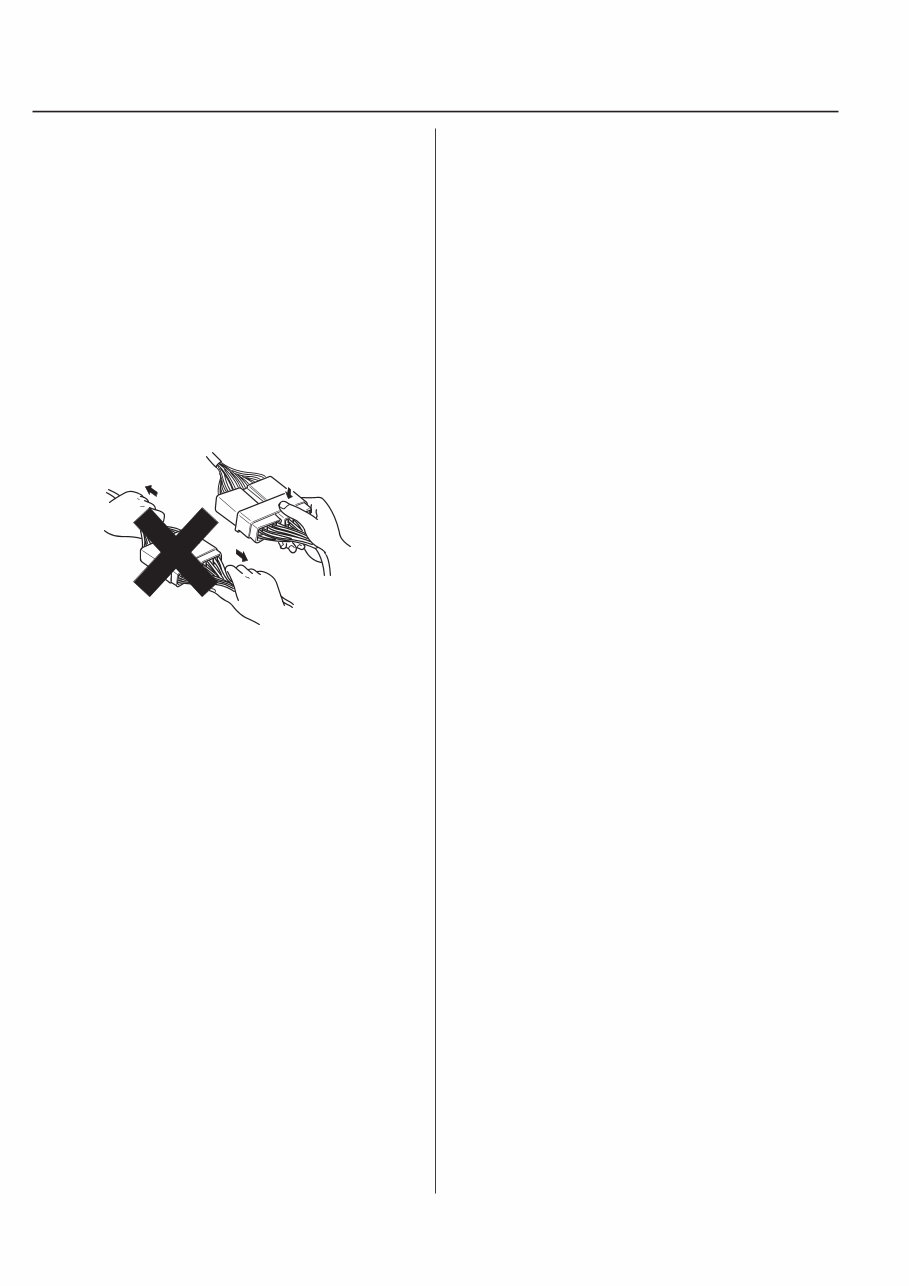
Body frame straightener When using a frame straightener, do not enter the area where the body is being straightened by the chain. Electrical procedures 1. Disconnect the negative battery terminal. 2. Do not pull on wires when disconnecting electrical connectors. Be careful to hold the connector itself when disconnecting it. 3. Insert the connector until it “clicks” when connecting the connector. 4. Handle all electrical components with care. 00-2 General information ba2c015f
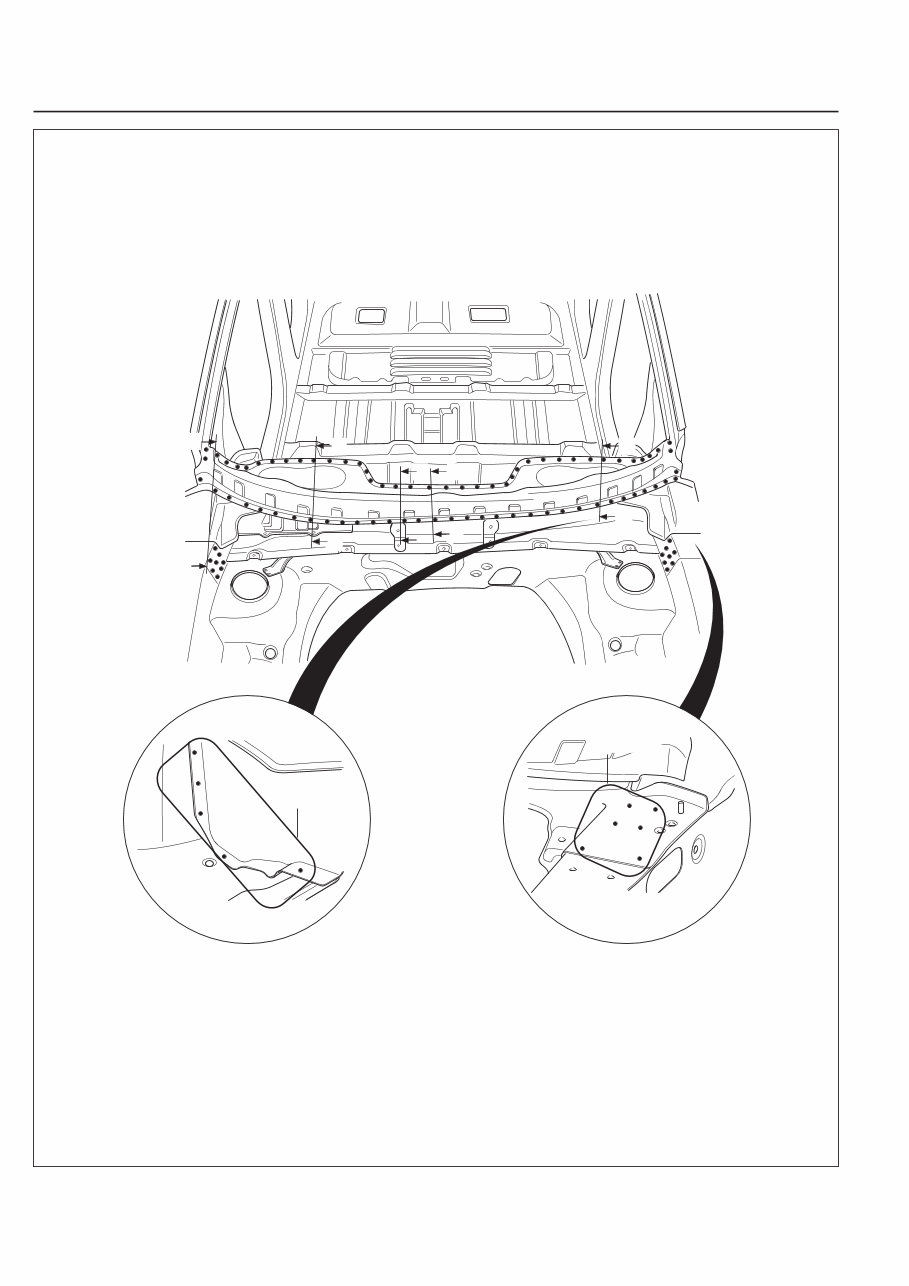
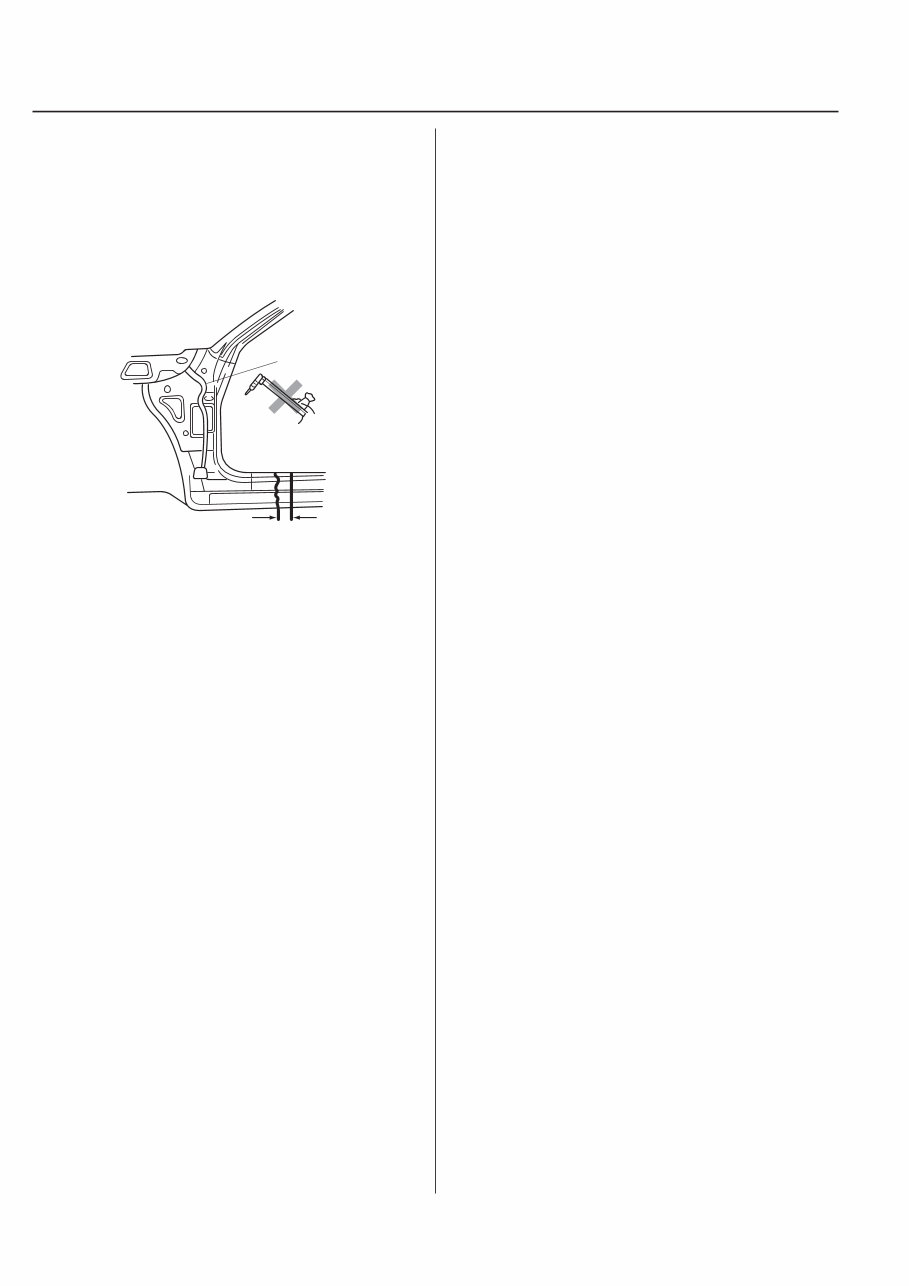
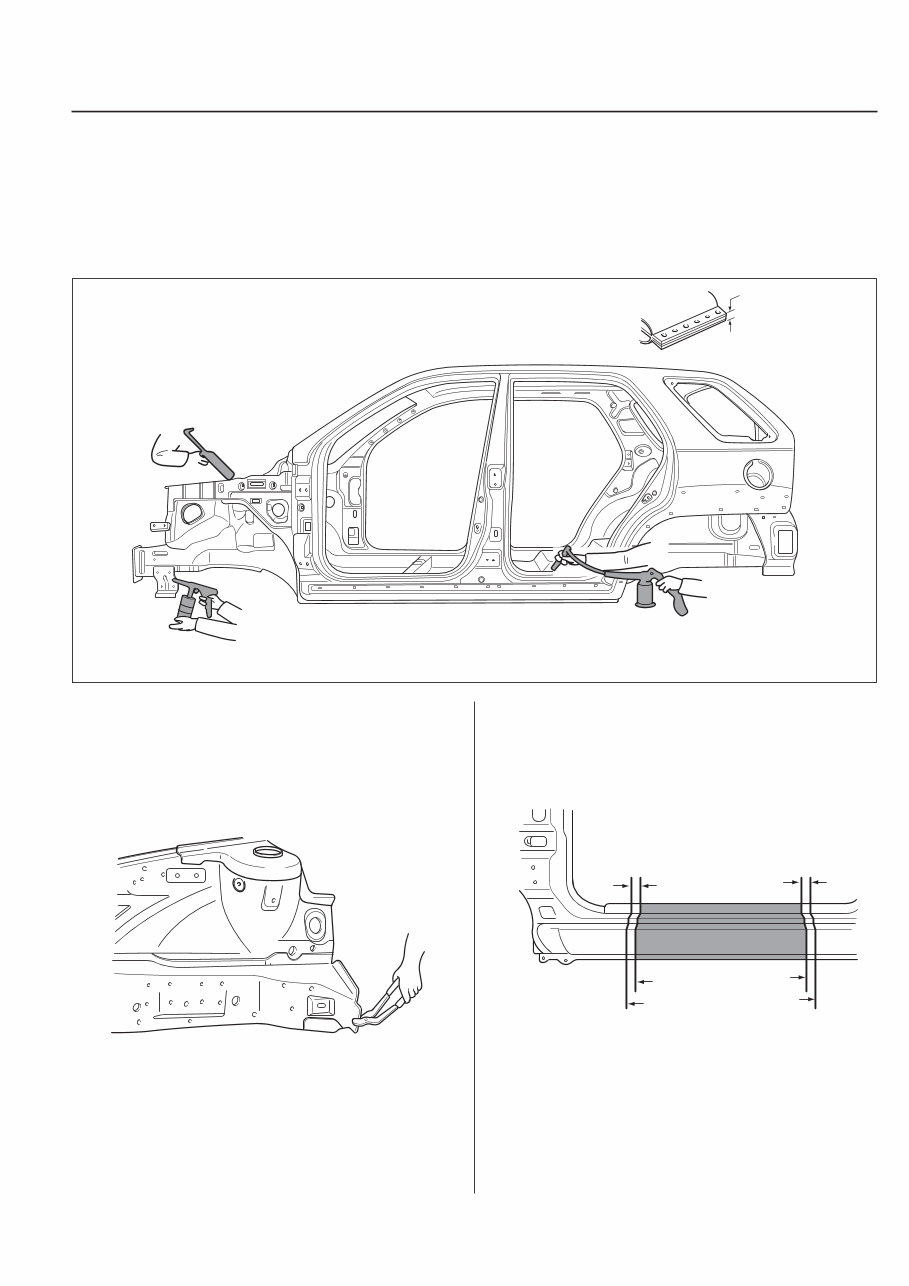
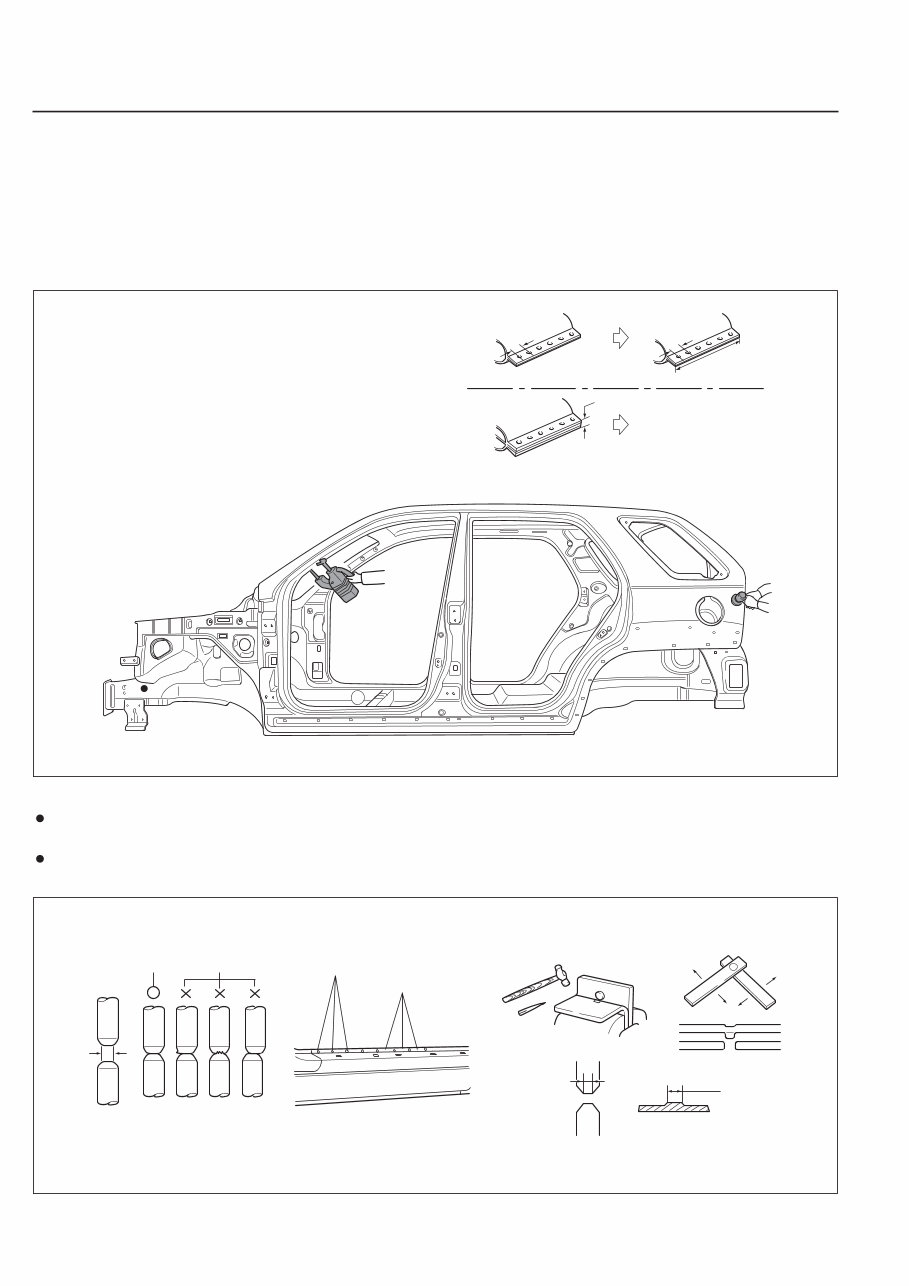
General information 00-3 For best results Disassembly Measuring dimensions before beginning Measure the dimensions of the damaged area according to the body dimension drawings before disassembling and repairing. Adjust dimensions with body frame adjuster if deformed. Selecting cutting area Select a cutting area that is easily accessible and that is prone to the least amount of distortion when welding. Select an area that would allow the new part to overlap repair area by 1.2~2.0 in (30~50 mm). Protecting body from damage Secure the body with clamps and jacks to prevent damage to the body when working on it. BMKM100
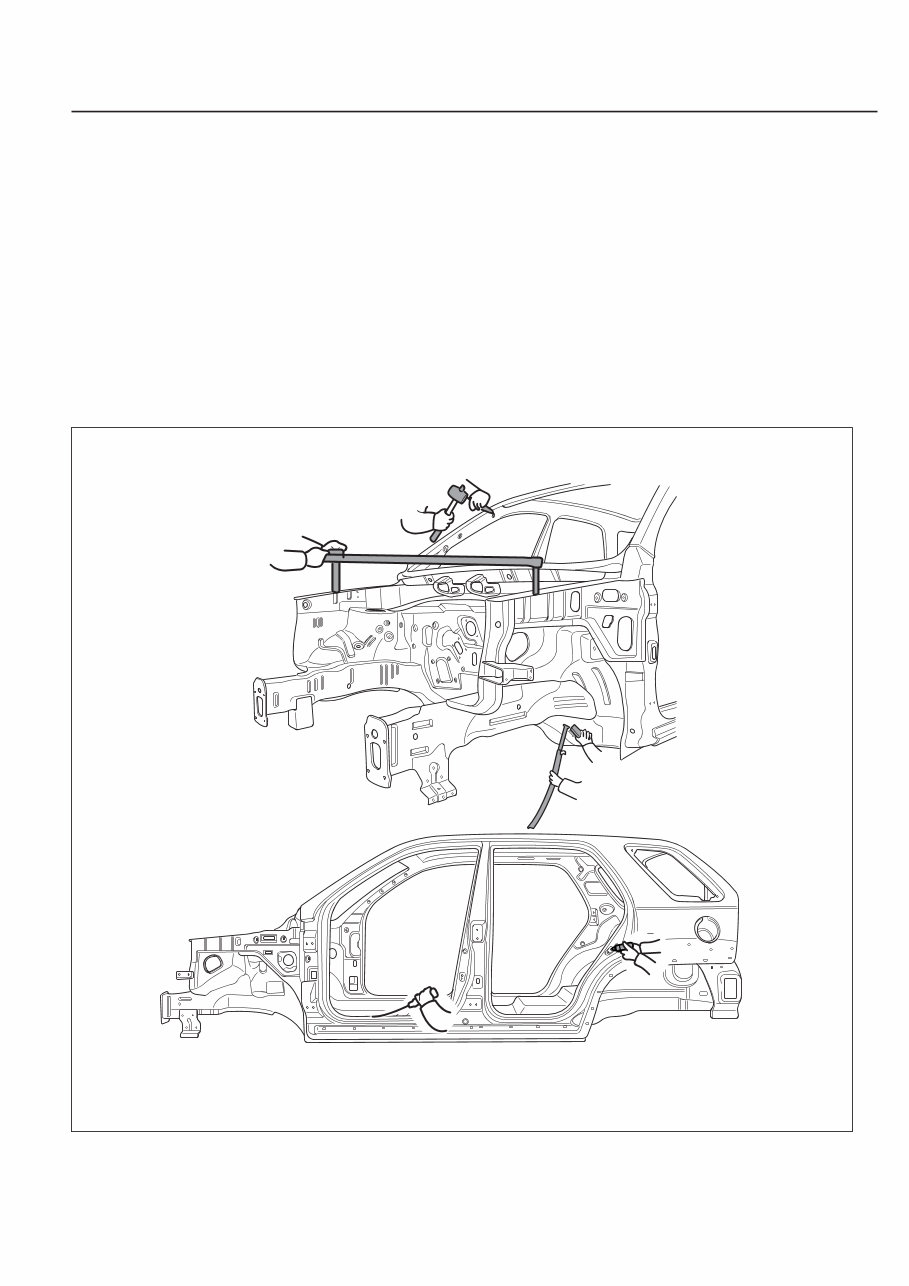
Disassembling related parts Use caution when removing body molding and trim from the area to be worked. Apply masking tape where needed to prevent damage to the part being removed or to the vehicle body. Before starting repairs, check if pipes, hoses or electrical components are present near damaged area. 00-4 General information 1SD1BM005 Wire harness Repair work area Cutting area
Machining holes for plug welding Drill a hole of approximately 0.2~0.24 in (5~6 mm) in diameter in those areas which are not suitable for spot welding. General information 00-5 Adjusting a new part The new part should be cut larger than the repair area, overlapping the repair area by 1.2~2.0 in (30~50 mm). Preparation of assembly Applying spot sealer Remove paint from the surface of new parts and body to be spot welded, and apply spot sealer for rustproofing. Selecting a welding method If the thickness of the area to be welded with the panels overlapped is greater than 0.1 in (3 mm), do plug welding using a carbon arc welding machine. 00012 1.2~2.0 in (30~50 mm) Overlap 1.2~2.0 in (30~50 mm) Overlap body side to modify new part to modify Thicker than 0.1 in (3mm) ASD1BM007 BMKM101
00-6 General information Assembly Measuring dimensions before welding When assembling a new part, assemble it according to the body dimensions given in Section 31, and start welding after checking the gaps with nearby parts. Caution when welding The number of welding points should be determined based on the criteria below: Caution when spot welding The tip of the spot welding machine should be maintained to a minimum of 0.1 in (3 mm) because it greatly affects welding strength. When possible, spot welding should be done between the existing spot welded points. Before and after spot welding, weld a test piece(test pin) of the same material as the body panel, and check the welding strength. ASD1BM010 0.1 in (3 mm) 0.1 in (3 mm) Center diameter Good Existing welded spots New welded spots Using a hammer and a chisel Using a test piece(test pin) Nugget diameter to be 4/5 of chip diameter No good BMKM102 Spot welding Old part Repair part Pitch: 2.0 in (50 mm) Increase the number of spot welds by 30%. Pitch: Same number of welds as original part. Pitch: 1.4 in (35 mm) Repair part more than 0.1 in (3 mm) Plug welding A 9
This KIA SPORTAGE GENERAL BODY SERVICE REPAIR MANUAL is a comprehensive guide suitable for individuals interested in the technical aspects of this brand. It provides immediate access to all the technical details sourced directly from the manufacturer. Whether you are a professional mechanic or a DIY enthusiast, this manual contains complete information on the KIA SPORTAGE.
Our team of skilled mechanics has dedicated this manual to both maintenance and repairs for the KIA SPORTAGE. It includes a wide range of quality solutions, high technical skills, and details for diagnostics, repair, and maintenance of the vehicle.
Upon accessing this manual, you will find mechanical and technical specifications of the vehicle, introductory mechanics, equipment elevation, collision information, products and supplies, painting details, and a comprehensive description of various parts of the vehicle.
With the ability to print each section, this manual ensures that you have all the necessary information at your fingertips. In the rare event that you cannot find the desired information, feel free to reach out to us, and we will assist you promptly.
Embracing the digital age, this manual provides an eco-friendly and instant solution without the need for printed books and postage. Take advantage of the opportunity to access this manual with just one click and commence your repairs or maintenance immediately.