


This Body Shop Manual illustrates body structures and
service procedures for the CLARUS.
This manual illustrates the replacement of major body
panels, plastic parts, body dimensions, sealing treatment
etc., in a systematic manner which is necessary for effec-
tive and lasting body repairs.
You are encouraged to become familiar with this manual
and understand each section in order to perform proper
repair procedures. Keep this manual in a convenient lo-
cation so that it is readily available.
All information in this manual including specifications, da-
ta and illustrations is made based on the vehicles built at
the time the manual was printed.
Information regarding the removal/replacement of com-
ponents not specifically covered in this manual can be
found in the CLARUS Service Manual. Information re-
garding electrical harness routing/connections, etc. can
be found in the CLARUS Electrical Troubleshooting Man-
ual.
The descriptions and specifications contained in this
manual were in effect at the time this manual was ap-
proved for printing. Kia Motors Corporation reserves the
right to discontinue models at any time, or change speci-
fications or design without notice and without incurring
obligation.
Kia Motors Corporation
Overseas Service Engineering Dept.
1996, Kia Motors Corporation
0K-K9AA-667
Preface
As you read through the procedures, you may find
Notes, Cautions and Warnings. Notes give you added
information that will help you complete a particular proce-
dure. Cautions give you information to prevent you from
making an error that could damage the vehicle. Warnings
alert you to be careful in areas where carelessness can
cause personal injury.
The following list contains general warnings that should
always be followed while working on a vehicle.
Leave the ignition switch OFF unless otherwise
specified.
Use a safety stand for underbody work.
Wear safety glasses for eye protection.
Run the engine only in a well ventilated area.
When the engine is running, keep clear of moving
parts.
To prevent serious burns, avoid contact with hot
metal parts such as the radiator, exhaust manifold,
catalytic converter, etc.
Do not smoke while working on a vehicle.
CLARUS
BODY SHOP MANUAL
For your
SAFETY
CLARUS
BODY SHOP MANUAL
GENERAL INFORMATION 00
BODY STRUCTURE 11
REPLACING BODY PANELS 21
BODY DIMENSIONS 31
WATERPROOFING AND RUSTPROOFING 41
BODY MODIFICATION TOOLS 51
PLASTIC PARTS 61
CONTENTS

GENERAL INFORMATION
FUNDAMENTAL PROCEDURES ................... 00- 3
VEHICLE PROTECTION ...................................... 00- 3
A WORD ABOUT SAFETY ................................... 00- 3
WELDING PROCEDURES ................................... 00- 3
BODY FRAME STRAIGHTENER ......................... 00- 4
ELECTRICAL PROCEDURES .............................. 00- 4
FOR BEST RESULTS ..................................... 00- 5
DISASSEMBLY ..................................................... 00- 5
PREPARATION OF ASSEMBLY .......................... 00- 6
ASSEMBLY ........................................................... 00- 7
RUSTPROOF TREATMENT
AFTER ASSEMBLY .............................................. 00- 8
JACK AND SAFETY STAND POSITION ........ 00- 9
FRONT .................................................................. 00- 9
REAR .................................................................... 00- 9
VEHICLE LIFT (2 SUPPORT TYPE)
POSITIONS ..................................................... 00-10
FRONT END ......................................................... 00-10
REAR END ............................................................ 00-10
TOWING .......................................................... 00-10
IDENTIFICATION NUMBER LOCATIONS ........... 00-11
BODY COLORS AND MAJOR
SPECIFICATIONS ........................................... 00-12
KIA EXTERIOR / INTERIOR
COLOR CODES .................................................... 00-12
PAINT MANUFACTURER CODES ....................... 00-12
DIMENSIONS ........................................................ 00-13
00
FUNDAMENTAL PROCEDURES GENERAL INFORMATION 00-3
00001
00002
00003
00004
00005
FUNDAMENTAL PROCEDURES
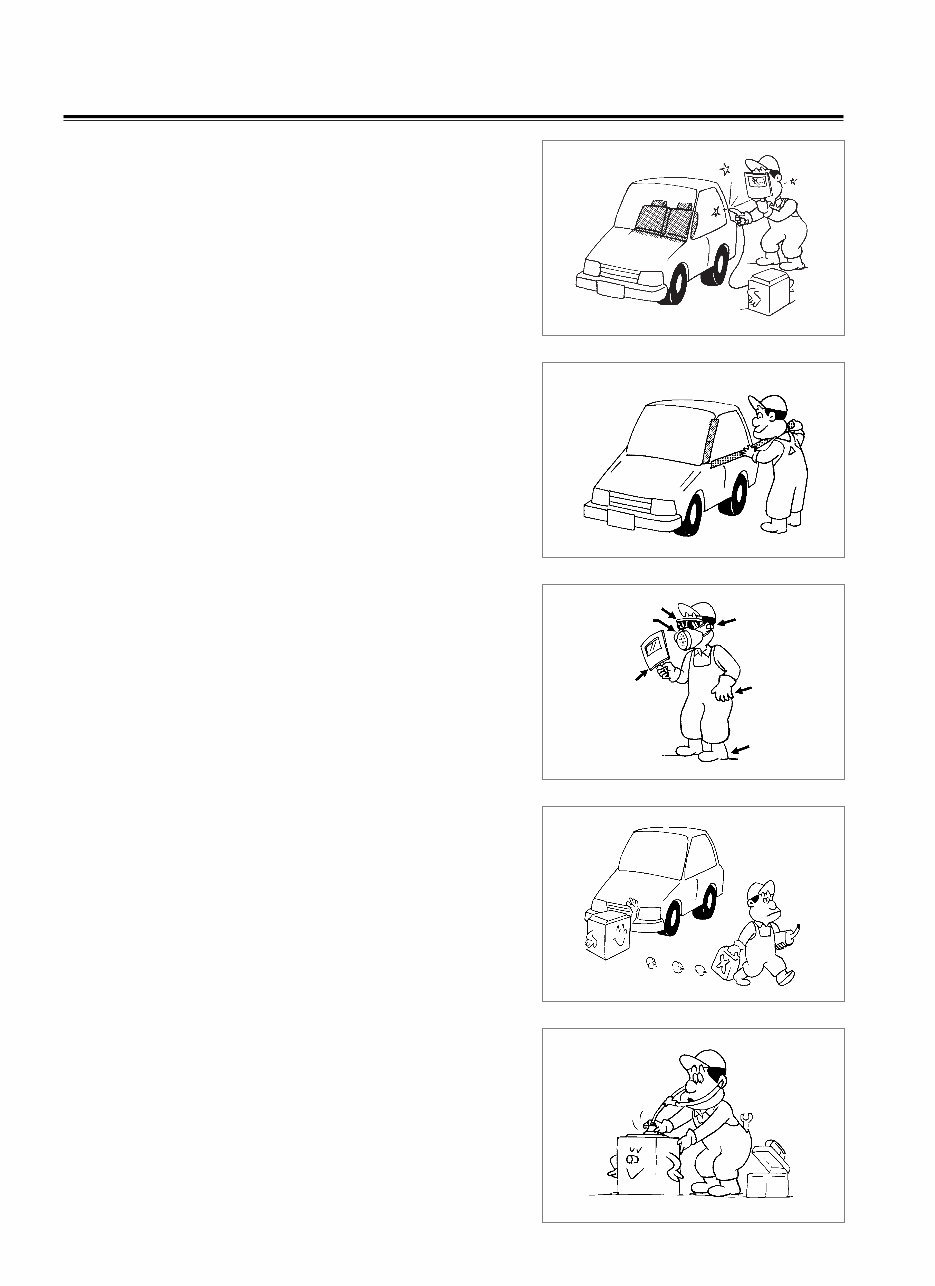
VEHICLE PROTECTION
1. Cover the seats before performing any procedure to keep
them from getting dirty.
2. Cover all glass, seats and mats with a heat resistant cover
when welding.
3. Protect moldings, garnishes and ornaments.
A WORD ABOUT SAFETY
1. Wear the appropriate safety equipment that is necessary
for the procedure being performed.
2. When welding or performing other procedures that require
the use of an open flame near the fuel tank, disconnect
and remove the tank and fuel pipe, and cap the pipe to
prevent fuel leakage.
WELDING PROCEDURES
Observe the following tips when welding.
1. Wear appropriate eye protection.
2. Carefully follow the manufacturers operating instructions
for the welding machine you are using.
3. Do not weld, smoke or allow open flames around volatile
chemicals, cleaners or solvents or in any area where they
have just been used.
SAFETY
GLASSES
EAR
PROTECTORS
GLOVES
FACE SHIELD
MASK
SAFETY
SHOES
00-4 GENERAL INFORMATION FUNDAMENTAL PROCEDURES
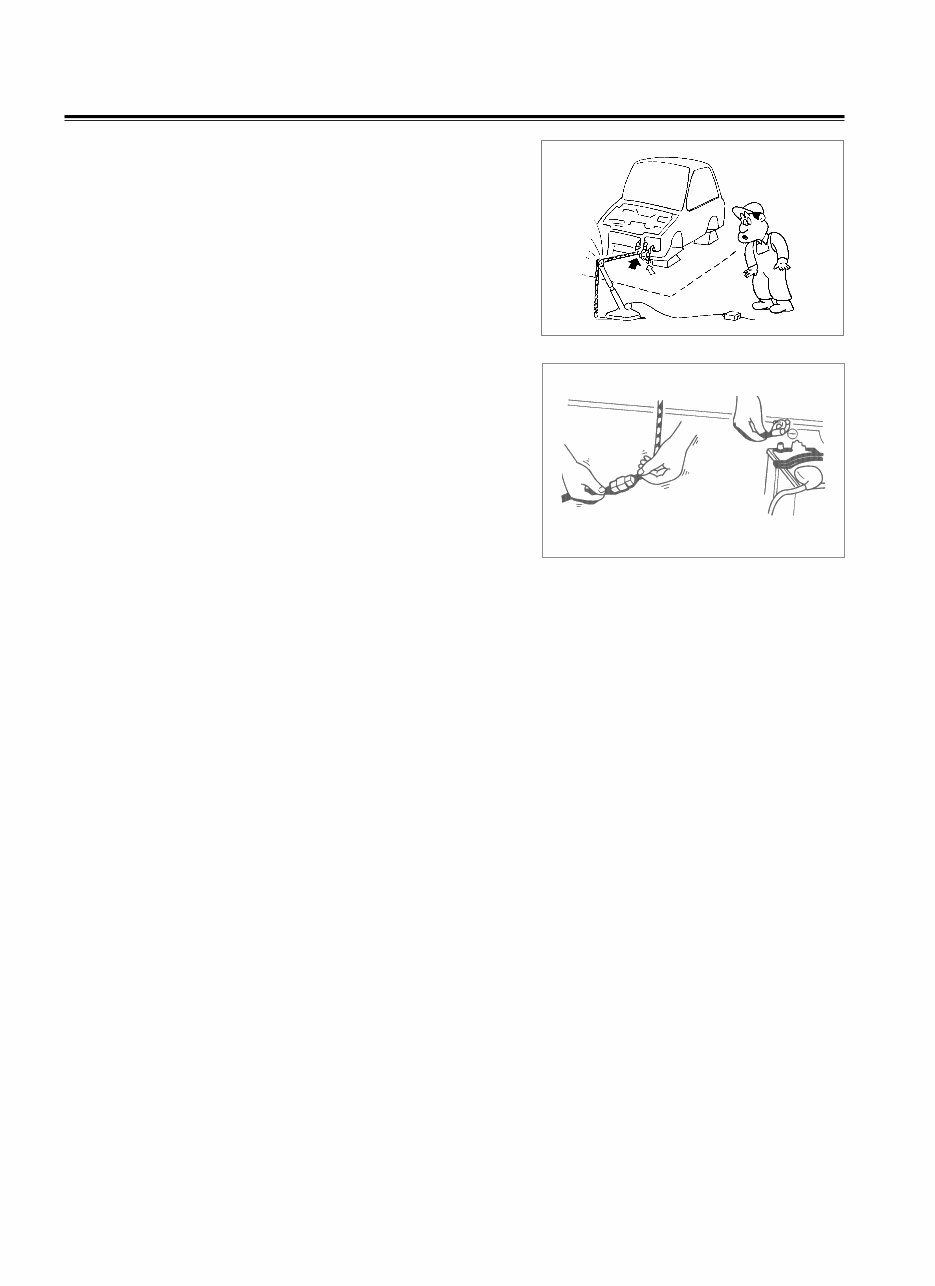
BODY FRAME STRAIGHTENER
When using a frame straightener, do not enter the area
where the body is being straightened by the chain.
ELECTRICAL PROCEDURES
1. Disconnect the negative battery terminal.
2. Do not pull on wires when disconnecting electrical con-
nectors. Be careful to hold the connector itself when dis-
connecting it.
3. Insert the connector until it “clicks” when connecting the
connector.
4. Handle all electrical components with care.
00006
00007
FOR BEST RESULTS
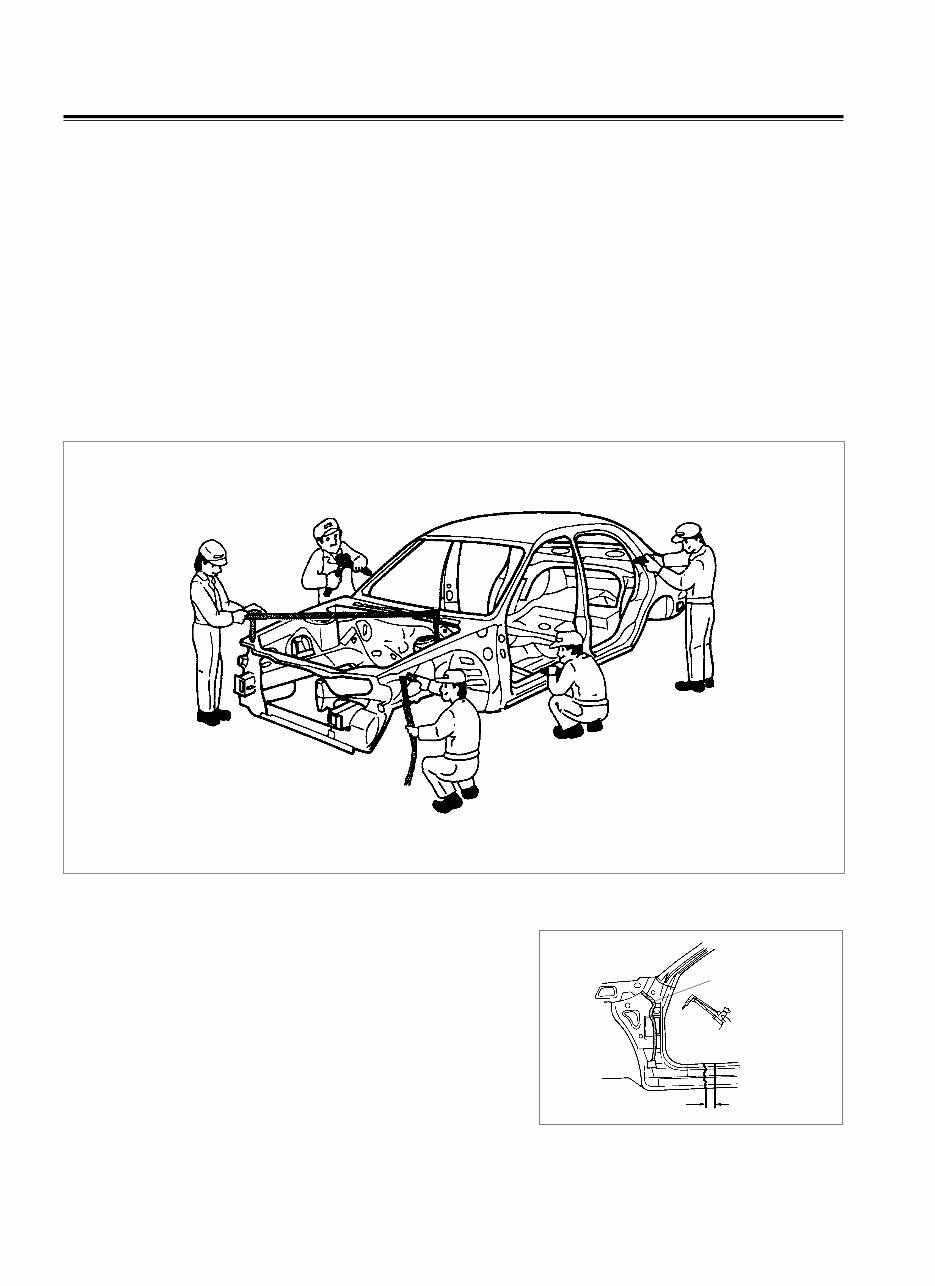
DISASSEMBLY
Measuring Dimensions Before Beginning
Measure the dimensions of the damaged area according to the body dimension drawings before disassem-
bling and repairing. Adjust dimensions with body frame adjuster if deformed.
Selecting Cutting Area
Select a cutting area that is easily accessible and that is prone to the least amount of distortion when welding.
Select an area that would allow the new part to overlap repair area by 30~50 mm.
Protecting Body From Damage
Secure the body with clamps and jacks to prevent damage to the body when working on it.
FOR BEST RESULTS GENERAL INFORMATION 00-5
00008
Disassembling Related Parts
Use caution when removing body molding and trim from the
area to be worked. Apply masking tape where needed to
prevent damage to the part being removed or to the vehicle
body. Before starting repairs, check if pipes, hoses or electri-
cal components are present near damaged area.
00009
WIRE HARNESS
REPAIR WORK AREA CUTTING AREA
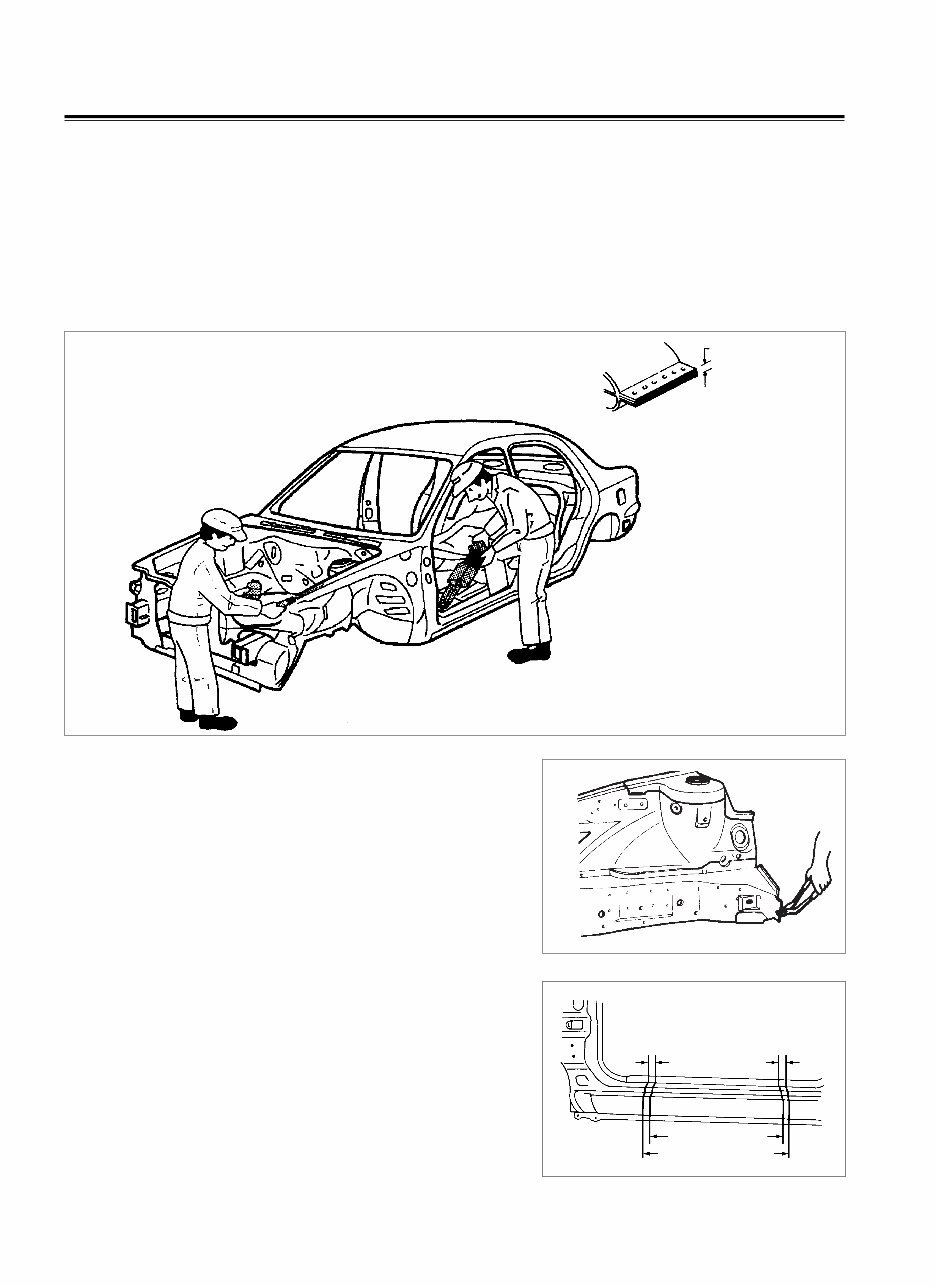
PREPARATION OF ASSEMBLY
Applying Spot Sealer
Remove paint from the surface of new parts and body to be spot welded, and apply spot sealer for rust-
proofing.
Selecting a Welding Method.
If the thickness of the area to be welded with the panels overlapped is greater than 3 mm, do plug welding
using a carbon arc welding machine
00-6 GENERAL INFORMATION FOR BEST RESULTS
00010
00012
30~50 mm
OVERLAP
30~50 mm
OVERLAP
BODY SIDE TO MODIFY
NEW PART TO MODIFY
00011
Machining Holes for Plug Welding
Drill a hole of approximately 5~6 mm in diameter in those
areas which are not suitable for spot welding.
Adjusting a New Part
The new part should be cut larger than the repair area, over-
lapping the repair area by 30~50 mm.
THICKER THAN
3 mm
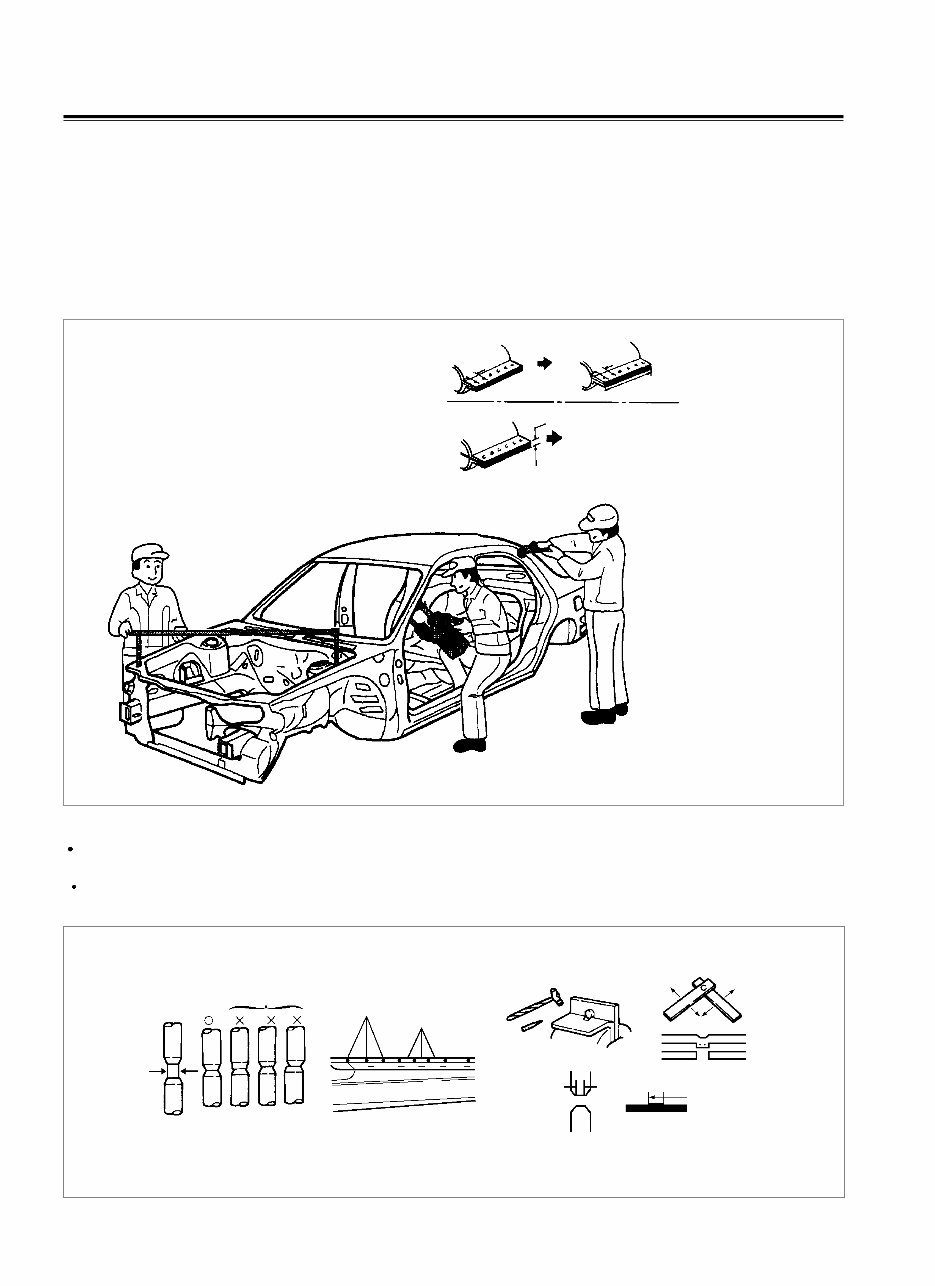
ASSEMBLY
Measuring Dimensions Before Welding
When assembling a new part, assemble it according to the body dimensions given in Section 31, and start
welding after checking the gaps with nearby parts.
Caution When Welding
The number of welding points should be determined based on the criteria below:
Caution When Spot Welding
The tip of the spot welding machine should be maintained to a minimum of 3 mm because it greatly affects
welding strength. When possible, spot welding should be done between the existing spot welded points.
Before and after spot welding, weld a test piece(test pin) of the same material as the body panel, and
check the welding strength.
FOR BEST RESULTS GENERAL INFORMATION 00-7
00014
3 mm
3 mm
CENTER
DIAMETER
GOOD
EXISTING WELDED SPOTS
NEW WELDED SPOTS
USING A HAMMER AND A CHISEL
USING A TEST PIECE(TEST PIN)
NUGGET DIAMETER
TO BE 4/5 OF CHIP
DIAMETER
NO GOOD
00013
SPOT WELDING
OLD PART REPAIR PART
PITCH: 50 mm
INCREASE THE
NUMBER OF SPOT
WELDS BY 30%.
PITCH:
SAME NUMBER OF
WELDS AS ORIGINAL
PART.
PITCH:35 mm
REPAIR PART
MORE THAN 3 mm
PLUG WELDING
RUSTPROOF TREATMENT AFTER ASSEMBLY
Body Sealing
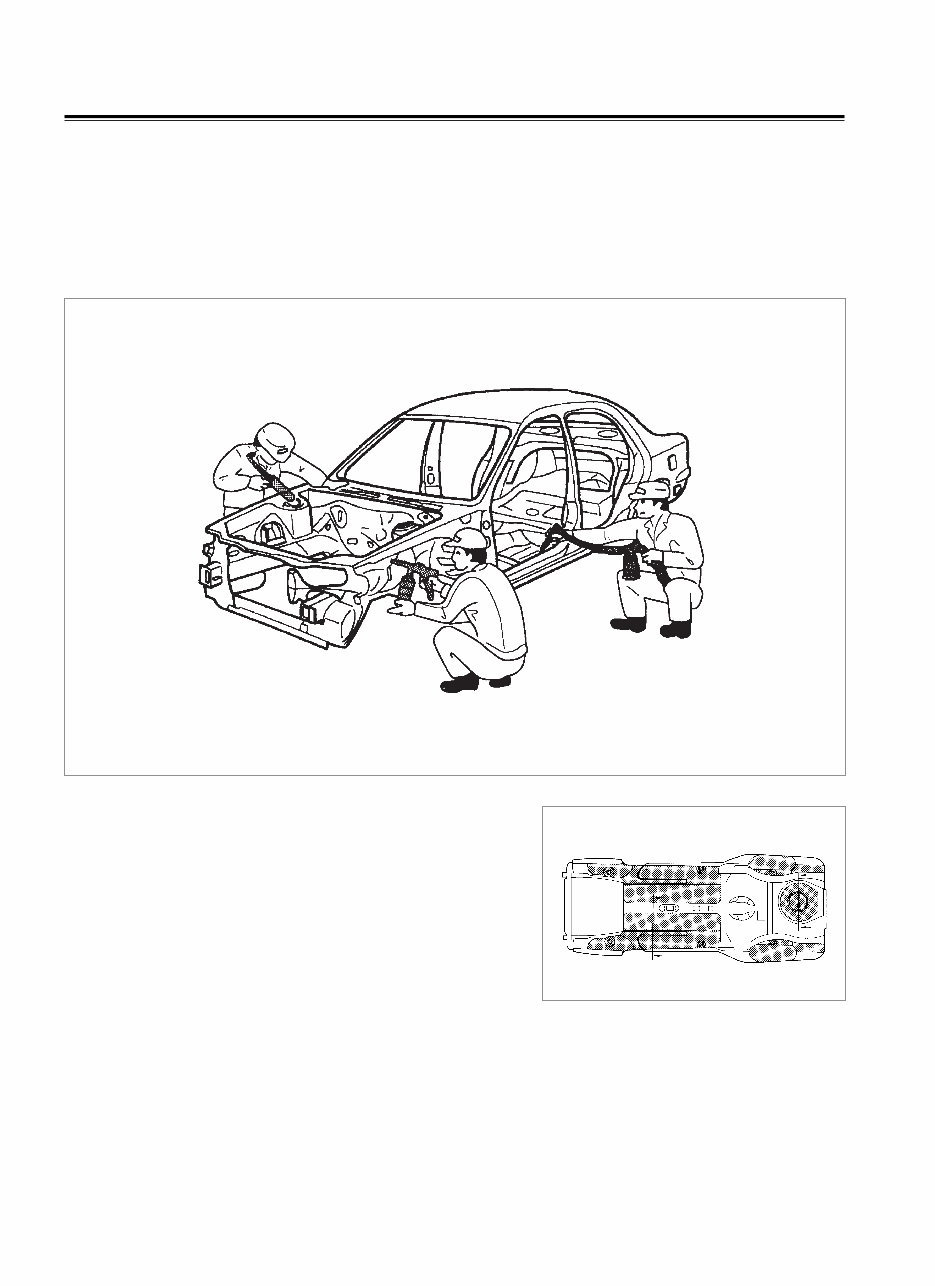
Apply body sealer where necessary.(Refer to pages 41-3 through 41-6)
Applying Rustproof Material
Apply rustproofing material (wax, oil, etc.) behind welded area.
00-8 GENERAL INFORMATION FOR BEST RESULTS
00015
AGX060054
Applying Undercoat
Apply undercoat on the body where necessary.(Refer to
page 41-7)
You're Reading a Preview
What's Included?
 Lifetime Access
Fast Download Speeds
Online & Offline Access
Access PDF Contents & Bookmarks
Full Search Facility
Print one or all pages of your manual
$30.99
1997-2000 KIA CLARUS Body Service / Repair/ Workshop Manual ! 97 98 99 00
Viewed 51 Times Today

What's Included?
Lifetime Access
Fast Download Speeds
Online & Offline Access
Access PDF Contents & Bookmarks
Full Search Facility
Print one or all pages of your manual
$30.99

Secure transaction
What's Included?
Lifetime Access
Fast Download Speeds
Online & Offline Access
Access PDF Contents & Bookmarks
Full Search Facility
Print one or all pages of your manual
Description
This workshop manual provides maintenance and repair procedures for the 1997-2000 KIA CLARUS Body, offering step-by-step instructions and detailed exploded diagrams for DIY enthusiasts and professional mechanics. It covers general information, body structure, body panel replacement, body dimensions, waterproofing and rustproofing, body modification tools, and plastic parts.
Instant access eliminates shipping costs and waiting time for a CD or paper manual. Upon payment completion, you will receive the manual instantly. It is compatible with all Windows and Mac versions and requires Adobe Reader and Win for viewing and printing.


