2023 Jeep Wrangler- 3.6L V6 24v VVT ETorque UPG I Service & Repair Manual
What's Included?
Lifetime Access
Fast Download Speeds
Online & Offline Access
Access PDF Contents & Bookmarks
Full Search Facility
Print one or all pages of your manual
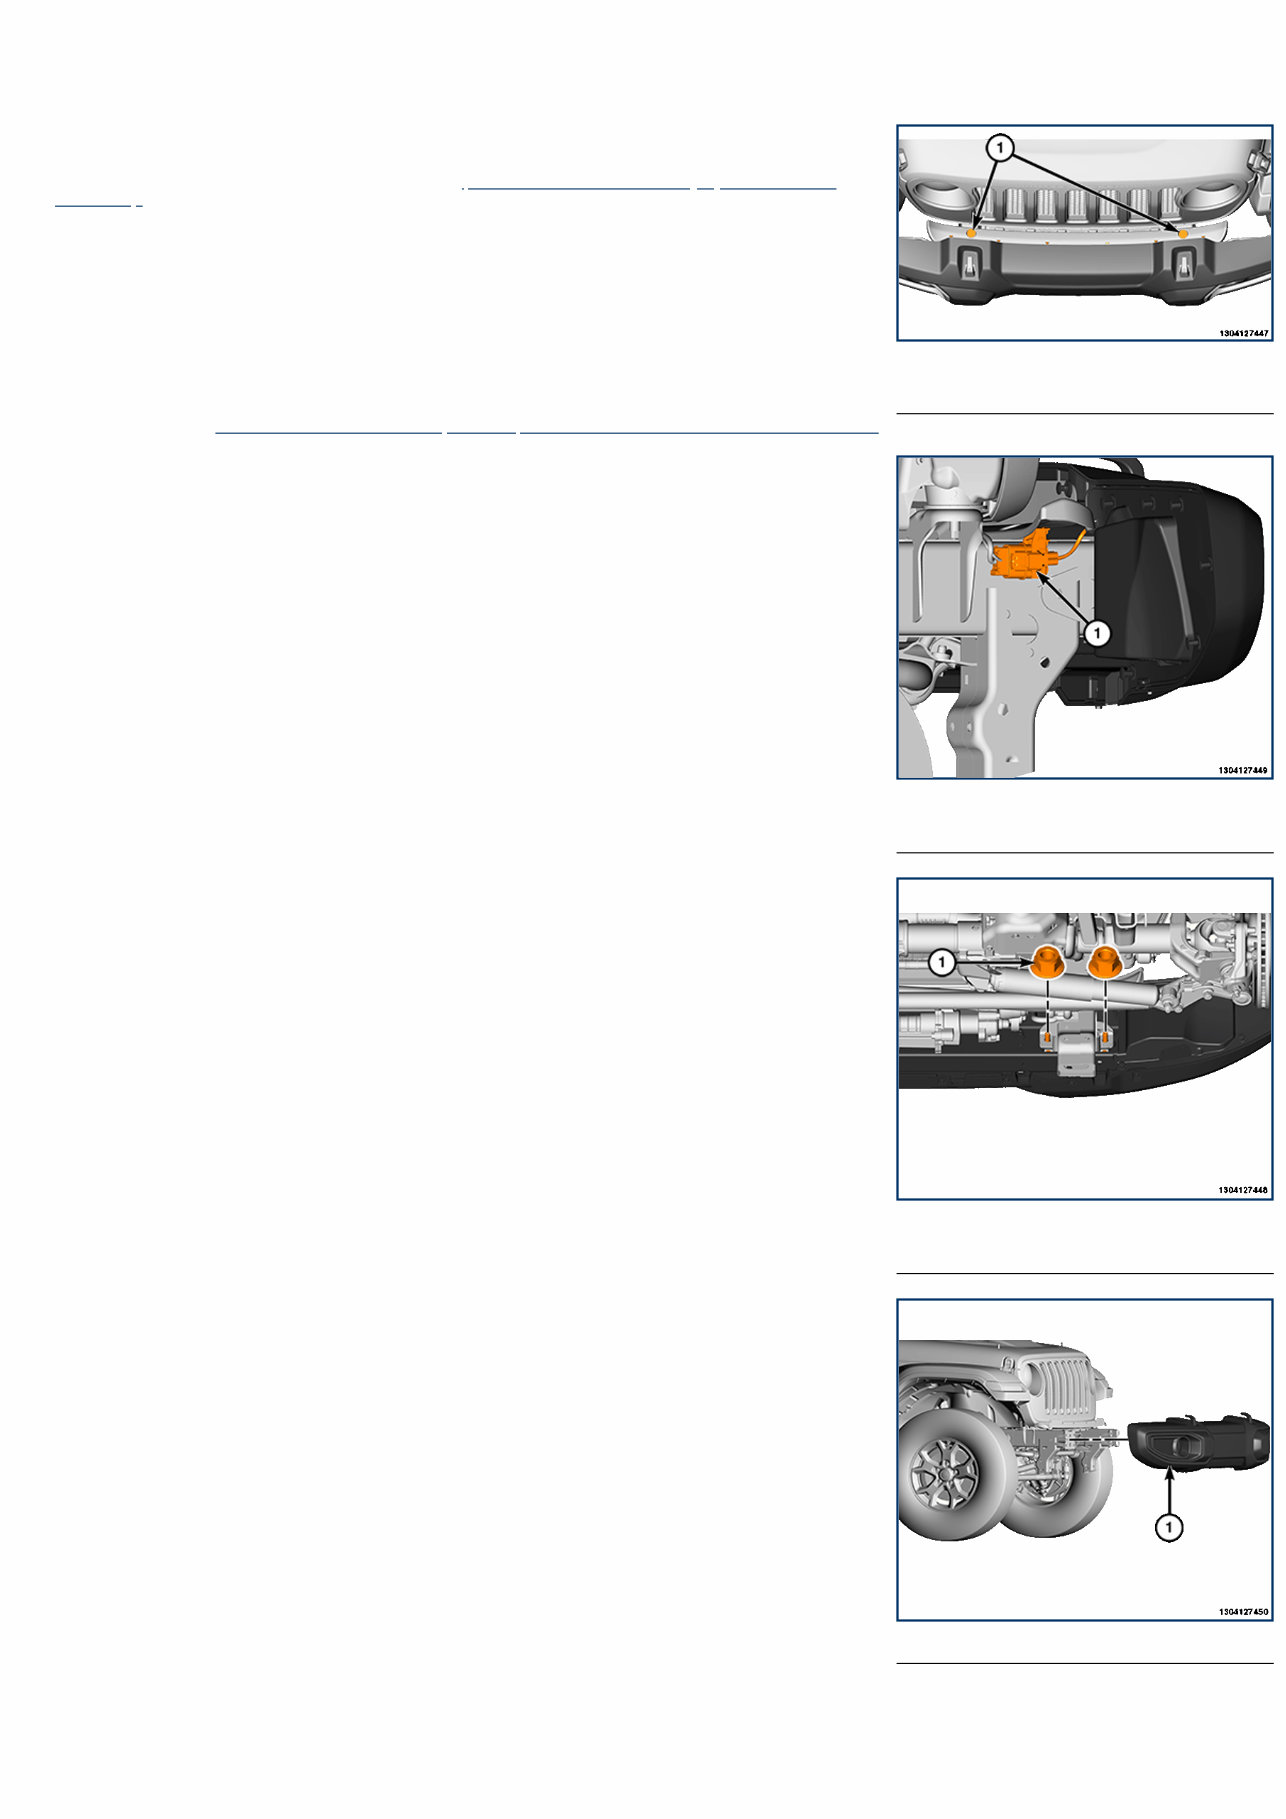
1 - Push Pin Fastener 2 - Bolts 1 - Air Dam 13 - Frame and Bumpers / Bumpers / AIR DAM, Front / Removal and Installation AIR DAM REMOVAL 1. Raise and support the vehicle (Refer to 04 - Vehicle Quick Reference/Hoisting/Standard Procedure) . 2. Remove the eight push pin fasteners. 3. Remove the bolts. 4. Remove the air dam. INSTALLATION Follow the removal procedure in reverse for general reassembly of the components on the vehicle. The steps listed below are calling out specific procedures that should be followed during installation. Tighten the bolts securely.
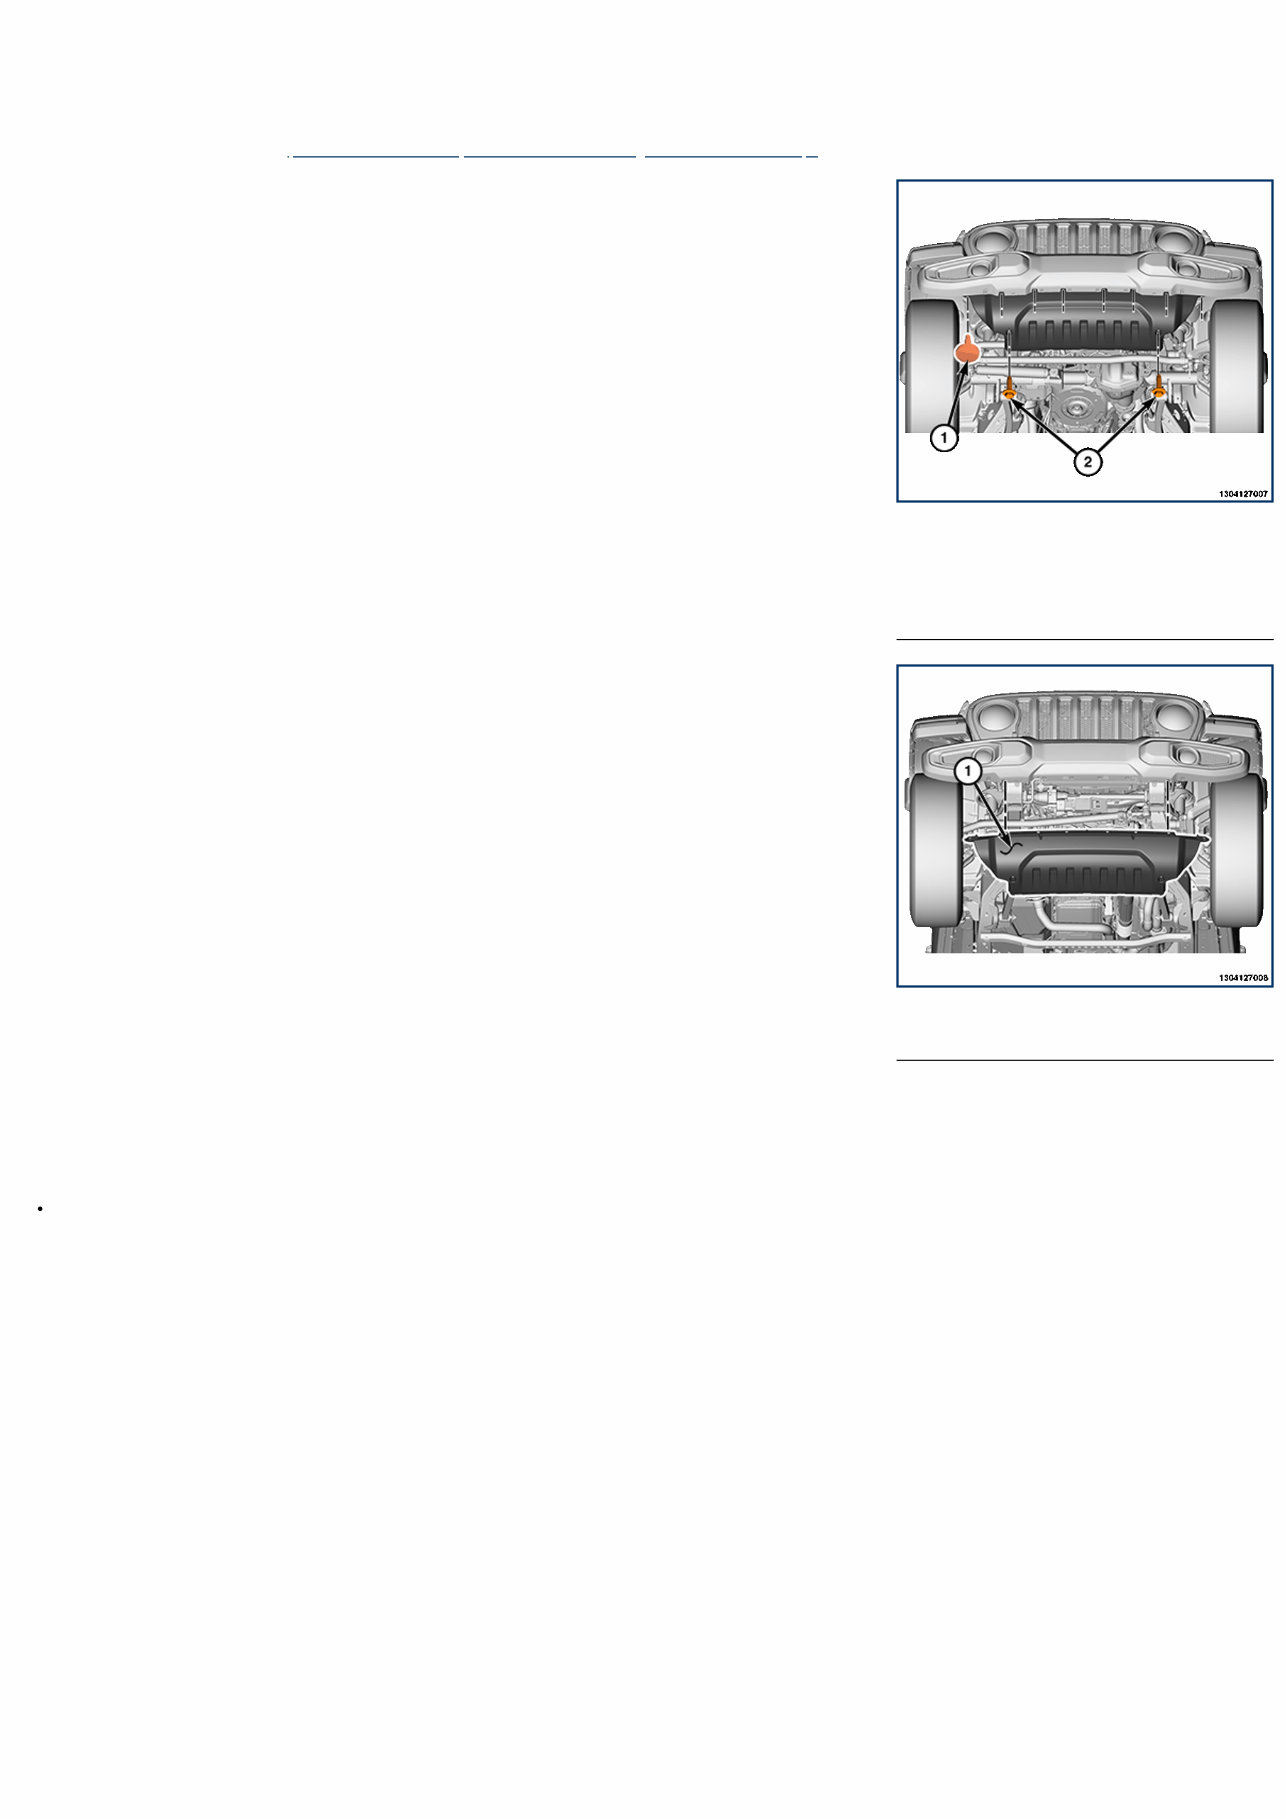
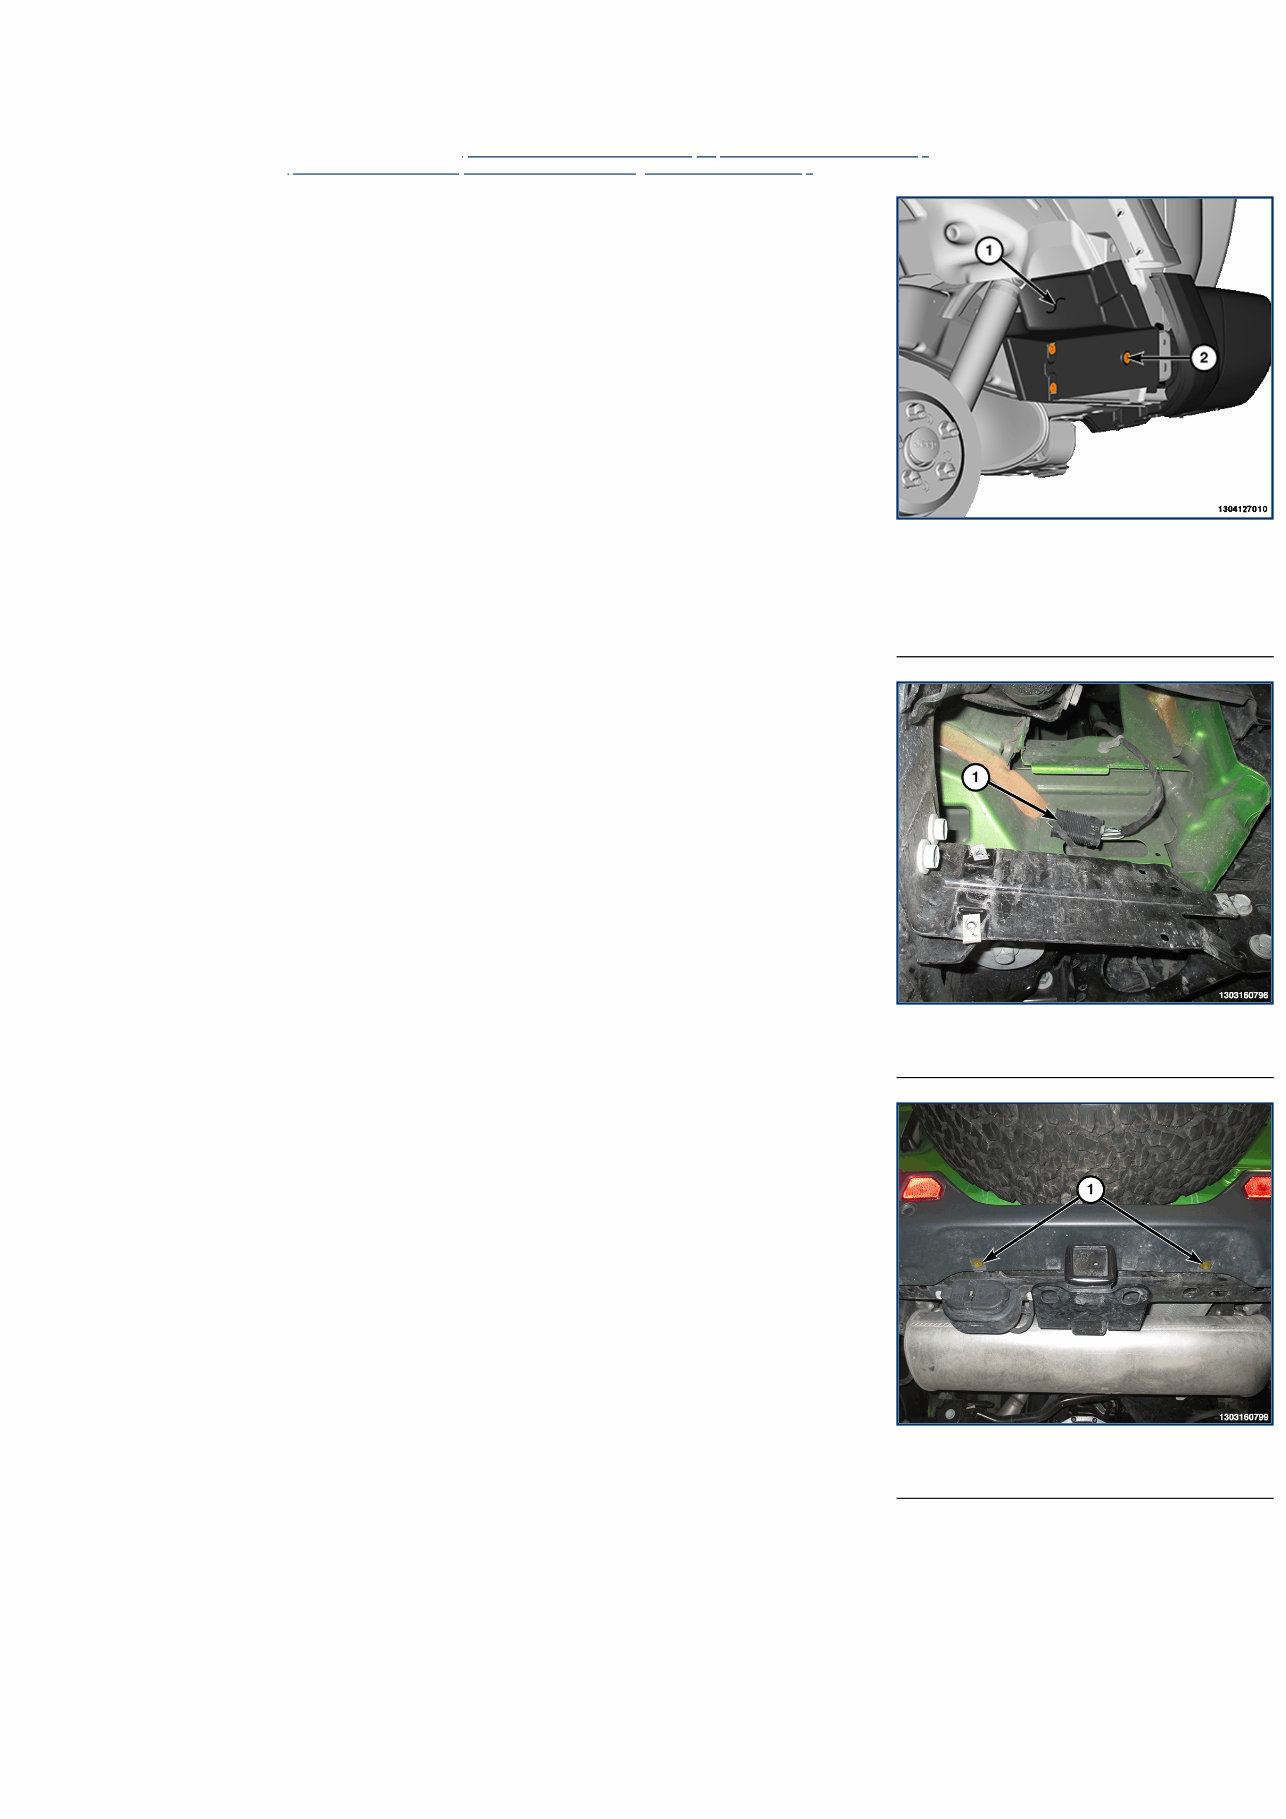
1 - Fastener 2 - Closeout Panel 13 - Frame and Bumpers / Bumpers / AIR DAM, Front / Removal and Installation LOWER CLOSEOUT PANEL REMOVAL 1. Raise and support the vehicle (Refer to 04 - Vehicle Quick Reference/Hoisting/Standard Procedure) . 2. Remove the fasteners. 3. Remove the lower closeout panel. INSTALLATION Follow the removal procedure in reverse for general reassembly of the components on the vehicle. The steps listed below are calling out specific procedures that should be followed during installation. Tighten the fasteners to the proper (Torque Specifications) ..
1 - Fastener 2 - Skid Plate 13 - Frame and Bumpers / Bumpers / AIR DAM, Front / Removal and Installation SKID PLATE REMOVAL 1. Raise and support the vehicle (Refer to 04 - Vehicle Quick Reference/Hoisting/Standard Procedure) . 2. Remove the fasteners. 3. Remove the skid plate. INSTALLATION Follow the removal procedure in reverse for general reassembly of the components on the vehicle. The steps listed below are calling out specific procedures that should be followed during installation. Tighten the fasteners securely.
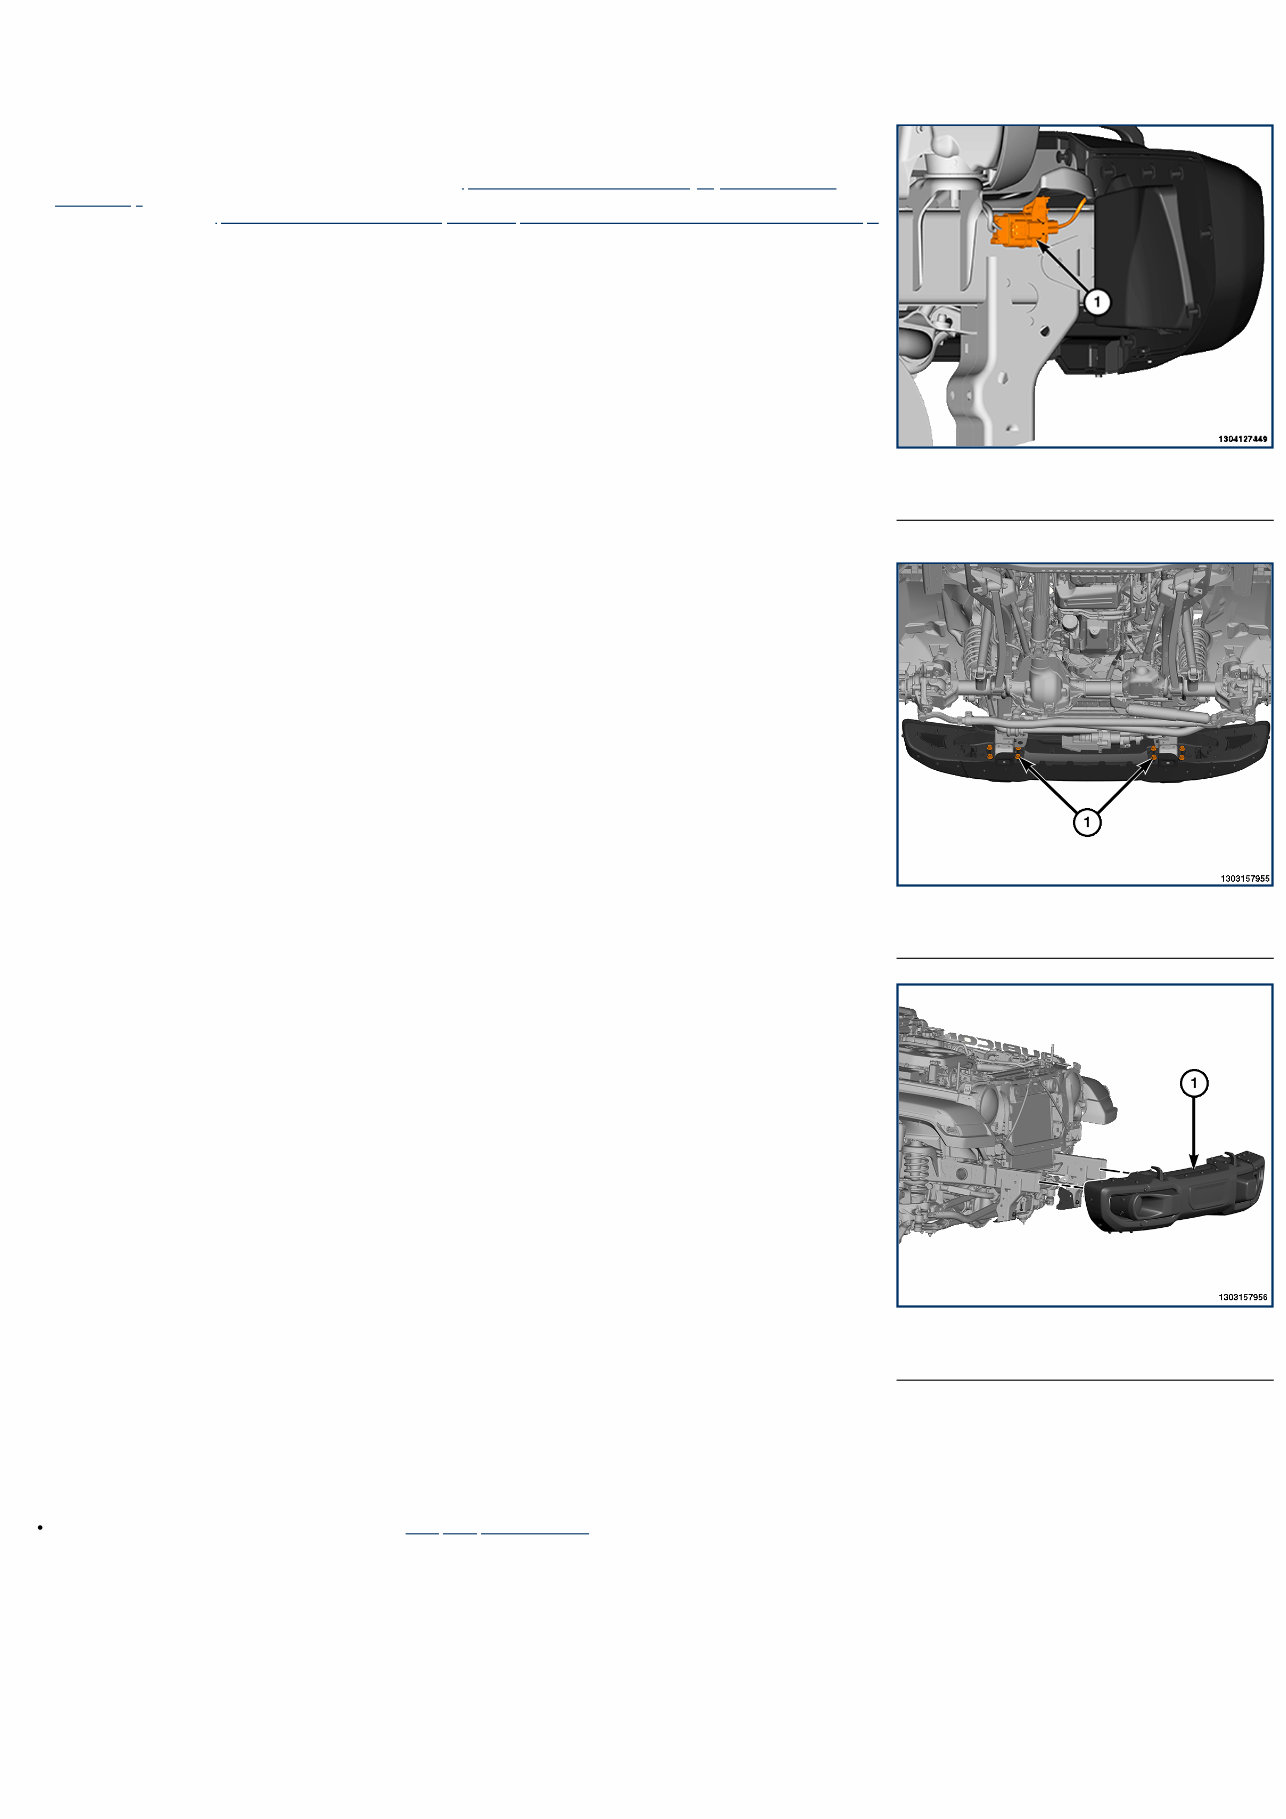
1 - Push Pin Fasteners 1 - Wire Harness Connector 1 - Bumper Frame Nuts 1 - Bumper Assembly 13 - Frame and Bumpers / Bumpers / BUMPER, Front / Removal and Installation MOLDED BUMPER REMOVAL 1. Disconnect and isolate the negative battery cable(s) (Refer to 08 - Electrical/Battery System/Standard Procedure) . 2. From the top of the bumper, remove the push pin fasteners securing the closeout panel to the frame tips. 3. Remove the air dam (Refer to 13 - Frame and Bumpers/Bumpers/AIR DAM, Front/Removal and Installation) . 4. Disconnect the wire harness connector. 5. Remove the four bumper frame nuts. 6. Remove the bumper assembly. INSTALLATION Follow the removal procedure in reverse for general reassembly of the components on the vehicle. The steps listed below are calling out specific procedures that should be followed during installation.
Tighten the bumper frame nuts to the proper (Torque Specifications) .. If equipped with an Intelligent Battery Sensor (IBS), connect the IBS connector.
1 - Wire Harness Connector 1 - Bumper Frame Nuts 1 - Bumper Assembly 13 - Frame and Bumpers / Bumpers / BUMPER, Front / Removal and Installation STEEL BUMPER REMOVAL 1. Disconnect and isolate the negative battery cable(s) (Refer to 08 - Electrical/Battery System/Standard Procedure) . 2. Remove the air dam (Refer to 13 - Frame and Bumpers/Bumpers/AIR DAM, Front/Removal and Installation) . 3. Disconnect the wire harness connector. 4. Remove the bumper frame nuts. 5. Remove the bumper assembly. INSTALLATION Follow the removal procedure in reverse for general reassembly of the components on the vehicle. The steps listed below are calling out specific procedures that should be followed during installation. Tighten the bumper frame nuts to the proper (Torque Specifications) ..
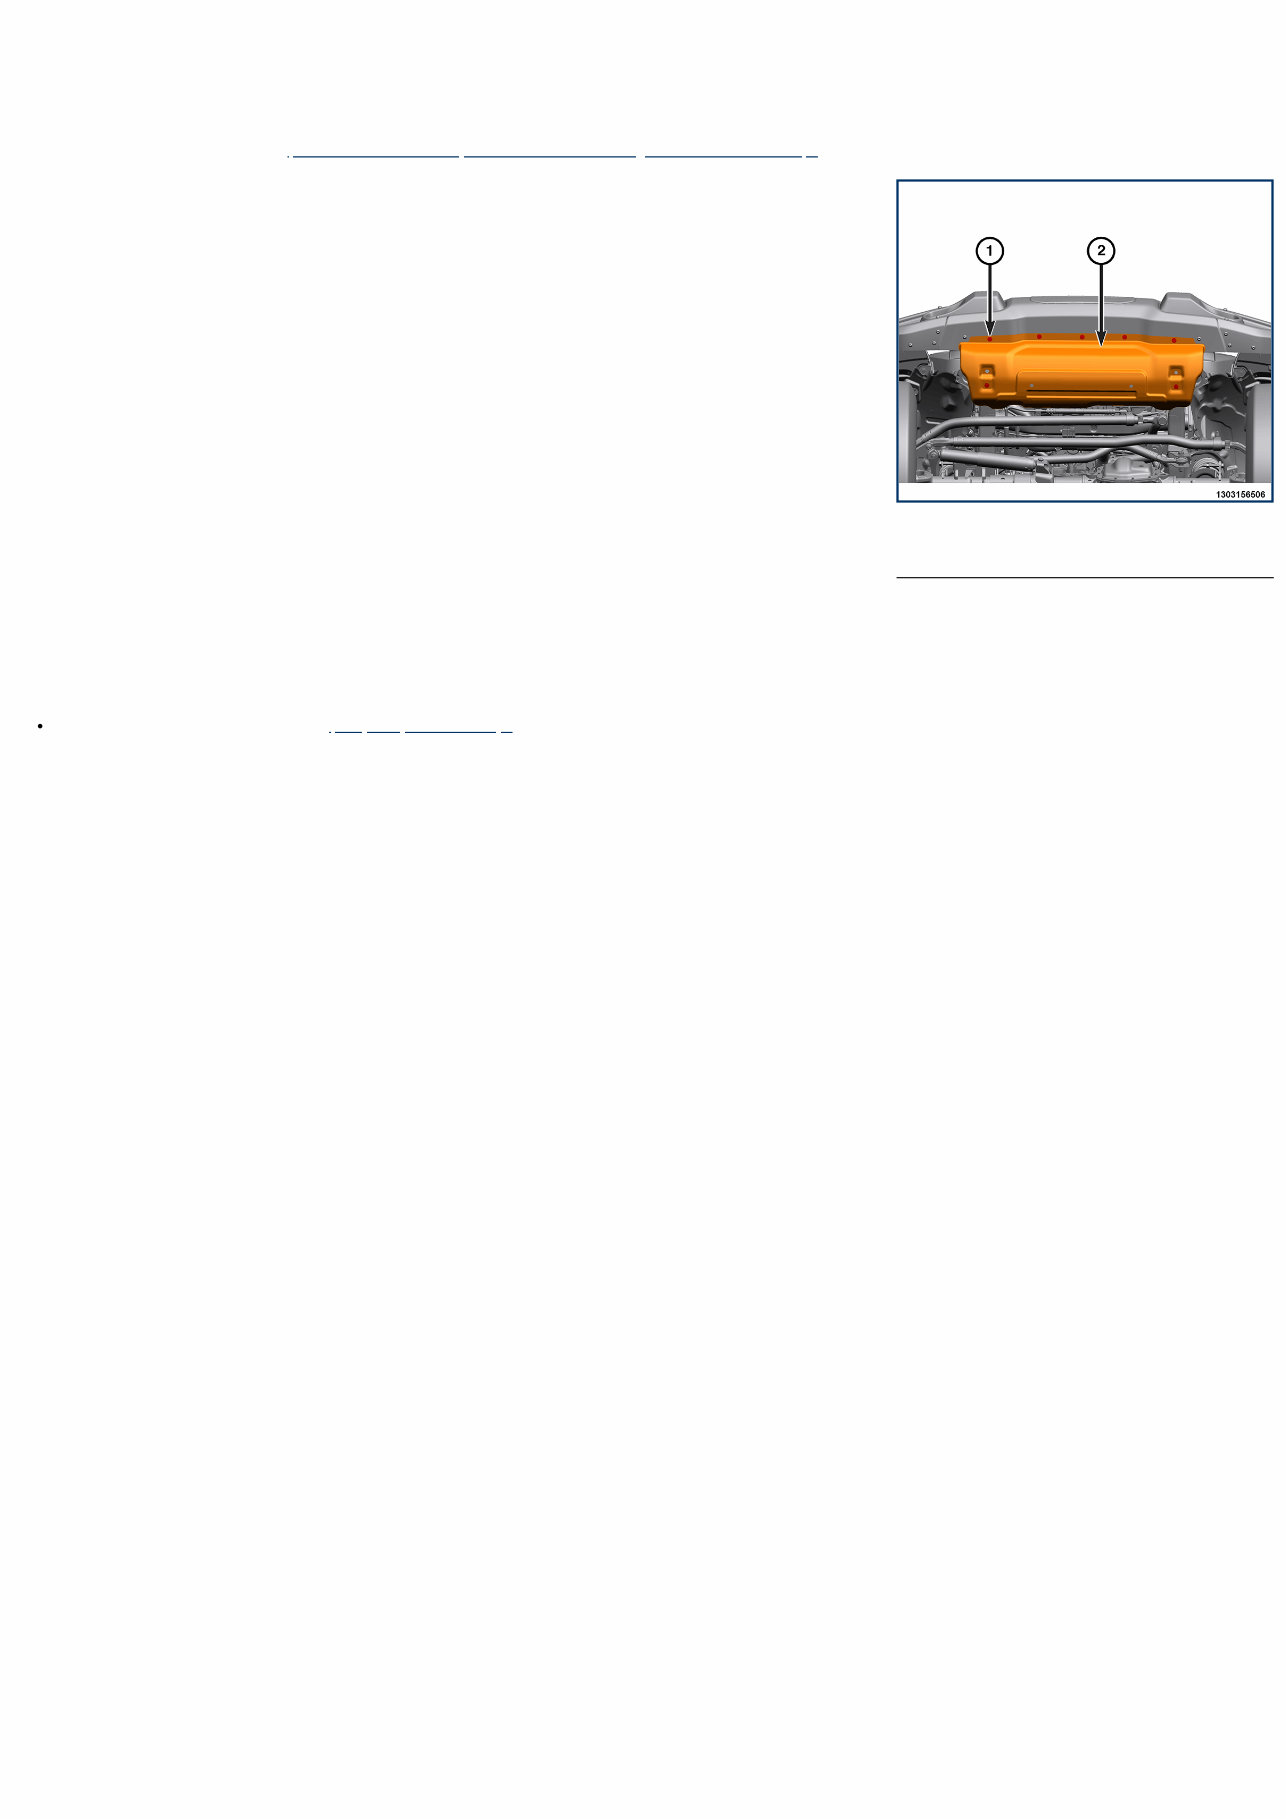
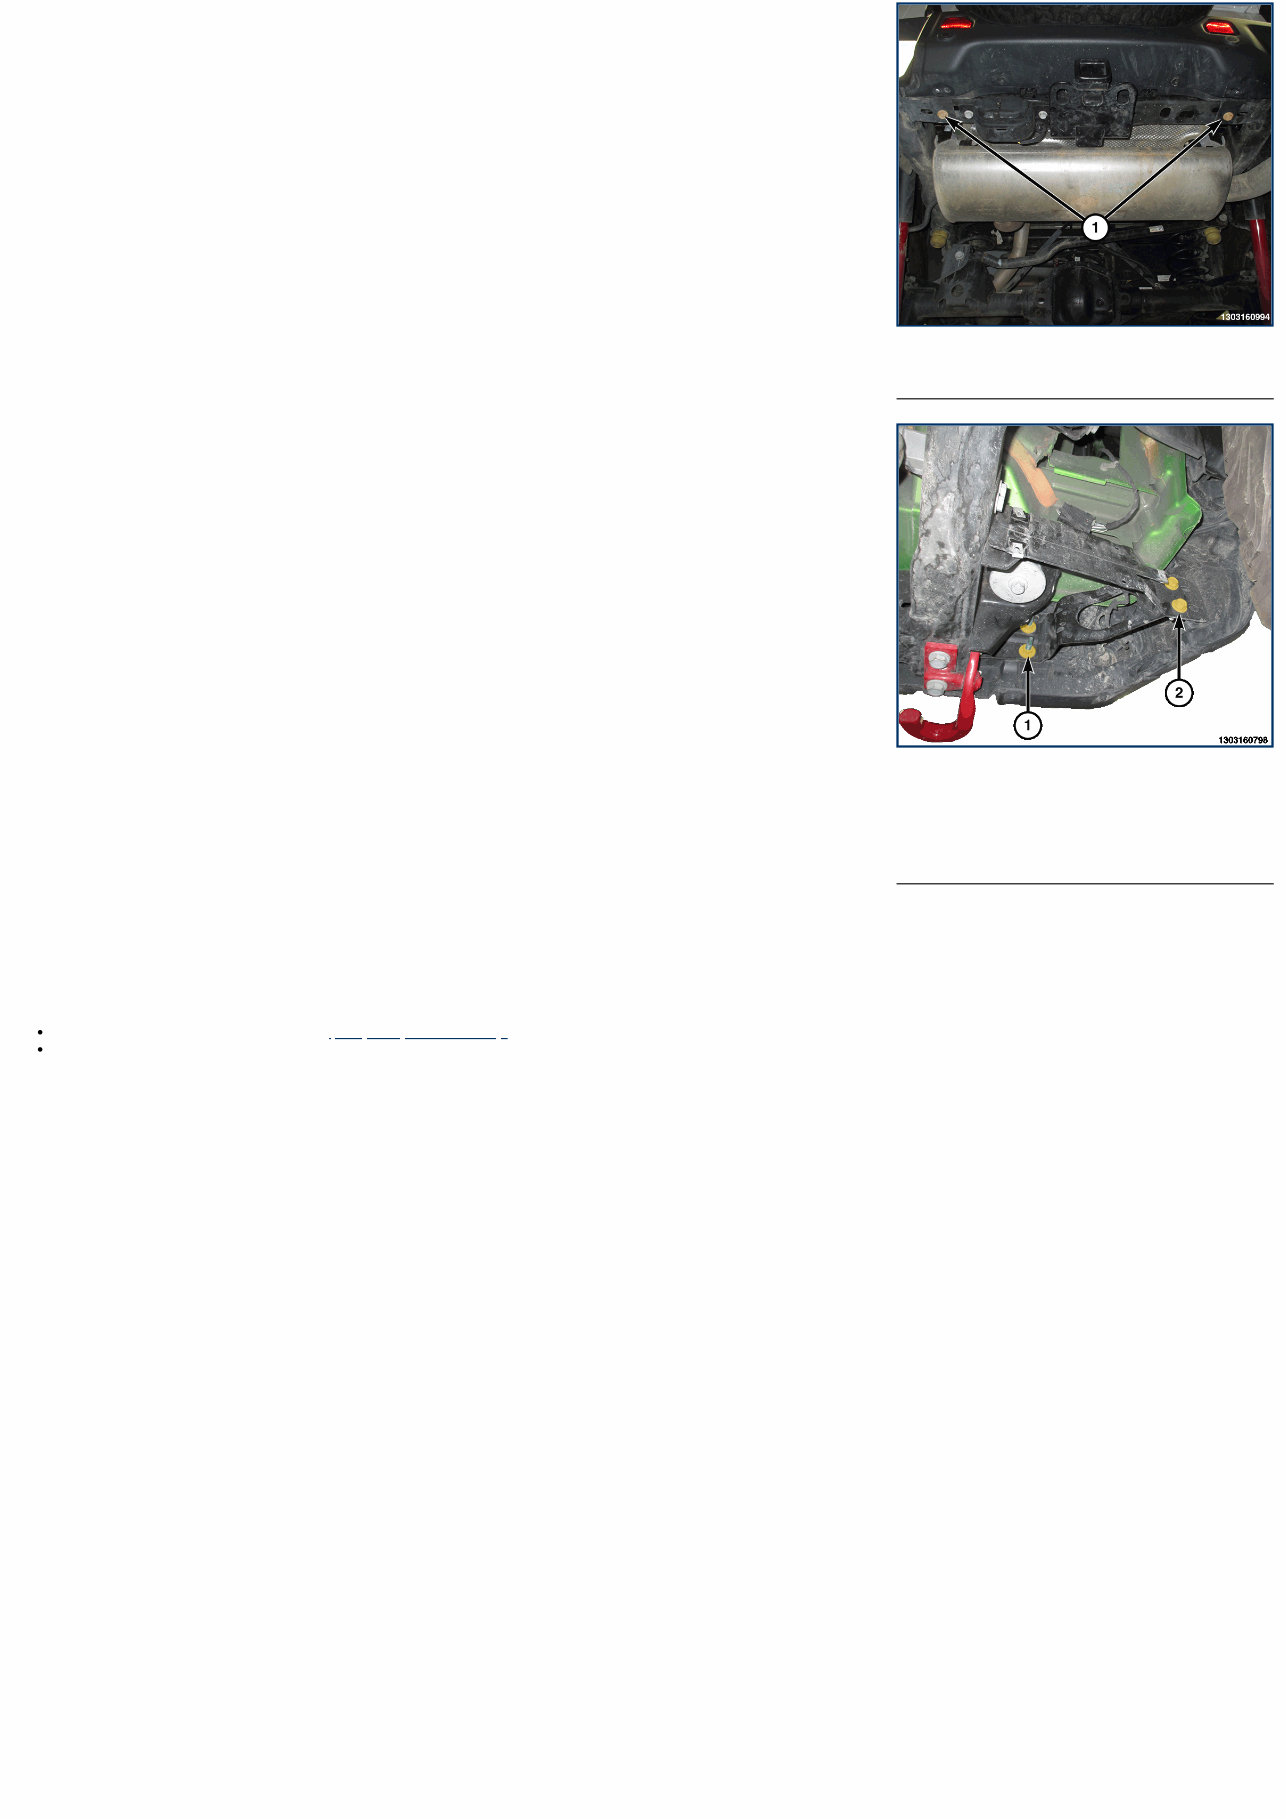
1 - Closeout Panel 2 - Screw 1 - Wire Harness Connector 1 - Fasteners 13 - Frame and Bumpers / Bumpers / BUMPER, Rear / Removal and Installation REAR BUMPER REMOVAL 1. Disconnect and isolate the negative battery cable(s) (Refer to 08 - Electrical/Battery System/Standard Procedure) . 2. Raise and support the vehicle (Refer to 04 - Vehicle Quick Reference/Hoisting/Standard Procedure) . 3. Remove the three screws and remove the closeout panels. 4. Disconnect the wire harness connector and separate the harness support clips as needed. 5. For vehicles equipped with a molded bumper remove the fasteners. 6. For vehicles equipped with a steel bumper remove the fasteners.
1 - Fasteners 1 - Bumper Nut 2 - Support Bracket Bolt 7. Remove the support bracket bolts and the bumper nuts on each side and separate the bumper assembly from the vehicle. INSTALLATION Follow the removal procedure in reverse for general reassembly of the components on the vehicle. The steps listed below are calling out specific procedures that should be followed during installation. Tighten the fasteners to the proper (Torque Specifications) . Seat the support clips fully.
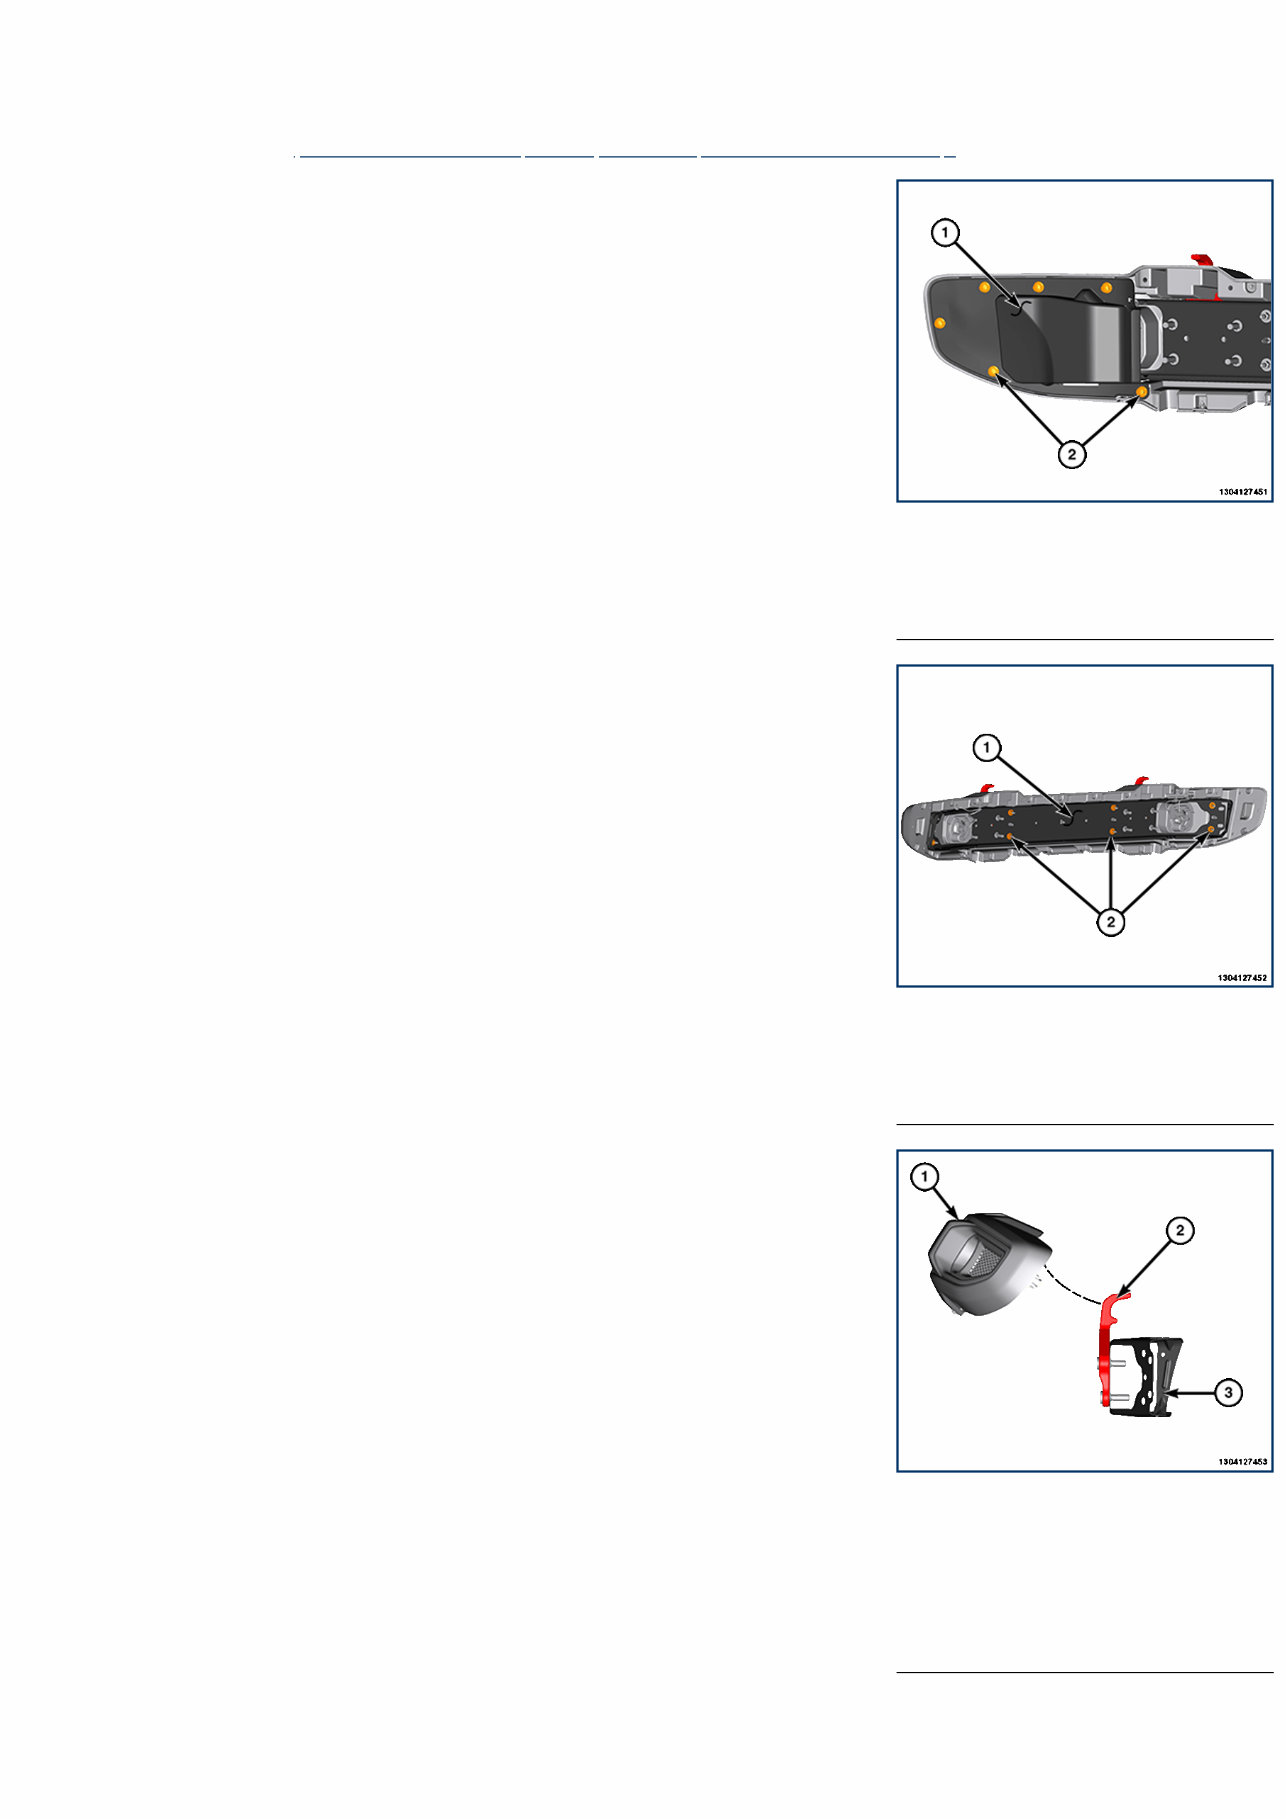
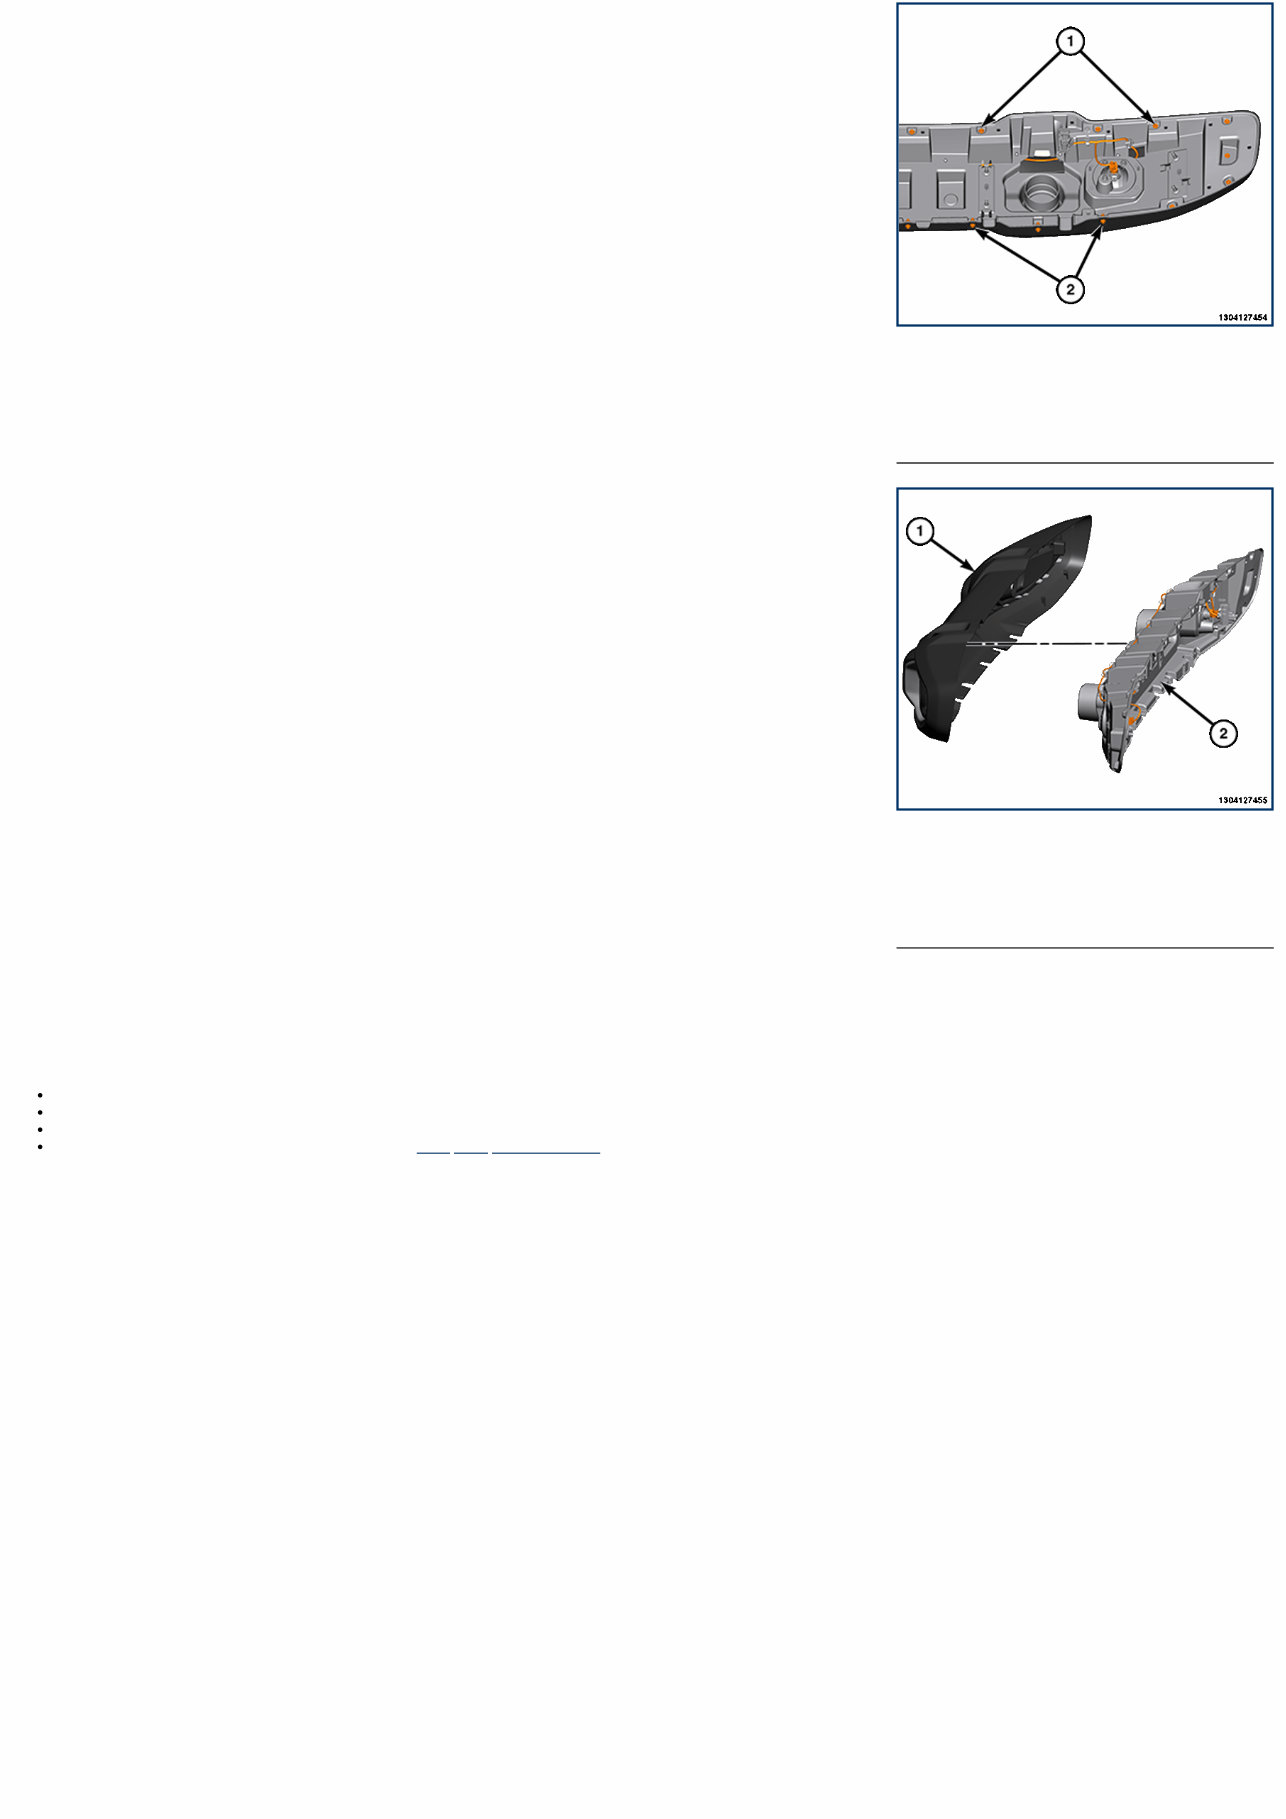
1 - Closeout Panel 2 - Push Pin Fasteners 1 - Support Bracket 2 - Nuts 1 - Energy Absorber Assembly 2 - Tow Hook 3 - Support Bracket 13 - Frame and Bumpers / Bumpers / FASCIA, Front / Removal and Installation FRONT FASCIA REMOVAL 1. Remove the bumper assembly (Refer to 13 - Frame and Bumpers/Bumpers/BUMPER, Front/Removal and Installation) . 2. Remove the push pin fasteners and remove the closeout panels. 3. Remove the nuts and remove the support bracket. 4. Lift the fascia and energy absorber assembly off of the support bracket and tow hook. 5. Remove the 16 inner screws. 6. Remove the eight lower screws.
1 - Inner Screws 2 - Lower Screws 1 - Fascia 2 - Energy Absorber Assembly 7. Separate the fascia from the energy absorber assembly. INSTALLATION Follow the removal procedure in reverse for general reassembly of the components on the vehicle. The steps listed below are calling out specific procedures that should be followed during installation. Install the fascia and energy absorber assembly down over the tow hooks and seat onto the support bracket fully. Seat the support bracket fully. Tighten the screws securely. Tighten the support bracket nuts to the proper (Torque Specifications) .
Easily Fix Any Problems On Your 2023 Jeep Wrangler With This Comprehensive Service And Repair Manual. Designed By The Manufacturer, It Includes Step-By-Step Instructions, Clear Images, And Exploded-View Illustrations To Guide You Through Every Troubleshooting And Replacement Procedure.
While Your Vehicle Is Known For Its Durability, Regular Maintenance Is Still Essential To Keep It Running Smoothly. And When The Time Comes For Parts To Be Replaced, This Manual Will Come In Handy With The Manufacturer'S Recommended Troubleshooting Charts And Replacement Procedures.
Save On Costly Repairs, Increase Your Vehicle'S Reliability, And Keep The Repair Shop At Bay With This User-Friendly Manual. No More Flipping Through Hundreds Of Pages Or Dealing With Greasy, Torn, Or Lost Pages. You Can Easily Search, Screenshot, And Bookmark The Information You Need On Any Electronic Device, Including Pc And Mac Computers, Android And Apple Smartphones And Tablets.
But If You Prefer A Physical Copy, Simply Print It Out And Take It With You On The Go. No Matter Your Preference, This Manual Is A Must-Have For Any 2023 Jeep Wrangler Owner Looking To Maintain And Repair Their Vehicle With Ease.
Some Notable Features Of This Manual Include:
Step-By-Step Instructions For Troubleshooting And Replacement Procedures
Clear Images And Exploded-View Illustrations For Easy Understanding
Compatibility With Various Electronic Devices, Including Pc, Mac, Smartphones, And Tablets
Printable Option For Those Who Prefer A Physical Copy
Compatible With The Free Adobe Reader
Recently Viewed
5,521,897Happy Clients
2,594,462eManuals
1,120,453Trusted Sellers
15Years in Business
Price:
Actual Price:
2023 Jeep Wrangler- 3.6L V6 24v VVT ETorque UPG I Service & Repair Manual