2009-2015 Jaguar XF Series (X250) Service & Repair Manual
What's Included?
Lifetime Access
Fast Download Speeds
Online & Offline Access
Access PDF Contents & Bookmarks
Full Search Facility
Print one or all pages of your manual
2009-2015 Jaguar XF (X250) 2.2L, 3.0L Diesel & 2.0 L Petrol
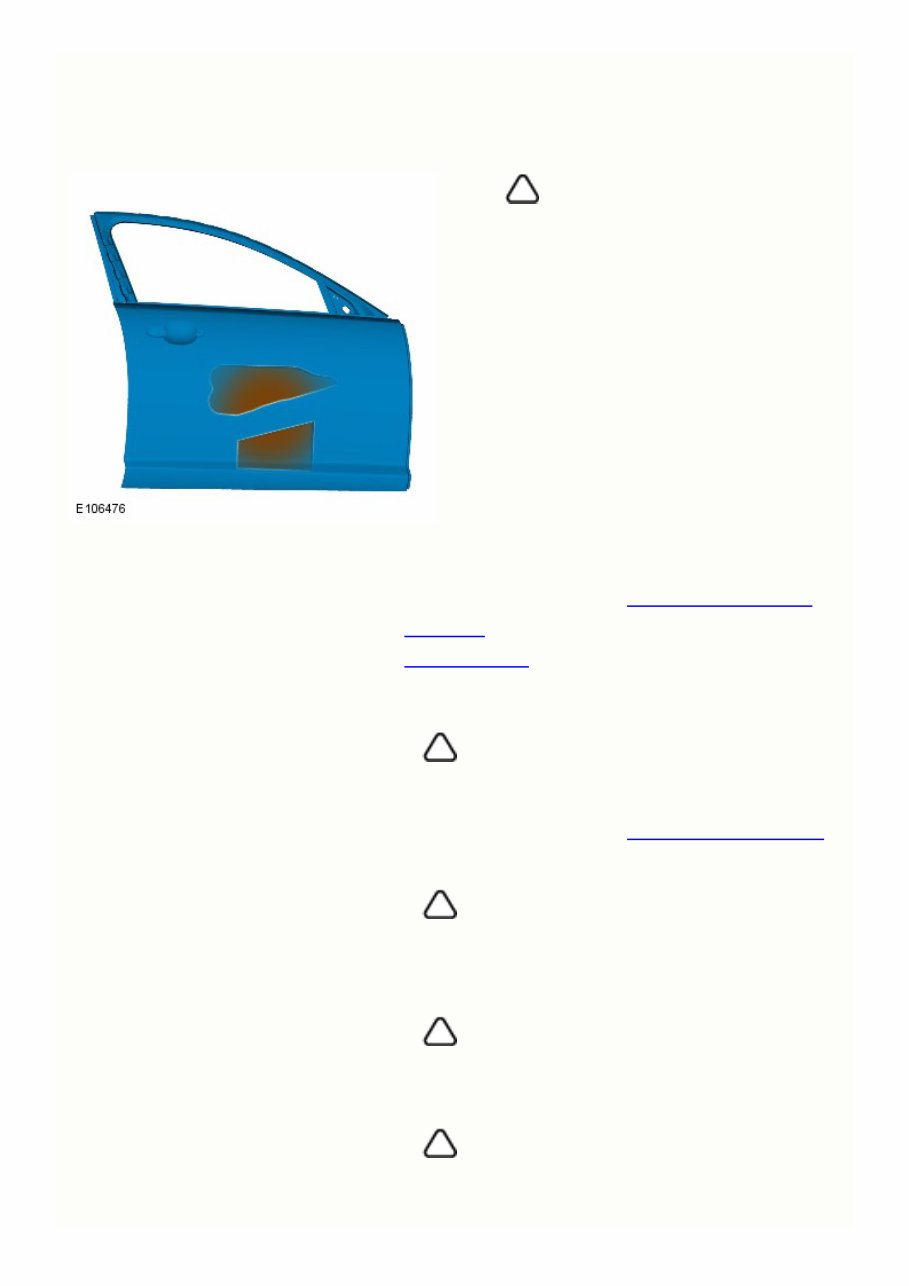
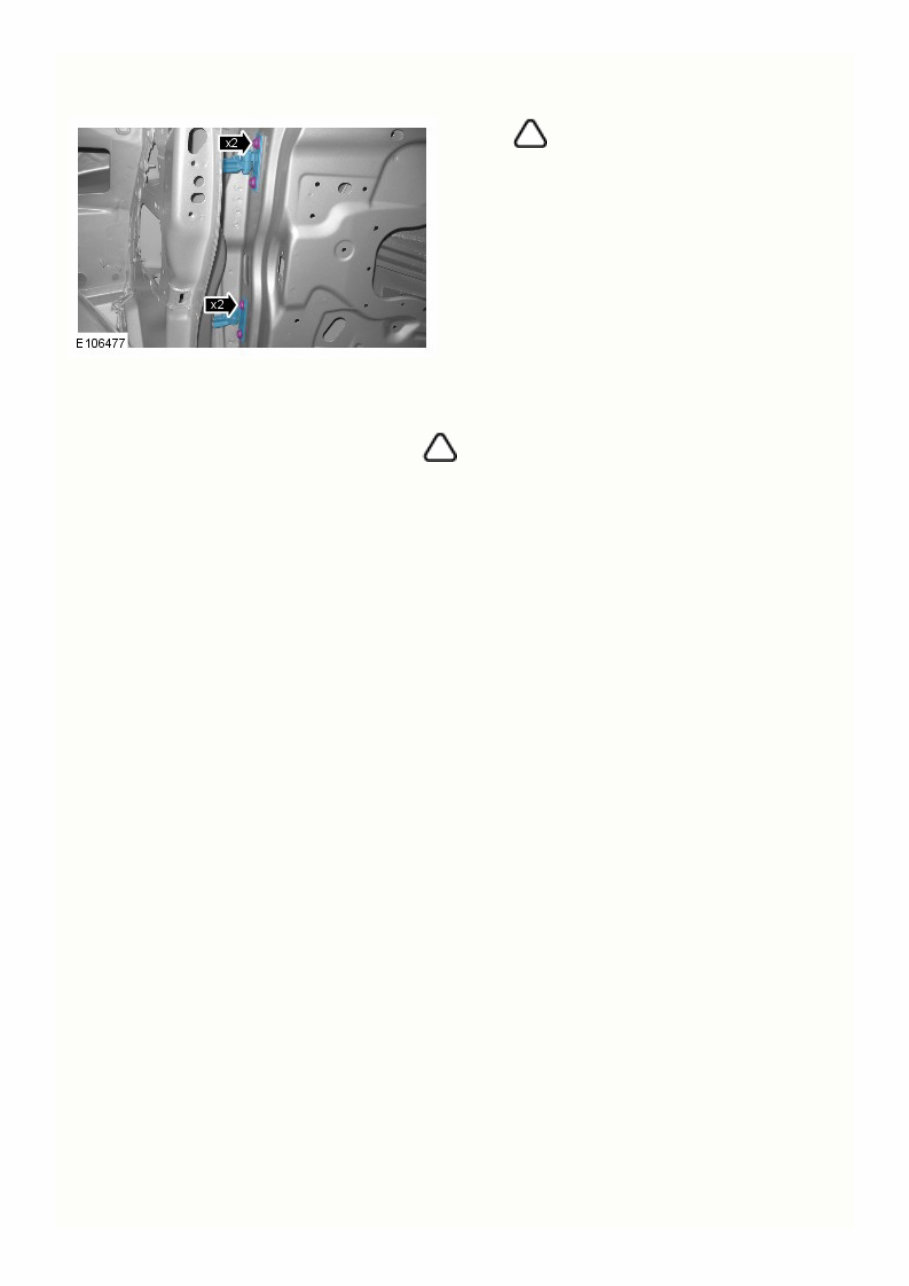
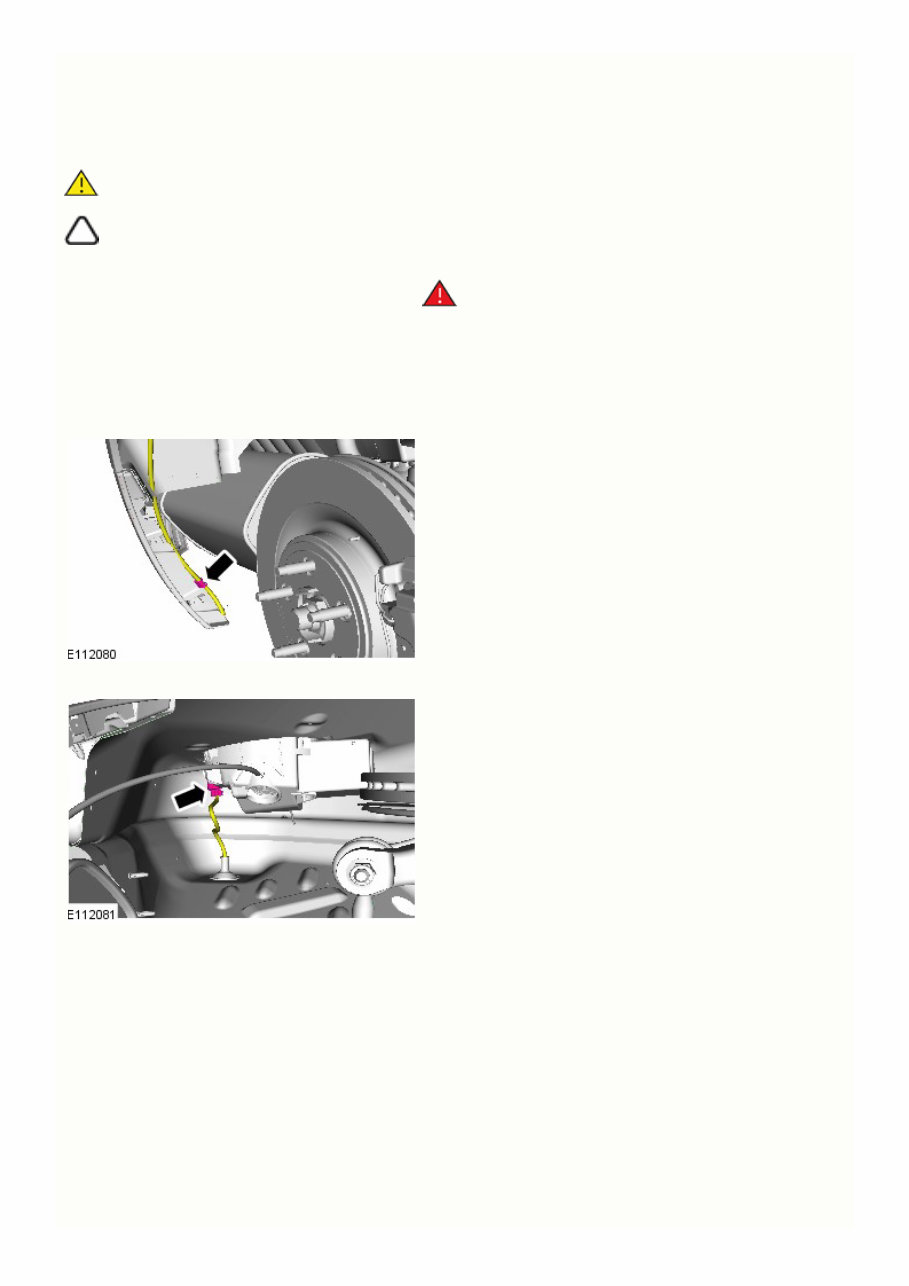
6. 5. 4. 3. 2. 1. Published: 11-May-2011 Body Closures - Front Door Removal and Installation Removal NOTE: The front door is manufactured from mild steel, it contains a side impact reinforcement manufactured from boron steel. The front door is serviced as a separate bolt-on panel. For additional information relating to this repair procedure please see the following: For additional information, refer to: Health and Safety Precautions (100-00 General Information, Description and Operation) / (501-25A Body Repairs - General Information, Body Repairs Description and Operation) / (501-25B Body Repairs - Corrosion Protection, Corrosion Protection Description and Operation) / Body and Frame (501-26, Description and Operation). NOTE: If the procedure includes removal of the front door components, the battery can remain connected to aid their removal and disconnected afterwards. Disconnect the battery ground cable. For additional information, refer to: Battery Disconnect and Connect (414-01 Battery, Mounting and Cables, General Procedures). NOTE: For new front door installation, this step may be carried out later in the removal procedure. Disconnect the front door wiring harness, accessed behind the grommet on the A-pillar. NOTE: For new front door installation, this step may be carried out later in the removal procedure. Release the front door check strap from the body. NOTE: This step is for removing the fully trimmed front door for access only, for installing a new front door, continue to removal step 7.
15. 14. 13. 12. 11. 10. 9. 8. 7. Remove the front door upper and lower hinge pivot bolts and lift the front door to remove. Remove the front door window regulator and motor. For additional information, refer to: Front Door Window Regulator and (501-11 Glass, Frames and Mechanisms, Removal and Motor Installation). Remove the exterior mirror. For additional information, refer to: (501-09 Rear View Exterior Mirror Mirrors, Removal and Installation). Remove the front door latch. For additional information, refer to: (501-14 Front Door Latch Handles, Locks, Latches and Entry Systems, Removal and Installation). Remove the front door outer window frame mouldings. Remove the front door weatherstrips. Remove the front door wiring harness. Remove the front door impact absorbers. Remove the front door check strap. Remove the front door glass run felt.
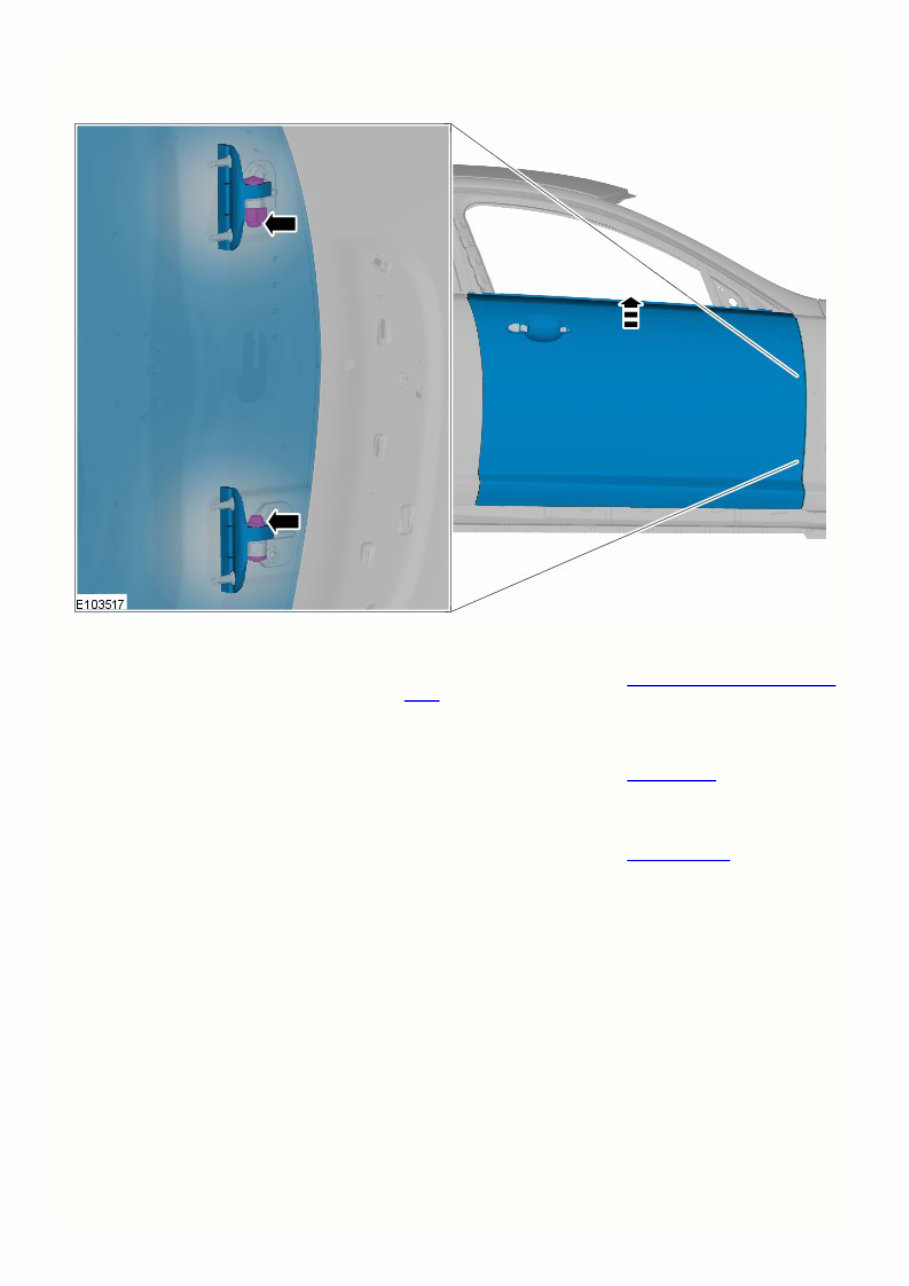
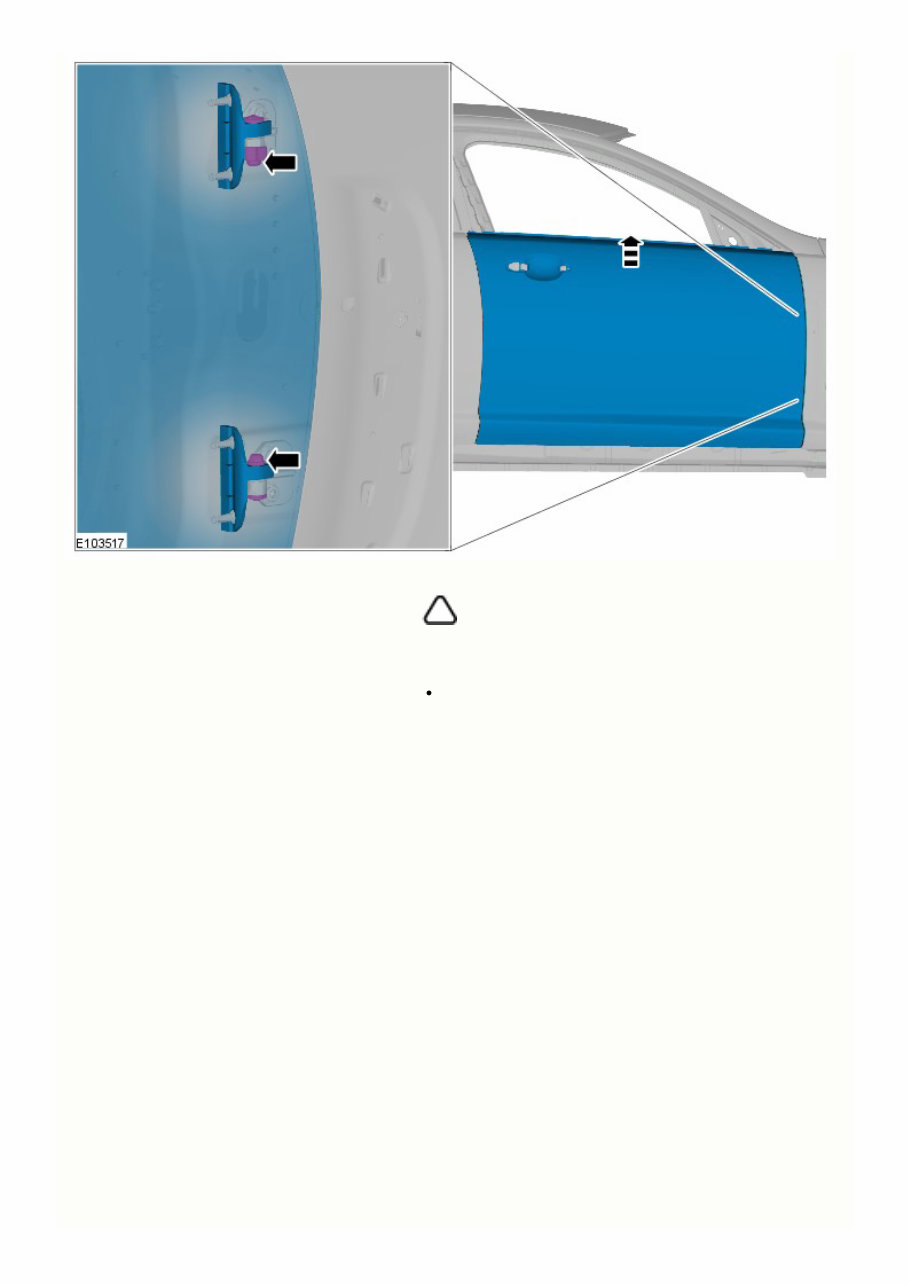
4. 3. 2. 1. 17. 16. Remove any miscellaneous front door clips, grommets and blanking covers. NOTE: If new hinges are being installed, install the complete hinges to the A-pillar. To align the hinges at the A-pillar it will be necessary to remove the front fender. Remove the upper and lower front door hinge fixing bolts and remove the front door. Installation NOTE: If the front door has been removed for access only, it can be installed back on to its upper and lower hinge pivots and secured with the upper and lower hinge pivot bolts. Offer up the front door and loosely install the front door hinge bolts. Check alignment, if correct, proceed to next step, if not, rectify and recheck before proceeding. Tighten the front door hinge bolts to 30 Nm. When correctly aligned and with the front door hinge bolts tightened, the new front door can be removed at its upper and lower hinge pivot bolts for refinishing.
5. NOTE: Install the front door upper frame weatherstrip prior to installing the front door. The installation of associated panels and components is the reversal of removal procedure. Tighten the front door upper and lower hinge pivot bolts to 30 Nm.
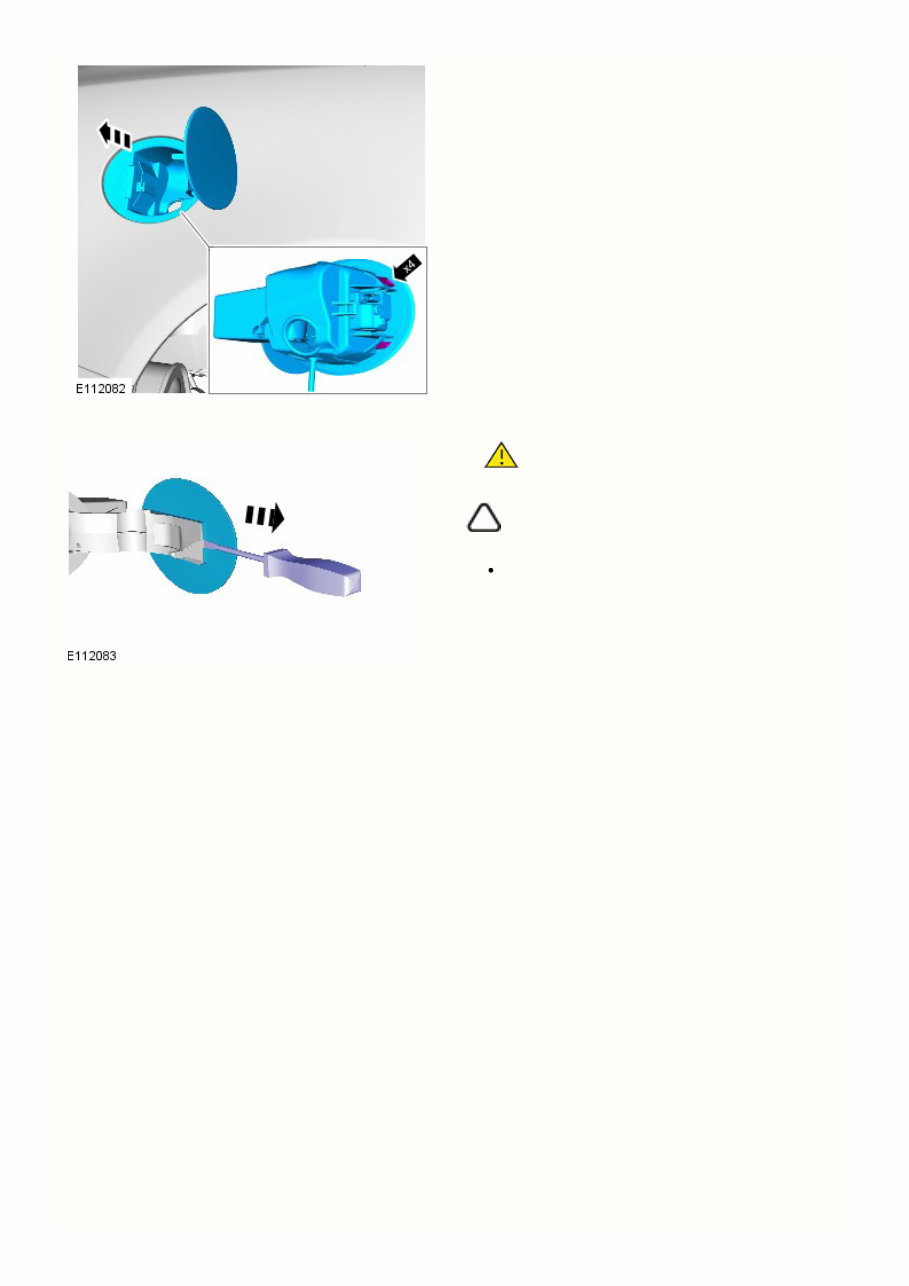
5. 4. 3. 2. 1. Published: 11-May-2011 Body Closures - Fuel Filler Door Assembly Removal and Installation Removal CAUTION: Do not align the bowl using the hinge arm. NOTE: Removal steps in this procedure may contain installation details. WARNING: Do not work on or under a vehicle supported only by a jack. Always support the vehicle on safety stands. Raise and support the vehicle. Refer to: Fuel Tank Filler Pipe (310-01, Removal and Installation).
1. 6. CAUTION: Protect the surrounding paintwork to avoid damage. NOTE: Do not disassemble further if the component is removed for access only. Release the clip. Installation To install, reverse the removal procedure.
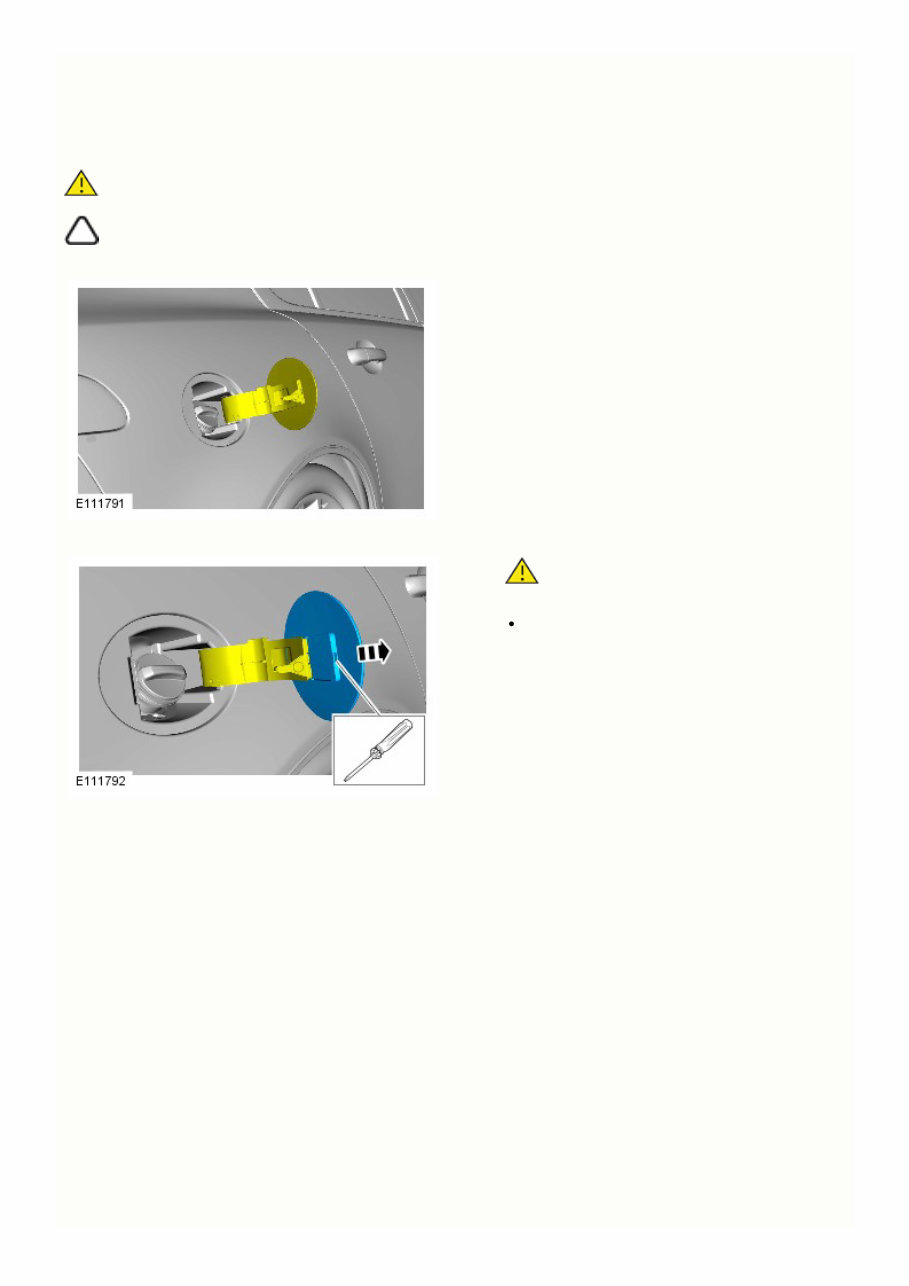
1. 2. 1. Published: 11-May-2011 Body Closures - Fuel Filler Door Removal and Installation Removal CAUTION: Do not align the bowl using the hinge arm. NOTE: Removal steps in this procedure may contain installation details. CAUTION: Protect the surrounding paintwork to avoid damage. Release the clip. Installation To install, reverse the removal procedure.
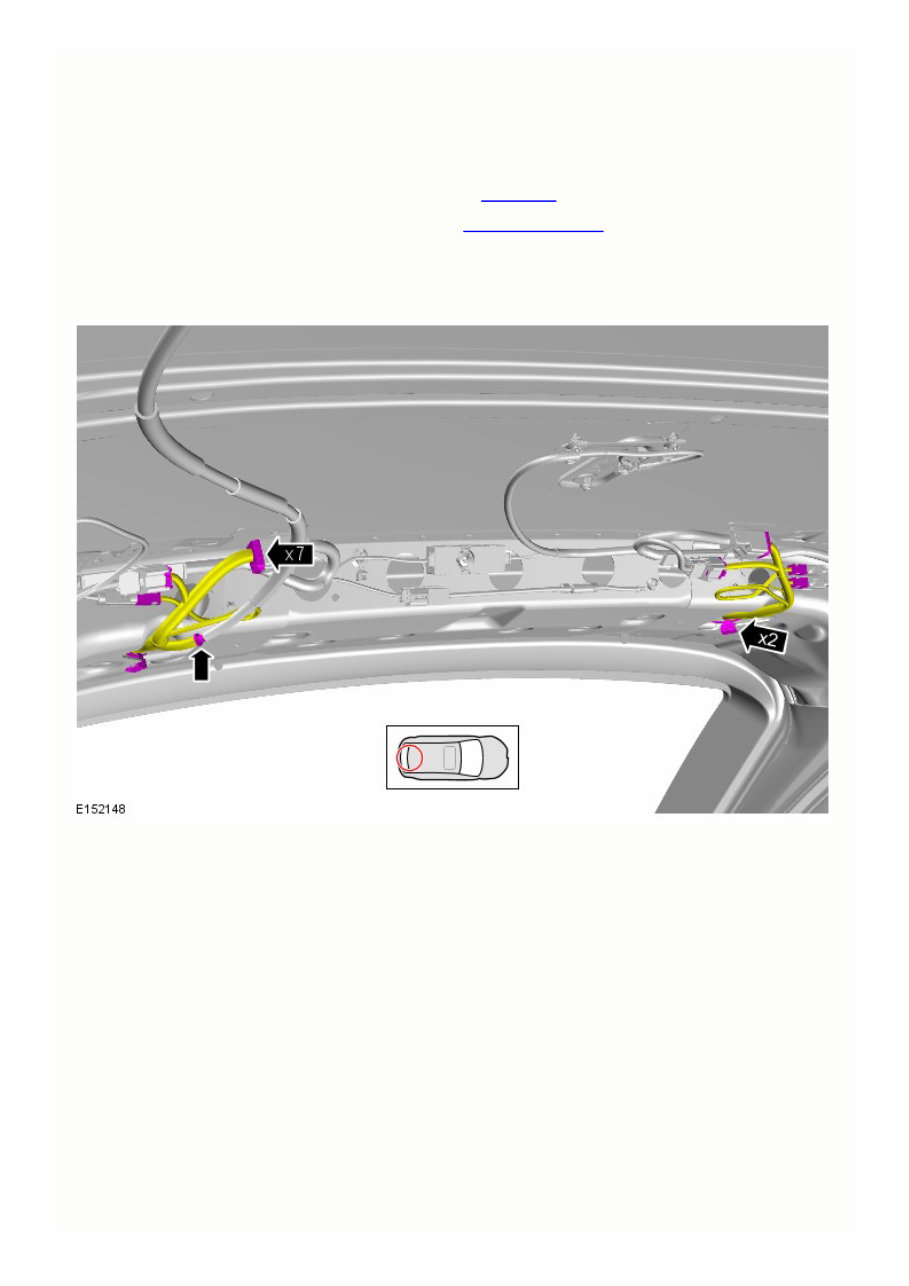
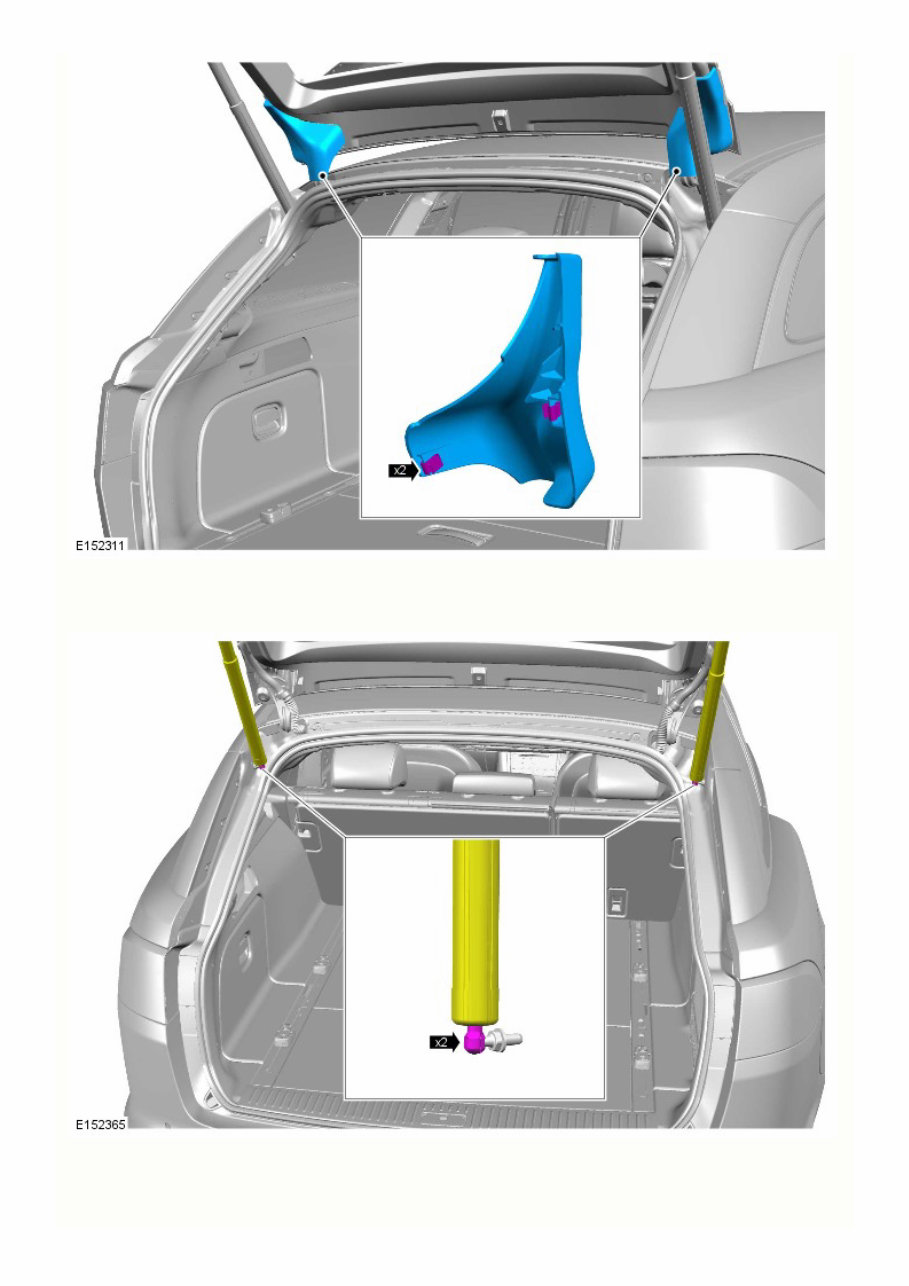
3. 2. 1. Published: 31-May-2013 Body Closures - Liftgate Hinge Removal and Installation Removal Refer to: (501-08 Exterior Trim and Ornamentation, Rear Spoiler Removal and Installation). Refer to: (501-05 Interior Trim and Headliner - Sportbrake Ornamentation, Removal and Installation).
2009-2015 Jaguar XF Series (X250) Service & Repair Manual
Engines covered:
2.0L Turbocharged Ford Ecoboost I4
2.2L Ford Duratorq I4 (Diesel)
3.0L Ford AJD V6 (Diesel)
5.0L Supercharged Jaguar AJ133S V8
Format: .PDF
Printable: Yes
Language: English
Compatibility: Compatible with various electronic devices including PC, Mac computers, Android and Apple smartphones, and tablets.
Requirements: Requires Adobe Reader (free)
Whether you are a professional mechanic or a DIY enthusiast, this auto repair manual provides every troubleshooting and replacement procedure recommended by the manufacturer. It includes step-by-step instructions, clear images, and exploded-view illustrations.
Regular maintenance is essential for the durability of your vehicle. Over time, certain parts will wear out and require replacement.
A reliable car repair manual is invaluable as it offers the manufacturer's recommended troubleshooting charts and replacement procedures, enabling you to save on repairs, enhance your vehicle's reliability, and minimize visits to the repair shop.
Please note:
This is not a generic repair manual. It contains every troubleshooting and replacement procedure provided by the manufacturer, including step-by-step instructions, exploded-view illustrations, and clear images in an easy-to-use digital format.
Digital repair manuals are highly convenient as they can be accessed on various electronic devices without the need to flip through numerous pages. They are easily searchable, portable, and can be printed if desired.
Recently Viewed
5,521,897Happy Clients
2,594,462eManuals
1,120,453Trusted Sellers
15Years in Business
Price:
Actual Price:
2009-2015 Jaguar XF Series (X250) Service & Repair Manual