Adhesives, Fluids, Lubricants, and Sealers Application Type of Material GM Part Number GM Vehicle Care Odor Eliminator Fluids Refer to Electronic Parts Catalog. Page 1 of 1
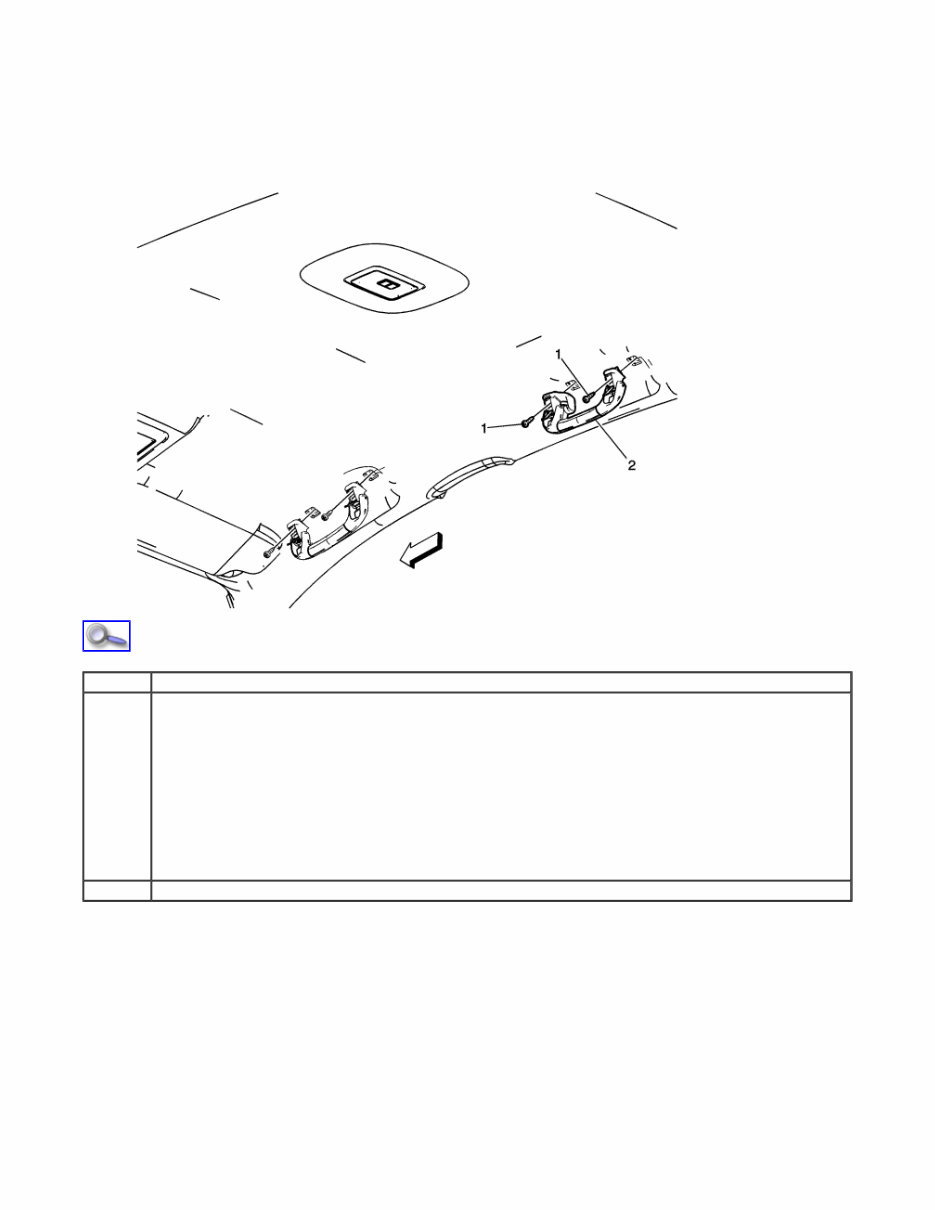
Assist Handle and Rear Coat Hook Replacement Callout Component Name 1 Roof Rail Rear Assist Handle Screw (Qty: 2) Caution: Refer to Fastener Caution in the Preface section. Procedure 1. Fold the assist handle downward and hold. 2. Use a small flat bladed tool to open the assist handle covers to access the screws. Tighten 6 N·m (53 lb in) 2 Roof Rail Rear Assist Handle Page 1 of 1
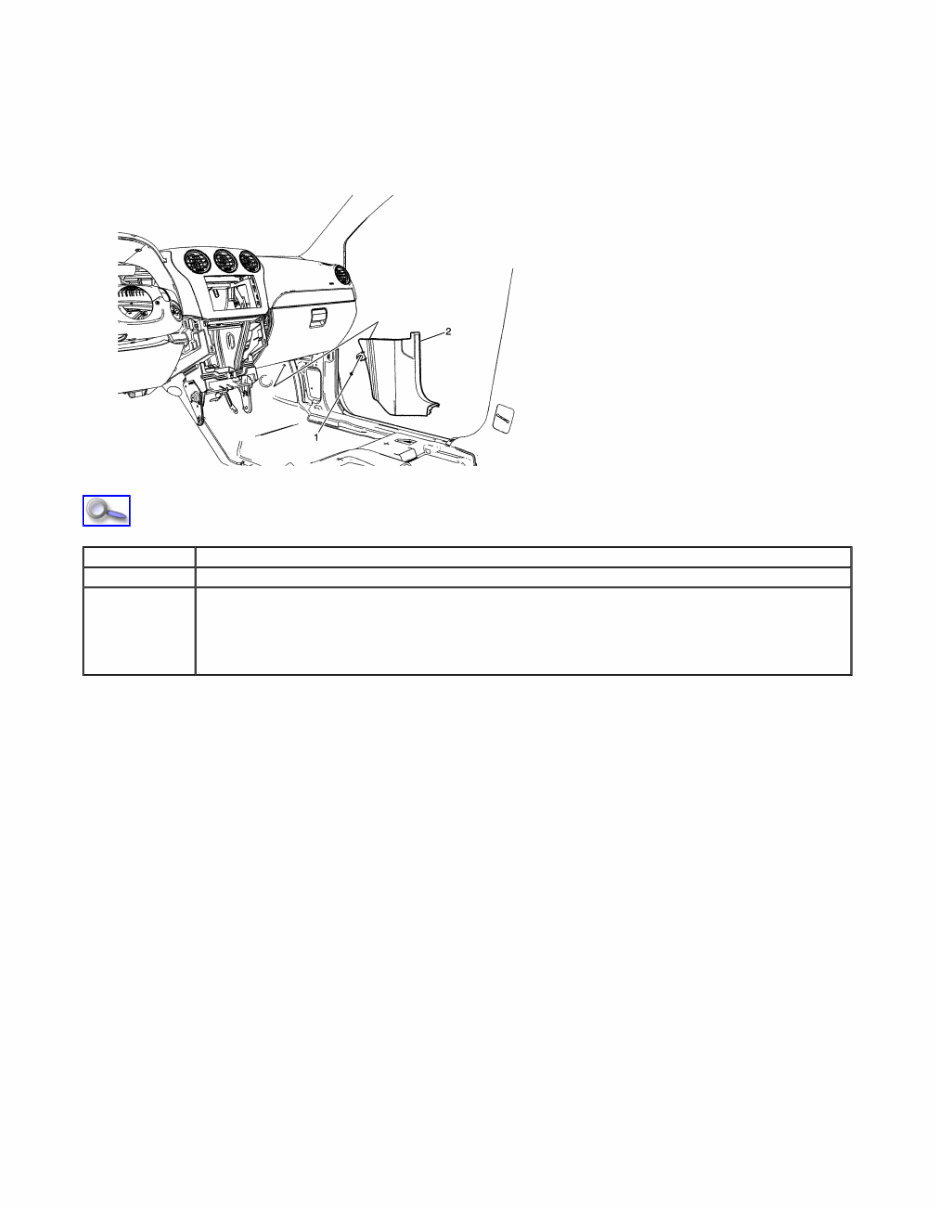
Body Hinge Pillar Trim Panel Replacement - Long Body Callout Component Name 1 Body Hinge Pillar Trim Panel Fastener 2 Body Hinge Pillar Trim Panel Assembly Procedure Reposition the front floor panel carpet as needed. Page 1 of 1
Body Panel Paint Protector Replacement (VGC) 1. The paint protective film and vehicle surface temperature should be 13-32°C (55-90°F) for best resu lts. 2. Automatic car washes should be avoided for at least 24 hours after the paint protective film application. 3. Wipe the vehicle surface with isopropyl alcohol or flash naptha at the application area. 4. Dry the surface with a clean lint-free cloth. 5. Create a mixture of 25 percent isopropyl alcohol and 75 percent water and two drops of baby shampoo per 16 oz of fluid mixture. 6. Remove the backing liner from the protective film patch. 7. Use the solution to liberally spray the adhesive side of the protective patch, the mounting location along with your hands. 8. Position the paint protective film patch to the desired location on the vehicle. 9. Spray the surface of the film with the alcohol, water and soap solution. 10. Using a dampened squeegee, start at the center of the protective patch, working outward in order to remove the air and solution from under the protective patch. 11. Release any air bubbles with a pin. 12. Dry the surface with a clean, lint-free cotton cloth. Page 1 of 1
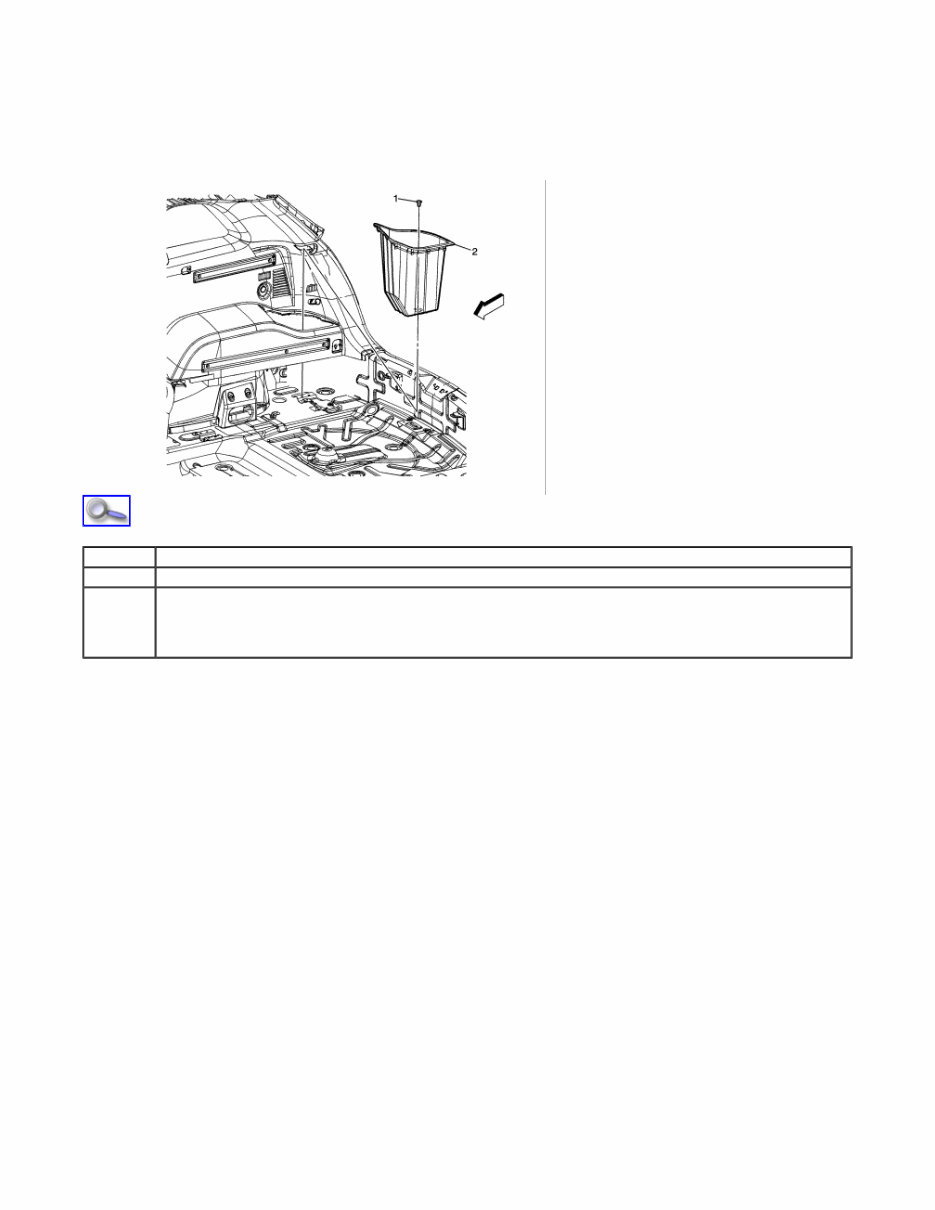
Body Side Rear Stowage Compartment Replacement Callout Component Name 1 Body Side Rear Stowage Compartment Retainer 2 Body Side Rear Stowage Compartment Tip Pull upward to disengage the retainers along the top of the stowage compartment. Page 1 of 1
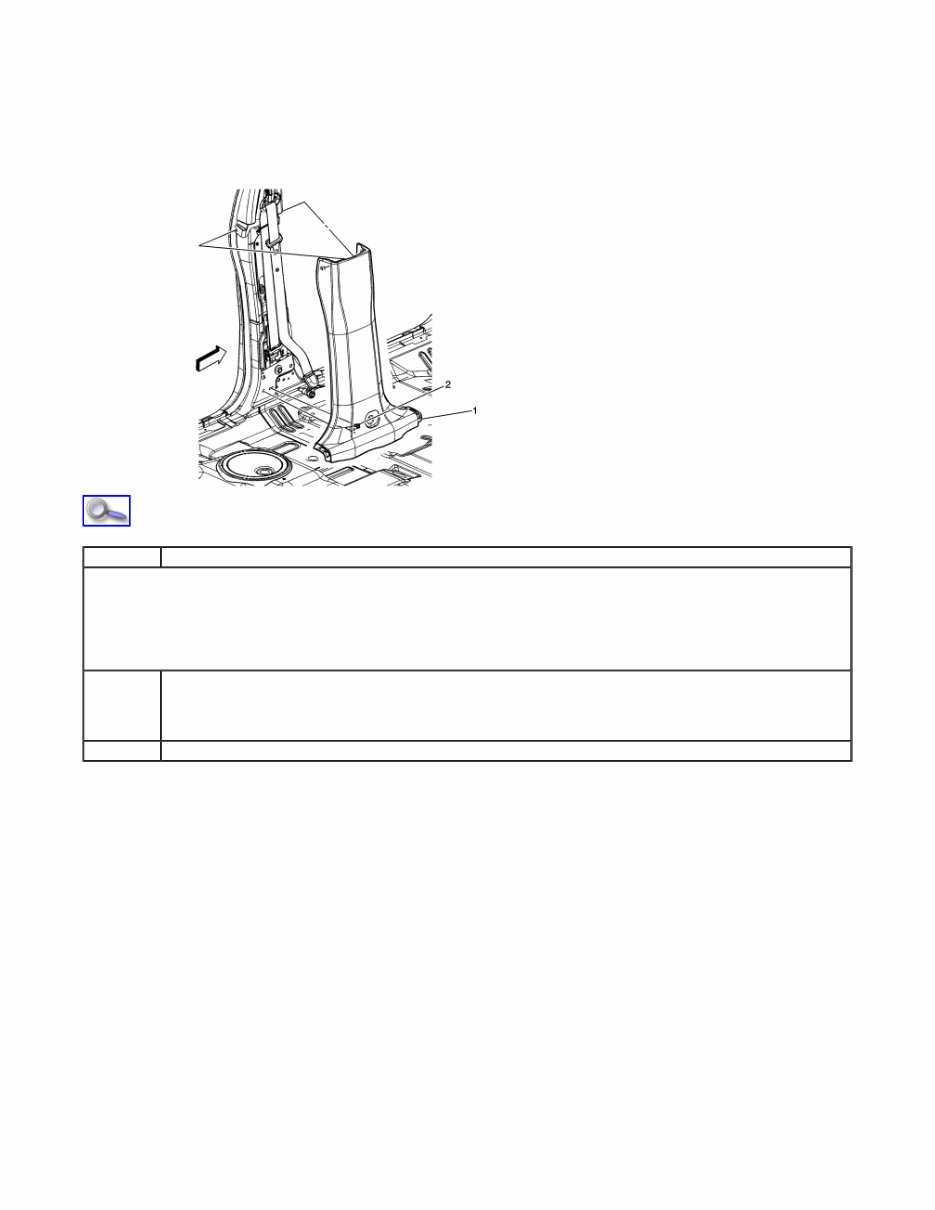
Centre Pillar Lower Garnish Moulding Replacement Callout Component Name Preliminary Procedures 1. Remove the front carpet retainer. Refer to Front Side Door Opening Floor Carpet Retainer Replacement . 2. Remove the rear carpet retainer. Refer to Rear Side Door Opening Floor Carpet Retainer Replacement . 3. Remove the driver or passenger seat retractor side belt. Refer to Driver or Passenger Seat Retractor Side Belt Replacement . 1 Centre Pillar Lower Garnish Moulding Assembly Tip There are 2 locating pins at the top of the moulding for alignment purposes. 2 Centre Pillar Lower Garnish Moulding Clip (Qty: 2) Page 1 of 1
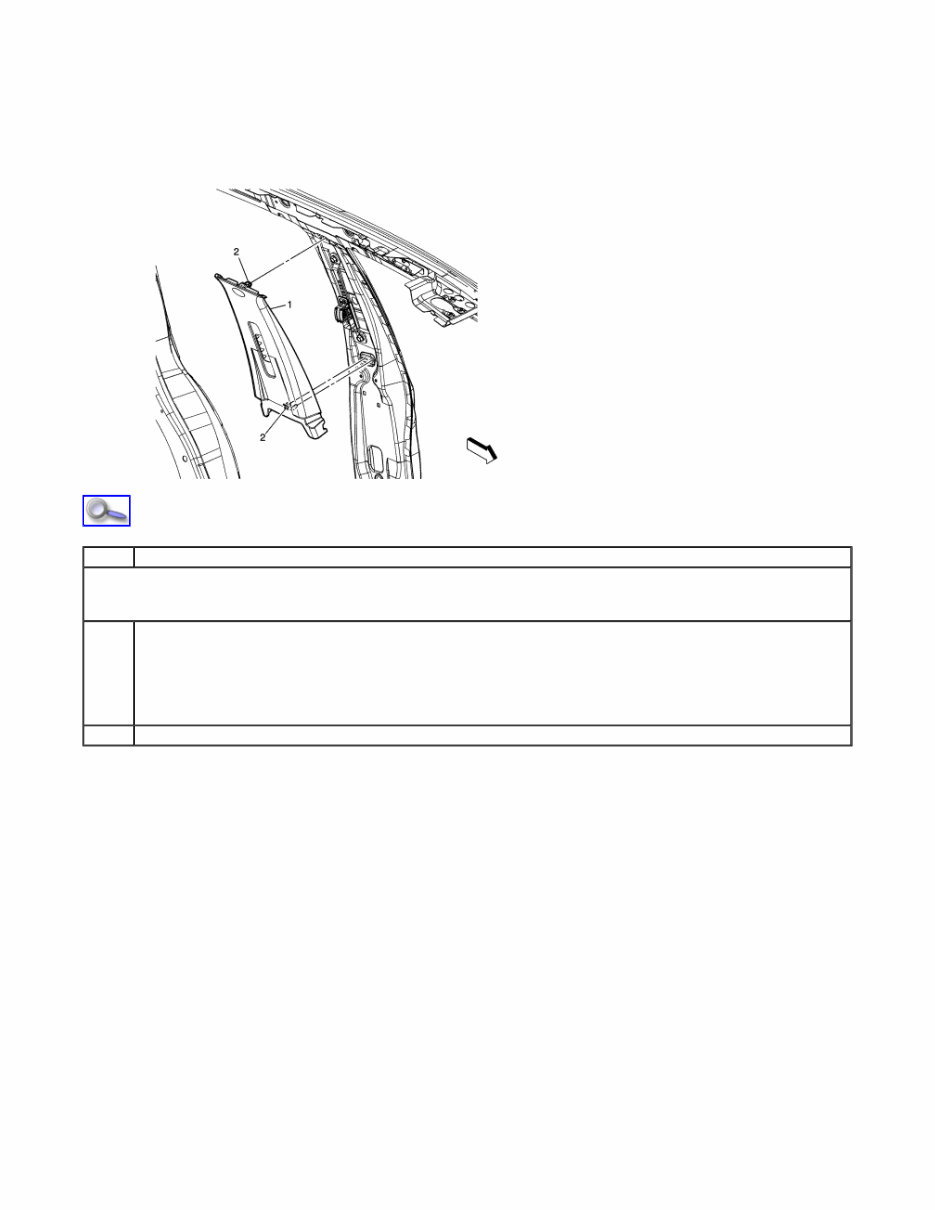
Centre Pillar Upper Garnish Moulding Replacement Callout Component Name Preliminary Procedure Remove the centre pillar lower garnish moulding. Refer to Centre Pillar Lower Garnish Moulding Replacement . 1 Centre Pillar Upper Garnish Moulding Assembly Procedure Remove the driver or passenger seat retractor side belt. Refer to Driver or Passenger Seat Retractor Side Belt Replacement . 2 Centre Pillar Upper Garnish Moulding Clip (Qty: 2) Page 1 of 1
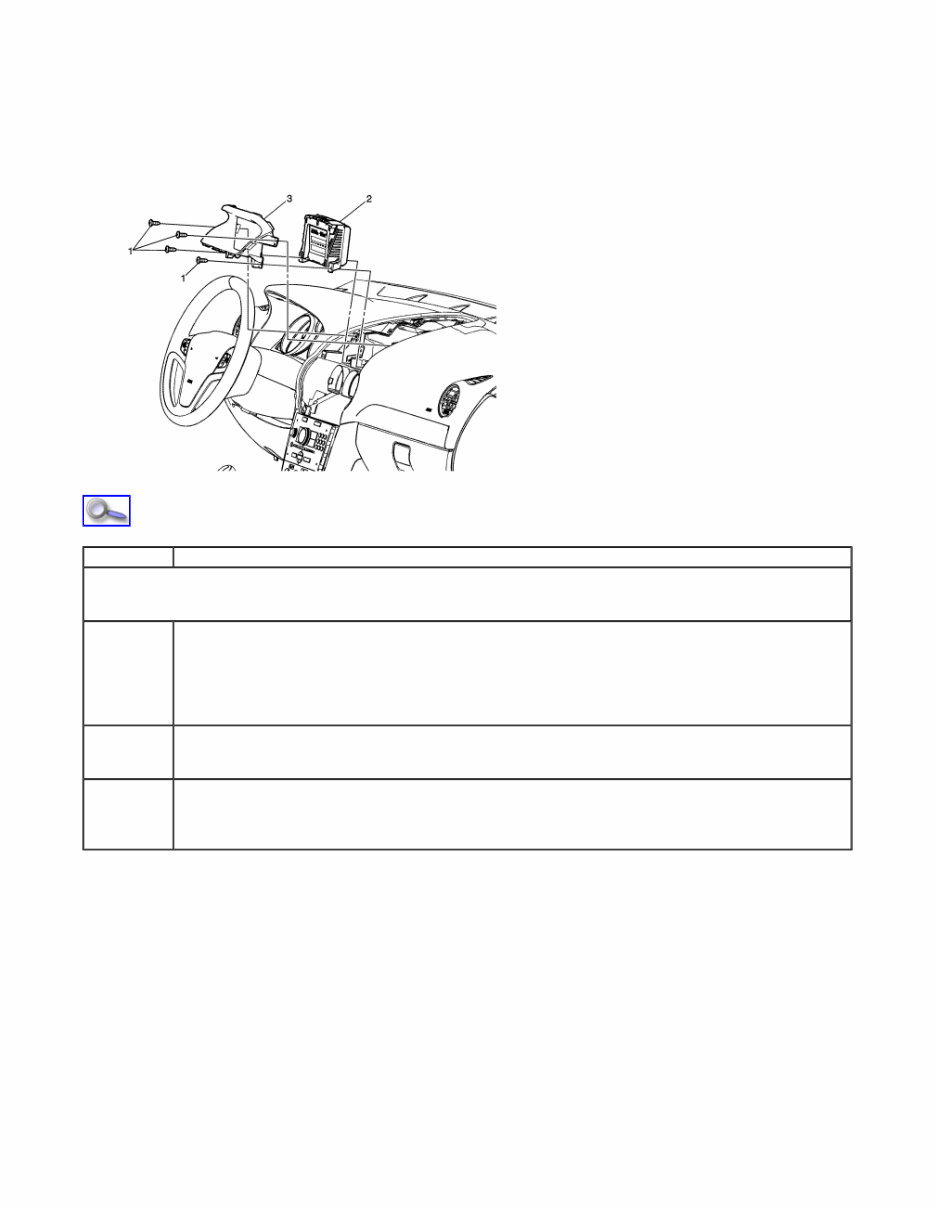
Driver Information Display Bezel Replacement - Short Body Callout Component Name Preliminary Procedure Remove the instrument panel accessory bezel. Refer to Instrument Panel Accessory Bezel Replacement . 1 Driver Information Display Bezel Screw (Qty: 4) Caution: Refer to Fastener Caution in the Preface section. Tighten 2 N·m (18 lb in) 2 Driver Information Display Assembly Refer to Driver Information Display Replacement . 3 Driver Information Display Bezel Tip Left hand drive vehicle shown, right hand drive vehicle similar. Page 1 of 1
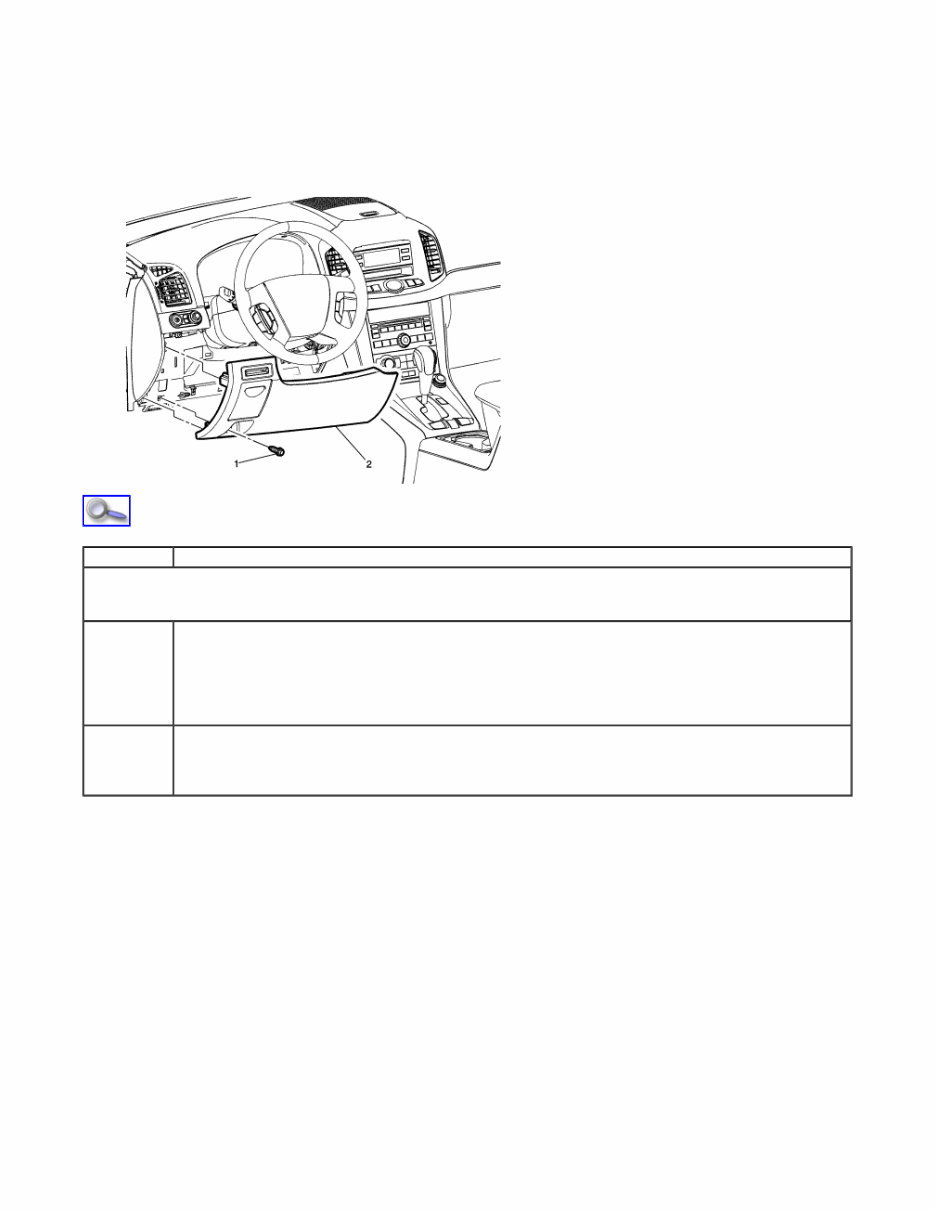
Driver Knee Bolster Replacement - Long Body Callout Component Name Preliminary Procedure Remove the bonnet release cable handle. Refer to Bonnet Primary Catch Release Cable Handle Replacement . 1 Drivers Knee Bolster Screw Caution: Refer to Fastener Caution in the Preface section. Tighten 2 N·m (18 lb in) 2 Drivers Knee Bolster Assembly Tip Left hand drive vehicle shown, right hand drive vehicle similar. Page 1 of 1
Get your hands on the 2012 Holden Captiva 5 Service and Repair Manual for comprehensive instructions and procedures to fix your vehicle. Whether you're a professional mechanic or a DIY enthusiast, these manuals are invaluable for immediate repairs and long-term maintenance. With detailed technical data, diagrams, and a complete list of car parts, even novice car mechanics can easily follow the step-by-step guides. The manual covers all models and repairs A-Z, providing you with the exact same information used by dealership technicians. It includes complete step-by-step instructions, diagrams, illustrations, wiring schematics, and specifications to effortlessly repair your vehicle. Say goodbye to flipping through books or dealing with greasy, torn manuals – everything you need is conveniently available in one easy-to-use manual. The manual also contains hundreds of photos and is available for free preview. Choose the format that suits you best – whether it's a .OVA file manual or a .PDF manual, these resources are designed to enhance the performance and durability of your vehicle.





 Lifetime Access




