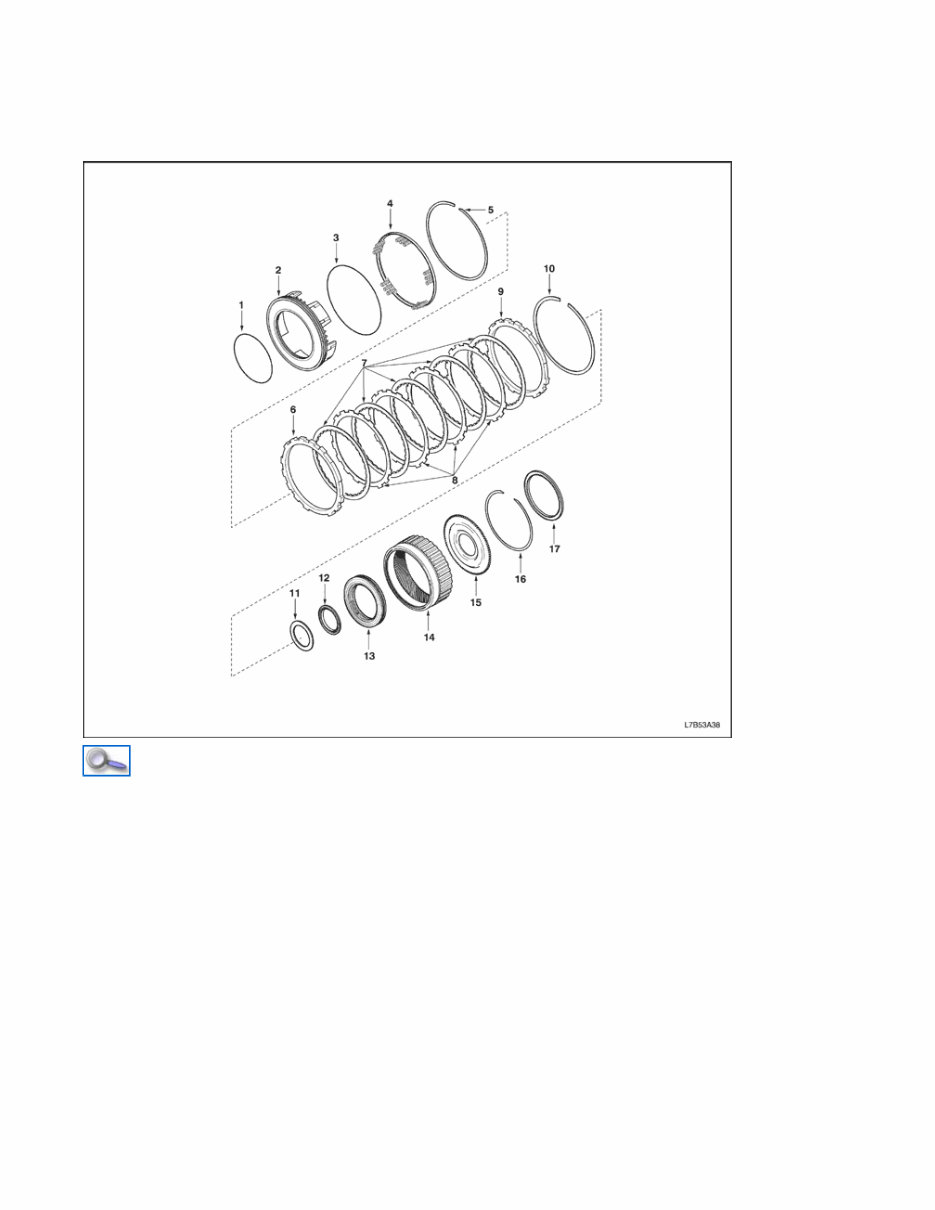
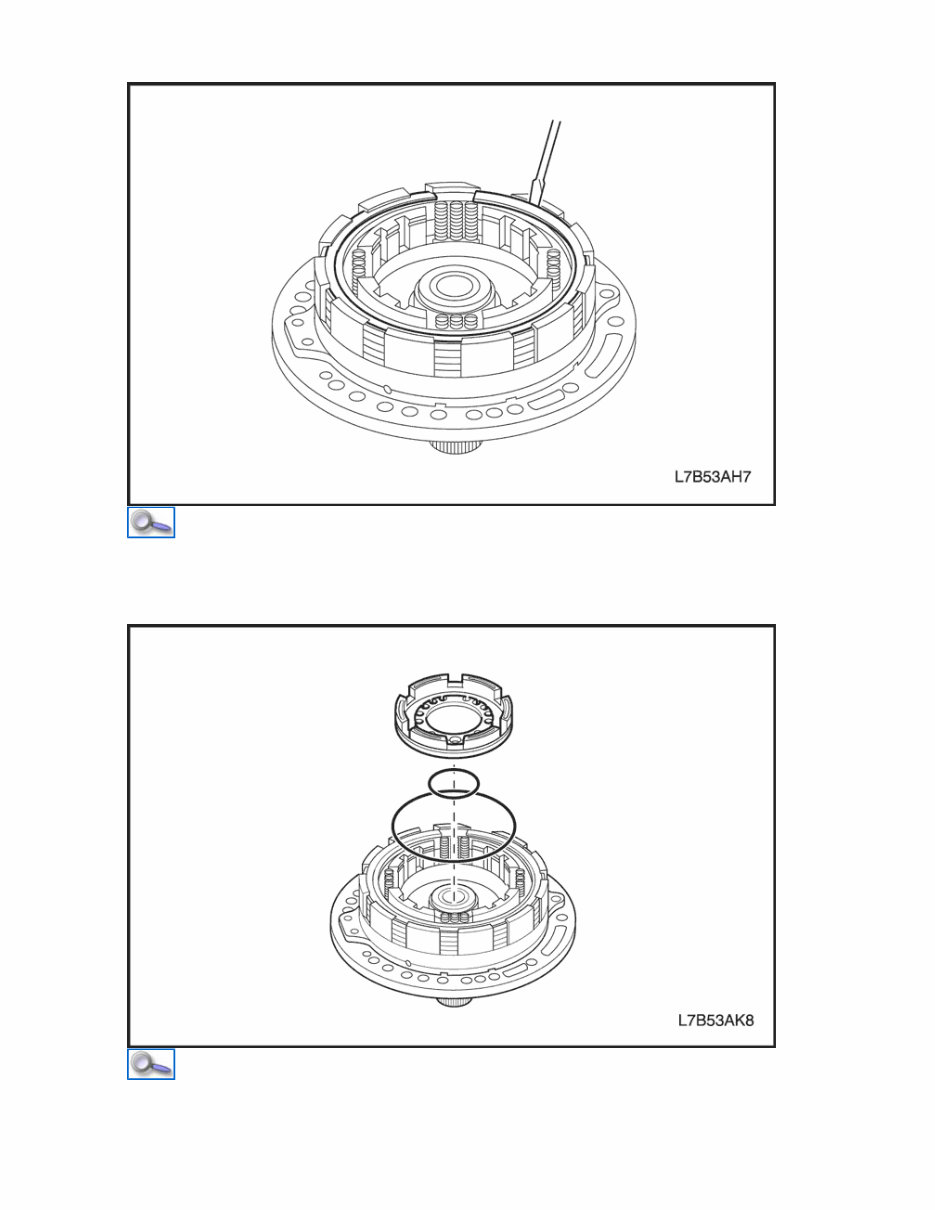
1st and Reverse Brake (B3) and One Way Clutch No.2 (F2) Illustration 1. O-ring 2. 1st and Reverse Brake (B3) Piston 3. O-ring 4. 1st and Reverse Brake (B3) Return Spring 5. Snap Ring 6. 1st and Reverse Brake (B3) Flange 7. 1st and Reverse Brake (B3) Disc 8. 1st and Reverse Brake (B3) Plate 9. 1st and Reverse Brake (B3) Flange 10. Snap Ring 11. Thrust Bearing Race 12. Thrust Bearing 13. One Way Clutch No.2 (F2) Assembly Page 1 of 2 8/9/2016 http://localhost:9080/tis2web/?target=AN00TJFM&target.method=getPage
14. Front Planetary Ring Gear 15. Front Planetary Ring Gear Flange 16. Snap Ring 17. Thrust Bearing Page 2 of 2 8/9/2016 http://localhost:9080/tis2web/?target=AN00TJFM&target.method=getPage
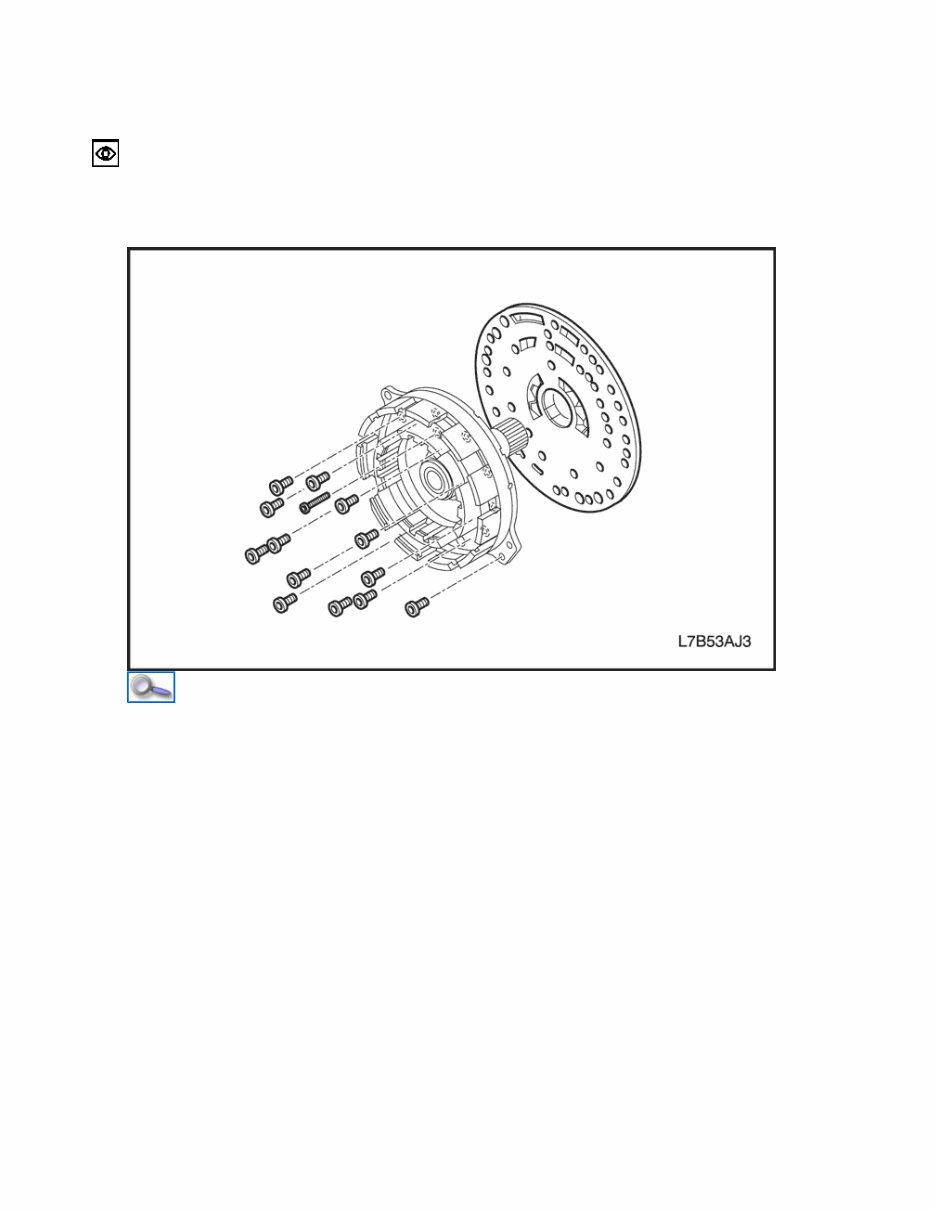
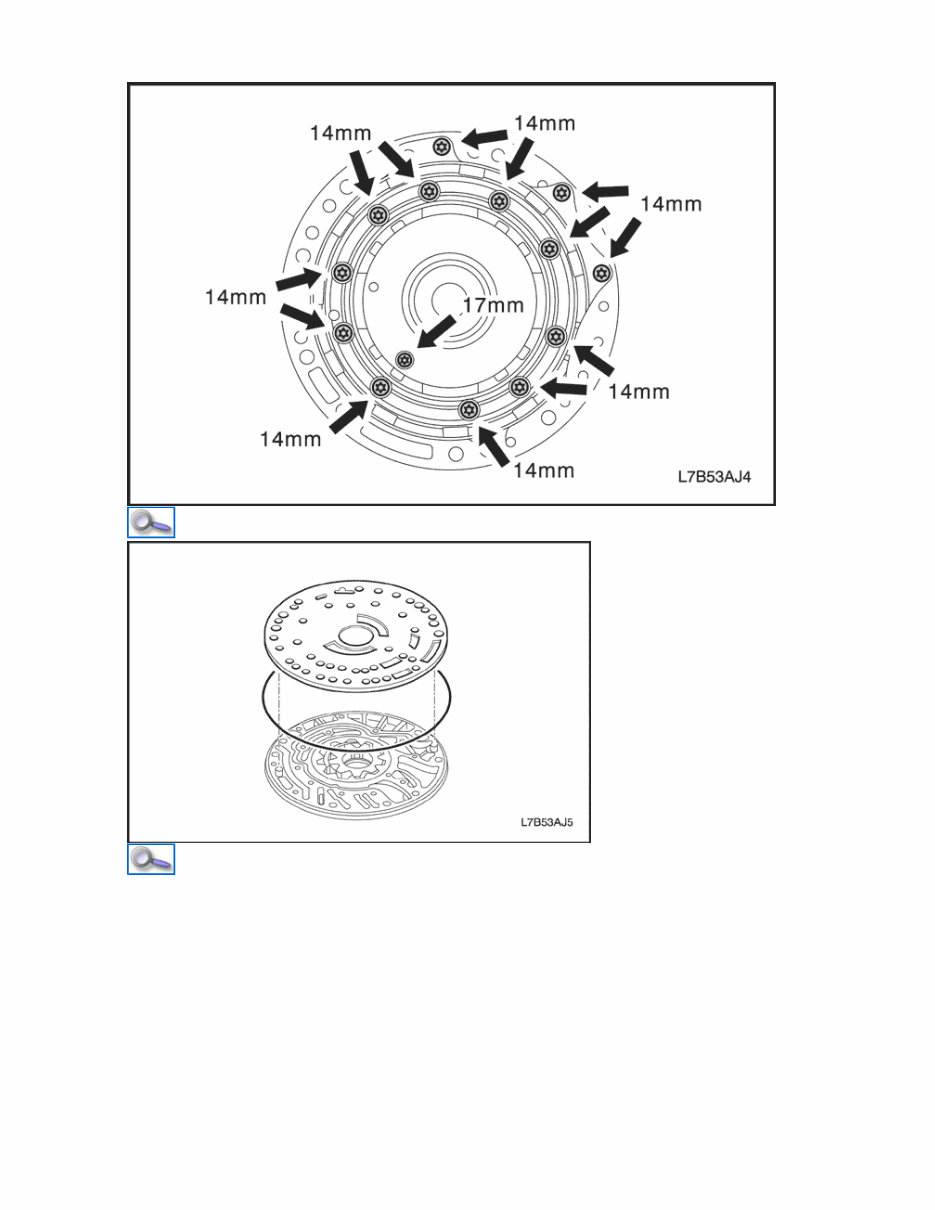
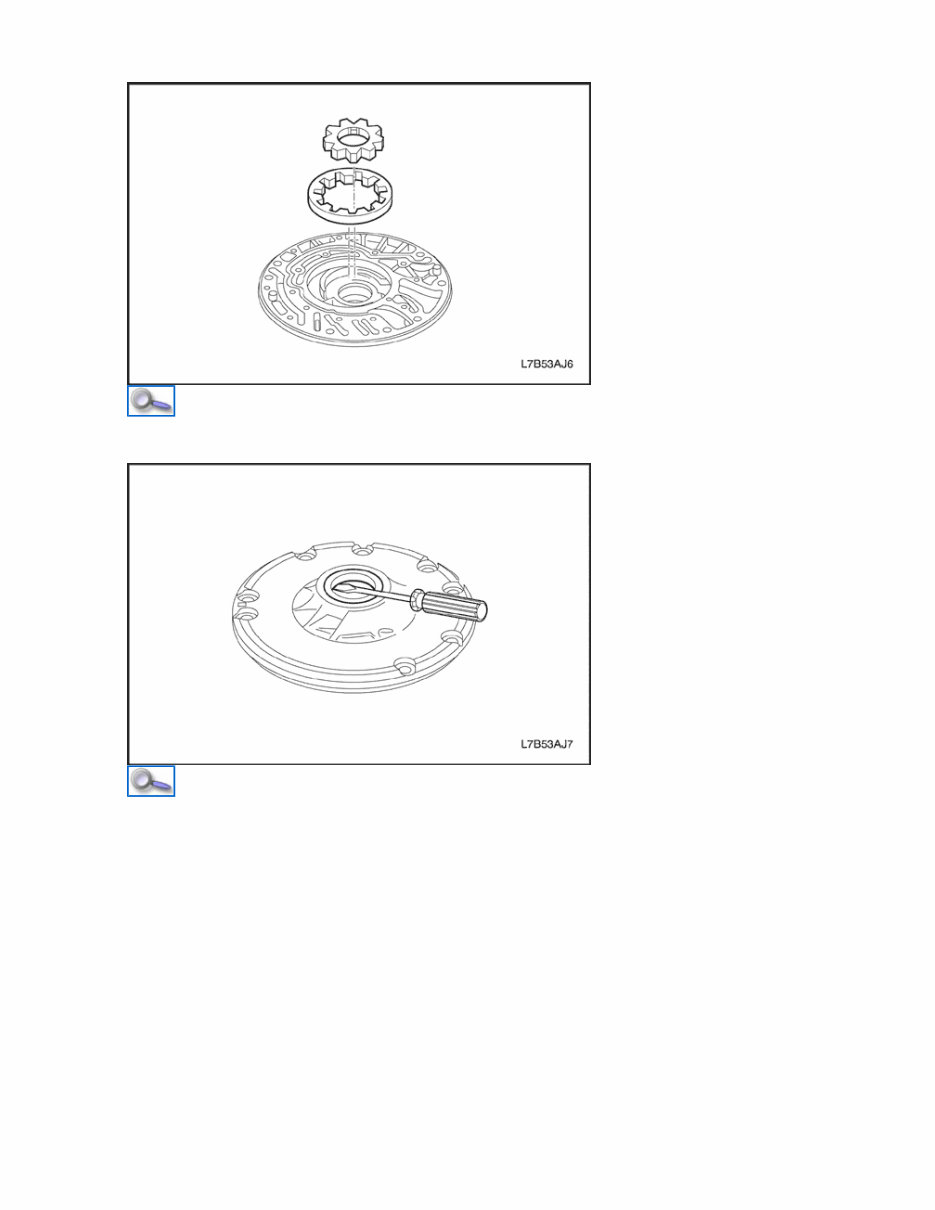
2 nd Coast Brake (B1) and 2 nd Brake (B2) Inspection Inspect 1. Inspect the flange, disc and plate. Check that the sliding surface of disc and plate is not worn or burnt. If the disc or plate is worn or burnt, replace it. Important : When replacing clutch discs, soak the new discs for at least 2 hours in ATF. 2. Remove the oil pump cover. Remove the 14 torx bolts. Important : Be careful not to drop the oil pump body and oil pump cover. Remove the oil pump cover. Page 1 of 3 8/8/2016 http://localhost:9080/tis2web/?target=AMKZKD7&target.method=getPage
3. Remove the oil pump plate. Remove the oil pump plate. · Remove the O-ring from the pump body. Page 2 of 3 8/8/2016 http://localhost:9080/tis2web/?target=AMKZKD7&target.method=getPage
4. Remove the oil pump drive gear and oil pump driven gear. 5. Remove the oil seal. · Remove the oil seal with a screwdriver. Important : Be careful not to damage the oil pump body bushing. Page 3 of 3 8/8/2016 http://localhost:9080/tis2web/?target=AMKZKD7&target.method=getPage
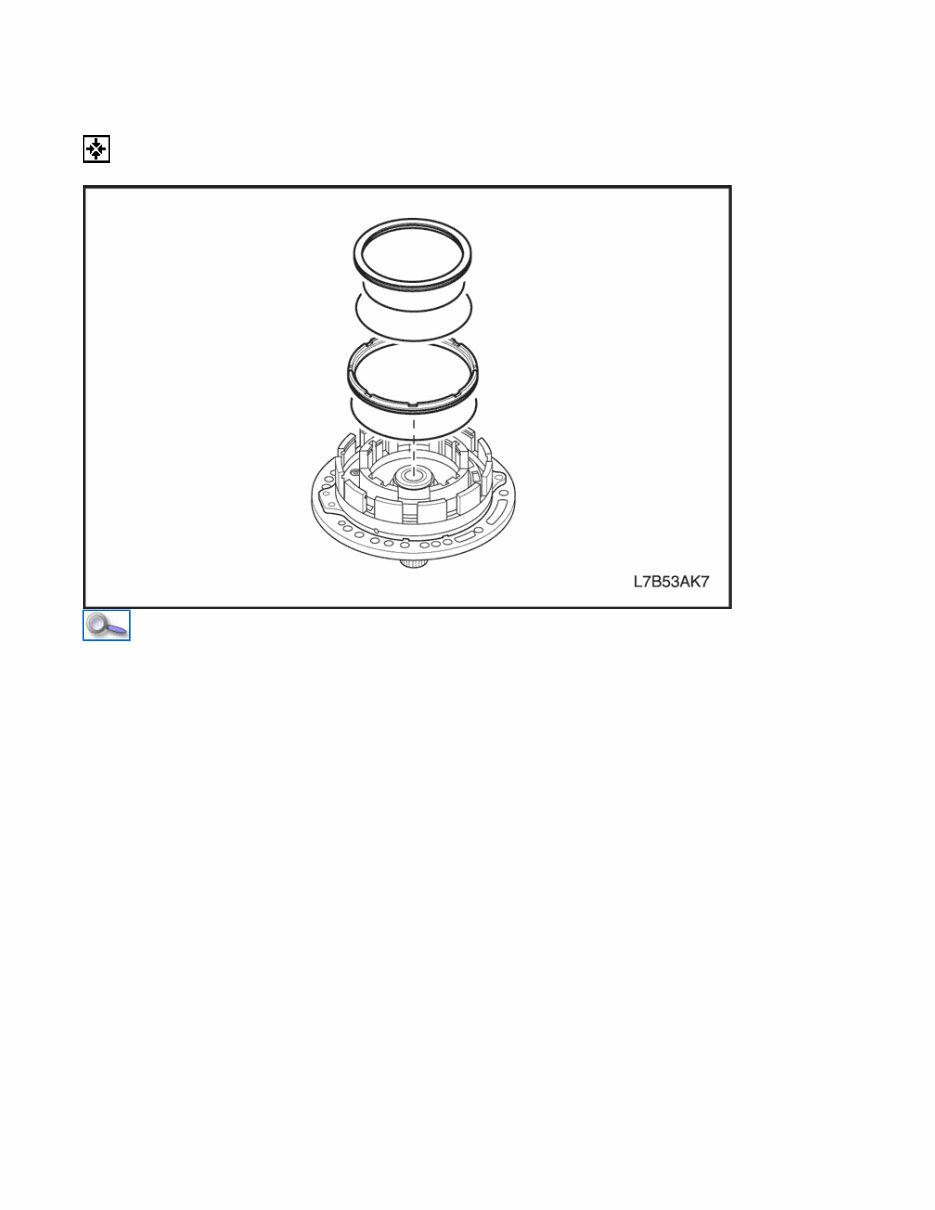
2nd Coast Brake (B1) and 2nd Brake (B2) Assembly Assemble Tools Required J 23327 Clutch Spring Compressor J 28585 Snap Ring Remover J 41236 Coast Clutch Spring Compressor J 45164 Spring Compressor Bridge 1. Install the 2nd brake (B2) piston. Coat the new O-rings with ATF and install them on the piston. Coat the inner surfaces of oil pump cover with ATF. Press the piston into the oil pump cover. Page 1 of 9 8/8/2016 http://localhost:9080/tis2web/?target=AMKZKD7&target.method=getPage
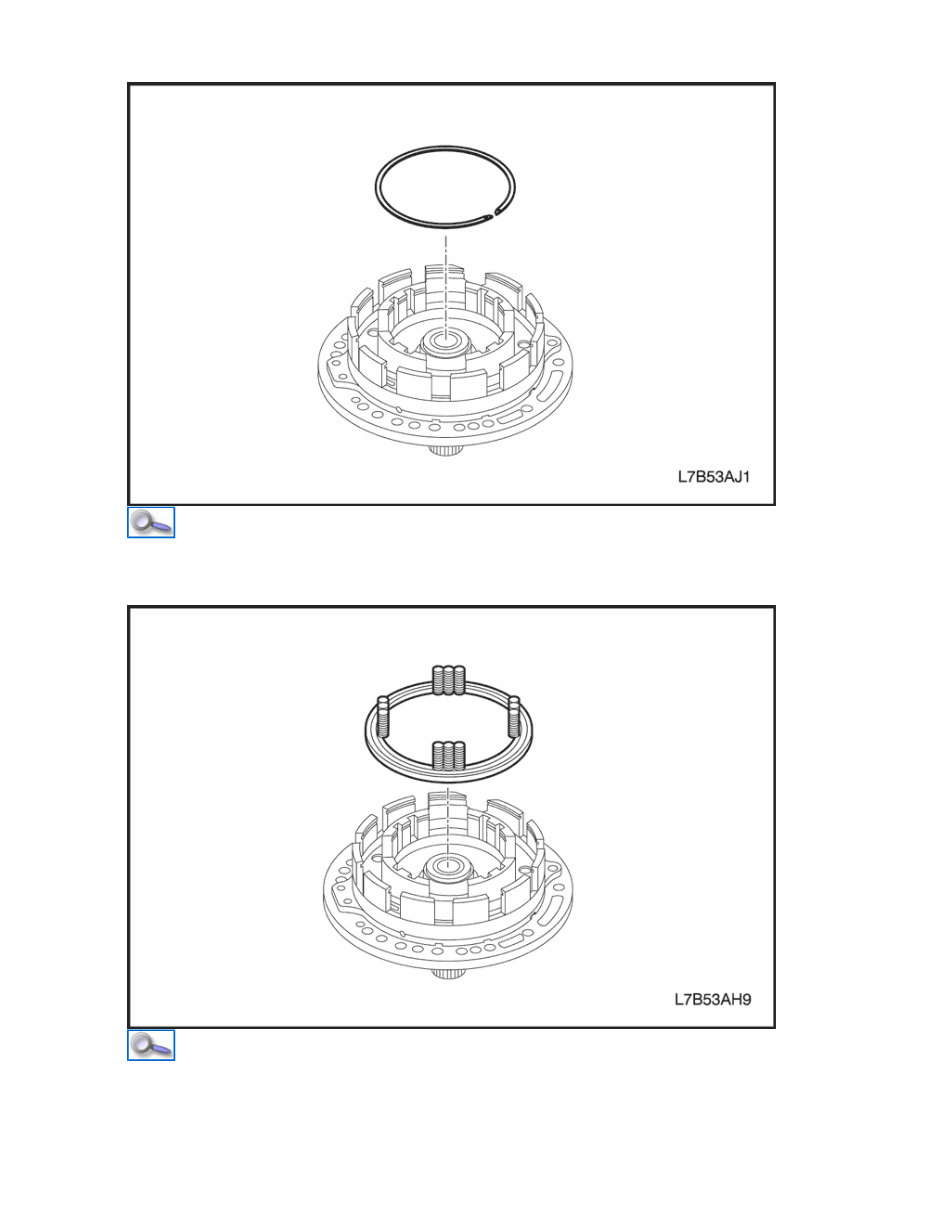
Install the snap ring. Important: Be careful not to damage the oil pump cover. 2. Install the 2nd brake (B2) return spring. Page 2 of 9 8/8/2016 http://localhost:9080/tis2web/?target=AMKZKD7&target.method=getPage
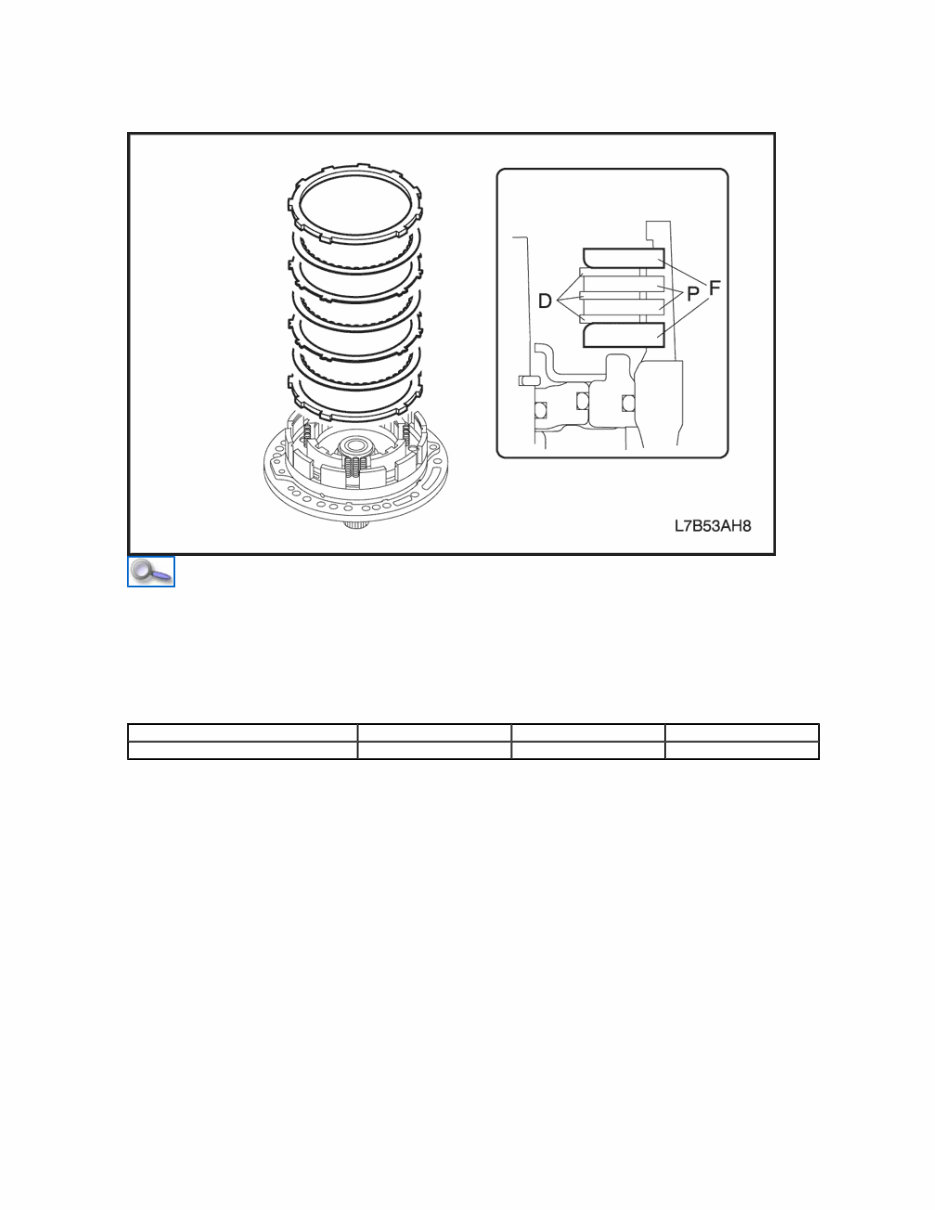
Place the return spring on the piston with the spring side up. 3. Install plate, disc and flange of 2nd brake (B2). Install the flange, disc and plate as shown in the figure. Important : Be sure of number and order of plates and discs. Order : F-D-P-D-P-D-F (Z24XE) P-D-P-D-P-D-P-D-F (Z32SE or Z20DMH, Z20DM) () : For Z32SE or Z20DMH, Z20DM Clutch/Brake Flange (F) Plate (P) Disc (D) 2nd brake (B2) 2 (1) 2 (4) 3 (4) Page 3 of 9 8/8/2016 http://localhost:9080/tis2web/?target=AMKZKD7&target.method=getPage
Using a screwdriver, install the snap ring. Check that the end gap of snap ring is not aligned with one of the cutouts. 4. Install the 2nd coast brake (B1) piston. Page 4 of 9 8/8/2016 http://localhost:9080/tis2web/?target=AMKZKD7&target.method=getPage
Get the comprehensive service and repair manual for the 2007 Holden Captiva 5. Whether you're a professional mechanic or a DIY enthusiast, this manual provides detailed instructions and procedures to fix any issues with your vehicle. With over 20 years of experience in auto repair and body work, you can trust the valuable insights and support offered.
Constant use of your vehicle can lead to wear and tear, eventually requiring replacement of parts. With a reliable repair manual, you can save money and enjoy the satisfaction of do-it-yourself projects. The manual includes technical data, diagrams, a complete list of car parts, and illustrative pictures, making it accessible even for novice mechanics.
Enhance your engine's performance with a complete list of accessories and benefit from the same information used by the company's engineers. This manual covers all models and repairs from A to Z, providing step-by-step instructions, wiring schematics, and specifications for easy vehicle repair.
Experience the convenience of having all the necessary information in one easy-to-use manual without the hassle of flipping through multiple books. Print only the required pages and diagrams, eliminating the need for greasy or torn paper manuals. Take advantage of the free preview available and ensure your vehicle receives the maintenance, service, diagnosis, and repair it deserves.




 Lifetime Access




