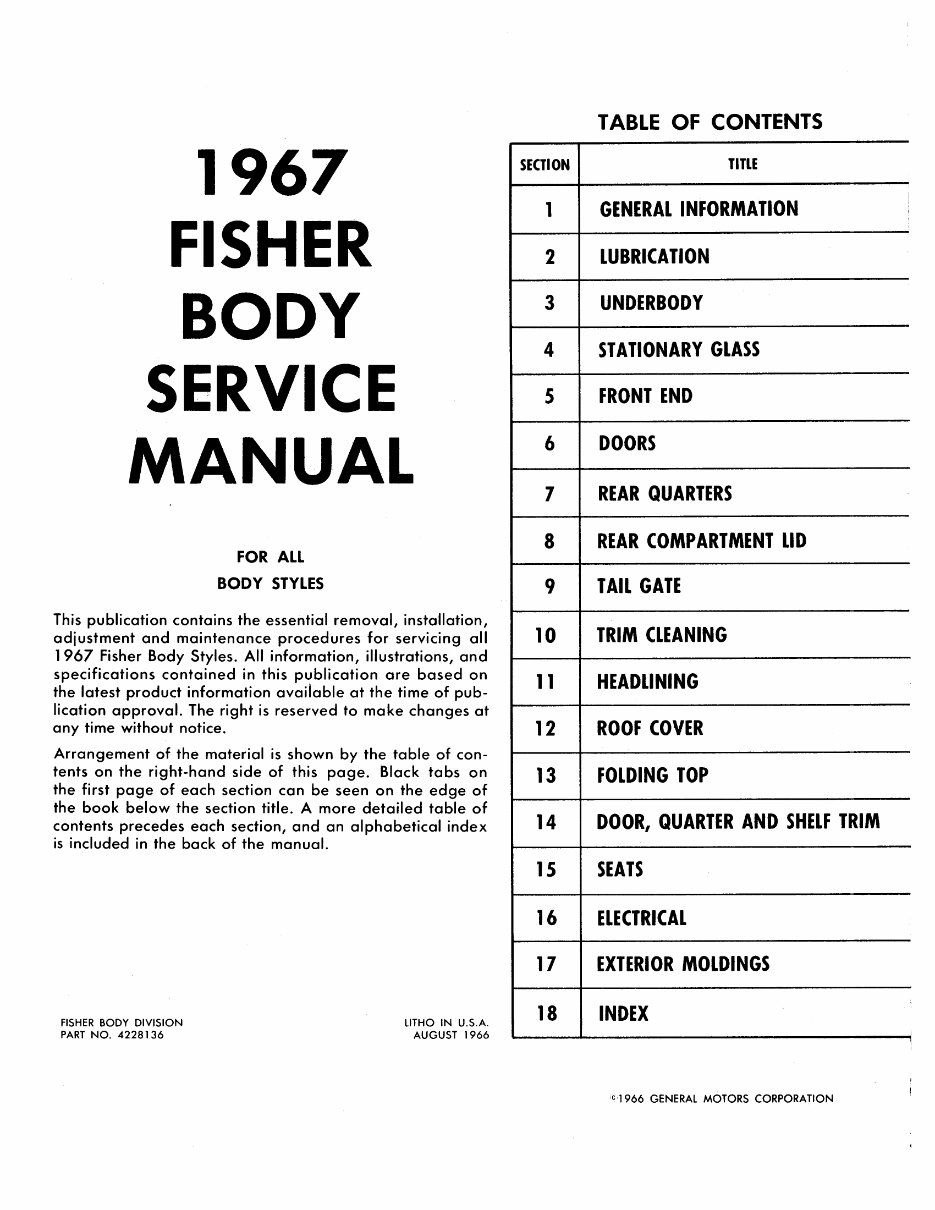
TABLE OF CONTENTS SECTION TITLE 1 GENERAL INFORMATION 2 LUBRICATION 3 UNDERBODY 4 STATIONARY GLASS 5 FRONT END 6 DOORS 7 REAR QUARTERS 8 REAR COMPARTMENT LID 9 TAIL GATE 10 TRIM CLEANING 11 HEADLINING 12 ROOF COVER 13 FOLDING TOP 14 DOOR, QUARTER AND SHELF TRIM 15 SEATS 1 6 ELECTRICAL 17 EXTERIOR MOLDINGS 18 INDEX 1967 FISHER BODY SERVICE MANUAL FOR ALL BODY STYLES This publication contains the essential removal, installation, adjustment and maintenance procedures for servicing all 1 967 Fisher Body Styles. All information, illustrations, and specifications contained in this publication are based on the latest product information available at the time of pub lication approval. The right is reserved to make changes at any time without notice. Arrangement of the material is shown by the table of con tents on the right-hand side of this page. Black tabs on the first page of each section can be seen on the edge of the book below the section title. A more detailed table of contents precedes each section, and an alphabetical index is included in the back of the manual. FISHER BODY DIVISION LITHO IN U.S.A. PART NO. 4228136 AUGUST 1966 C 966 GENERAL MOTORS CORPORATION
NOTE Scheduling revisions prevented the incorporation of service procedure references pertaining to the "Z-67" body style in this service manual. Due to basic similarity in design, service procedures specified in this manual for the "Z-37" style can be utilized when servicing the "Z-67" style, with a few exceptions. For basic service procedures concerning the "Z-67" rear quarter window mechanism, folding top adjustment, folding top stay pad dimensions or folding top electric actuator, refer to the 1966 Fisher Body Service Manual. The Folding Top Trim Assembly operations are the same as for other series convertibles in Section 13 of this 1967 manual.
GENERAL INFORMATION 1-1 SECTION 1 GENERAL INFORMATION Subject Manual Description Introduction Index Page and Figure Numbers. Reference Tabs Text Illustrations Body Number Plate Model Identification Introduction INDEX Page 1-11-11-11-11-11-11-11-11-1 1-1 Subject Body Style Number. Body Style Number Series Body Style Number Suffix Body Type Name Body Type Letter . Wood Grain Treatment Description Removal . Installation MANUAL DESCRIPTION INTRODUCTION This publication contains the installation, adjustment and cedures for servicing all 1967 This information is current as tion approval. INDEX consecutive page number or figure number within the particular body area section. REFERENCE TABS The first page of each section is marked with a ready-reference black tab corresponding with the table of contents page. TEXT Unless otherwise specified, each service procedure covers all body styles. Procedures covering speci fic styles are identified by the style number, body series number, body type letter or similar designa tion. A description of these designations is covered in this section under "Model Identification". ILLUSTRATIONS Where possible, illustrations are placed in close proximity to the accompanying text and should be used as part of the text. BODY NUMBER PLATE The body number plate identifies the body style, body assembly plant, body number, trim combina tion number, paint code and time built code Fig. 1-1. On Corvair styles, the body number plate is attached to the left side of the motor compartment cross rail. On Cadillac "C" & "D" styles, the plate is located on the left upper portion of the horizontal surface of the cowl. On all other cars, the plate is located on the left upper portion of the vertical surface of the dash firewall. MODEL IDENTIFICATION INTRODUCTION Due to the wide variety of body styles available, certain body styles have been grouped in this publication as an aid to identification. These group designations may be used individually or in various combinations. An explanation of the principal cate gories follows: Page 1-2 1-2 1-2 1-2 1-2 1-3 1-3 1-3 1-3 essential removal, maintenance pro- Fisher Body Styles. of time of publica The preceding page contains a "Table of Contents" which lists the section number and subject title of each main body area section. The first page in each main body area section has an index to the subjects included in that section. An alphabetic index covering the entire manual is located in section 18. PAGE AND FIGURE NUMBERS All page numbers and figure numbers consist of two sets of digits separated by a dash. The digits preceding the dash identify the main body area sec tion. The digits following the dash represent the
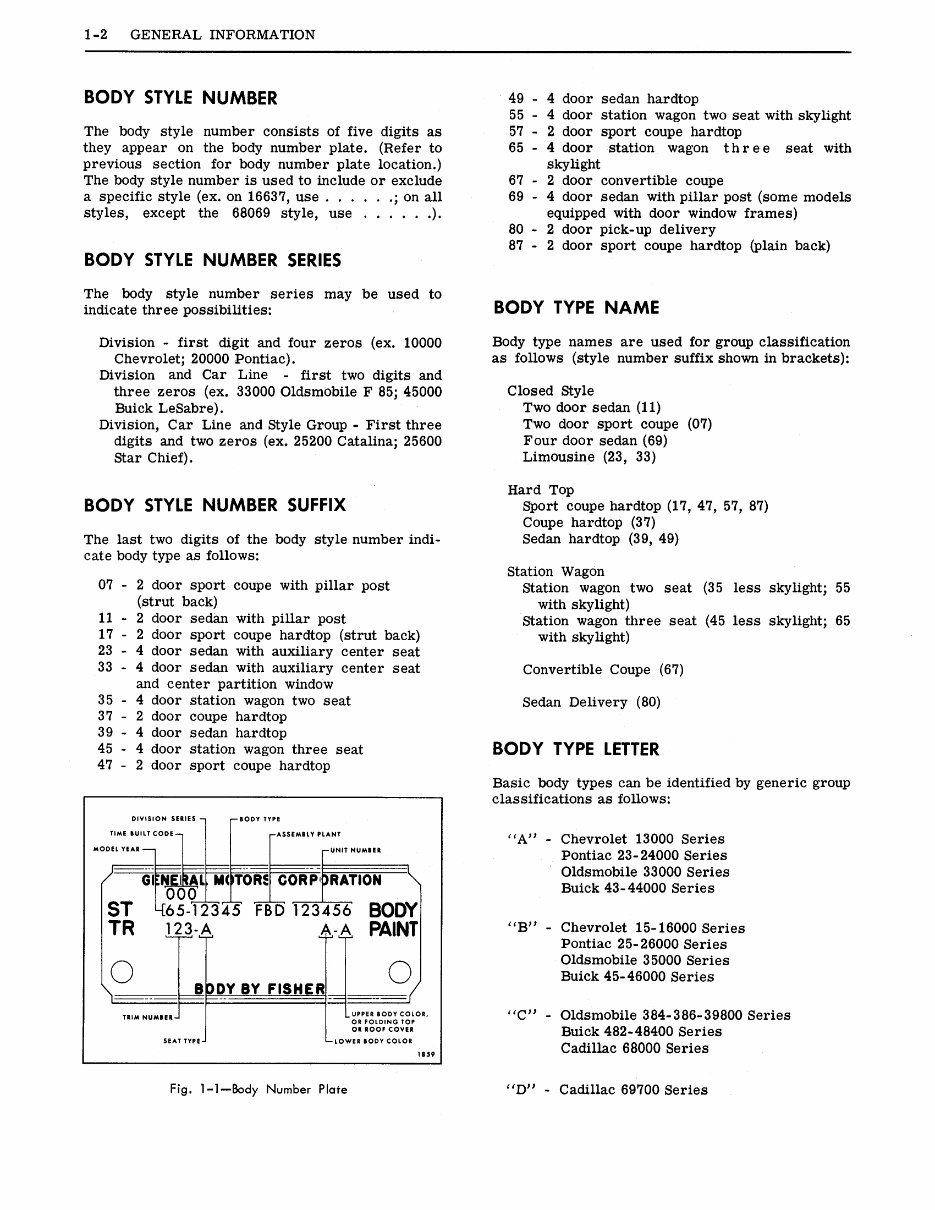
1-2 GENERAL INFORMATION BODY STYLE NUMBER The body style number consists of five digits as they appear on the body number plate. Refer to previous section for body number plate location. The body style number is used to include or exclude a specific style ex. on 16637, use ; on all styles, except the 68069 style, use BODY STYLE NUMBER SERIES The body style number series may be used to indicate three possibilities: Division - first digit and four zeros ex. 10000 Chevrolet; 20000 Pontiac. Division and Car Line - first two digits and three zeros ex. 33000 Oldsmobile F 85; 45000 Buick LeSabre. Division, Car Line and Style Group - First three digits and two zeros ex. 25200 Catalina; 25600 Star Chief. BODY STYLE NUMBER SUFFIX The last two digits of the body style number indi cate body type as follows: 07 - 2 door sport coupe with pillar post strut back 11 - 2 door sedan with pillar post 17 - 2 door sport coupe hardtop strut back 23 - 4 door sedan with auxiliary center seat 33 - 4 door sedan with auxiliary center seat and center partition window 35 - 4 door station wagon two seat 37 - 2 door coupe hardtop 39 - 4 door sedan hardtop 45 - 4 door station wagon three seat 47 - 2 door sport coupe hardtop skylight 67 - 2 door convertible coupe 69 - 4 door sedan with pillar post some models equipped with door window frames 80 - 2 door pick-up delivery 87 - 2 door sport coupe hardtop plain back BODY TYPE NAME Body type names are used for group classification as follows style number suffix shown in brackets: Closed Style Two door sedan 11 Two door sport coupe 07 Four door sedan 69 Limousine 23, 33 Hard Top Sport coupe hardtop 17, 47, 57, 87 Coupe hardtop 37 Sedan hardtop 39, 49 Station Wagon Station wagon two seat with skylight Station wagon three seat with skylight Convertible Coupe 67 Sedan Delivery 80 Basic body types can be identified by generic group classifications as follows: "A" - Chevrolet 13000 Series Pontiac 23-24000 Series Oldsmobile 33000 Series Buick 43-44000 Series "B" - Chevrolet 15-16000 Series Pontiac 25- 26000 Series Oldsmobile 35000 Series Buick 45- 46000 Series "C" - Oldsmobile 384-386-39800 Series Buick 482-48400 Series Cadillac 68000 Series 49 - 4 door sedan hardtop 55 - 4 door 57 - 2 door 65 - 4 door station wagon two seat with skylight sport coupe hardtop station wagon t h r ee seat with 35 less skylight; 55 45 less skylight; 65 BODY TYPE LETTER DIVISION SERIES - F_BODY TYPE TIME BUILT CODE ASSEMBLY PLANT MODEL YEAR 1 [ r’T NUMBER L GIjL ::T-T:-:t - ST L165f’ TR 12-A ---I B DY BY FISHER1 M!TORI CORPRATION 43 t’123456 BODY A-A PAINT 0 TRIM NUMBER SEAT TYPE [UPPER BODY COLOR, OR FOLDING TOP OR ROOF COVER -LOWER BODY COLOR I 859 Fig. 1-1-Body Number Plate "D" - Cadillac 69700 Series
GENERAL INFORMATION 1-3 - Oldsmobile 394-39600 Series Buick 49000 Series Cadillac 69300 Series "F" - Chevrolet 12000 Series - Chevrolet 11000 Series - Chevrolet 10000 Series WOOD GRAIN TREATMENT STATION WAGONS AND SEDAN DELIVERY DESCRIPTION The wood grain transfer film is a vinyl material with a pressure sensitive adhesive backing. The transfers are serviced in pre-cut panels. REMOVAL Remove the moldings from the affected panel see Molding Section 17. The transfer film may then be removed by lifting an edge and peeling the material from the painted urface. Exercise care so as not to damage the paint. NOTE: Application of heat to the transfer and the panel by means of a heat gun or heat lamp will aid in the removal. INSTALLATION Preparation of the surface to which the transfer will be applied is very important. In cases where body metal repair has been made, it is necessary to prime and color coat these areas to blend with the undamaged surface. Apply the transfer film to color coated panels only, never to bare metal or primer. The surface must be free of any imper fections that may high-light through the film. Re move dirt nibs and other foreign material in the paint by light sanding with 600 grit sandpaper. The temperature of the body must be maintained at a moderate level between approximately 65 and 90 degrees. Too warm a body will cause the wood grain film to stick prematurely while too cool a body will reduce the adhesion of the wood grain film. Cool the body panel with cool water when too warm and heat the body panel with a heat gun or a heat lamp when too cold. Just prior to application of the transfer film clean the painted surface with a non-petroleum base volatile cleaner and allow to The following are the recommended steps for easy application of the film. 1. Cut the paper backing the entire width of the transfer at the approximate centerline of the film exercising care not to damage the transfer film. 2. Peel the paper backing from one half of the film. 3. Align the upper edge of the half of the film with the paper backing to the lower edge of the pierced molding holes making sure that the transfer is centered on the panel. 4. Starting at the center of the transfer and using a water dampened rag, press that half of the transfer with the backing removed on to the panel. Work outboard from the middle to the edges. Remove all air bubbles. NOTE: The transfer can be pulled back from the panel and reinstalled if large air pockets develop. Exercise care not to stretch the ma terial. Small air bubbles may be removed by piercing the film at the bubble with a pin and pressing the bubble down. 5. Remove the backing from the other half of the transfer. Apply this half in the same manner working from the center to the end and from the middle to the upper and lower edges. 6. Fold the transfer over the door or quarter edges and press to the hemming flanges. Ap plication of heat with a heat lamp or heat gun will aid in folding the transfer over the edge. NOTE: If the transfer film will not adhere to the flange, brush a clear vinyl adhesive to the back edge of the film and reapply. dry. 7. Reinstall the moldings.
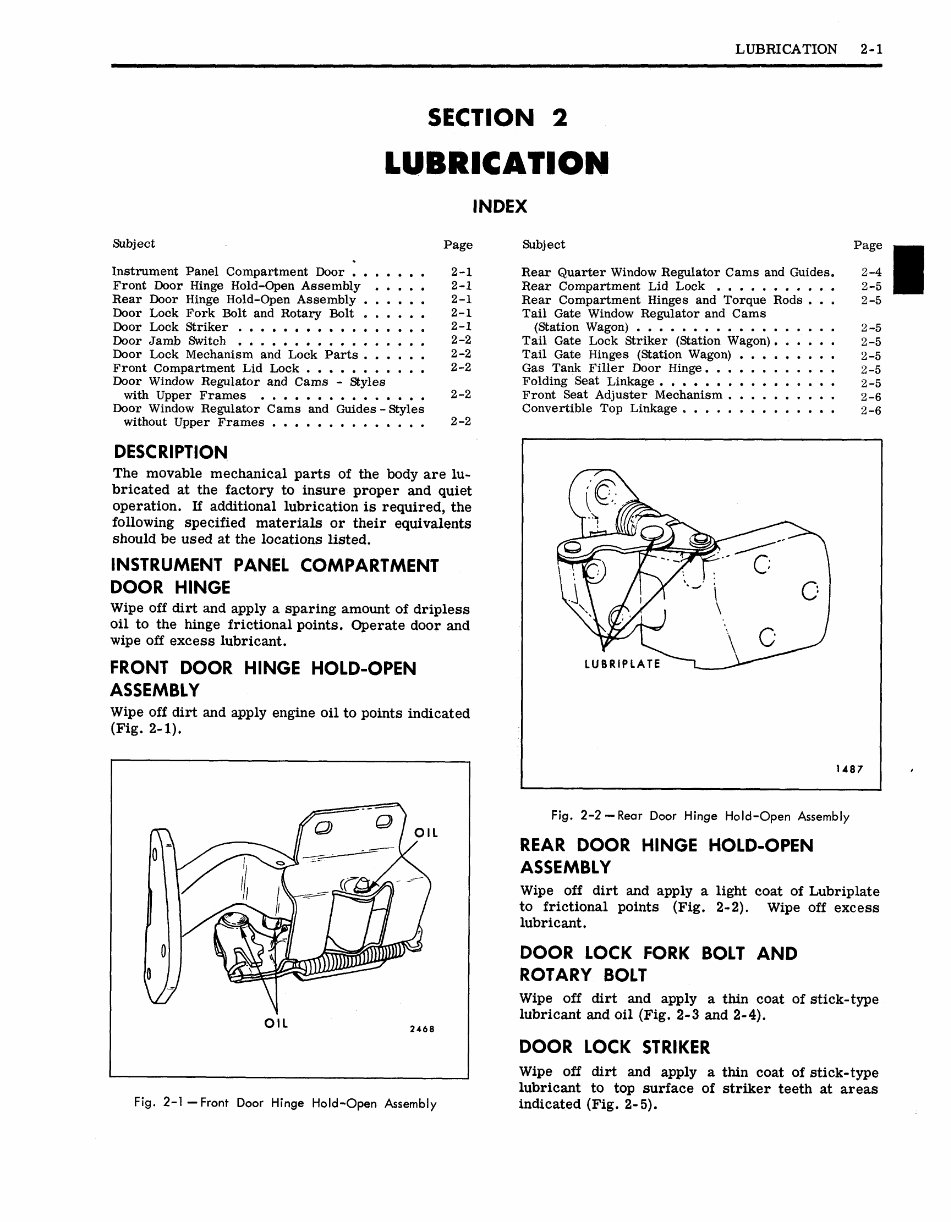
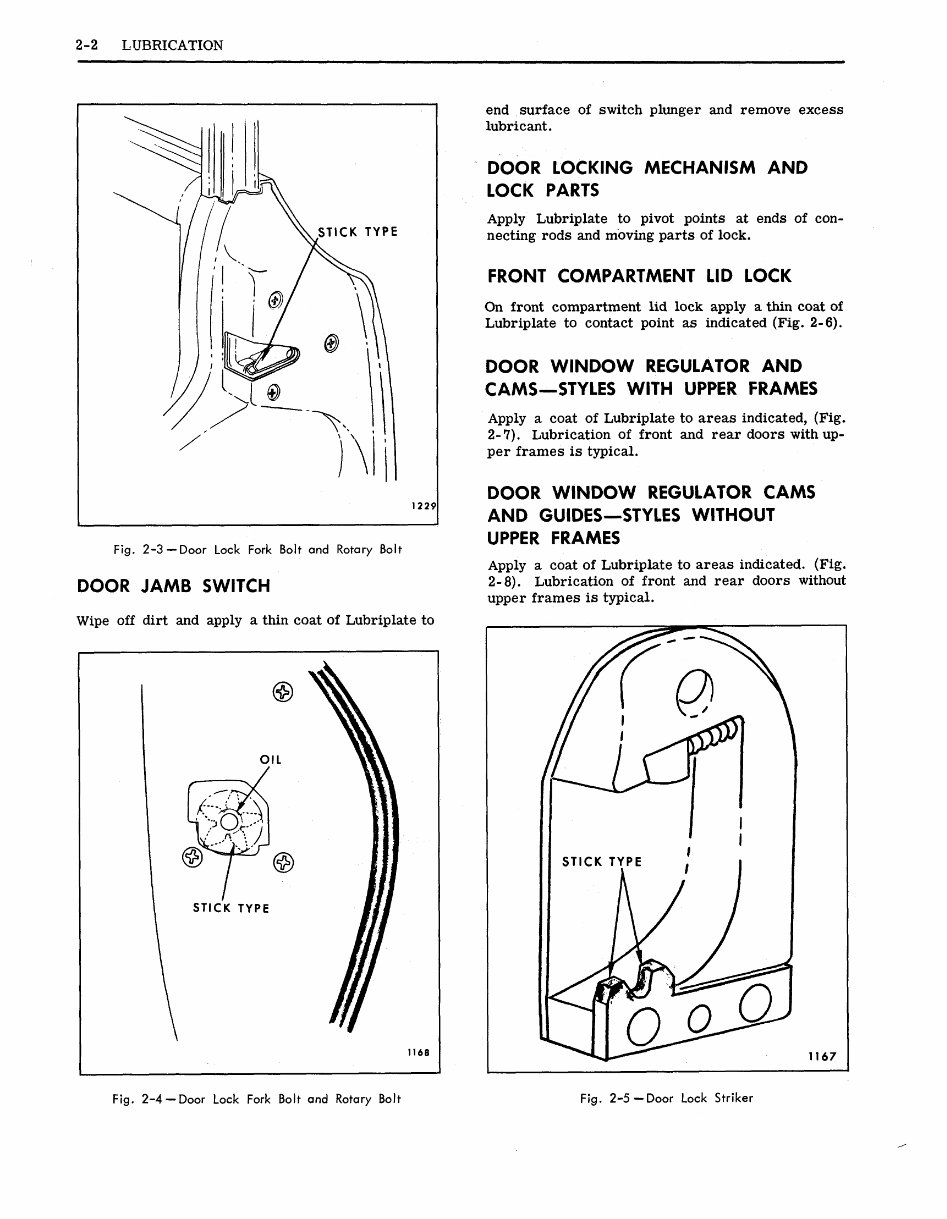
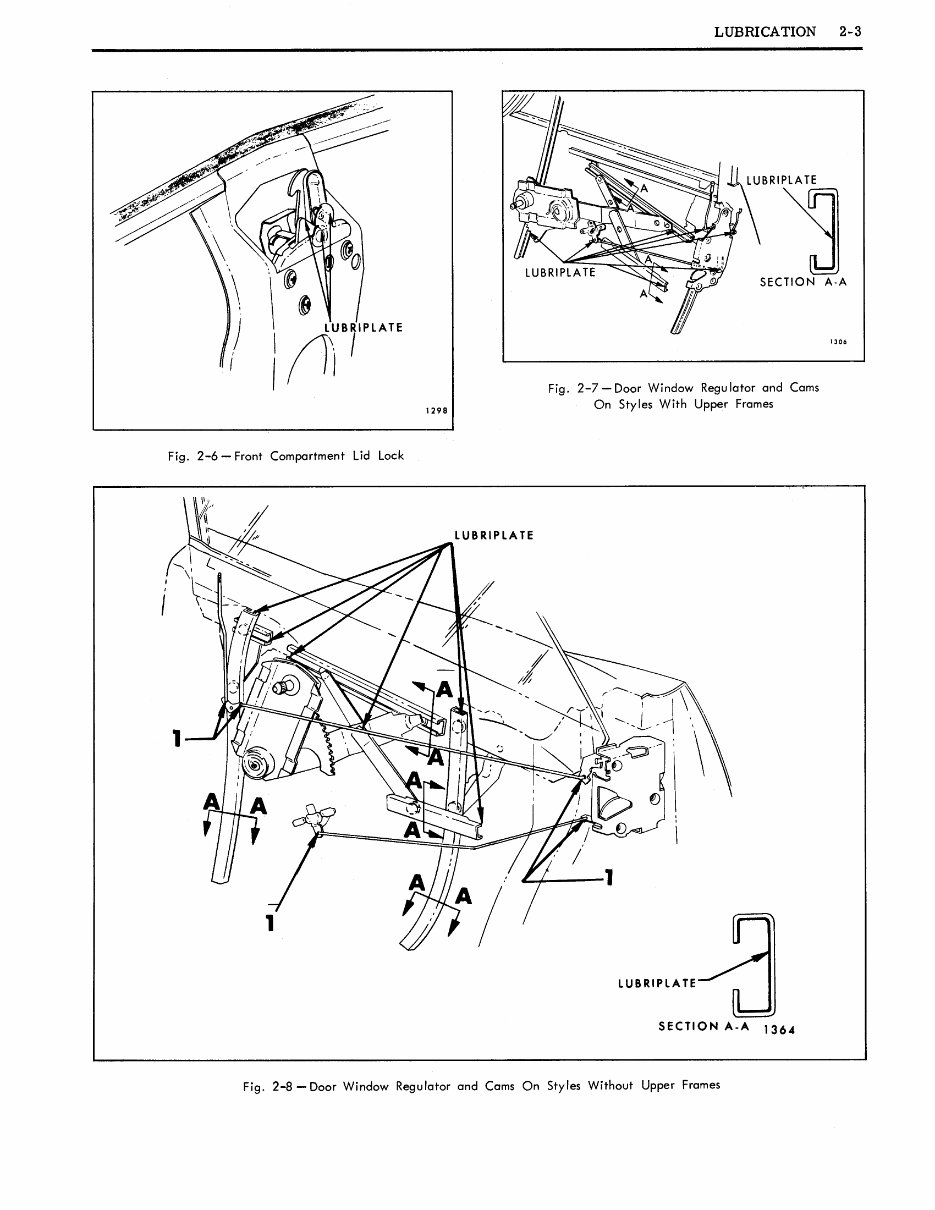
LUBRICATION 2-1 SECTION 2 LUBRICATI ON INDEX Subject Instrument Panel Compartment Door Front Door Hinge Hold-Open Assembly Rear Door Hinge Hold-Open Assembly Door Lock Fork Bolt and Rotary Bolt Door Lock Striker Door Jamb Switch Door Lock Mechanism and Lock Parts Front Compartment Lid Lock Door Window Regulator and Cams - Styles with Upper Frames Door Window Regulator Cams and Guides - Styles without Upper Frames Page Subject Page 2-1 Rear Quarter Window Regulator Cams and Guides. 2-1 Rear Compartment Lid Lock 2-1 Rear Compartment Hinges and Torque Rods 2-1 Tail Gate Window Regulator and Cams 2-1 Station Wagon 2-2 Tail Gate Lock Striker Station Wagon 2-2 Tail Gate Hinges Station Wagon 2-2 Gas Tank Filler Door Hinge Folding Seat Linkage 2-2 Front Seat Adjuster Mechanism Convertible Top Linkage 2-2 DESC RI PTION The movable mechanical parts of the body are lu bricated at the factory to insure proper and quiet operation. If additional lubrication is required, the following specified materials or their equivalents should be used at the locations listed. INSTRUMENT PANEL COMPARTMENT DOOR HINGE Wipe off dirt and apply a sparing amount of dripless oil to the hinge frictional points. Operate door and wipe off excess lubricant. FRONT DOOR HINGE HOLD-OPEN ASSEMBLY Wipe off dirt and apply engine oil to points indicated Fig. 2-1. Fig. 2-2-Rear Door Hinge Hold-Open Assembly 2-4 2-5 2-5 2-5 2-5 2-5 2-5 2-5 2-6 2-6 REAR DOOR HINGE HOLD-OPEN ASSEMBLY Wipe off dirt and apply a light coat of Lubriplate to frictional points Fig. 2-2. Wipe off excess lubricant. DOOR LOCK FORK BOLT AND ROTARY BOLT Wipe off dirt and apply a thin coat of stick-type lubricant and oil Fig. 2-3 and 2-4. DOOR LOCK STRIKER Wipe off dirt and apply a thin coat of stick-type lubricant to top surface of striker teeth at areas indicated Fig. 2-5. 1487 OIL 2468 Fig. 2-1 -Front Door Hinge Hold-Open Assembly
2-2 LUBRICATION end surface of switch plunger and remove excess lubricant. DOOR LOCKING MECHANISM AND LOCK PARTS Apply Lubriplate to pivot points at ends of con necting rods and moving parts of lock. FRONT COMPARTMENT LID LOCK On front compartment lid lock apply a thin coat of Lubriplate to contact point as indicated Fig. 2-6. DOOR WINDOW REGULATOR AND CAMS-STYLES WITH UPPER FRAMES Apply a coat of Lubriplate to areas indicated, Fig. 2-7. Lubrication of front and rear doors with up per frames is typical. DOOR WINDOW REGULATOR CAMS AND GUIDES-STYLES WITHOUT UPPER FRAMES Fig. 2-3 - Door Lock Fork Bolt and Rotary Bolt Apply a coat of Lubriplate to areas indicated. Fig. DOOR JAMB SWITCH 2-8. Lubrication of front and rear doors without upper frames is typical. Wipe off dirt and apply a thin coat of Lubriplate to 1168 Fig. 2-4 - Door Lock Fork Bolt and Rotary Bolt Fig. 2-5 -Door Lock Striker
LUBRICATION 2-3 Fig. 2-6 - Front Comportment Lid Lock Fig. 2-7-Door Window Regulator and Cams On Styles With Upper Frames LATE 1298 I I UB RIP LATE 1 1 LUB RIP LATE SECTION A-A 1364 Fig. 2-8 - Door Window Regulator and Cams On Styles Without Upper Frames
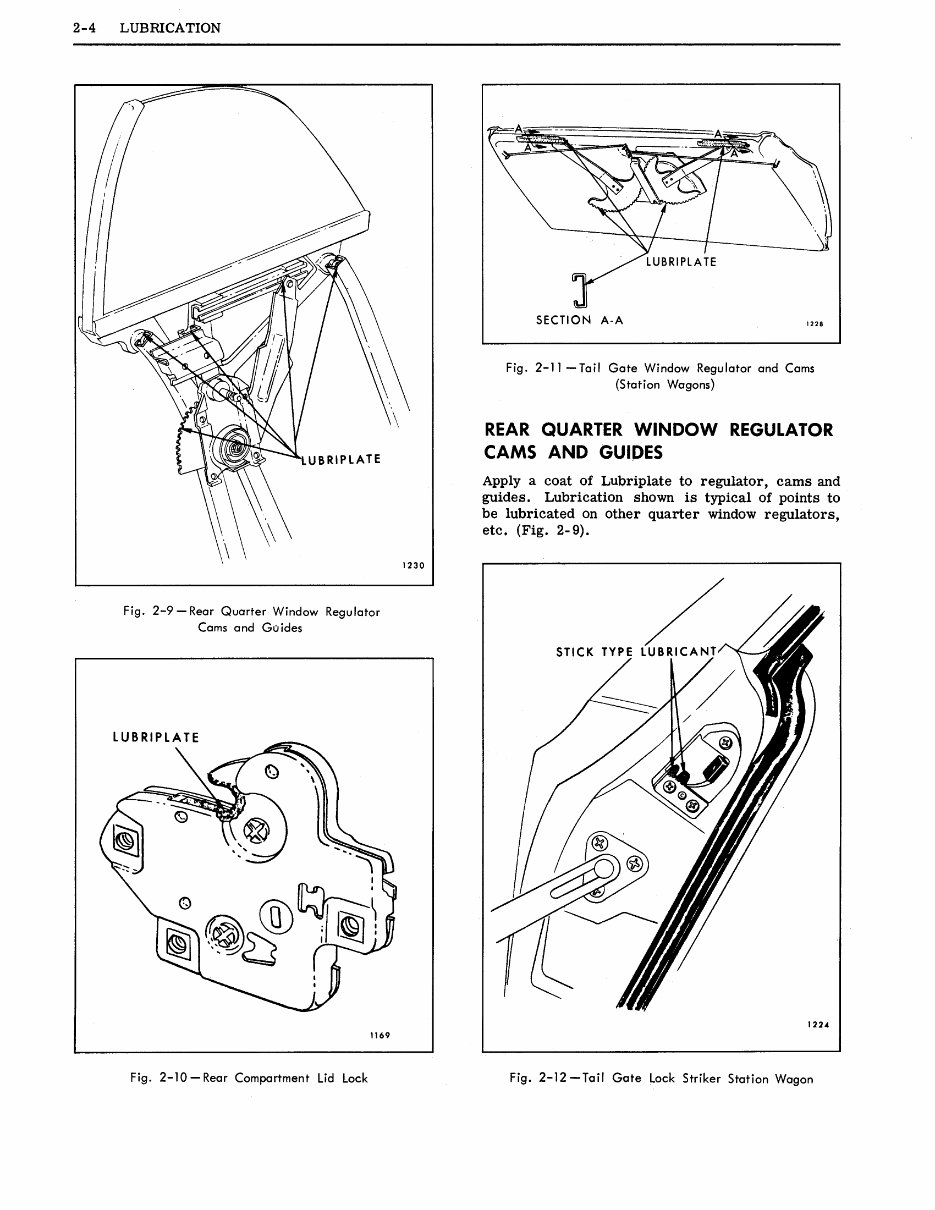
2-4 LUBRICATION Fig. 2-9-Rear Quarter Window Regulator Cams and Goides Fig. 2-11 -Tail Gate Window Regulator and Cams Station Wagons REAR QUARTER WINDOW REGULATOR CAMS AND GUIDES Apply a coat of Lubriplate to regulator, cams and guides. Lubrication shown is typical of points to be lubricated on other quarter window regulators, etc. Fig. 2-9. SECTIONI A-A 1228 LUB RIP LATE 1169 1224 Fig. 2-10-Rear Comportment Lid Lock Fig. 2-12-Toil Gate Lock Striker Station Wagon
This is a comprehensive General Motors Corporation 1967 Fisher Body OEM Service & Repair Manual, copyright August 1966, part#4228136. It covers all GM body styles, including but not limited to:
This extensive manual comprises 18 chapters and provides crucial removal, installation, adjustment, and maintenance procedures for the above-listed models. It includes detailed information on topics such as general specifications, lubrication, underbody care, stationary glass, front end systems, doors, rear quarters, rear compartment lids, tailgates, headlining, trim cleaning, roof covers, folding tops, door and quarter trim, seating, electrical systems, exterior moldings, and more.
Professionals and DIY enthusiasts alike will benefit from the same comprehensive guidance used daily by GM service department mechanics. It is indispensable for tasks such as replacing the backup lamp on a 442, adjusting side window glass on a GTO, or replacing the front window weatherstrip on a Chevelle SS.
This manual is fully keyword searchable and printable, allowing users to zoom in or out of specific pages and print individual pages or entire chapters as needed. It is compatible with all versions of Windows and Mac, and is available in English using Adobe Reader for viewing.
With this manual, users can save on dealer labor costs while having comprehensive, OEM-approved repair and service guidance at their fingertips—a valuable resource for any do-it-yourself mechanic or professional technician.