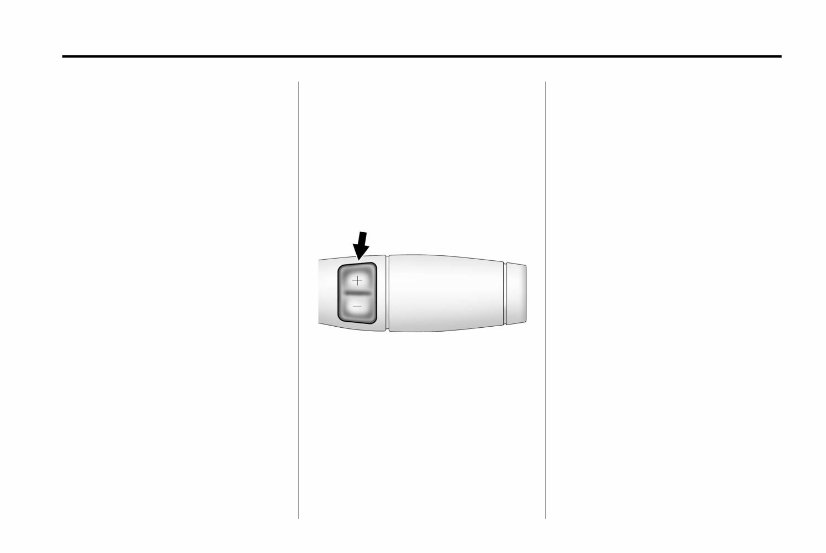
In Brief 1-1 In Brief Initial Drive Information Transmission .................. 1-1 Hybrid Features High Voltage Safety Information .................. 1-2 Fuel Economy Gauge ......... 1-2 Automatic Engine Start/Stop Feature ...................... 1-3 Regenerative Braking ......... 1-4 Battery ........................ 1-4 Service ....................... 1-4 Initial Drive Information Transmission Range Selection Mode The Range Selection Mode switch is located on the shift lever. To enable the Range Selection feature, move the column shift lever to the M (Manual) position. The current range will appear next to the M. This is the highest attainable range with all lower gears accessible. As an example, when 3 (Third) gear is selected, 1 (First) through 3 (Third) gears are available. Press the plus/minus buttons, located on the steering column shift lever, to select the desired range of gears for current driving conditions. See Automatic Transmission Operation in the owner manual. Cruise control can be used while the vehicle is in Range Selection Mode. See Manual Mode on page 9‑7.
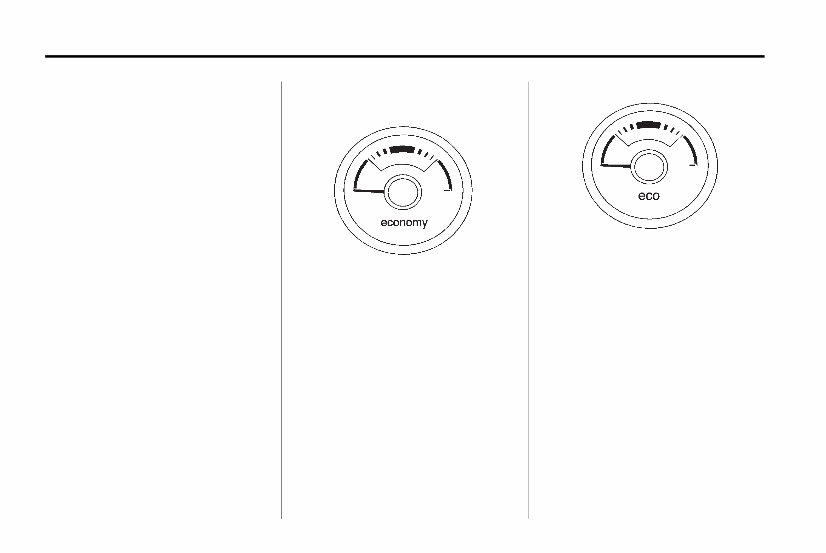
1-2 In Brief Hybrid Features High Voltage Safety Information This vehicle has a standard 12-volt battery and a high voltage hybrid battery. Only a trained service technician with the proper knowledge and tools should inspect, test, or replace the hybrid battery. See your dealer if the hybrid battery needs service. The 12-volt battery cables, in the engine compartment, are clearly labeled. In emergency situations, first responders can cut those cables to disable the high voltage hybrid battery system. Fuel Economy Gauge United States Canada This gauge indicates fuel efficiency. To obtain the best fuel efficiency, operate the vehicle so that the indicator is in the high efficiency band. Modifying both braking and acceleration behavior to keep the indicator in the center of the gauge will result in the best system efficiency and fuel economy. See Fuel Economy Gauge on page 5‑4.
In Brief 1-3 Automatic Engine Start/ Stop Feature Start the engine as you would any other engine. See “Starting the Engine” in the owner manual for more information on starting. The hybrid system provides very quiet engine starting. If pulling a trailer with trailer brakes, see Trailer Towing on page 9‑9 for more information. Auto Stop The vehicle has an Auto Stop feature. After a successful engine start, the engine may turn off and operate in the Auto Stop mode. Keep your foot firmly on the brake pedal until you are ready for the vehicle to move. Engine OFF and AUTO STOP modes are indicated on the tachometer display. When the tachometer needle indicates OFF, the engine is not running and will remain off until the ignition key is placed in the START position or a remote vehicle start is performed. When the tachometer needle indicates AUTO STOP, the hybrid system is on, the engine is not running, but may Auto Start at any time without notice. See Tachometer on page 5‑3 for more information. A chime will sound if the driver door is opened while in Auto Stop as a reminder that the ignition switch is not in the LOCK/OFF position. Always turn the ignition switch to LOCK/OFF and remove the key from the ignition switch when exiting the vehicle. Auto Start The vehicle also has an Auto Start feature. The engine will remain off while in Auto Stop mode until vehicle conditions require the engine to run. The near-instant starting of the engine from Auto Stop mode is called Auto Start. EV Mode The vehicle also has an EV mode which uses only the electric motor to move the vehicle. With light acceleration, the vehicle will drive in EV mode. EV mode is unavailable when the vehicle is out of fuel. For more information on Auto Stop, Auto Start, and EV Mode, see Starting the Vehicle on page 9‑2.
1-4 In Brief Regenerative Braking Regenerative braking enables the electric drive motor to operate as a generator when coasting or braking. Energy from the moving vehicle recharges the hybrid battery. The hydraulic disc brakes work with the regenerative braking to insure effective braking. The braking system is computer controlled and blends the regenerative braking with the conventional hydraulic disc brakes to meet any requirements for deceleration. Because the controller applies the hydraulic brakes through its high pressure accumulator, you may occasionally hear the motor driven pump when it recharges the system. This is normal. In the event of a controller problem, the brake pedal may be harder to push and the stopping distance may be longer. See Regenerative Braking on page 9‑8. Battery This vehicle has a standard 12-volt battery and a high voltage hybrid battery. When a new standard 12-volt battery is needed, see your dealer for one that has the replacement number shown on the original battery's label. Only a trained service technician with the proper knowledge and tools should inspect, test, or replace the hybrid battery. See your dealer if the hybrid battery needs service. See Battery on page 10‑12. Service Never try to do your own service on hybrid components. You can be injured and the vehicle can be damaged if you try to do your own service work. Service and repair of these hybrid components should only be performed by a trained service technician with the proper knowledge and tools. See Doing Your Own Service Work on page 10‑2.
Seats and Restraints 3-1 Seats and Restraints Rear Seats Rear Seats .................... 3-1 Airbag System Replacing Airbag System Parts After a Crash ................ 3-1 Rear Seats Folding Rear Seat Notice: Folding a rear seat with the safety belts still fastened may cause damage to the seat or the safety belts. Always unbuckle the safety belts and return them to their normal stowed position before folding a rear seat. Make sure that nothing is on the seat. To fold the seat, slowly pull the seat cushion up. To return the seat to the normal seating position, slowly pull the seat cushion down. Make sure the safety belts are not twisted or caught in the seat cushion. Airbag System Replacing Airbag System Parts After a Crash If an airbag inflates or the vehicle has been in a crash, the vehicle's sensing system may command the automatic hybrid battery disconnect to open. When the battery disconnect is open, the hybrid battery will be off and the vehicle will not start. The airbag readiness light and/or SERVICE HYBRID SYSTEM warning message may come on in the Driver Information Center (DIC). See “Airbag Readiness Light” in the owner manual and Driver Information Center (DIC) on page 5‑11 for more information. To operate the vehicle, the automatic hybrid battery disconnect must be reconnected by a qualified service technician and sensing system parts will need to be replaced. Have the vehicle serviced right away.
3-2 Seats and Restraints 2 NOTES
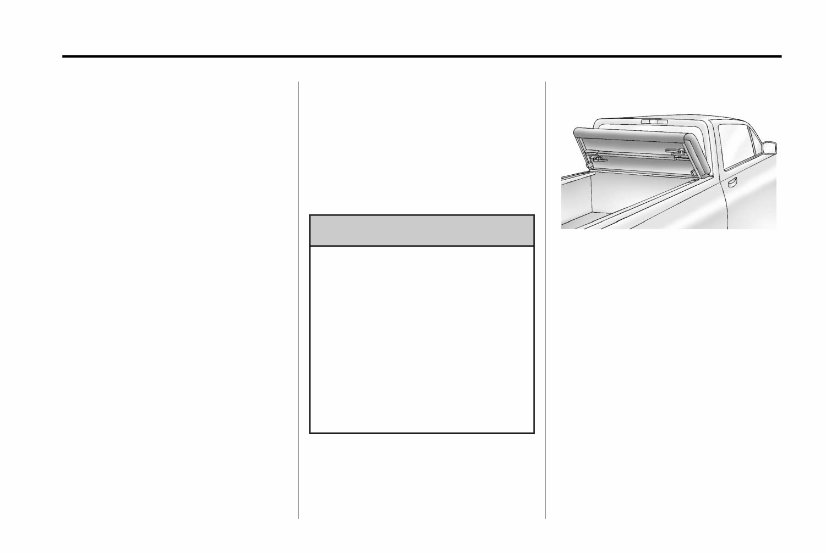
Storage 4-1 Storage Additional Storage Features Tonneau Cover (Hard Tonneau) .................... 4-1 Tonneau Cover (Soft Tonneau) .................... 4-6 Additional Storage Features Tonneau Cover (Hard Tonneau) Installing the Cover { CAUTION An improperly stored cargo cover could be thrown about the vehicle during a collision or sudden maneuver. Someone could be injured. If the cover is removed, always store it in the proper storage location. After positioning the cargo cover back on the vehicle, always be sure that it is securely reattached by properly securing the straps and latches. 1. Position the tonneau cover onto the top of the pickup box with the locator tabs positioned into the front stake pockets. If equipped, remove the front stake pocket covers from the bed rail protectors. The locators must fully seat into the stake pocket. 2. Align the front edge of the cover with the front edge of the bed rail so that it is centered on each side of the truck bed. 3. Lower the front clamp from its storage position.
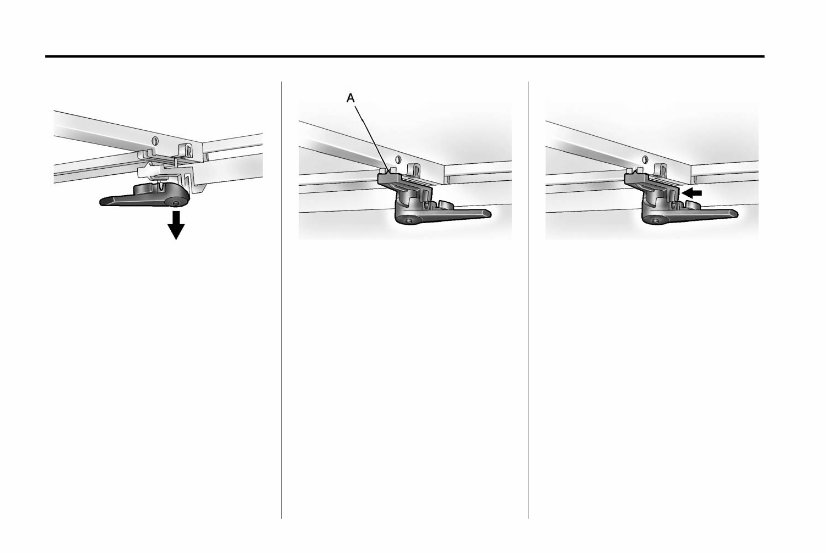
4-2 Storage 4. Tilt the clamp assembly so that the locator is in the slot, pull down on the assembly, and slide the clamp under the edge of the inner lip of the bed rail. 5. Pull the handle toward the rear of the truck to engage the clamp. Make sure the locator is secure into the slot (A). If unable to completely engage clamp, see the tightening and loosening procedures later in this section. 6. The clamp should be securely engaged. Shake the handle assembly to make sure the handle does not move. 7. There are locking features on the front clamps only. With the handle in the clamped position, push the locking tab to engage the lock. 8. Repeat the clamp attachment steps 3 through 7 for the opposite side.
The Chevrolet 2011 Silverado 1500 Operators Owners User Manual is an essential resource for anyone working on or maintaining a Chevrolet Silverado 1500 from the 2011 model year. This manual contains detailed information on the operation, maintenance, and basic repairs of the vehicle.
Whether you are a professional mechanic or a DIY enthusiast, this manual provides valuable insights into the various systems and components of the Chevrolet Silverado 1500. From routine maintenance procedures to troubleshooting common issues, this manual equips you with the knowledge needed to keep your vehicle in top condition.
With clear and concise instructions, this manual covers a wide range of topics including engine specifications, electrical systems, transmission, brakes, and more. It serves as a comprehensive guide for understanding the intricacies of the Chevrolet Silverado 1500.
Available in PDF format, this manual is easily accessible and can be used on various devices, making it convenient for referencing while working on the vehicle. Whether you are looking to perform regular maintenance or delve into more complex repairs, this manual is an invaluable tool for ensuring the optimal performance of your Chevrolet Silverado 1500.